electronic works ASC User manual

Inh. Michael Sieg
Hauptsr. 65
49635 Badbergen
Betriebs- und Montageanleitung
operating manual
Wichtiges Dokument für den Endanwender! Muss den Fahrzeugunterlagen beigelegt werden!
Important document for the final user! Must be enclosed with the vehicle documents!
Version 2.1.1
Audi Q7 4M

Inh. Michael Sieg
Hauptsr. 65
49635 Badbergen
Inh. Michael Sieg
Hauptsr. 65
49635 Badbergen
Betriebs- und Montageanleitung
operating manual
Betriebs- und Montageanleitung
operating manual
Inhaltsverzeichnis // contents
1
Important document for the final user! Must be enclosed with the vehicle documents!

Inh. Michael Sieg
Hauptsr. 65
49635 Badbergen
Betriebs- und Montageanleitung
operating manual
Allgemeine Informationen zum ASC
// General information about ASC
Lieferumfang // contents of delivery
Urheberrecht // copyright
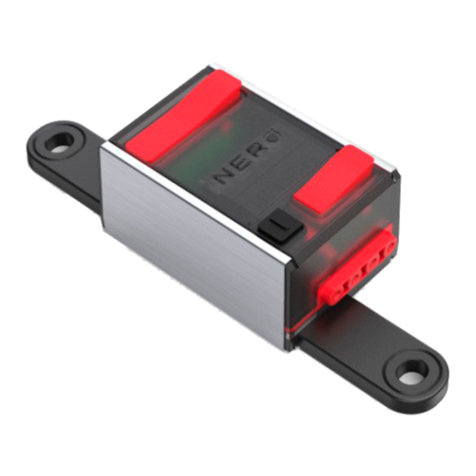
ASC-Modul // ASC module
Betriebs- und Montageanleitung // Operating manual
Fahrzeugspezifischer Kabelsatz // Vehiclespecific cable set
USB-Kabel für Firmware Updates // USB cable for Firmware Updates
Überbrückungsstecker (wird anstelle des ASC-Moduls auf den
Kabelbaum gesteckt für den Betrieb im Serienzustand)
//
Die Betriebs- und Montageanleitung darf nicht (auch nicht in Teilen) vervielfältigt oder in
Print- oder anderen Medien veröffentlicht werden, ohne das die Firma electronicworks
eine schriftliche Genehmigung erteilt hat.
The operating manual may not be reproduced (even in parts of it) or published in print
or other media without the written permission of electronicworks.
Bridging plug (is plugged onto the wiring harness instead of the
ASC module for operation in stock mode)
2
Das AirSuspensionControl ist ein Produkt der Firma electronicworks.
Dank der jahrelangen Erfahrung in der automotiven Elektronikbranche,
ist ein Produkt entstanden, dass den aktuellen Anforderungen der Automobilindustrie
entspricht.
Die moderne High-Tech Hardware in Verbindung mit der durchdachten und intelligenten
Software garantieren die Betriebssicherheit und Zuverlässigkeit des Systems.
Um die bestmögliche Leistung und Flexibilität zu bieten,
müssen wir leider auf ein Gutachten verzichten.
1

Inh. Michael Sieg
Hauptsr. 65
49635 Badbergen
Inh. Michael Sieg
Hauptsr. 65
49635 Badbergen
Betriebs- und Montageanleitung
operating manual
Betriebs- und Montageanleitung
operating manual
3
Alle Extra-Wünsche lassen sich, soweit es technisch möglich ist, entgeltlich umsetzen.
Kontaktieren Sie uns, und wir nehmen Ihren Wunsch sehr gerne entgegen.
Das ASC können Sie selbst ganz einfach zu Hause per USB updaten.
Wir behalten uns das Recht vor, die Firmware belibieg zu ändern.
The AirSuspensionControl is a product of electronicworks
.
Thanks to years of experience in the automotive electronics industry,
a product has been developed that fits on the current requirements of the automotive
industry.
The modern hightech hardware in connection with the fully developed software guaran-
tee the reliability of the system.
To offer the best performance and flexibility,
we unfortunately have to go without an experts report.
For an extra payment all extra wishes can be realized, as far as it is technically possible.
Contact us and we will accept your request.
ASC can be easily updated at home via USB.
We reserved the right to change the firmware whenever needed.

Inh. Michael Sieg
Hauptsr. 65
49635 Badbergen
Betriebs- und Montageanleitung
operating manual
Sicherheitshinweise // Safety instructions
!!! ACHTUNG !!! ATTENTION !!!
Das ASC darf NUR in unten angegebenen Fahrzeugen verbaut werden:
Audi Q7 4M
Die in der Montageanleitung aufgeführten Hinweise sind unbedingt zu beachten!
Sie sind durch folgendes Symbol deutlich gekennzeichnet.
Die aktuell geltenden Unfallverhütungsvorschriften für die jeweiligen Tätigkeiten sind zu
beachten und einzuhalten.
4
Montageanleitung ASC im Fahrzeug
// ASC installation guide
Follow strictly the Safety Instructions given in the Installation guide!
They are clearly marked by the following symbol.
The currently valid accident prevention regulations for that kind of activities must be
observed and followed, too.
The ASC may only be installed in the following vehicles:
Audi Q7 4M
2
3

Inh. Michael Sieg
Hauptsr. 65
49635 Badbergen
Inh. Michael Sieg
Hauptsr. 65
49635 Badbergen
Betriebs- und Montageanleitung
operating manual
Betriebs- und Montageanleitung
operating manual
Die Bedienungs- und Einbauanleitung bezieht sich nur auf das vorgenannte Fahrzeug.
Ein Einbau in andere Fahrzeuge darf nicht erfolgen.
Die Betriebs- und Montageanleitung sollte jederzeit griffbereit im Fahrzeug aufbewahrt
werden (z.B. im Handschuhfach) und muss vor der Montage oder Demontage des
ASC-Moduls gelesen und verstanden werden.
The operating manual refer only to the vehicle listed above.
Installation in other vehicles is not permitted.
The operating manual should always be kept within easy reach in the vehicle and must
be read and studied before mounting or dismounting the ASC module.
5
Schritt 1
Schalten Sie die Zündung ca. 5 Minuten vor
dem Einbau aus oder klemmen Sie die
Batterie gemäß Herstellerangaben ab.
Step 1
Switch off the ignition approx. 5 minutes
before installation or disconnect the battery,
as said in the manufacturer's instructions.

Inh. Michael Sieg
Hauptsr. 65
49635 Badbergen
Betriebs- und Montageanleitung
operating manual
6
Schritt 3
Lösen Sie wie auf dem Bild das Plastikgitter,
indem Sie rausziehen.
Step 3
Pull towards yourself, to remove the plastic grid.
Schritt 2
Entfernen Sie im Fußraum der Beifahrersei-
te, die auf dem Bild zu sehende Blende.
Um die Blende zu entnehmen, müssen Sie
dazu lediglich oben, mittig hineingreifen und
nach unten ziehe.
Step 2
Remove the cover shown in the picture in
the floor area of the passenger side.
To dismount the cover, grab inside in the
middle at the top and pull downwards.
Ziehen Sie vorsichtig den Teppich nach
unten, um mehr Platz zu generieren.
Pull the carpet carefully downwards, in order
to create more space.

Inh. Michael Sieg
Hauptsr. 65
49635 Badbergen
Inh. Michael Sieg
Hauptsr. 65
49635 Badbergen
Betriebs- und Montageanleitung
operating manual
Betriebs- und Montageanleitung
operating manual
7
Schritt 4
Nun sehen sie das Steuergerät für das
Luftfahrwerk im freigelegten Bereich. Entfer-
nen Sie nun, wie auf dem Bild gekennzeich-
net den Stecker, indem Sie den Bügel entrie-
geln.
Step 4
Now you can see the Control Unit of the air
suspension. Now remove the plug as
marked in the picture. Therefore unletch the
trigger guard.
Schritt 5
Nun entfernen Sie die selbe Blende im
Fußraum der Fahrerseite.
Step 5
Now dismount the same cover on the drivers
side.
Ziehen Sie ebenfalls den Teppich nach
unten, um mehr Platz zu generieren.
Pull even the carpet carefully downwards,
same as on the other side.

Inh. Michael Sieg
Hauptsr. 65
49635 Badbergen
Betriebs- und Montageanleitung
operating manual
8
Schritt 6
Drücken Sie vorsichtig das Plastikgitter nach
Unten, damit Sie an das Kabel des Steuer-
gerätes gelangen.
Step 6
Push the plastic grid carefully downwards, in
order to create space, to grab the cable of
the control unit.
Schritt 7
Stecken Sie nun, wie auf dem Bild zu sehen
den originalen Stecker auf den Adapter des
mitgelieferten Kabelsatzes. Stecken Sie das
andere Ende des Kabelsatzes in zurück in
das Luftfahrwerk-Steuergerät und verschlie-
ßen Sie die Riegel erneut.
Step 7
Now Plug the original plug in to the adapter-
of the in delivery included wire harness.
Plug the other end of the wireharness into
the air suspension control unit and close
the trigger guard.
Schritt 8
Um die Mittelkonsole zu demontieren, muss
bei Punkt 1 die Gummimatte entfernt
werden. Bei Punkt 2 muss der Wählhebel
demontiert werden, indem die Handauflage
weggezogen wird.
Step 8
To dismount the main console, it is neces-
sary to take the rubber matte at point 1 out
and dismount the gear selector at point 2, by
pulling out the upper part.
1
2

Inh. Michael Sieg
Hauptsr. 65
49635 Badbergen
Inh. Michael Sieg
Hauptsr. 65
49635 Badbergen
Betriebs- und Montageanleitung
operating manual
9
Betriebs- und Montageanleitung
operating manual
Schritt 11
Jetzt kann die Mittelkonsole, durch einen
kräftigen Zug nach oben an der markierten
Kante, angehoben werden.
Step 11
Now you are able to lift the main console
up, by pulling upwards at the marked edge
as shown as in the picture.
Schritt 9
Entfernen Sie beide gekennzeichneten
Torx-Schrauben mit einem Schraubendre-
her.
Step 9
Dismount both marked torx screws as
shown as in the picture, by using a screwdri-
ver.
Schritt 10
Entnehmen Sie nun den Wählhebel samt
Sattel. Vorsicht beim ziehen, da der Sattel
am Aluminiumrahmen befestigt ist.
Step 10
Now take the gear selector including the
leather out. Be careful by pulling it out of the
aluminium frame, cause the leather is
connected to it.

Inh. Michael Sieg
Hauptsr. 65
49635 Badbergen
Es wird empfohlen das mitgelieferte USB-Kabel bereits in das ASC-Modul einzustecken
und so zu positionieren, dass Firmware Updates ohne großen Aufwand in Form einer
weiteren Demontage geschehen können.
It is recommended to plug in the USB cable to the ASC module already to avoid more
dismounting processes, to be able to install Firmware Updates of the module.
Betriebs- und Montageanleitung
operating manual
10
Schritt 13
Entfernen Sie den gekennzeichneten
Stecker, indem Sie die Entriegelungsnase
drücken.
Step 13
In order to remove the plug shown in the
picture, it is necessary to press the unleas-
hing flap.
Schritt 12
Nehmen Sie nun am vorderen Ende der
Mittelkonsole das mitgelieferte Kabel an und
führen Sie es bis nach Hinten durch, sodass
es in einer festen Position sitzt.
Step 12
Now take the included wire harness from the
very front of the main console and pull it
towards you in the back, that it stays in a
fixed position.

Inh. Michael Sieg
Hauptsr. 65
49635 Badbergen
Betriebs- und Montageanleitung
operating manual
11
Information zum Pin-Verfahren
Zum Auspinnen mit einem spizten Gegen-
stand die Entriegelung des Crimp-Kontakts
nach unten eindrücken und das Kabel nach
oben ziehen. Dann die Entriegelung darüber
ebenfalls herabdrücken und das Kabel ganz
aus dem Stecker ziehen.
Den Stecker oben und unten zusammendrü-
cken und verschliessen.
Information material for pin-method
To disconnect a pin use a pointed object to
press the release of the crimp contact down-
wards. Pull the selected cable upwards.
Now press down even the unlocking mecha-
nism above and pull the cable completely
out of the plug.
Press the top and the bottom of the plug
together to close it.
P
Pi
in
n
2
2
P
Pi
in
n
1
1
e
ex
xa
am
mp
pl
le
e
Beispiel

Inh. Michael Sieg
Hauptsr. 65
49635 Badbergen
Betriebs- und Montageanleitung
operating manual
12
Schritt 16
Pinnen Sie nun das „orangene“ Kabel des
ASC Kabelsatzes in Pin 3 des Wählhe-
bel-Steckers ein. Das „orange/schwarze“
Kabel muss in Pin 4 eingepinnt werden.
Step 16
Now connect the „orange“ cable from the
asc wire harness into the 3rd Pin of the
gear selector plug. The „orange/black“
cable has to be pinned into the 4rd Pin of
the gear selector plug.
Schritt 15
Pin 3 „Orange/Braun“ auspinnen und in Pin
2 des mitgelieferten 2-Pol Stecker einpin-
nen. Pin4 „Violett“auspinnen und in Pin 1
des 2-Pol Steckers einpinnen.
Step 15
Pin out the 3rd Pin „orange/brown“ and
connect it into Pin 2 from the in the delivery
included 2-pole plug. Pin out the 4rd Pin
„violette“ and connect it into Pin 1 of the
2-pole plug.
Schritt 14
Benutzen Sie nun einen Schraubenzieher,
um die gekennzeichnete Lasche um 45
Grad nach oben zu biegen.
Step 14
Use a Screwdriver to bend the marked flap
45 degrees upwards.

Inh. Michael Sieg
Hauptsr. 65
49635 Badbergen
Schritt 18
Stecken Sie nun den schwarzen
Stecker, der sich am ende des
ASC-Kabelsatzes befindet in das
ASC Modul.
Step 18
Now plug the black plug from the
end of the ASC wire harness into
the ASC module.
Schritt 19
Bauen Sie nun alles wieder
Schrittweise zurück
Step 18
Start to rebuild everything rever-
se, like its said in the manual.
Schritt 12
Platzieren Sie das Modul an
einer geeigneten Stelle
Step 12
Store the module on a suitable
place
Betriebs- und Montageanleitung
operating manual
13
Schritt 17
Führen Sie das Kabel nun geeignet durch
die Mittelkonsole, sodass es nicht beschä-
digt werden kann.
Step 17
Now place the wire in a suitable position,
that it cannot be damaged by closing the
main console.

Inh. Michael Sieg
Hauptsr. 65
49635 Badbergen
Betriebs- und Montageanleitung
operating manual
Erste Inbetriebnahme // First-time use
USB-Buchse für Firmware Updates
USB port for Firmware Updates
Status-LED
status LED
Stecker für fahrzeugspezifischen Kabelsatz
Plug for vehicle-specific cable set
14
Kontrollieren Sie den Anschluß des ASCs, indem Sie die Status-LED beobachten.
Check the connection of the ASC by observing the status LED.
LED leuchtet // LED on: Wlan nicht aktiv // WiFi is not active
LED blinkt langsam // LED flashes slowely: Wlan-Betrieb an, App nicht verbunden // WiFi is acive, App not connected
LED blinkt schnell // LED flashes fast: Wlan-Betrieb an, App verbunden // WiFi is active, App is connected
LED aus // LED off: Modul im StandBy oder aus // module in StandBy mode or off
Wir weisen Sie gerne erneut darauf hin, das mitgelieferte USB-Kabel bereits in das
ASC-Modul einzustecken und so zu positionieren, dass Firmware Updates ohne großen
Aufwand in Form einer weiteren Demontage geschehen können.
We would like to suggest you for a second time to plug in the USB cable to the ASC
module already to avoid more dismounting processes, to be able to install Firmware
Updates of the module.
4

Inh. Michael Sieg
Hauptsr. 65
49635 Badbergen
Betriebs- und Montageanleitung
operating manual
15
Stellen Sie die Freigängigkeit nach unten sicher!
Beim ASC wollen wir dem Kunden die bestmögliche Flexibilität geben, daher sind alle
Funktionen und plausible Einstellmöglichkeiten offen.
Der Nutzer ist selbst dafür verantwortlich, mit welcher Fahrzeugtiefe
oder -höhe er fährt.
Bevor Sie die Schalter oder die App bedienen, seien Sie sich
darüber im Klaren, dass Ihr Fahrzeug evtl. zu tief werden könnte.
Also erstmal sich an die individuelle maximale Tiefe ran tasten.
Diese kann je nach Fahrzeug unterschiedlich sein. Ist z.B. eine
Spurverbreiterung verbaut, kann es passieren, dass der Radlauf
durch den Reifen bei zu hoher Tieferlegung beschädigt wird.
Guarantee the clearance down the vehicle!
We want to give the customer the best possible flexibility with the ASC module, therefore
all functions and plausible options are possible at adjustment.
The user himself is responsible for, with which height or depth he drives the vehicle.
Before you operate the switches or App, be sure about, that your vehicle perhaps could
get too deep.
So first you have to adjust very carefully in order to figure out the individual maximum
depth. This can be different depending on vehicle. For example if a wheel spacer is
obstructed, the wheel arche could be damaged by the tire if the lowering adjustment is set
too deep.
5. Einstellung der Tieferlegung // Lowering adjustment
5

Inh. Michael Sieg
Hauptsr. 65
49635 Badbergen
Inh. Michael Sieg
Hauptsr. 65
49635 Badbergen
Betriebs- und Montageanleitung
operating manual
Betriebs- und Montageanleitung
operating manual
16
Installieren Sie die ASC-Air Suspension Control App aus dem AppStore oder
GooglePlay.
Verbinden Sie Ihr Handy per Wlan mit dem ASC-Modul und starten Sie die ASC-App. Nun
können Sie die gewünschten Einstellungen mit der App vornehmen.
Stellen Sie sicher ,dass die Option "auf Mobile Daten wechseln" um eine stabile Internet-
verbindung aufrecht zu halten in Ihrem Smartphone deaktiviert ist!
Sonst verbindet sich zwar Wlan, aber die APP nicht.
Install the ASC-Air Suspension Control App from the
AppStore or GooglePlay Store.
Connect your mobile phone via WI-FI to the ASC module and start the ASC app. Now you
can do your desired settings in the application.
Make sure that the option "switch to mobile data" is deactivated to guarantee the best
possible internet connection in your smartphone!
Otherwise WI-FI will connect, but the application will not.

Inh. Michael Sieg
Hauptsr. 65
49635 Badbergen
Betriebs- und Montageanleitung
operating manual
17
6. Haftungsausschluss // Exclusion of liability
Die Benutzung des ASC erfolgt ausschließlich auf eigene Gefahr.
Da das ASC-Modul ohne Gutachten ausgeliefert wird, ist es daher nicht im Bereich der
StVZO zugelassen!
Da wir den korrekten Einbau und richtige Handhabung nicht kontrollieren können,
übernehmen wir keinerlei Verantwortung und/oder Haftung für Schäden, die aus dem
Betrieb entstehen oder damit zusammenhängen.
Wir behalten uns das Recht vor, diese Bedienungs- und Montageanleitung jederzeit
ohne Ankündigung zu ändern oder zu erweitern.
Use of the ASC is at your own risk.
The ASC module is delivered without an experts report, it is therefore not approved in
the area of the general road traffic regulations.
Caused, that we cannot control the correct installation and correct handling, we do not
assume any responsibility and/or liability for damage arising from or in connection with
the operation.
We reserve the right to modify or extend this operating manual at any time without prior
notice.
Important document for the final user! Must be enclosed with the vehicle documents!
6

Inh. Michael Sieg
Hauptsr. 65
49635 Badbergen
Inh. Michael Sieg
Hauptsr. 65
49635 Badbergen
Modellbezeichnung // Model Name Air Suspension Control (ASC)
Betriebsspannung // Operating voltage 7-20V
Mittlere Stromaufnahme // Average current consumption 200mA
Betriebstemperatur // Operating temperature -30°C - +85°C
WiFi Frequenz // WiFi frequency 2,4 GHz / max. 50mW (17dBm)
Abmessungen (LxBxH) // Dimensions (LxWxH) 85x60x25mm
7. Technische Daten und Benutzerhinweise
// Technical data and user instructions
Betriebs- und Montageanleitung
operating manual
Betriebs- und Montageanleitung
operating manual
18
Install the ASC-Air Suspension Control App from the
AppStore or GooglePlay Store.
Connect your mobile phone via WI-FI to the ASC module and start the ASC app. Now you
can do your desired settings in the application.
Make sure that the option "switch to mobile data" is deactivated to guarantee the best
possible internet connection in your smartphone!
Otherwise WI-FI will connect, but the application will not.
8. Entsorgungshinweis // Disposal instructions
Wichtiges Dokument für den Endanwender! Muss den Fahrzeugunterlagen beigelegt
werden!
Important document for the final user! Must be enclosed with the vehicle documents!
Simplified EU Declaration of Conformity: This product complies with Directive 2014/53/EU.
You can download the complete declaration of conformity from: www. electronicworks.de/eu-
ke/euke_asc.pdf
Dieses Gerät enthält sowohl elektronische als auch recycelbare
Bauteile. Bitte entsorgen Sie deshalb das Gerät nicht über den
Hausmüll, sondern geben Sie es beim Recyclinghof ab oder führen
es dem Sondermüll zu.
This device contains both electronic and recyclable components. For
this reason, please do not dispose of the device with household
waste, but dispose of it at the recycling yard or dispose of it with
hazardous waste.
7
8

Table of contents
