ELEKON BATLOGGER User manual

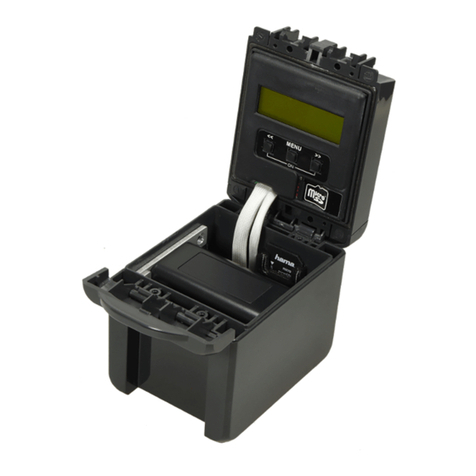
GPS Antenna
Ultrasound microphone
LCD display
Key
Key
Key
Speaker A
SD / SDHC card reader
Power supply connector
3 5 mm headphone jack
A nur bestimmte Varianten, siehe auch 2.2 Device variants
BATLOGGER Manual Elekon AG ov. 2012 1/28
www batlogger ch
Elekon AG
Cheerstrasse 16
CH-6014 Luzern
Manual
Software version V 2.2
BATLOGGER
»
MENU
«

Table of contents
1 otes............................................................................................................................................3
2 Overview......................................................................................................................................4
2.1 General...................................................................................................................................4
2.2 Device variants.......................................................................................................................4
2.3 Data storage...........................................................................................................................4
2.4 Recording ..............................................................................................................................4
2.5 Check and play of recorded #****.wav files...........................................................................5
2.6 Global positioning and time recording / GPS.........................................................................5
2.7 Recording the mode of operation of the BATLOGGER.........................................................5
3 Preparation..................................................................................................................................6
3.1 Battery charging.....................................................................................................................6
3.2 Accessories............................................................................................................................6
3.2.1 SD card.........................................................................................................................6
3.2.2 Ultrasound microphone.................................................................................................6
3.2.3 Microphone extension (optional)..................................................................................6
3.2.4 Headphones (optional).................................................................................................6
3.2.5 Strongbox (optional)......................................................................................................7
4 Switching the BATLOGGER on and off (with main menu and info lines)....................................8
4.1 Activating the BATLOGGER...................................................................................................8
4.2 Shutting the BATLOGGER off (manual and automatically)...................................................8
4.3 Download of new firmware when starting up.........................................................................9
5 Record.......................................................................................................................................10
5.1 Manual Trigger (Triggering recording by keystroke)............................................................10
5.2 Continuous Trigger (Continuous recording).........................................................................10
5.3 Crest- und Period – Trigger (”Automatic” recording)............................................................11
5.4 Live monitoring A .................................................................................................................11
5.5 Delayed recording (Recording in time windows).................................................................12
5.6 Interval recording (Recording in intervals)...........................................................................12
6 Process (Playback, analyse and erase stored wav files)..........................................................13
6.1 Play .....................................................................................................................................13
6.2 Play All..................................................................................................................................13
6.3 Analyse.................................................................................................................................13
6.4 Delete (Delete recordings)...................................................................................................14
7 Setup (Settings)........................................................................................................................15
7.1 Operation..............................................................................................................................15
7.2 Setup-Menu..........................................................................................................................16
8 Files...........................................................................................................................................20
8.1 The audio data file ”xxxxxxxx.wav” (e.g. 10160233.wav)....................................................20
8.2 Meta data file ”xxxxxxxx.xml” (Bsp. 10160233.xml)............................................................21
8.3 Parameter file "BATPARS.xml"............................................................................................22
8.4 Log file "BATREC.log"..........................................................................................................24
8.5 Google-Earth file ”route.kml”................................................................................................25
8.6 Track file ”xxxxxxxx.gpx” (e.g. 10160233.gpx).....................................................................25
9 Technical specifications.............................................................................................................26
BATLOGGER Manual Elekon AG ov. 2012 2/28

1 Notes
Development: The BATLOGGER was developed in a cooperation of the Swiss Federal Research
Institute WSL and the University of Applied Sciences orthwestern Switzerland FH W, with financial help
from the Environmental Research of the Swiss Federal Office for the Environment FOE .
Environmental conditions: The BATLOGGER is housed in a robust synthetic case for measuring
devices, ant it is operated through a polyester foil keyboard. With the many openings for GPS,
microphone, memory card, charging plug etc., it does only reach imperviousness level IP 30 and
therefore is not protected against water. When used in the field, unobserved and for extended periods of
time, the logger should be stowed in a waterproof box (Strongbox Part # 212.006) or bag, with the
microphone externally connected through a cable.
Microphone / ultrasound sensor: An active electret microphone is used as plug-in ultrasound sensor.
Attention has to be payed to a proper fitting of the microphone in its plug. The microphone itself can be
damaged by water. It must be protected from rain and extreme humidity, and it requires corresponding
positioning. For special recording purposes, the microphone can be connected with the logger through a
shielded stereo audio cable of no more than 2 m length.
Speaker A: The speaker can also be used for monitoring during recording. Depending on environment
and volume this may lead to acoustic feedback (loud whistling). In this case, reduce the volume and hold
the BATLOGGER further away from reflecting objects such as walls or your own body or use
headphones.
Li-Ion battery: The internal power is provided by a lithium-ion battery of 3,6 V and 4600 mAh. When
transporting and storing several BATLOGGERs together, the corresponding regulations have to be
followed.
Storage media SD / SDHC – card: The BATLOGGER uses SD / SDHC cards of up to 32 GB capacity
as storage media. Test have shown, that cards of different vendors may vary in writing and erasing
speed. We refrain from giving recommendations for specific products or vendors, as offered sizes and
technologies change constantly, which may also influence card performance.
Legende for display illustrations:
On the following pages the operation of the BATLOGGER is explained using symbolic representations of
the LCD display. The illustrations are only for the sake of clarity and understanding, and do not
necessarily reflect what you see on the device.
Display symbology (default settings) in the following explanations:
Display off Backlight full Backlight dimmed Backlight off
BATLOGGER Manual Elekon AG ov. 2012 3/28

2 Overview
2.1 General
The BATLOGGER is a data logger, which records ultrasound vocalisations of bats in real-time, and stores them for
later processing on a SD / SDHC memory card.
The logger performs a real-time recording to internal RAM and subsequently stores the recordings, that fulfil certain
criteria, as sound data (sequences of echolocation calls) onto SD / SDHC card.
Apart from the bat calls, which are stored as WAVE files, additional information is written in text format into a “.xml”
file, which stores all the settings of the BATLOGGER at the time of recording, including time, date and location of
the recording (GPS data), and the temperature of the logger.
To allow a later overview over all deployments of the BATLOGGER, its operating state is being written to a “LOG”
file on the SD card.
2.2 Device variants
The BATLOGGER is offered in a slightly extended version since the end of 2012 (Model: BATLOGGER M). It
additionally includes an integrated mixer for live monitoring of the bat calls during recording. BATLOGGER M has
speaker holes on the top, 3-line display and has Part #: 212.013 on the nameplate.
BATLOGGER M
Part #: 212.013
BATLOGGER
Part #: 212.003
3-line display
2-line display
Speaker LED charge indicator lights
red: charging
green: charged
2.3 Data storage
The audio files are stored on memory card as #****.wav files (where # = 4 digit serial number of the logger), with
consecutive numbering (****). For every #****.wav file, an #****.xml file is stored, which contains all parameter
settings, date, time, geographic position and temperature at the time of recording of the corresponding WAVE file.
Ultrasound data of the microphone are first written to the internal Random Access Memory (RAM) of the
BATLOGGER. After termination of a single recording sequences (Recording...), the data are stored automatically
from RAM to the SD card (Saving... #****.wav). During this storage time (duration depends on file size and card
type) ), the BATLOGGER is blocked.
2.4 Recording
The BATLOGGER can be operated in different ways. As a basic principle, when the logger is in ”Record” mode, the
signal from the microphone is constantly written to internal RAM (Sampling...).
If the logger is set for continuous recording, the RAM is filled with data and thereafter data are written to the
memory card. As the loggers RAM is limited to 32 MB, the length of a single recording sequence can not exceed
approx. 53 seconds, but can be set to less. Subsequently this recording sequence will be written as #****.wav file to
the SD card and a new recording will start, thereby overwriting data in RAM. The time required for data storage to
the memory card is largely depending on the file size but also on the type of card. In general the writing of the file
BATLOGGER Manual Elekon AG ov. 2012 4/28

should require significantly less time than the recording itself.
In manual recording the triggering has to be performed through the key pad and may also be stopped this way. If
a manual stop does not occur, the recording will stop automatically after a user selectable manual trigger time
(default = 10 sec), and the #****.wav file be written to memory card.
In automatic recording the signal from the microphone is constantly monitored and the recording started
automatically, when a triggering event is registered (detected ultrasound signal). The duration of such recordings
depends on the presence of the triggering criteria. The default setting allow for a recording duration which includes
0.5 seconds before the first and 1 second after the last trigger event (pre- and post-trigger). With the default
settings, the shortest recording duration is therefore 1.5 seconds, which corresponds to roughly 1 MB of data on
the SD card.
2.5 Check and play of recorded #****. av files
For immediate control, single stored audio files can be replayed through headphones in time expansion mode.
Ultrasound signals are slowed down by a user selectable factor x (default x = 10). A stored sequence therefore
requires an x-fold playback time of the original recording to monitor. Only recorded files can be played back and
listened to. Additionally recording details of a file such as date, time, length, peak frequency and more can be
displayed.
Single recordings on the memory card can also be erased through this mode. Erasing the complete memory card
must be achieved by formatting it (Settings menu).
2.6 Global positioning and time recording / GPS
The BATLOGGER is equipped with a GPS receiver. Its positioning and time data are stored in parallel to the
#****.wav file in a corresponding #****.xml file, and into a Google-Earth -.kml file. Further on, the travelled track can
be recorded to a GPX file.
2.7 Recording the mode of operation of the BATLOGGER
For later control of a BATLOGGER's state, its mode of operation is sequentially written to memory card into a
separate "log"-File (BATREC.log). This ”BATREC.log” file is constantly added to, and will not be overwritten.
However, formatting the SD card will also erase this log file.
BATLOGGER Manual Elekon AG ov. 2012 5/28

3 Preparation
3.1 Battery charging
Upon delivery the battery of the BATLOGGER may not be fully charged. Please charge the battery before first use.
1. Connect the supplied AC adapter to the BATLOGGER's power supply connector.
2. Plug the AC adapter into a power outlet.
3. Charging begins when the charging indicator lights red or, for BATLOGGER M, “charging...” is displayed.
4. Charging is complete when the charging indicator turns green or, for BATLOGGER M, “charged” is
displayed. The charging time can take several hours, depending on the state of charge.
ote: The BATLOGGER can also be operated with the AC adapter connected to e.g. extend the operation time.
3.2 Accessories
3 2 1 SD card
•For data storage a removable SD/SDHC card is used. Tested memory card
size is 32 MB to 32 GB. When the term “SD card” is used, always an
SD/SDHC card is meant. The card must be formatted as FAT32.
•The SD card must be inserted into the memory card slot until it clicks into
place before turning on the BATLOGGER. To remove the SD card, turn off
the BATLOGGER and press the SD card in gently. The SD card pops out
and can be removed.
•SD cards may have a write protect switch that prevents wrinting to the cards
when the switch is on LOCK.
•A recent version of BATPARS Editor software (Windows and Mac) is stored on the included SD card. The
executable file is in directory Software/BATPARS and can be started from there directly. Installation is not
required.
•A recent version of BatExplorer PC software is stored on the included SD card. It must be installed on the
computer before first use. It can be found in the directory Software/BatExplorer.
3 2 2 Ultrasound microphone
As ultrasonic sensor a pluggable active electret microphone is used. The microphone must be
plugged into the corresponding microphone jack on top of the device before use. Please make
sure the microphone is plugged in completely until dead stop to ensure maximum contact.
If the microphone is damaged, it can be replaced with a new, functional replacement
microphone (Part # 212.215).
3 2 3 Microphone extension (optional)
For special recordings a commercially available, shielded audio cable (stereo) up to about 2m
length may be inserted between BATLOGGER and microphone (Microphone extension Part #
212.004).
3 2 4 Headphones (optional)
To listen to recordings a standard headphone with 3.5mm plug is used (Part # 212.012). Plug
your headphone into the headphone jack and adjust the volume to a comfortable level in the
Setup menu (see also below).
BATLOGGER Manual Elekon AG ov. 2012 6/28

3 2 5 Strongbox (optional)
The Strongbox (Part # 212.006) provides long-term surveillance and monitoring of bat habitats. It protects the
BATLOGGER against weather and allows to run it independently up to 19 nights.
•Before using the Strongbox its battery must be fully charged with the special charger supplied. Please refer
to the instructions of the charger.
Using the BATLOGGER with the Strongbox:
1. Remove the ultrasonic microphone from the BATLOGGER.
2. Plug in the power plug of the Strongbox into the power supply connector of the BATLOGGER.
3. Plug in the microphone extension cable into the microphone jack of the BATLOGGER.
4. Plug in the ultrasonic microphone into the protective tube of the microphone extension. Make sure the
microphone is plugged in completely until dead stop to ensure maximum contact. To remove the
microphone from the protective tube, insert the included hose through the microphone and pull the hose
with the microphone out of the tube gently.
5. Place the BATLOGGER into the Strongbox.
6. Turn on the BATLOGGER and put it into record mode. Settings to trigger and recording time windows are
shown below.
7. Close the Strongbox. The microphone extension cable must be clamped into the provided opening of the
Strongbox on the blue-clad parts of the cable. Take care that the Strongbox is closed completely to ensure
proper sealing.
BATLOGGER Manual Elekon AG ov. 2012 7/28
Stromstecker Ladebuchse

4 Switching the BATLOGGER on and off (with main menu and info lines)
4.1 Activating the BATLOGGER
”Power Off” The BATLOGGER is switched off.
When pressing both keys simultaneously, If only key is pressed,
the device will start up. the display reads:
Serial number and software version are
indicated on the display.
The SD/SDHC card is initialised. If SD card is missing,
(Duration depends on card make) the display indicates:
If a parameter file ”BatPars.xml” exists on the SD card,
the BATLOGGER reads the contained parameter The BATLOGGER will
values. Without ”BatPars.xml” the BATLOGGER shut itself off after
works with internal parameter values, stored in 15 seconds of waiting
”CMOS” from previous recordings. Default for the insertion
parameters will only be used, if ”BatPars.xml” of a SD card.
is void of parameters, or after a firmware download.
The BATLOGGER automatically switches to the main menu
”Start Record?” and additionally shows changing information.
Main menu with info lines
Main menu points: During recording operation, the first line(s) of the display
cycles through the following information:
Recording
(see page 10) Serial number, temperature and
charging state of the internal battery.
Playback and Free memory on the SD card
”process” and last saved file number.
(see page 13)
Date (DD.MM.YYYY) and time (hh:mm)
after GPS satellite contact.
Settings of the
BATLOGGER
(see page 15) o GPS satellites in contact.
Reception from 4 satellites / accuracy.
Switching the Indication of coordinates on GPS
BATLOGGER (format depending on settings)
off GPS disabled through setup.
Back to ”Start Record?”
4.2 Shutting the BATLOGGER off (manual and automatically)
Press key in the main menu until ”Shut Off?” appears.
Press key to switch off the BATLOGGER.
Automatic shut-off:
If no keys are pressed on the BATLOGGER for 4 minutes, and the device is not in
keine Tasten recording or sleep mode, it will switch off automatically.
If no SD/SDHC card is inserted, the BATLOGGER will switch off after 15 seconds.
”Power Off”
BATLOGGER Manual Elekon AG ov. 2012 8/28
Insert SD card!
Waiting...
No GPS (0 vie )
xxxxxxxxxxxxxxxx
»
3.4GB Free #123
xxxxxxxxxxxxxxxx
#1021 25°C ▐▐▐▐
xxxxxxxxxxxxxxxx
10.06.2009 15:30
xxxxxxxxxxxxxxxx
BATLOGGER #xxxx
<< Po er-On >>
BATLOGGER #xxxx
SW Rev. x.x
Init SD Card . . .
Using SD Pars
Using CMOS Pars
Using Def. Pars
(Changing Info-Line)
Start Record? >
(Changing Info-Line)
Setup? >
(Changing Info-Line)
Process File? >
(Changing Info-Line)
Shut Off? >
(Changing Info-Line)
Start Record? >
« » »
Menu
Menu
Menu
Menu
4 Sats HDOP=7.7
xxxxxxxxxxxxxxxx
662217 / 211655
xxxxxxxxxxxxxxxx
GPS S itched Off
xxxxxxxxxxxxxxxx
(Changing Info-Line)
Shut Off? >
MENU
Good Bye . . .

4.3 Do nload of ne firm are hen starting up
Download possible new firmware version from the BATLOGGER-Homepage www.batlogger.ch and copy it to the
SD card.
”Power Off” The BATLOGGER is switched off with new firmware,
contained in file FWxxx BL, on the inserted SD card.
Start up the BATLOGGER by simultaneously pressing both keys
As in “normal” startup, the BATLOGGER's serial number is shown, and the version
of the installed firmware revision appears.
During initialisation of the SD card, a firmware ”FWxxx BL” is found on the SD card,
SD card, which does not correspond to the installed firmware version on the BATLOGGER.
The found firmware revision ”FWxxx BL” is indicated.
After pressing the new firmware will be loaded into the BATLOGGER.
When pressing the firmware download can be skipped.
The size of the read software will be shown shortly during programming.
After loading of the new firmware, the BATLOGGER will shut itself off automatically.
”Power Off”
Start the BATLOGGER again by simultaneously
pressing both keys .
As in “normal” startup, the BATLOGGER's serial number is shown, and the version
of the installed firmware revision appears.
During initialisation of the SD card, a firmware is found on the SD card,
which does correspond to the installed firmware version on the BATLOGGER.
The firmware in the BATLOGGER is verified agains the version stored on the
SD card, as long as the same same firmware version is present there.
Pressing the key will erase the firmware on the SD card.
If a parameter file ”BatPars.xml” exists on the SD card, the BATLOGGER
reads the contained parameter values. Without ”BatPars.xml”
the BATLOGGER works with internal parameter values, stored
in ”CMOS” from previous recordings. Exception from this rules:
When starting up the BATLOGGER the first time after a firmware
download, default parameters are loaded! An “empty” “BatPars.xml” file
(containing just <BatPars></BatPars>) elicits the same.
The BATLOGGER automatically switches to ”Start Record?” in the main menu.
BATLOGGER Manual Elekon AG ov. 2012 9/28
FW Verify Ok !
Del. FW on SD? >
BATLOGGER #xxxx
SW Rev. x.x
Init SD Card . . .
Using SD Pars
Using CMOS Pars
Using Def. Pars
(Changing Info-Line)
Start Record? >
Ne F xxx.BL
Flash Firm are >
Programming
xxxxxx Bytes . . .
BATLOGGER #xxxx
SW Rev. x.x
Init SD Card . . .
»
« »
« »
»
Menu
Menu
» »

5 Record
•Recording with automatic and manual trigger
•Continuous recording
•Recording in preset time windows
5.1 Manual Trigger (Triggering recording by keystroke)
Proceed with key in the main menu to ”Start Record”.
In the setup menu, the trigger mode (TRIG_MODE) has to
be set to 0 = Manual (see page 15).
With the key to ”Recording” mode (directly or after warning of missing GPS).
If no valid GPS time is available, the BATLOGGER asks
for confirmation of the start of the recording without GPS data.
With the key , the recording mode is initiated.
With the key The BATLOGGER is in sampling position and
starting of recording waits for a manual start of the recording.
will be cancelled. Pressing the key will cancel the recording.
Back to ”Start Record” Pressing key will start the recording.
During recording, the BATLOGGER indicates,
that recording was triggered manually.
Pressing key will stop the recording.
When not stopped manually,
the recording will last up to the
duration chosen for manual triggering (default =10 s).
The recorded data are stored as wav file
and the corresponding meta information as xml file
onto SD card.
After storage of both data files, the BATLOGGER will switch back to the menu ”Sampling” .
Manual recording can be cancelled (back to ”Start Record”) with the keys and .
5.2 Continuous Trigger (Continuous recording)
Proceed ith key in the main menu to ”Start Record”.
In the setup menu, the trigger mode (TRIG_MODE) has to
be set to 1 = Continuous (see page 15).
With the key to ”Recording” mode (directly or after warning of missing GPS).
The BATLOGGER digitises data into RAM for the time preset
as maximum continuous recording duration (max. 53.5 s = default).
After this time it automatically switches to ”Saving”.
The recorded data are stored as wav file and the corresponding
meta information as xml file onto SD card.
The storage time depends on the recording duration and the type
of SD card used.
After storage, the BATLOGGER automatically returns to ”Recording”.
Continuous recording can be cancelled (back to ”Start Record”) with the keys and .
BATLOGGER Manual Elekon AG ov. 2012 10/28
Manual Trigger
Started . . .
Man. Triggered !
Sampling . . .
Manual Trigger
Stopped.
Saving #xxxxxxxx
Sampling . . . ^o^
(Changing Info-Line)
Sampling . . . ^5^
(Changing Info-Line)
Start Record? >
(Changing Info-Line)
Start /o GPS? >
(Changing Info-Line)
Start Record? >
Recording . . .
Sampling . . . ^o^
Saving #xxxxxxxx
Sampling . . . ^o^
»
»
»
»
Menu
Menu
Menu
Menu
Menu
Menu
»
»
»

5.3 Crest- und Period – Trigger (”Automatic” recording)
Proceed with key in the main menu to ”Start Record”.
In the setup menu, the trigger mode has to be set to
2 = Crest Adv, 3 = Crest or 4 = Period
(see page 15)
With the key to ”Recording” mode (directly or after warning of missing GPS).
If no valid GPS time is available, the BATLOGGER asks
for confirmation of the start of the recording without GPS data.
With the key , the recording mode is initiated.
The BATLOGGER is in sampling position and
awaits a trigger event (Crest or Period). In this
state, the BATLOGGER continuously digitises
signals from the microphone into internal RAM,
circularly overwriting old data (ring buffer)
(The ”5” on the display indicates present Crest factor)
Here, manual triggering is possible too: ( )
If a trigger event is detected, the BATLOGGER
displays the activity (peak frequency) and, if
Autorecord is enabled, switches to
”Recording” and stays in this mode, until
the trigger event disappears again and the
”post trigger time” has passed. The detected peak
frequency is displayed continuously.
Afterwards it switches to ”Saving”.
The recorded data, including the pre-trigger time,
are stored as * wav file and corresponding meta
information as * xml file onto SD card. Storage time
depends on the recording duration and SD card used.
During storage, the frequency that triggered the event
is displayed. This is a first hint for species recognition.
After storage, the BATLOGGER automatically returns to ”Recording”.
Automatic recording can be cancelled (back to ”Start Record”) with the keys and .
5.4 Live monitoring A
Is the BATLOGGER in record mode and live monitoring function is enabled (see page 16) the ultrasonic sounds are
output live on the speaker or headphones. Here, the bat calls are transformed into audible range after the mixer-
principle (heterodyne). The mixer is adapted automatically and continuously to the currently detected frequency of
the calling bat.
The volume can be adjusted during operation.
With the key in the record mode to “Volume”.
With the key the volume is lowered, with the key raised.
Volume = 0 output is muted.
BATLOGGER Manual Elekon AG ov. 2012 11/28
(Changing Info-Line)
Start Record? >
(Changing Info-Line)
Start /o GPS? >
(Changing Info-Line)
Sampling . . . ^5^
»
»
Menu
Menu
Menu
Saving #xxxxxxxx
Freq = xx kHz
(Changing Info-Line)
Sampling . . . ^5^
(Changing Info-Line)
Exit Record >
Menu
(Changing Info-Line)
Volume = 3 <>
Menu
Menu
« »
Menu
»
»
Act. xx kHz
Recording. . . ^8^
MENU »

5.5 Delayed recording (Recording in time windows)
Proceed with key in If a time window is defined in the “Setup”, and at least 1 day is
the main menu to ”Start Record” activated, the BATLOGGER will start directly into ”Sleep” mode. If
preset starting time has already passed, sampling immediately starts.
With the key to ”Recording” mode (directly or after warning of missing GPS).
If no valid GPS time is available, the BATLOGGER asks
for confirmation of the start of the recording without GPS data.
With the key , the recording mode is initiated.
The dark display indicates the sleep mode and the
”wakeup time”. After wakeup normal recording
operation resumes with the pre-chosen trigger
mode until the end of the set time window.
Sleep-Mode can be cancelled with the key (confirmation: ”Aborted by User”)
Example:
•r. Days = 2
•T1 Start = 20:30 T1 Stop = 01:30
•T2 Start = 04:00 T2 Stop = 07:30
5.6 Interval recording (Recording in intervals)
As with time delayed recording time windows have to be defined and a number of days must be set. When also a
recording interval is entered, then the BATLOGGER switches to record mode at the start time, but only for a single
recording or max. for one minute.
Then further recordings are blocked for the programmed number of minutes (”RecIntvl” / default = 0 = off). This is
followed by another record mode. This interval operation continues to the end of the time window. For this interval
operation the various trigger modes can be used.
Example:
•Rec Intervall = 3
BATLOGGER Manual Elekon AG ov. 2012 12/28
Wakeup at 01:15
Sleeping . . .
«
(Changing Info-Line)
Start Record? >
(Changing Info-Line)
Start /o GPS? >
»
»
Menu
Menu
Menu
...
21:00
21:01
21:02
21:03
21:04
21:05
21:06
21:07
21:08
Record mode
Time window 1
Ready to record Recording blocked Ready to record Recording blocked
...
01.07.2012 19:00
01.07.2012 20:00
01.07.2012 21:00
01.07.2012 22:00
01.07.2012 23:00
02.07.2012 00:00
02.07.2012 01:00
02.07.2012 02:00
02.07.2012 03:00
02.07.2012 04:00
02.07.2012 05:00
02.07.2012 06:00
02.07.2012 07:00
02.07.2012 08:00
02.07.2012 20:00
02.07.2012 21:00
02.07.2012 22:00
02.07.2012 23:00
03.07.2012 00:00
03.07.2012 01:00
03.07.2012 02:00
03.07.2012 03:00
03.07.2012 04:00
03.07.2012 05:00
03.07.2012 06:00
03.07.2012 07:00
03.07.2012 08:00
Switch on
Device
Start
Record mode
Device switches
Off
main
Menu
Record mode
Time window 1 sleep mode Record mode
Time window 2 sleep mode Record mode
Time window 1 sleep mode Record mode
Time window 2 Off
»
»
»

6 Process (Playback, analyse and erase stored wav files)
Proceed with key in the main menu to ”Process File”
With key into the submenu of ”Process File”
The last saved file ist shown
Selection of a different file with the keys .
Proceed to ”Play” and ”Analyse” with the key .
6.1 Play
Start playback the recording with the key
The file is loaded fron the SD card
The file is played at the mode preselected in the
“Setup”.
The volume can be changed with the
keys (Range: 0 – 9, Default: 5)
6.2 Play All
Start playback of all recordings with the key
The file is loaded from the SD card and
played with the preset mode. After
finishing the next (higher #) file is loaded
and played. After reaching the highest #,
the first file (lowest #), will be read and
played and so forth (endless loop). The
output volume can be set (see above) and
the # of the played file is indicated.
Cancel the play mode with the key
6.3 Analyse
”Analyse” the recording with the key
With the keys different recording details
can be displayed.
Cancel this submenu with the key
BATLOGGER Manual Elekon AG ov. 2012 13/28
« »
»
(Changing Info-Line)
Process File? >
File: #xxxxxxxx
Play ? >
Playing . . .
PB Volume=5 <>
File: #xxxxxxxx
Analyse ? >
File: #xxxxxxxx
Exit Analyse ?
Select File:
#xxxxxxxx. av <>
Loading . . .
Play ?
»
« »
»
»
File: #xxxxxxxx
Play All ? >
Loading . . .
Play All ? Loading . . .
PB Volume=5 <>
Play all . . .
PB Volume=5 <>
Play #xxxxxxxx
PB Volume=5 <>
» »
Menu
Menu Menu
Menu
Menu
Menu
Menu Menu
Menu
Menu
File: #xxxxxxxx
xx.xx.xxxx <>
File: #xxxxxxxx
xx:xx:xx <>
» »
« »
File: #xxxxxxxx
Peak: xx kHz <>
File: #xxxxxxxx
Temp = xx°C <>
»

6.4 Delete (Delete recordings)
Deleting a single file starts with key
Erase file with the key
(*.wav and *.xml file will be deleted)
Erasing the file has to be confirmed!
Delete with the key
The files ”xxxxxxxx.wav” and
”xxxxxxxx.xml” were deleted.
Return to ”Start Record“
Exit from the submenu ”Process File” to the
main menu ”Start Record” by pressing the key .
Proceed in the submenu ”Process File” with key (back to menu point ”Select File”).
BATLOGGER Manual Elekon AG ov. 2012 14/28
»
Delete ? >
File: #xxxxxxxx
Delete This? >
File: #xxxxxxxx
Confirm Delete! >
Deleted!
Exit Process ? >
»
»
»
»
»
»
Menu
Menu
Menu
Menu

7 Setup (Settings)
Set parameters for
•Recording time windows (delays), triggers
•GPS, backlight, time zone and audio
•SD card and parameter file
7.1 Operation
Proceed with key in the main menu to ”Setup?”
With the key into the submenu of ”Setup”.
With the key into the submenu or with the
key to the next menu item or with the key
to the last menu item.
With the keys value can be changed.
With the key to the next parameter.
To exit the setup menu the last menu item („Exit Setup“) must be selected.
BATLOGGER Manual Elekon AG ov. 2012 15/28
« »
»
(Changing Info-Line)
Setup? >
Setup X/Z
Submenu X >
Parameter = X < >
»
»
Menu Menu
Menu
Menu
Menu
Menu
»
Parameter = Y < >
Menu
Setup Y/Z
Submenu Y >
Menu
...
...
«

7.2 Setup-Menu
Menu Description Default
Setup 1/7
Delay Record
Timing (delay) of the recordings (Program 1 or 2 time slots per day for a programmed
number of days)
r. Days Enter the number of days on which the time windows (one or both) are performed.
0 = time control (delay) disabled
Example: 30
For a maximum of 30 days, recording is performed during the configured time slot (see
below)
0
T1 Start 1. start time (in 15 minute steps)
Example: 20:30
00:00
T1 Stop 1. stop time (in 15 minute steps)
Example: 00:00
00:00
T2 Start 2. start time (in 15 minute steps)
00:00 = 2. time slot disabled
Example: 04:30
00:00
T2 Stop 2. stop time (in 15 minute steps)
00:00 = 2. time slot disabled
Example: 06:00
00:00
Rec Intervall Interval time between single recordings (in one minute steps)
Example: 3
After a recording at least 3 minutes no new recording is started (triggered)
0
Setup 2/7
Trigger
Trigger settings
Set the trigger mode, that is how a recording is started
TRIG_MODE: Choose trigger mode:
0 = Manual: start and stop recording need manual key input (autom. stop after
2
BATLOGGER Handbuch Elekon AG ov. 2012 16/28

”MA TRIG MAXTIME”)
1 = Continuous: continuous recording of blocks of default 53 seconds duration (interrupt for
storage).
2 = Crest Adv: automatic triggering with Crest factor, enhanced call detection and reduce
noise sensitivity (manual triggering possible to override automatism)
3 = Crest: automatic triggering with Crest factor (manual triggering possible to override
automatism)
4 = Period: automatic triggering with Period algorithm (manual triggering possible to
override automatism)
TRIG_AUTOREC 0 = Manual: A trigger event does not start recording. The recording must be started and
stopped manually, but the trigger frequency is displayed.
1 = Auto: A trigger event automatically starts the recording and recording automatically
stops when trigger conditions are no longer met.
1
TRIG_MODE:
Crest Adv
Min. Crest Minimal Crest factor as trigger condition
Lower values trigger easier
7
Min. F Minimal frequency for trigger condition in kHz 15
Max. F Maximal frequency for trigger condition in kHz 155
TRIG_MODE:
Crest
Min. Crest Minimal Crest factor as trigger condition
Lower values trigger easier
6
Min. RMS Factor for minimal effective value as trigger condition
Lower values trigger easier
2
Min. Peak Factor for minimal amplitude as trigger condition
Lower values trigger easier
2
HP Factor for the lowest frequency, that still may elicit a trigger event (Factor times 1,22 kHz) 6
TRIG_MODE:
Period
ProdVal Period-Trigger: ProdVal
Higher values improve triggering at low frequencies, but also insects, and vice versa.
8
DivVal Period-Trigger: DivVal
Higher values improve triggering at low frequencies, but also insects, and vice versa.
20
Setup 3/7
Audio
Audio settings
Volume Headphones/SpeakerA -Volume
0 = mute
10 = very loud
ATTE TIO : Too high volume can cause hearing loss, particularly using the headphones
5
BATLOGGER Handbuch Elekon AG ov. 2012 17/28

Monitoring Live monitoring (mixer output)A
0 = Live monitoring disabled
1 = Live monitoring enabled
1
PB Mode Playback mode
0 = Pitch, playback slowed down with PB Speed factor
1 = Mixer, playback mixed with peak frequency of the recording
1
PB Speed Playback speed
1 = real-time
2 = half speed
etc.
Example: 10
The recordings are played slowed down 10 times (time expansion and frequency division).
Thus the ultrasonic sounds are audible (e.g. 45 kHz -> 4.5 kHz)
The real-time playback enables the output of the original ultrasonic sounds. This can be
useful for demonstration purpose for example. Pay attention to connect a speaker with
appropriate ultrasound capability.
10
Test Microphone Record the current spectrum and write it to the log file
Setup 4/7
Location / GPS
Position, time and GPS settings
Show Status Displays the current status of GPS reception and information about the current location
GPS Mode Set position determination mode
0 = position determination disabled
1 = position determination enabled
2 = position determination and track recording (GPX) enabled
Example: 0
GPS off for the lowest possible power consumption or because reception is not possible,
such as in caves.
1
Coord.Fmt Coordinates display format to display current location
0 = WGS84 (e.g.. 47.052804 / 8.257801)
1 = CH1903 (e.g.. 662240 / 211632)
0
TZ Set time zone
Deviation to UTC in hours
(The time is set and adapted by GPS reception)
+2
BATLOGGER Handbuch Elekon AG ov. 2012 18/28

Example: +2
Daylight savings time in Zurich (CH)
Int. Interval of position determination in seconds
Lower values = more frequent position determination, higher power consumtion
Higher values = less frequent position determination, lower power consumtion
ote: While recording, the position determination is paused for performance reasons.
10
Setup 5/7
SD Card
SD card setup
Write BATPARS Write the current settings to the BATPARS.XML file
Delete BATPARS Delete the BATPARS.XML file from the SD card
Format SD Card Format the SD card
CAUTIO : All data on the SD card will be deleted. Make sure that you have made a backup.
Setup 6/7
Miscellaneous
Various settings
Backl.Mode Set the display backlight
0 = Backlight off during recording
1 = Backlight dimmed during recording
2 = Backlight bright during recording
(except in recording mode, the display backlight is always bright; in sleep mode the light is
always off)
1
Load Defaults Set settings back to factory defaults
Setup 7/7
Exit Setup
Exit Setup menu and save changes
Save to BATPARS Write settings to BATPARS.XML file and exit Setup menu
Save to int.Mem Write settings to internal memory and exit Setup menu
If the BATPARS.XML file exists on the SD card, those settings will be loaded on the next
start of the BATLOGGER.
Discard changes Discard changes and exit Setup menu
BATLOGGER Handbuch Elekon AG ov. 2012 19/28

8 Files
8.1 The audio data file ”xxxxxxxx. av” (e.g. 10160233.wav)
After completion of recording into internal RAM, the stored data is written as standard audio WAVE file onto the
inserted SD card with the file name ”xxxxxxxx.wav”. (e.g. 10160233.wav)
The first four digits identify the serial number of the BATLOGGER and the following four digits exhibit the
consecutive number of the recorded files on the inserted SD card.
The above example therefore identifies the 233th recording on this SD card of the BATLOGGER with the serial
number 1016.
The *.wav file contains all the uncompressed raw measurement values of the analog to digital converter and a
“header”, which is specific to the wave format. This “header” contains, amongst other information, the sampling rate
of the digitiser.
Concurrent with these recorded wave data, a file containing meta information about the recording (see below) is
saved to SD card with the name *.xml (in our example 10160233.xml).
The standard *.wav files can be read and opened with general audio software or bat specific sound analysis
programs. It may be displayed as time signal or spectrogram. The latter offers best possibilities to identify species.
Elekon AG offers a specific analysis software for Windows PCs: BatExplorer. It can be found on the included SD
card or can be downloaded from www.batlogger.ch.
WSL offers BatScope, a Mac software tool for management and preview of recorded data, which will eventually be
extended to bat species identification: see http://www.wsl.ch/fe/biodiversitaet/produkte/batscope/ or [email protected]
BATLOGGER Manual Elekon AG ov. 2012 20/28
Table of contents
Other ELEKON Data Logger manuals
