ELEKTROBOCK TS10 User manual

Utilization examples:
Temperature regulation
of connected appliance
MADE IN CZECH REPUBLIC
DESCRIPTION OF
CONTROLS
Fce = selection of functions
= selection of temperatures
= confirmation (ENTER),
information present
temperatur (tE:A), present
time (CL:O), sum of
operating hours (SU:MA),
and day (dE:n)
= setting of
temperature,time,
functions
/+
electric
heating
plates
direct
heating
bodies
electric
tubular
radiators
build-in temperature
sensor
THERMO-
SWITCH
SOCKET
TS10

DISPLAY DESCRIPTION
OPERATING INSTRUCTIONS
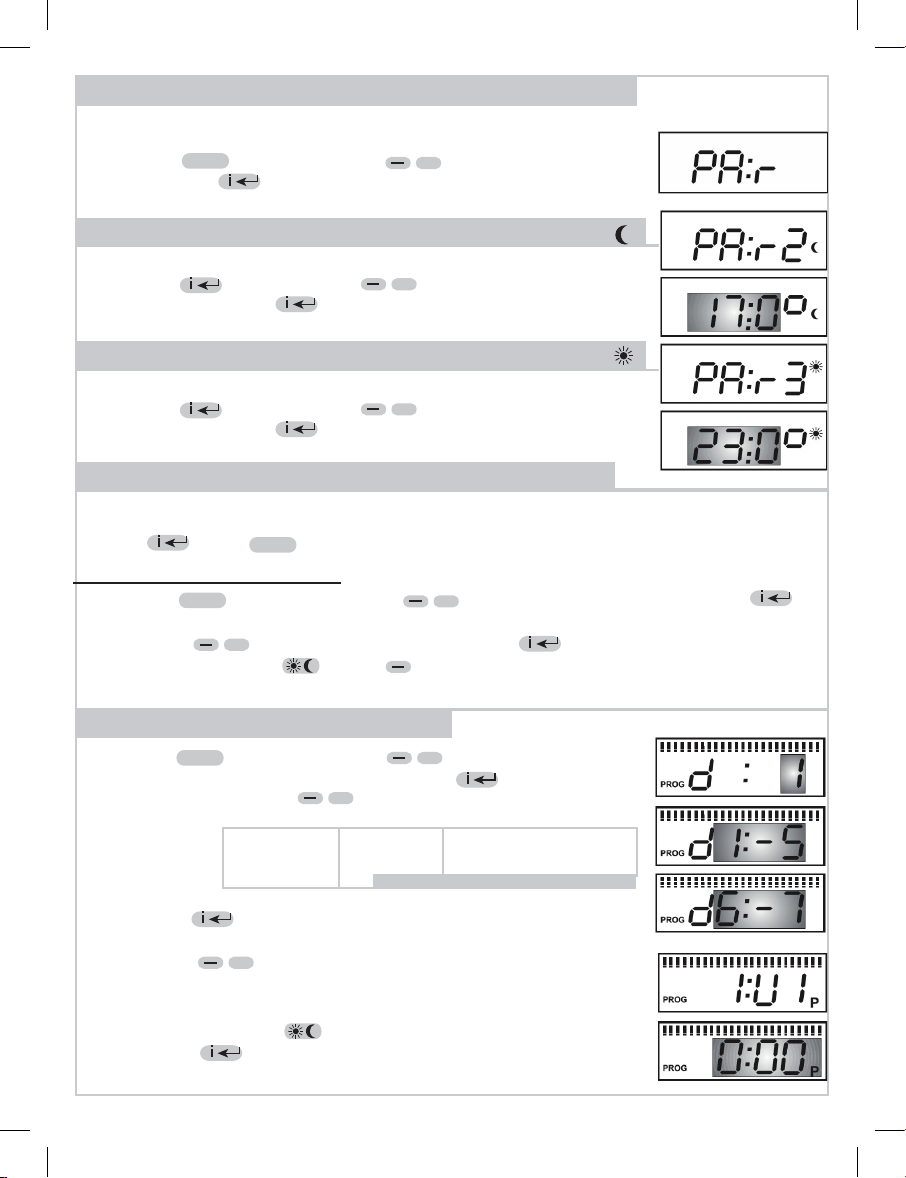
Setting of current day and time - “ CLO “ function
1. Functions of TS10
2. Proceed during programming
indication of set time and
temperature program
indication of
operating mode
indication of temperatures
comfort
economy
indication of required
temperature
After connection in 230V-socket is TS10 immediately ready for use. If sign
dO:bI is flashing on the display, the back-up battery is not fully charged
and it is necessary let the TS10 in 230V-socket to charge for minimal 2
days (full charge take about 4 days). After charging it is possible to remove
TS10 from socket without losing the actual time and you can provide the programming outside
the 230V-socket. (Maximal backup time is 100 hours).
After pushing the button you can select following functions by pushing
Fce
Fce
Fce
/+
/+
/+
/+
/+
: thermo-switch socket works according to program as set.
: serves for manual setting of temperature ( the selection by or by
buttons), the temperature should be constant up to next change of mode.
: setting of present day and time.
: setting of parameters (constants).
: programming mode.
: in this mode is TS10 permanently switched-off .
1. AUTO
2. MANU
3. CLO
4. PAr
5. PROG
6. OFF
Note: If you do not push any button in 2 minutes, TS10 returns into set mode. Longer pushing of
buttons speeds up their functions.
Before the programming itself, it is necessary to set present day, time and parameters (constants),
namely in following way.
Press the button, by pressing select CLO (CLOCK)
function and confirm by . Indication of hours blinks on the display,
use buttons to set required data and confirm by button.
Use the same method for minutes and day (d:1represents Monday,
d:2 Tuesday and d:7Sunday). After the completion of setting, press
button to return.
If we disconnect TS10 from the network 230V, the TS10 comes to stanby mode and
only actual time will be shown on display (the colon symbol will not be flashing) and the
buttos will be functionless. The activation of the buttons you can make by pressing the
button. When the sign dObI will be permanently shown on display, it is not possible
to make any settings on TS10 without connection into 230VAC
If the TS10 is not in 230V-socket the showed temperature is 2 °C lower than real actual temperature.
Parameters serve for setting of temperatures and another functions.
Setting of parameters (constants) - “ PAr “ function
PA:r2 economic temperature (the 17°C temperature is factory - set)
PA:r3 comfort temperature (the 23°C temperature is factory - set)
PA:r9 Firmwareversion/ factory setting restoration
- Press the button, by pressing select Par (Parameters)
and confirm by .
-PA:r2 shows on the display,
Fce
Fce
/+
/+
/+
-PA:r2 shows on the display
- confirm by and with using of buttons set economic
temperature and press button to confirm
-PA:r3 shows on the display
- confirm by and with using of buttons set comfort
temperature and press button to confirm
-PA:r9 shows on the display
- Firmware version for information only
- press button button to return.
Fce
/+
/+
Restoring the default settings:
- Press the button, by pressing select function Par and confirm by
button
- By pressing buttons select PA:r9, confirm by
- Simultaneously press and buttons, it will restore the factory settings!
Note: Use only when necessary, all saved changes will be deleted!
Fce
/+
/+
/+
Programming- “ PROG “ function
- Press the button, by pressing buttons select PROG
(PROGRAMMING) function and confirm by .
- By repeated pressing of buttons select one of following
options:
d:1 Monday
d:2 Tuesday
d:3 Wednesday
d:4 Thursday
d:5 Friday
d:6 Saturday
d:7 Sunday
d1:5 Monday to Friday
d6:7 Saturday to Sunday
d:1:7 all week
Tabel for day selection
- Confirm by , button. The sign 1:U1 shows on display for
setting up of the first time interval
- by pressing buttons set the time of first change (min. step
of 30 min.)
- assign comfort or economic temperature to the setting time by
repeated pressing of button
- Confirm by , display automatically shows symbol 1:U2 (the
second time interval in the first day).

3. Another functions
Fce
/+
Fce
Fce /+
EXAMPLE of Programm setting
Short-term change of temperature in AUTO mode:
Status indication of TS10:
AUTO (or MANU) is shown = output is switched on
AUTO (or MANU) blinks = output is switched off
1, Set on 18°C (PA:r2)
2, Set on 23°C ein (PA:r3)
3, Choose programmig of whole week d1:7(Prog)
4, 17:U1 assig time 6:00 and temperature
5, 17:U2 assig time 9:00 and temperature
6, 17:U3 assig time 13:00 and temperature
7, 17:U4 assig time 19:00 and temperature
8, Leave the programming regime by pressing
button and select AUTO mode.
By simple pressing of buttons in AUTO mode, it is possible to make a short-
term change of required temperature. TS10 will maintain this temperature up to next
temperature change as defined in the program.
Mo - Su
[hours]
programm process on LCD
- Use the same procedure for the setting of further time intervals (max. 4). Leave the
programming regime by pressing button.
- Select AUTO function, TS10 starts to work according to the program set.
“ OFF “ function:
Press the button, by pressing button select OF:F
function and confirm by button.
In this way, TS10 ispermanently switched off. In this mode, symbol OF:F and antifreeze
temperature 3°C are showed alternatively on the display. To cancel this function, press
Fce button and select different mode with using of /+buttons.
Fce
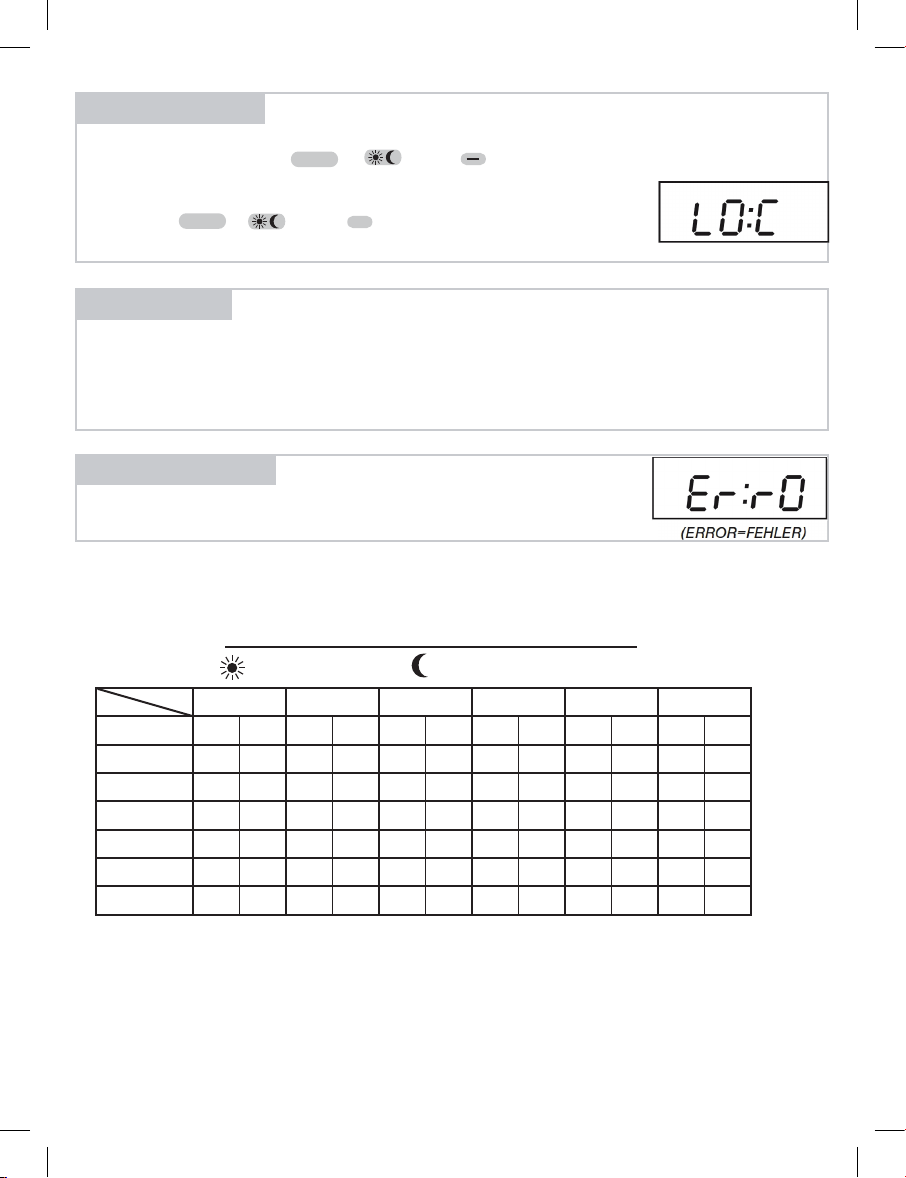
Fce +
It serves for keyboard blocking, as a protection against unauthorized handling.By
simultaneous pressing of , and buttons the keyboard is locked
(buttons
are inactive)
. Message LOC (LOCK) is shortly displayed.The function
can be cancelled, e.g. the keyboard unblocked, by simultaneous
pressing of , and buttons (the buttons are again
functioning from now).
Child lock:
Installation:
Error messages:
1. Connect TS10 in 230V/50 Hz socket.
2.Program it according to instructions (register respective data in the table).
3.Connect the heating body you want to regulate.
If following error message is shown on the display, contact immediately the
manufacturer (it is dealing with a failure of temperature sensor).
= °C = °C
123456
Mon
Tue
Wed
Thu
Fri
Sat
Sun
Table for registration of your programs
The temperature and
time set
Day progr.
Table of contents
Other ELEKTROBOCK Accessories manuals


