ELICA EBS52SS1 User manual
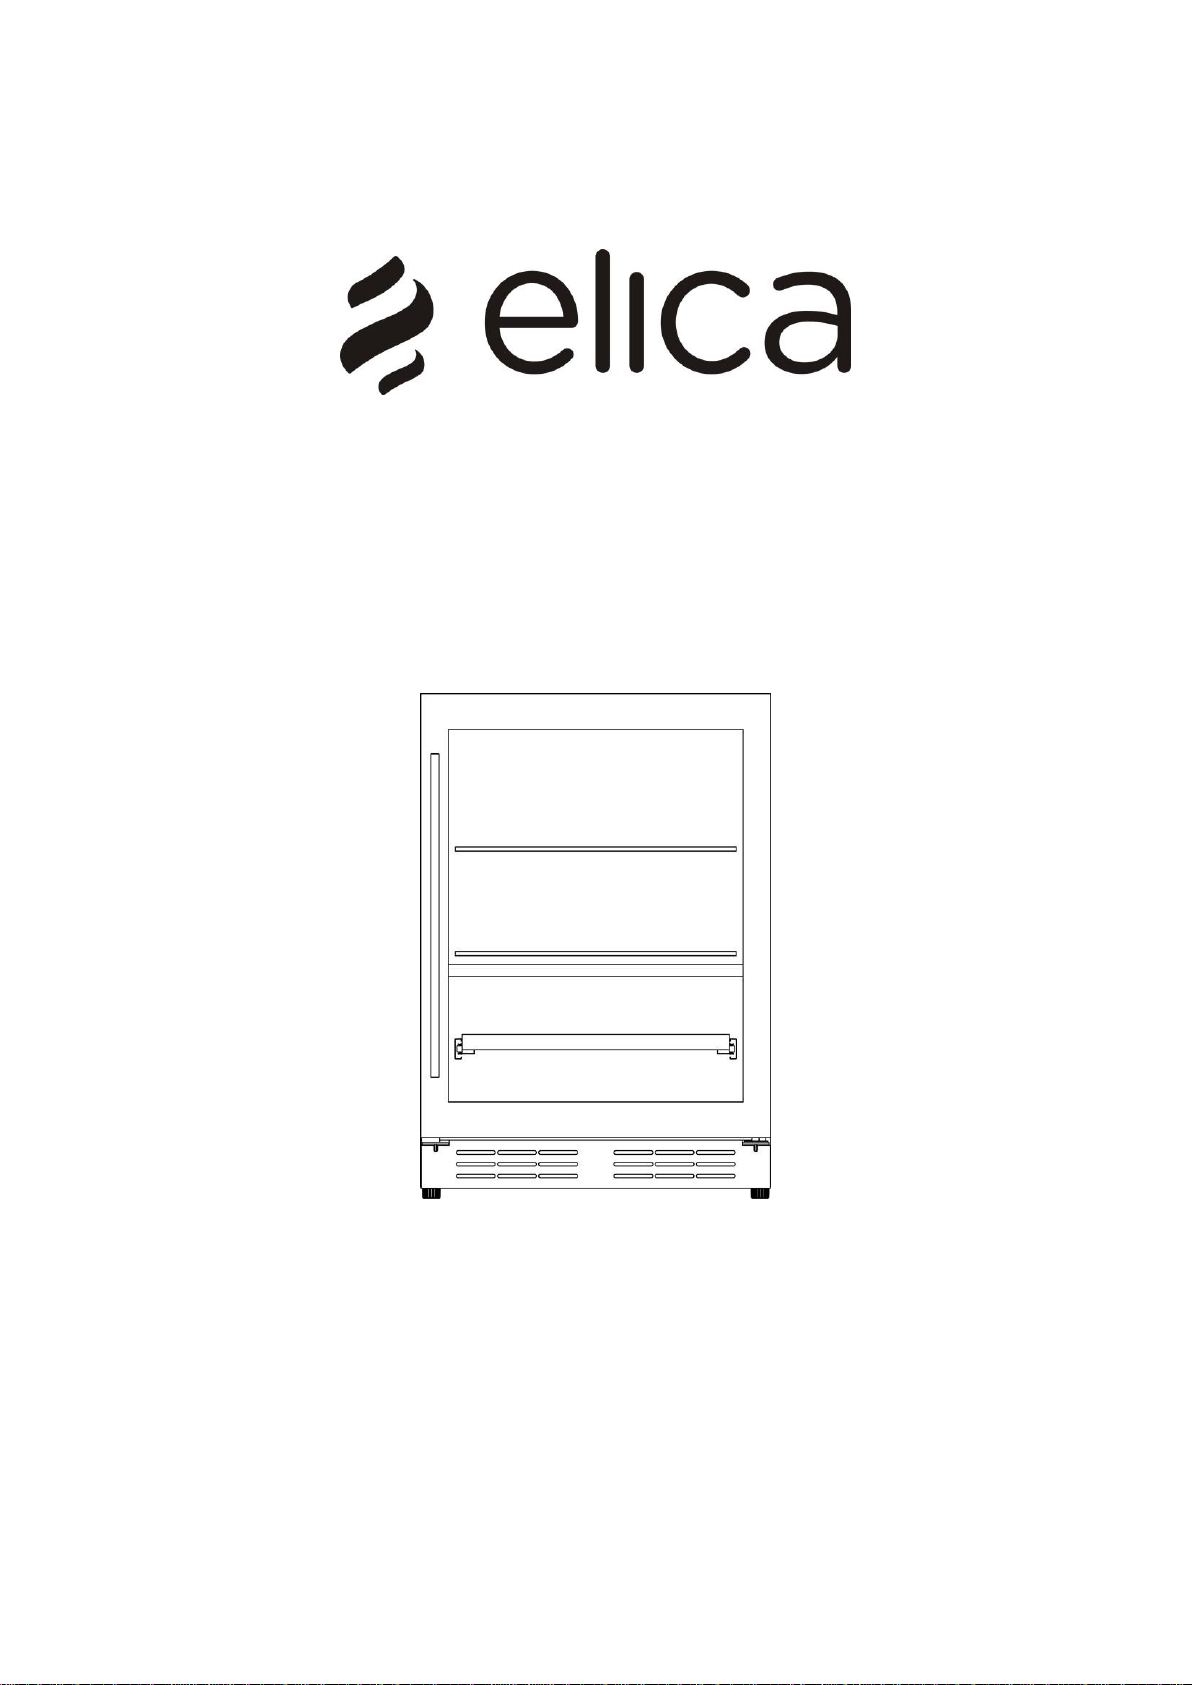
Instruction Manual
Model: EBS52SS1
BEFORE USE, PLEASE READ AND FOLLOW ALL SAFETY RULES
AND OPERATING INSTRUCTIONS. KEEP THIS MANUAL IN A SECURE LOCATION.

2
IMPORTANT SAFETY INSTRUCTIONS
Read all instructions before using the appliance.
This appliance is not intended for use by persons
(including children) with reduced physical, sensory or
mental capabilities, or lack of experience and knowledge,
unless they have been given supervision or instruction
concerning use of the appliance by a person responsible
for their safety.
Children should be supervised to ensure that they do not
play with the appliance.
If the supply cord is damaged, it must be replaced by the
manufacturer, its service agent or similarly qualified
persons in order to avoid a hazard.
WARNING: When positioning the appliance, ensure the
supply cord is not trapped or damaged.
WARNING: Do not locate multiple portable socket-outlets
or portable power supplies at the rear of appliance.
WARNING: Keep ventilation openings, in the appliance
enclosure or in the built-in structure, clear of obstruction.
WARNING: Do not use mechanical devices or other means
to accelerate the defrosting process, other than those
recommended by the manufacturer.
WARNING: Do not damage the refrigerant circuit.
WARNING: Do not use electrical appliances inside the
food storage compartments of the appliance, unless they
are of the type recommended by the manufacturer.
Do not store explosive substances such as aerosol cans
with a flammable propellant in this appliance.
This appliance is intended to be used in household and
similar applications such as
– staff kitchen areas in shops, offices and other working
environments;
– farm houses and by clients in hotels, motels and other
residential type environments;
– bed and breakfast type environments;

3
– catering and similar non-retail applications.
Plug into a grounded 3-prong outlet. Do not remove
grounding prong, do not use an adapter, and do not use an
extension cord.
It is recommended that a separate circuit, serving only your
appliance, be provided. Use receptacles that cannot be
turned off by a switch or pull chain.
Never clean appliance parts with flammable fluids. These
fumes can create a fire hazard or explosion.
Before proceeding with cleaning and maintenance
operations, make sure the power line of the unit is
disconnected.
Do not connect or disconnect the electric plug when your
hands are wet.
Unplug the appliance or disconnect the power before
cleaning or servicing. Failure to do so can result in
electrical shock or death.
Do not attempt to repair or replace any part of your
appliance unless it is specifically recommended in this
manual. All other servicing should be referred to a qualified
technician.
Do not store or use gasoline or any other flammable
vapors and liquids in the vicinity of this or any other
appliance. The fumes can create a fire hazard or
explosion.
Use two or more people to move/install the refrigerator.
Failure to do so can result in back or other injury.
To ensure proper ventilation for your appliance, the front of
the unit must be completely unobstructed. Choose a well-
ventilated area with temperatures above 50°F (10°C) and
below 100°F (38°C). This unit must be installed in an area
protected from the elements, such as wind, rain, water
spray or drips.
The appliance should not be located next to ovens, grills or
other sources of high heat.

4
The appliance must be installed with all electrical
connections in accordance with state and local codes. A
standard electrical supply (115V AC 60 Hz), properly
grounded in accordance with the National Electrical Code
and local codes and ordinances, is required.
Do not kink or pinch the power supply cord of the
appliance.
The fuse (or circuit breaker) size should be 15 amps or
higher.
It is important for the appliance to be leveled in order to
work properly. You may need to make several adjustments
to level it.
Although the unit has been tested at the factory, due to
transit and storage, you should clean the appliance before
use.
Do not use alcohol-based, solvent-based cleaning agents
or abrasives on the interior. These cleaners may damage
or discolor the interior.
Do not use this apparatus for other than residential
purposes.
This appliance is CFC- and HFC-free and contains small
quantities of Isobutane (R600a) which is environmentally
friendly, but flammable. It does not damage the ozone
layer, nor does it increase the greenhouse effect. Care
must be taken during transportation and setting up of the
appliance that no parts of the cooling system are
damaged. Leaking coolant can ignite and may damage the
eyes.
In the event of any damage:
ᅳAvoid open flames and anything that creates a spark,
ᅳDisconnect from the electrical power line,
ᅳAir the room in which the appliance is located for several
minutes, and Contact the Service Department for advice.
The more coolant there is in an appliance, the larger the
room it should be installed in. In the event of a leakage, if

5
the appliance is in a small room, there is the danger of
combustible gases building up. For every ounce of coolant,
at least 325 cubic feet of room space is required. The
amount of coolant in the appliance is stated on the data
plate on the back of the appliance. It is hazardous for
anyone other than an authorized Service Person to carry
out servicing or repairs to this appliance.
Take serious care when handling, moving, and using the
appliance to avoid either damaging the refrigerant tubing or
increasing the risk of a leak.
Replacing component parts and servicing shall be done by
factory authorized service personnel so as to minimize the
risk of possible ignition due to incorrect parts or improper
service.
DANGER: Risk of child entrapment. Before you throw
away your old refrigerator or freezer:
Take off the doors.
Leave the shelves in place so that children may not
easily climb inside. And make sure the coolant circuit,
particularly the heat exchanger at the back/bottom of the
unit is not be damaged.
The recycle symbol on the product or its packaging
indicates that this product is not to be handled as
normal household waste and it is to be taken to a
recycling collection point for electrical and
electronic goods.
The appliance must be positioned so that the plug is
accessible after installed.

6
- SAVE THESE INSTRUCTIONS -
INSTALLATION INSTRUCTIONS
Before Using Your Appliance
Remove the exterior and interior packing.
Before connecting the appliance to the power source, let it stand upright for approximately 2 hours. This will reduce
the possibility of a malfunction in the cooling system from handling during transportation.
Clean the interior surface with lukewarm water using a soft cloth.
Install the handle on the left side of the door using the screws that are provided.
Avoid use of abrasive products and never use alcohol!
Installation of Your Appliance
This appliance is designed for free standing or built-in (fully recessed) installation.
Place your appliance on a floor that is strong enough to support it when it is fully loaded. To level your appliance,
adjust the front leveling legs at the bottom.
Locate the appliance away from direct sunlight and sources of heat (stove, heater, radiator, etc.). Direct sunlight
may affect the acrylic coating and heat sources may increase electrical consumption. Extremely cold ambient
temperatures may also cause the unit not to perform properly.
Avoid locating the unit in moist areas.
Plug the appliance into an exclusive, properly installed and grounded wall outlet. Do not under any circumstances
cut or remove the third (ground) prong from the power cord. Any questions concerning power and/or grounding
should be directed toward a certified and authorized products service center.
This appliance is intended to be installed in a space between two units.
The minimum space required is:
600mm wide × 600mm deep × 865mm high
Please note: When the product is installed, there should be a small ventilation gap between the top of the unit and
the underside of any fitting above (6mm or 1/4").
The appliance should always be plugged into its own individual electrical outlet which has a voltage rating that
matches the rating label on the appliance. This provides the best performance and also prevents overloading
house wiring circuits that could cause a fire hazard from overheating. Never unplug the appliance by pulling on the
power cord. Always grip the plug firmly and pull straight out from the receptacle. Repair or replace immediately all
power cords that have become frayed or otherwise damaged. Do not use a cord that shows cracks or abrasion
damage along its length or at either end. When moving the appliance, be careful not to damage the power cord.
Installation of the Handle
To install the handle, please follow these instructions:
Carefully pull the door gasket (seal) away from the door in the area where the handle will be attached.
Place the handle over the screw holes on the outside of the door and attach it with the screws that have been
provided. Tighten the screws.
Press the door gasket back into its groove.

7
How to put off the shelves
1. Remove all bottles from the shelve.
2. Please keep the door opened fully all the way before pulling the shelves out.
3. Pull the shelf forwards(seeing ①) until groove on either side of the shelf is level with plastic peg on either side of
the cabinet(seeing ②). Then lift the shelf up from one side(seeing ③), and pull forwards(seeing ④).
1. Take out the wine bottles from the shelves.
2. Please keep the door opened fully all the way before pulling the shelves out.
3. Touch the plastic buckles in the left and right of the sliding rail, pressing the left plastic buckle upwardly and pressing
the right plastic buckle downward at the same time, and then pushing out the shelf.

8
Storage
Bottles can differ in size. Accordingly, the actual number of bottles you can store may vary.
The approximate maximum bottle capacity can be achieved when storing traditional 750 ml Bordeaux bottles in
bulk storage.
You may load your wine bottles in single rows or by stacking while taking note of the following: if you do not have
enough bottles to fill your wine cellar, it is better to distribute the load throughout the wine cellar so as to avoid “all
on top” or “all below” type loads.
Do remove or relocate adjustable wooden shelves to accommodate larger types of bottles or increase the
capacity of the cellar by stacking the bottles when necessary. (See instructions for removing shelves, above.)
Keep small gaps between the walls and the bottles to allow air to circulate. As in an underground cellar, air
circulation is important to prevent mold and for a more homogeneous temperature within the cellar.
To facilitate air circulation, do not overload your wine cellar.
Avoid obstructing the internal fans (located inside on the rear panel of the wine cellar).
To prevent bottles from falling, do not try to slide the shelves outward beyond the fixed position.
Do not pull out more than one loaded shelf at a time as this may cause the wine cellar to tilt forward if not
properly installed.
Reversing the Door Swing
This appliance has the capability of the door opening from either the left or right side. The unit is delivered to you with
the door opening from the left side. Should you desire to reverse the opening direction, please follow the instructions
below.
To make the reversal, you will find two hardware pieces in a plastic bag inside the appliance: the top left door hinge
and left bottom door hinge core assembly.
1. Carefully lay the appliance on its back. Use cushioning to protect the floor and appliance.
2. Using a Slotted screwdriver to remove the upper door hinge core at the upper right corner of the door.
3. Using a Philips screwdriver, remove the two screws of bottom right hinge core beneath the door. Keep the hinge
in a safe place in case you need to reverse the door again in the future.
4. Carefully slide the door off and place it on a padded surface.
5. Using a Philips screwdriver, remove the screws from the top right hinge, remove the top right hinge and keep it
in a safe place in case you want to reverse the door in the future.
6. Remove the screws from the top left and transfer to the right.
7. Install the top left hinge.
8. Rotate the door 180° and take out the bottom left door hinge core from Accessory bag, insert it to the door shaft
hole in the lower left corner of the door .
9. Put the door back into the cabinet, and use a Slotted screwdriver to install the door hinge core back to the door
shaft hole in the upper left corner of the door body.
10. Adjust door alignment. When set, tighten screw on hinge.
Carbon Filter
A built-in carbon filter protects your wines by acting as a natural barrier against
harmful odors. The carbon filter should be replaced every 9-12 months
depending on the unit’s exposure level to odor. If the unit is placed in a kitchen,
regular replacement every three months is ideal.
Remove the carbon filter by turning counterclockwise to unlock from rear panel.
9
OPERATING YOUR APPLIANCE
Recommended temperatures for Chilling Wine:
Red Wines: 15 ~ 18°C (59 ~ 64.4°F)
Dry / White Wines: 9 ~ 14°C (48.2 ~ 57.2°F)
Sparkling Wines: 5 ~ 8°C (41 ~ 46.4°F)
The appliance should be placed where the ambient temperature is between 10~38°C (50~100°F). If the ambient
temperature is above or below this range, the performance of the unit may be affected. Placing your unit in extreme
cold or hot conditions may cause interior temperatures to fluctuate.
Connect power cord to a properly grounded outlet.
This appliance is equipped with Memory IC – should there be a power interruption, unit will auto recover at last
setting.
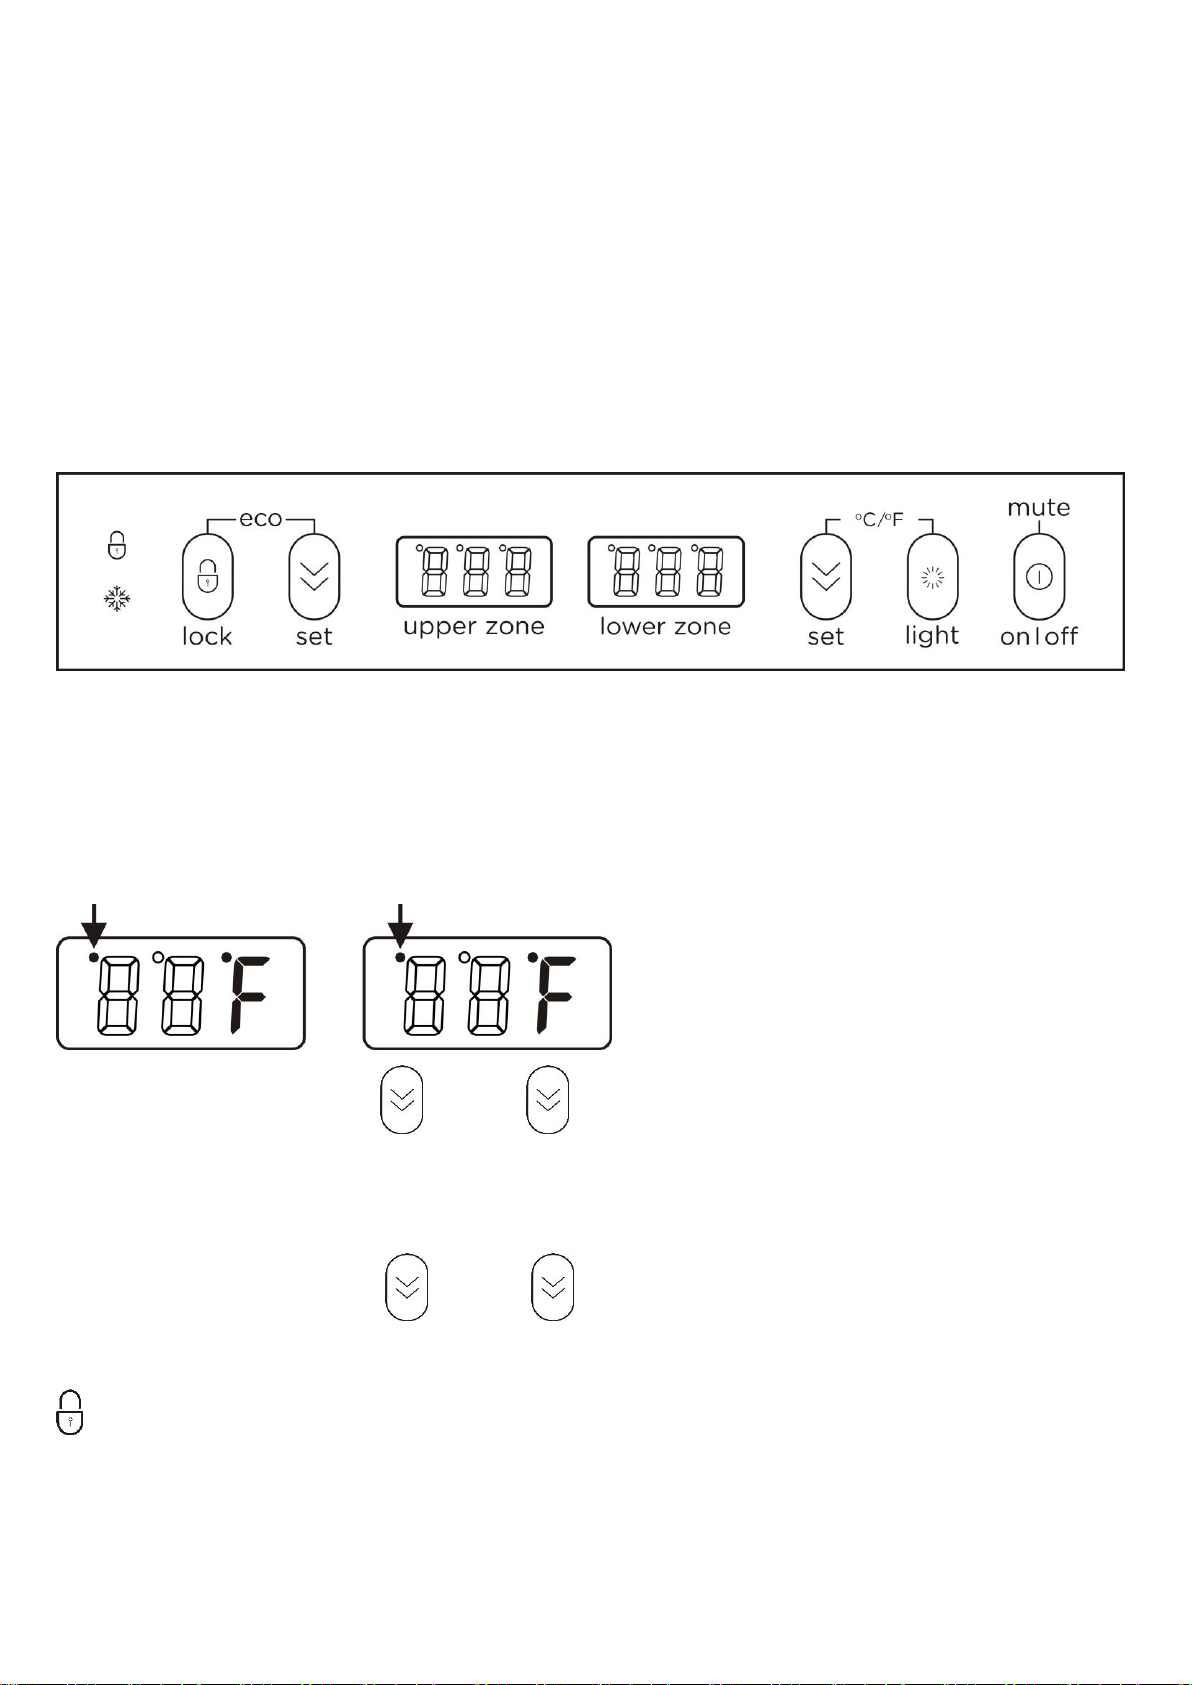
Control Panel:
Smart control mode
When the door is opened, inner light automatically start up and inner fan stop working.
When the door is closed, inner light automatically shut down.
Door ajar alarm: When the door is opened more than 5 minutes, will send out alarming sound, compressor and
outer fan will stop working.
Force Quit the Smart control mode
Press and hold the buttons left and right simultaneously for 5 seconds, the small dot in the upper left
corner of the LED will bright.
After quit the Smart control mode, the alarm will not sound when the door is open for more than 5 minutes.
Notice: The interior light can only be controlled by pressing the button.
Press and hold the buttons left and right simultaneously for 5 seconds to re-enter the Smart control
mode.
LOCK
Press and hold for 3 seconds to lock or unlock the control panel.
If illuminated, indicates the control panel is locked.
10
RUN
When unit’s compressor is running, this indicator light will illuminate to signify that cooling mode is currently in
operation.
Setting the temperature Control
Upper zone adjustable temperature: 1°C to 10°C (34°F to 50°F)
Lower zone adjustable temperature: 5°C to 18°C (40°F to 64°F)
Please note: For optimal performance, the difference of temperatures set in the two zones should be with the
range 4~8°C
Set the desired temperature by pressing the corresponding buttons, Left or right to decrease. Each
press is in 1-degree increment. Once released, set temperature will flash for approximately 5 seconds then revert
back to display the internal temperature.
To view your set temperature, press either the button once and LED display will flash set temperature for 5
seconds.
Note: The temperature inside may vary slightly depending on whether or not the interior bulb is ON or OFF and where
the bottles are located (upper/middle or lower section).
ECO mode:
Press and hold the button for 3 seconds to enter or exit ECO mode.
In this mode, the interior LED light, the compressor indicator and the temperature value on the display panel
will be turned off and the symbol ° will illuminate on the upper left corner of °C / °F.
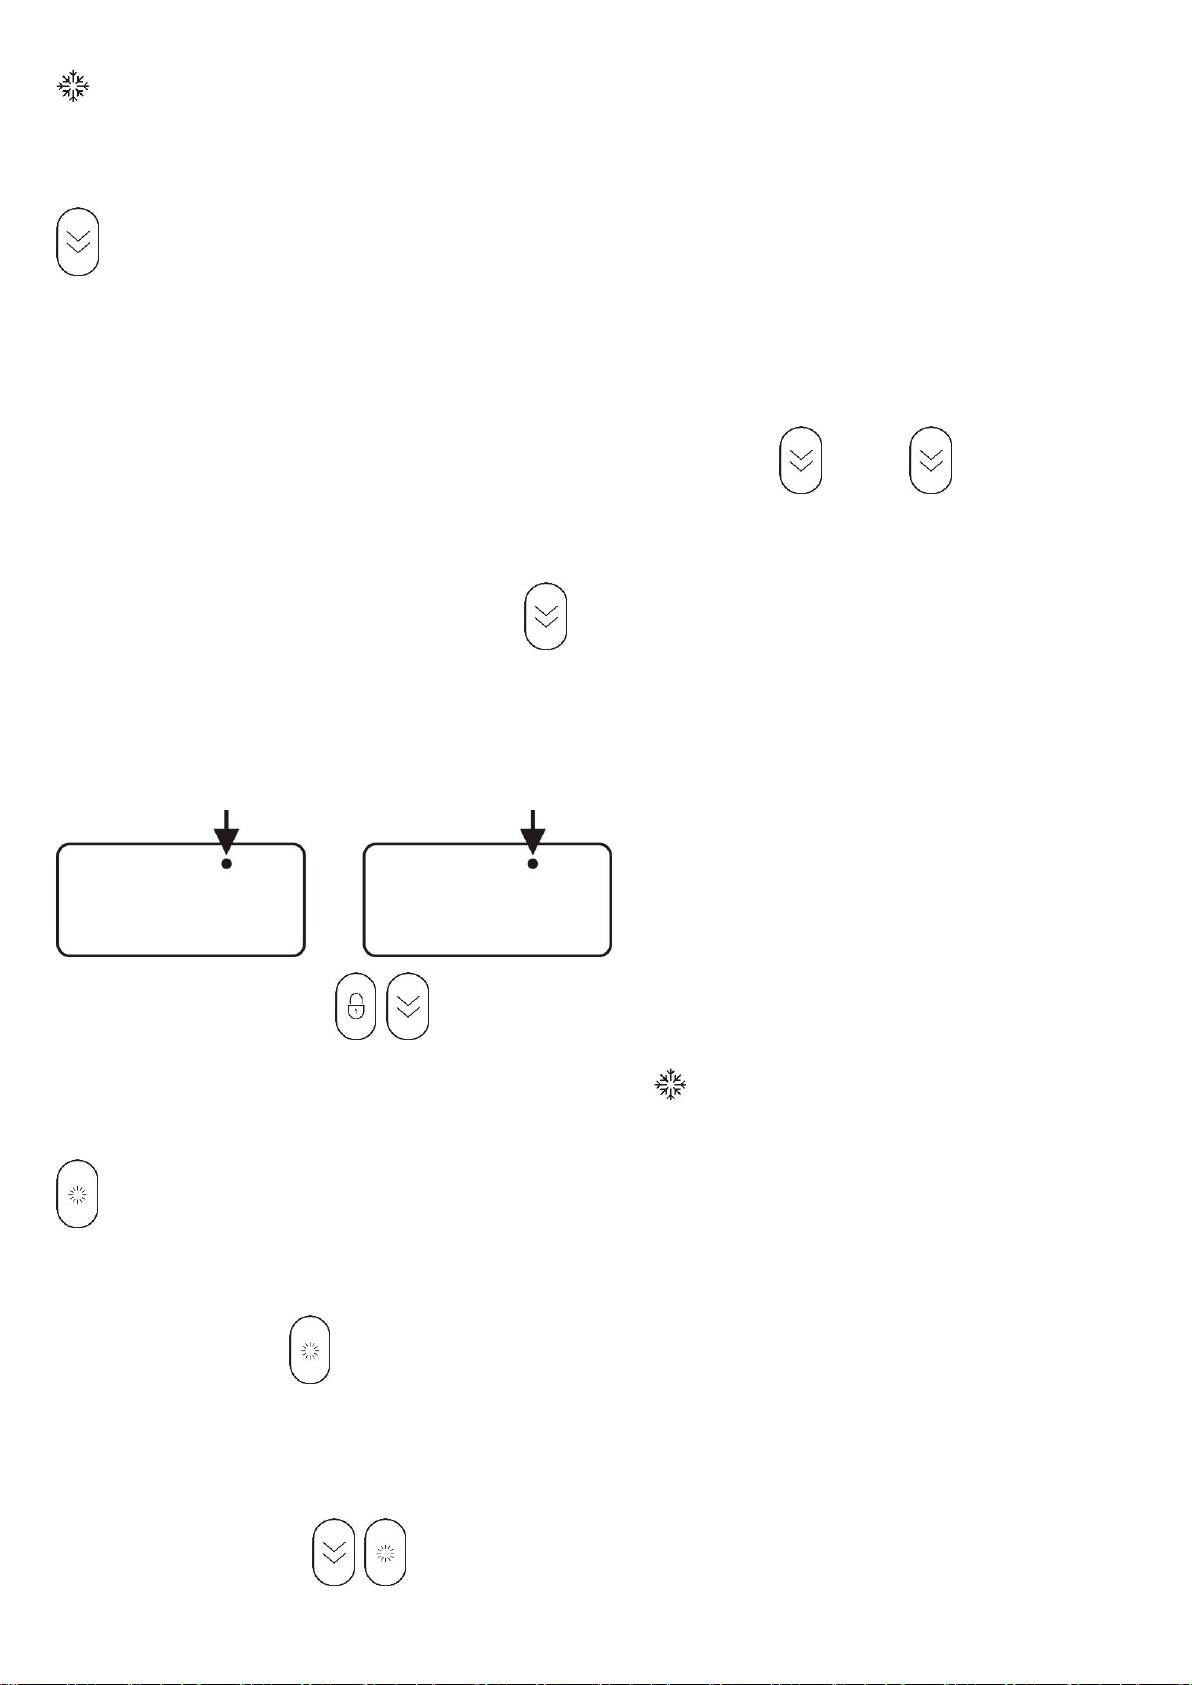
Light
LED lamp brightness mode: with Memory IC (when unit restarts after power failure unit, will auto recover to last
setting), the default brightness is 100%.
Each time the button is pressed, the brightness of the LED will be cycled through the four positions (100%,
75%, 50%, OFF)
Temperature Conversion
The appliance has the capability to display temperature in either Celsius or Fahrenheit. To change the temperature
scale, press and hold both buttons simultaneously for approx. 3 seconds.
11
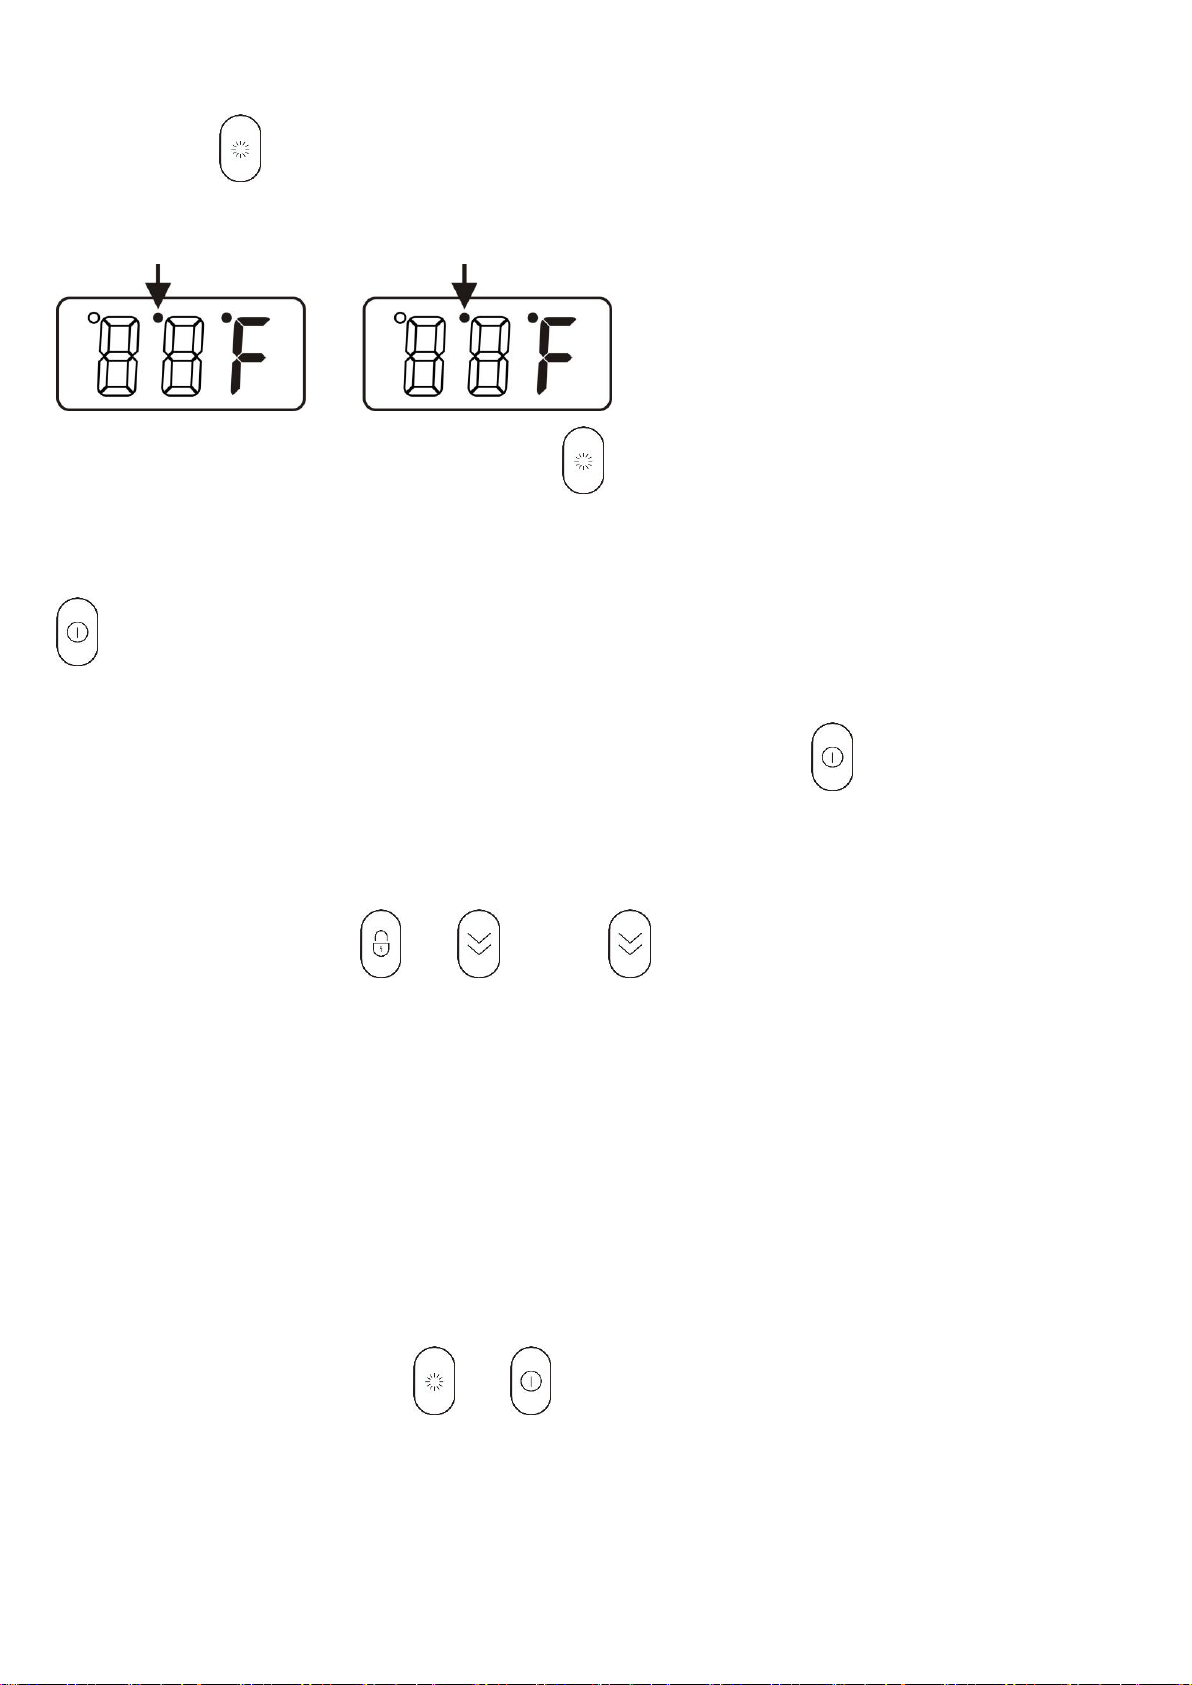
Atmosphere Lamp Mode
Press the button to set the brightness of the light to 100%, 75%, 50%, the small dot in the middle of the display
panel lights up, and the interior light automatically enters the atmosphere light mode: the interior light on (whether the
door is open or closed, the interior lights are always on)
Exit the Atmosphere Lamp Mode: Press the button to set the brightness of the light to OFF, the small dot in
the middle of the display board goes out, the interior light exits the ambient light mode and re-enters the smart control
mode.
ON/OFF Power / Mute
To turn the appliance on or off, press and hold the ON/OFF button for 3 seconds.
When the Door ajar alarm activated, the buzzer will sound continuously. Press one time alarm will be closed.
Contact the Service Department for advice.
Demo mode
Press and hold three buttons , Left and Right simultaneously for 10 seconds to enter or exit demo
mode.
In this mode, the display panel can operate settings, but the temperature is a fixed display 12°C (54°F) and all fans
plus the compressor will not start.
Defrosting
The unit defrosts automatically in normal operating conditions.
The evaporator behind the rear wall of the unit defrosts automatically. Water will drain through the drain pipe from
the back of the product. Users need to bring the water to the drain or find an appliance to load the water. (If loading
with an appliance, you need to pay attention to clearing the water regularly)
However, frost may accumulate on the evaporator if the unit is repeatedly opened in a high heat or high humidity
location. If this frost pattern does not clear within 24 hours, your unit will require manual defrosting.
Mandatory defrost mode: Press the and at one time for 10 seconds to enter the compulsory defrost
mode.

12
Sabbath mode
Press and hold buttons and at the same time for at least 5 seconds to enter or exit Sabbath mode. In
this mode, LED will display "Sb". This mode turns off the displays, interior light and prevents them from turning on
again. Normal cooling operations will still take place. The compressor and the fan work normally.
When the cabinet power off, it will not automatically exit Sabbath mode, and it will keep Sabbath mode
when power on again. The Sabbath Mode will automatically turn off after 96 hours.
Temperature Alarm Function
If the ambient temperature ≥30°C (86°F) for 2 hours, the high temperature alarm will be activated, the LED will display
"HH", the buzzer will sound continuously, the cooling system continues to work. The display return to normal until the
high temperature conditions is relieved.
If the ambient temperature is <0°C (32°F) for 1 hour, the low temperature alarm will be activated, the LED will display
"LL", the buzzer will sound continuously, the cooling system will stop working. The display return to normal until the
low temperature is relieved.
NOTE:
It is normal that the cabinet shows “HH” or “LL” from time to time. If it occurs frequently or lasts for a long time,
you can restart the unit by unplugging it, then re-plugging after 5 minutes. If the problem occurs again after
restarting, please contact customer service.
Before reconnecting the power, wait 3 to 5 minutes. Otherwise you could damage your appliance. If you
attempt to start the appliance before the end of this time delay, the appliance will not turn on.
If you turn on the appliance for the first time or after a restart, or after it has been out of operation for a long
time, there may be a temperature difference between the temperature inside the appliance and that on the LED
display. This is a normal event caused by the duration of the activation period. Leave the appliance turned on
for several hours and the temperatures will stabilize during operation.

13
CARE AND MAINTENANCE
Cleaning Your Appliance
1. Turn off the power, unplug the appliance, and remove all items.
2. Wash the inside surfaces with a warm water and baking soda solution. The solution should consist
of about 2 tablespoons of baking soda to a quart of water.
3. Wring excess water out of the sponge or cloth when cleaning the area of the controls or any electrical
parts.
4. Wash the exterior of the cooler with a warm solution of mild liquid detergent. Rinse well and wipe
dry with a clean soft cloth.
Power Failure
Most power failures are corrected within a few hours. If your power is going to be off for a longer period
of time, you need to take the proper steps to protect your contents.
Transporting Your Appliance
If you need to move your appliance once the box has been discarded:
1. Securely tape down all loose items inside your appliance.
2. Turn the adjustable legs up to the base to avoid damage.
3. Be sure the appliance stays secure in the upright position during transportation. Also protect the
outside of the appliance with a blanket or similar item.
Energy-Saving Tip
The appliance should be located in the coolest area of the room, away from heat-producing
appliances and out of direct sunlight.

14
PROBLEMS WITH YOUR APPLIANCE
You can solve many common problems easily, saving you the cost of a possible service call. Try the
suggestions below to see if you can solve the problem before calling the servicer.
TROUBLESHOOTING GUIDE
PROBLEM
POSSIBLE CAUSE
REMEDY
Appliance does
not operate.
The unit defrosts automatically in normal
operating conditions.
The appliance is turned off.
Tripped circuit breaker or a blown fuse.
Connect the appliance.
Switch on the appliance.
Switch on the circuit breaker or
replace the fuse.
Appliance is not
cold enough.
The temperature is not set correctly.
The ambient temperature could require a
lower temperature setting.
The condenser is too dirty.
The ventilation opening is blocked or too
dusty.
Check the set temperature.
Set a lower temperature.
Clean the condenser when
necessary.
Clear the obstructions and wipe off
the dust.
Appliance turns
itself on and off
frequently.
The room temperature is higher than
average.
A large number of bottles has been
added to the unit.
Put the appliance in a cooler place.
Leave the appliance to work for a
while until the set temperature has
been reached.
The light does
not work.
Appliance is not connected to a power
supply.
Tripped circuit breaker or a blown fuse.
The light was switched off on the control
panel.
Connect the appliance.
Switch on the circuit breaker or
replace the fuse.
Switch on the light.
Vibrations
The appliance is not properly level.
Level the appliance with the
adjustable feet.
The appliance
seems to make
too much noise.
The rattling noise may come from the flow of the refrigerant, which is normal. As each
cycle ends, you may hear gurgling sounds caused by the flow of refrigerant in your
appliance.
If temperature fluctuations occur, the contraction and expansion of the inner walls may
cause popping and crackling noises.
The appliance is not properly level.
Level the appliance with the
adjustable feet.
Display “E1”,
“E2”.
“E1” or “E2” indicates that the air
temperature sensor has failed.
Call for service.
NOTE: This appliance is intended to be used exclusively for the storage and display of wines in
restaurants, hotels, bars and other commercial settings.

15
Manual de instrucciones
Modelo: EBS52SS1
ANTES DE UTILIZAR EL PRODUCTO, LEA Y SIGA TODAS LAS NORMAS DE SEGURIDAD
E INSTRUCCIONES DE USO. CONSERVE ESTE MANUAL EN UN LUGAR SEGURO.

16
INSTRUCCIONES DE SEGURIDAD IMPORTANTES
Lea atentamente las instrucciones antes de utilizar este
producto.
Este producto no está diseñado para que lo utilicen
personas (incluidos niños) con capacidades físicas,
sensoriales o mentales reducidas, o sin conocimiento ni
experiencia previa en productos similares, a menos que
hayan recibido supervisión o instrucciones sobre el uso
correcto del producto por una persona responsable de su
seguridad.
Asegúrese de supervisar a los niños cuando utilicen el
producto para evitar que jueguen con el aparato.
Si el cable de alimentación presenta algún daño, éste
deberá ser reemplazado por el fabricante, un agente de
servicio o persona calificada, con el fin de evitar un
accidente.
ADVERTENCIA: Previo a realizar la instalación del
aparato, asegúrese de que el cable de alimentación no se
encuentre enredado o dañado.
ADVERTENCIA: No utilice enchufes portátiles o fuentes
de alimentación portátiles en la parte posterior del aparato.
ADVERTENCIA: Mantenga las rendijas de ventilación
libres de obstrucciones. Estas rendijas se pueden
encontrar en el gabinete o en la estructura del aparato.
ADVERTENCIA: No utilice dispositivos mecánicos u otros
medios ajenos al electrodoméstico para acelerar el
proceso de descongelación, a menos que sean
recomendados por el fabricante.
ADVERTENCIA: No dañe el sistema refrigerante.
ADVERTENCIA: No utilice aparatos eléctricos ajenos a la
unidad dentro de los espacios de almacenamiento del
producto, a menos de que sean recomendados por el
fabricante.
No almacene sustancias explosivas como latas de aerosol
con propelente inflamable en este aparato.

17
Este aparato está diseñado para uso doméstico y
similares, como:
– Áreas de cocina para personal de tiendas, oficinas y
otros entornos de trabajo;
–Casas de campo, y por clientes en hoteles, moteles y
otros entornos de tipo residencial;
– Espacios B&B (bed and breakfast) o similar
– eventos privados y aplicaciones similares no minoristas
Enchufe el aparato en un tomacorriente de 3 clavijas con
conexión a tierra. No quite o remueva la clavija de
conexión a tierra, no utilice un adaptador para clavijas o un
cable de extensión.
Se recomienda utilizar un tomacorriente exclusivo para
este aparato. No utilice placas que se puedan apagar por
medio de un interruptor o cadena.
No limpie los componentes, gabinetes o interiores del
aparato con líquidos inflamables. Estos vapores podrían
ser causantes de incendios o explosiones.
Antes de comenzar con el proceso de limpieza y
mantenimiento del aparato, asegúrese de que la unidad
esté desconectada completamente de la toma de
corriente.
No conecte ni desconecte el enchufe de alimentación
eléctrica con las manos mojadas.
Asegúrese de desenchufar por completo el aparato de la
corriente de energía antes de limpiar o reparar. Evite
provocar una descarga eléctrica u otros casos
desafortunados.
No intente hacer reparaciones o reemplazos de ninguna
pieza de su aparato, a menos de que se recomiende de
manera específica en algún fragmento de este manual.
Cualquier otro tipo de servicio necesario a realizar sobre el
producto, deberá ser realizado por un técnico calificado.
No almacenar, ni utilizar ningún tipo de líquido o vapor
inflamable cerca de este o cualquier otro aparato, para
evitarprovocar incendio o explosión.

18
La instalación o cualquier movimiento del electrodoméstico
deberá realizarse entre dos o más personas. Evite causar
lesiones de cualquier tipo.
Para asegurar la ventilación adecuada de su aparato la
parte frontal de la unidad deberá permanecer
completamente despejada. Elija un área suficientemente
ventilada con temperaturas superiores a 50 ° F (10 ° C) e
inferiores a 100 ° F (38 ° C). Esta unidad deberá ser
instalada en un área protegida de elementos como el
viento, la lluvia, rocío de agua o goteos.
El aparato no deberá ser instalado cerca de hornos,
parrillas u otras fuentes de calor intenso.
El aparato deberá cumplir con todos los códigos estatales
y locales referentes a conexiones eléctricas al momento
de ser instalado. Se requiere un suministro eléctrico
estándar (115 V CA 60 Hz), debidamente conectado a
tierra de acuerdo con el Código Eléctrico Nacional, los
códigos y las normas locales.
No retuerza, ni pellizque el cable de alimentación eléctrica
del aparato.
El tamaño del fusible (o breaker) deberá ser de 15
amperes o mayor.
Es importante que el aparato esté nivelado para su
correcto funcionamiento. Haga los ajustes necesarios para
nivelarlo.
A pesar de que la unidad haya sido examinada en la
fábrica, asegúrese de limpiar el aparato antes de utilizarlo.
No utilice agentes de limpieza a base de solventes o
alcohol o abrasivos en el interior. Estos limpiadores
podrían dañar o decolorar el interior del producto.
No utilice este producto para fines que no sean
residenciales.
Este aparato no contiene CFC ni HFC y contiene
pequeñas cantidades de isobutano (R600a), que es una

19
sustancia amigable con el medio ambiente pero
inflamable. No daña la capa de ozono, ni contribuye al
efecto invernadero. Se debe tener cuidado durante el
transporte y la instalación del producto para que ninguna
pieza del sistema de refrigeración resulte dañada. Las
fugas de refrigerante pueden llegar a inflamarse y/o
ocasionar daño a los ojos.
En caso de cualquier daño:
ᅳEvite las llamas y cualquier cosa que pudiera crear
chispas,
ᅳDesconecte completamente el aparato de la corriente
eléctrica,
ᅳVentile la habitación en la que se encuentra el aparato
durante varios minutos; y Póngase en contacto con el
área de servicio para ser asesorado.
De acuerdo con el grado de refrigerante que contenga el
aparato, deberán ser las dimensiones del espacio en el
que se pretende instalar, a mayor cantidad de refrigerante,
mayor deberá ser el espacio. En caso de fuga, si el
aparato se encuentra en una habitación pequeña, existe el
riesgo de que se acumulen gases combustibles. Por cada
onza (3 mililitros) de refrigerante, se requieren al menos
325 pies cúbicos (9 metros cúbicos) de espacio en la
habitación. La cantidad de refrigerante que contiene el
aparato, se indica en la placa de datos en la parte de atrás
del mismo. Será necesario que la persona que realice
reparaciones o servicio al aparato, sea un técnico
autorizado, evite riesgos.
Tenga mucho cuidado al manipular, mover y/o usar el
aparato para evitar daños al tubo de refrigeración y evitar
el riesgo de fugas.
Cualquier reemplazo o reparación de componentes y/o
servicio, deberá ser realizado por técnicos autorizados,
con la finalidad de minimizar el posible riesgo de incendio
derivado de una colocación incorrecta de las piezas o la
realización de un servicio de forma inadecuada.

20
PELIGRO: Existe el riesgo de que un niño quede atrapado
dentro del aparato. Antes de desechar su refrigerador o
congelador asegúrese de realizar los siguiente pasos:
Retire las puertas;
Deje los estantes colocados en su lugar, para evitar el
mal uso del aparato, especialmente por parte de
menores. Asegúrese de que el sistema refrigerante,
particularmente el intercambiador de calor en la parte
trasera / inferior de la unidad no esté dañado.
El símbolo de reciclaje en el aparato o embalaje,
indica que este producto no debe ser manipulado
como un residuo doméstico normal y debe ser
trasladado a un centro de reciclaje de productos
eléctricos y electrónicos.
El aparato deberá colocarse de manera que haya fácil
acceso al enchufe después de instalado.
Table of contents
Languages:
Other ELICA Kitchen Appliance manuals


