manuals.online logo
Brands
  1. Home
  2. •
  3. Brands
  4. •
  5. Elite Industries
  6. •
  7. Indoor Furnishing
  8. •
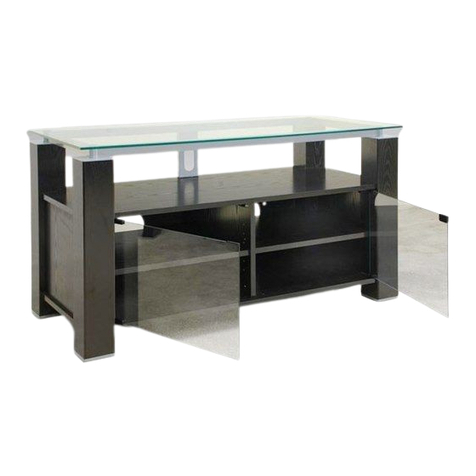
  9. Elite Industries EL149 S User manual

Elite Industries EL149 S User manual

Hardware for unit assembly
SPECIAL NOTE
In all steps involving camlocks, please
note the correct position of the camlock
in the illustration at the left. Check all
camlocks before aligning and joining
pieces together.
IMPORTANT: Throughout assembly
of the unit, camlocks must be inserted with
the openings facing the nearest unfinished
edge and screwdriver slot parallel to
unfinished edge.
IMPORTANT NOTES & CAUTIONS/WARNINGS
• Carefully read and follow these instructions for assembly.
• Please handle parts carefully, some parts may be heavy.
• To protect the unit and your flooring surface we recommend working on a padded or carpeted area, you may also use the open box the unit
came in for this purpose.
• For proper construction & integrity/assembly and for TV weight support and safety, all connections need to be sufficiently tight. However, do
not over-tighten connections to the point of stripping screw threadings. Parts are designed to fit together tightly, however, avoid excessive
force but rather align & fit panels together methodically and with patience.
• For some heavy or large units, it may be recommended for 2 people to work together on this assembly.
• It is extremely important to attach the BACK PANEL as instructed within this manual. Such panels are crucial for the stability and structural
support of the unit.
• Please read additional important safety information at the end of this instruction manual.
• We urge you to keep this manual with your unit for future reference.
ALIGN CAMLOCK &
CONNECTING BOLT
JOIN PIECES
TOGETHER
TURN CAMLOCKS
180° CLOCKWISE
USING A FLATHEAD
SCREWDRIVER
CAMLOCK/CONNECTING BOLT PROCEDURE
12
3
G
16
5/8"
Wood Screws
for Back Panel
F
14
Camlocks
A
14
Connecting
Bolts
BLACK
J
14
Plastic
Camlock Covers
H
8
1" Long
Shelf Pins
K
8
Wooden Dowels
RR
1
Plastic
Hole Cover
PLEASE NOTE:
The following numbers
and letters correspond
to the sketches in this
instruction booklet.
CABINET PARTS:
1. Top Panel
2. Bottom Panel with
attached Base and
Swivel Mechanism.
3. Left and Right Side
Panels (identical)
4. Two Vertical
Mouldings (identical)
5. Two Adjustable
Shelves (identical)
6. Back Panel
(2 identical parts) 2
4
4
3
3
6
6
1
5
5
30 1/4"
22" 18"
475865 Page 1/4 04.10.07
PLEASE DO NOT RETURN UNIT TO STORE FOR PARTS & CUSTOMER SERVICE.
PLEASE CALL 1-800-ELITE-48. CUSTOMER SERVICE HOURS EASTERN TIME 8:45 AM - 4:45 PM M-F
VISIT OUR WEBSITE AT:
www.elite-inds.com
Thank you for purchasing this Elite product. You will need the following tools:
Phillips Head Screw Driver • Straight Blade Screw Driver • Rubber Padded Hammer or Mallet
ASSEMBLY INSTRUCTIONS
EL149 S — SWIVEL BASE HI-BOY STAND
OVERALL DIMENSIONS: 30 1/4" H x 22" W x 18" D, 19 1/3" (Bottom)
1 PREPARE BOTTOM PANEL
Insert 4 Connecting Bolts (A) as indicated
into the holes as indicated in drawing.
IMPORTANT:
Throughout assembly
of the unit, connecting
bolts must be screwed
in completely,
however do not
overtighten.
2 PREPARE TOP PANEL
With Top Panel (1) upside down,
screw four Connecting
Bolts (A) into the holes as
indicated in drawing.
5 ATTACH MOULDINGS TO SIDE PANELS
Align the Connecting Bolts (A) of Moulding (4) with
appropriate holes of the Camlocks (F) of Side Panel (3).
Butt two pieces together.
Turn Camlocks to locked
position (see diagram).
Repeat procedure for
remaining Moulding (4)
and Side Panel (3).
3 PREPARE MOULDINGS
Screw 3 Connecting Bolts (A)
into the holes for each
Moulding (4).
4 PREPARE SIDE PANELS
Place the Right and Left Side Panels
(3) with the holes facing up.
Insert Camlocks (F) into all side,
top and bottom holes. This is a
total of 7 Camlocks for each Side
Panel (3). Make sure that the
opening of each camlock is
facing towards the edge
nearest it. To make sure that the
camlocks are completely inserted,
tap them lightly with the hammer.
Insert 2 Wooden Dowels (K) into
the inner holes of both the top
and bottom edges of each Side
Panel (3).
WHEN INSERTING
CONNECTING BOLTS
DO NOT OVERTIGHTEN
Align Wooden Dowels (K)
and holes of Side Panel (3)
with appropriate holes and
Connecting Bolts (A) of Top
Panel (1).
Butt two pieces together.
Turn Camlocks of top edge
of Side Panel (3) to locked
position. SEE DIAGRAM.
Repeat above procedure for
remaining Side Panel (3).
Place Bottom Panel (2) with
Attached Base and Swivel
Mechanism down. Align
Wooden Dowels (K) and
holes of Side Panel (3) with
appropriate holes and
Connecting Bolts (A) of
Bottom Panel (2).
Butt two pieces together.
Turn Camlocks of bottom
edge of Side Panel (3) to
locked position.
SEE DIAGRAM
Repeat above procedure for
remaining Side Panel (3).
WHEN INSERTING
CONNECTING BOLTS
DO NOT OVERTIGHTEN
WHEN INSERTING
CONNECTING BOLTS
DO NOT OVERTIGHTEN
TURN
CAMLOCK 180°
CAMLOCK
SHOWN
IN LOCKED
POSITION
TURN
CAMLOCK 180°
CAMLOCK
SHOWN
IN LOCKED
POSITION
BACK EDGE
3
3
3
3
3
1
2
2
3
3
3
4
4
4
21
4
K
K
KK
A
A
A
FF
UNDERSIDE
6ATTACH TOP AND
BOTTOM PANELS
475865 Page 2/4 04.10.07
7 ADD ADJUSTABLE SHELVES
9 ADD CAMLOCK COVERS AND HOLE-COVER
J
RR
Insert shelf pins (H) into predrilled holes on
insides of Left and Right Sides at desired
heights and tap lightly into place. Lay
Adjustable Shelf (5) into place. Repeat for
remining Adjustable Shelf.
KEEP FINISHED
EDGES OF
SHELVES (5)
TOWARD THE
FRONT
Take Back Panel
(6) and insert it
into the groove on
the edges on the
rear of the assem-
bly so that it sits
evenly and flush
with the other
edges. Screw
the Back Panel
into place using
the 5/8" Black
Wood Screws (G)
provided.
5
5
6
6
G
Line up a
Camlock
Cover (J) over
each camlock
and push the
camlock cover
into place.
Hole-cover is
provided to con-
ceal the hole on
bottom panel (in
front to the left).
This is an option
provided for
installing a glass door.
Please see order form.
8 ATTACH BACK PANEL
Congratulations and enjoy your new ELITE product!
To clean your unit, apply window cleaner with soft tissue. This will also eliminate slight surface abrasions
or scratches that may have occurred in shipping or handling.
Distributed by: Elite Industries, 77 Gould Street • Bayonne, NJ 07002, Tel.: 201-436-1120 • Fax: 201-436-6960 • www.elite-inds.com
Elite Industries ensures complete satisfaction with this product. In the event of missing or damaged parts call toll free,
Customer service hours: 8:45-4:45, Monday-Friday, EST., 1-800-ELITE-48 •
VISIT OUR WEBSITE AT:
www.elite-inds.com
PLEASE SEE IMPORTANT SAFETY PRECAUTIONS ON PAGE 4.
475865 Page 3/4 04.10.07
ORDER FORM
GLASS DOOR FOR EL-149S (with hardware)
PART NO. _____________ PRICE EACH ____________ QUANTITY _________
NAME ________________________________________________________________________________________________
ADDRESS ____________________________________________________________________________________________
_________________________________________________________________________________________________________
CITY__________________________________________________STATE _________ ZIP CODE ____________
TELEPHONE _________________________________________EMAIL ______________________________
METHOD OF PAYMENT:  CHECK  MONEY ORDER  CREDIT CARD
CREDIT CARD TYPE ______________________ EXP. DATE ______________________________________
CREDIT CARD NO. _________________________________________________________________________________
SIGNATURE __________________________________________________________________________________________
You may order a
GLASS DOOR
to fit the front opening
of the EL-149S.
IMPORTANT NOTICE
Top Panel, Part #1 is designed to be used with TV's and other A/V equipment NOT weighing more than 80 lbs.
The loading weight needs to be evenly distributed across top panel and for optimum stability,
Place TV in a center position on Top Panel, not unbalanced to the side against edge for example.
Also: Note dimensions for Top Panel Surface as listed at the beginning of this manual and
read the following "Important Safety Precautions".
Bottom Panel, Part #2 is designed to be used with A/V
components NOT weighing more than 44 lbs.
Adjustable Shelves, Part #5, are designed to be used with A/V components
NOT weighing more than 33 lbs. per shelf.
HOWEVER, for the total unit loading capacity, DO NOT exceed a total of 170 lbs.
IMPORTANT SAFETY PRECAUTIONS
Please carefully read & follow these important safety information notes for proper use of the furniture you have just assembled. They are designed to avoid unsafe
conditions that can result in property damage, bodily injury or death. We therefore urge strict adherence to the following basic principals:
• Install this unit on a flat & level surface only.
• Avoid placing unit in direct sunlight or near heating source. We recommend not placing unit directly against wall but rather leaving a narrow space between unit
and wall for proper ventilation of your A/V equipment.
• Do not exceed the above recommended weight loading limits as this can result in sagging or structural failure of the
supporting panel leading to unsafe conditions.
• TV screen sizes are measured diagonally, therefore, base foot-print size for specific TV’s can not be determined by screen size as they vary from manufacturer
to manufacturer. Rather you will need to measure the TV’s base foot print and compare it to the top panel surface size of your furniture as listed in this manual.
• Make sure to place TV within the surface area of the top panel, a bit inward from the front edge and centered. Never use with a TV that is too large. The TV
base foot print surface must be able to sit completely on the top panel surface.
• When choosing locations for stacking A/V components on shelves, make sure to place the heaviest A/V equipment on the lowest possible shelves/bottom
panels first.
• Children should never be allowed to climb on or play with this furniture or/and the TV. This can result in an unsafe situation which may lead to the TV
and/or the furniture itself to become unsteady, slip, tip or fall over. Avoid using higher shelves or the top surface of the TV for objects that may tempt children to
reach and climb. Such items can include toys, food, as well as remote controls, etc. Proper supervision and common sense is always required.
• Glass doors are “Tempered.” This is a special process for achieving strength and safety. Although durable & solid we recommend avoiding bumping into glass
with force or dropping or chipping edges etc. Special caution should be given to glass corners, both, for protection of glass as well as most importantly to
avoid the possibility of injuries resulting from strong impacts against corners especially with children. Doors should be opened & closed gently. (Tempered glass
is designed to shatter upon very strong impact and rather than producing sharp knife-like dangerous edges, it turns instead into small pebble-like pieces.)
• Moving the unit: Do not drag unit when moving, especially not on a carpeted surface or on a rug. It is always recommended instead to lift unit from both ends
with a friend’s help. For the sake of safety and to avoid damages, we recommend you remove the TV and all A/V components prior to moving this stand. It is a
good idea to remove the glass panel surfaces as well. If this is not possible please use much caution and good judgment and seek help to ensure
stability and safety as the stand is being moved. Make sure afterwards to properly re-adjust all equipment, centered and stable as originally instructed above.
475865 Page 4/4 04.10.07

Other Elite Industries Indoor Furnishing manuals

Elite Industries EL-785 User manual

Elite Industries

Elite Industries EL-785 User manual

Elite Industries EL-905 User manual

Elite Industries

Elite Industries EL-905 User manual

Elite Industries CREDENZA EL-1195 User manual

Elite Industries

Elite Industries CREDENZA EL-1195 User manual

Elite Industries EL-147N User manual

Elite Industries

Elite Industries EL-147N User manual

Elite Industries EL-906 User manual

Elite Industries

Elite Industries EL-906 User manual

Elite Industries EL-786 User manual

Elite Industries

Elite Industries EL-786 User manual

Elite Industries EL-250 User manual

Elite Industries

Elite Industries EL-250 User manual

Elite Industries EL-469 User manual

Elite Industries

Elite Industries EL-469 User manual

Elite Industries EL-783 User manual

Elite Industries

Elite Industries EL-783 User manual

Elite Industries EL-9482 User manual

Elite Industries

Elite Industries EL-9482 User manual

Elite Industries EL-9973 User manual

Elite Industries

Elite Industries EL-9973 User manual

Elite Industries EL-907 User manual

Elite Industries

Elite Industries EL-907 User manual

Elite Industries EL-221 User manual

Elite Industries

Elite Industries EL-221 User manual

Popular Indoor Furnishing manuals by other brands

HoMedics EnviraScape Tabletop Relaxation Fountain... Instruction manual and warranty

HoMedics

HoMedics EnviraScape Tabletop Relaxation Fountain... Instruction manual and warranty

castorama 3663602991694 manual

castorama

castorama 3663602991694 manual

Tchibo 358 469 Aassembly Instructions

Tchibo

Tchibo 358 469 Aassembly Instructions

Costway HW63323 user manual

Costway

Costway HW63323 user manual

True E-QUO Assembly instructions

True

True E-QUO Assembly instructions

TOV Nixon Assembly instruction

TOV

TOV Nixon Assembly instruction

Dux DYNAMIC 19 Assembly instructions

Dux

Dux DYNAMIC 19 Assembly instructions

Grandinroad Corinne 175756 Assembly instructions

Grandinroad

Grandinroad Corinne 175756 Assembly instructions

BOBOCHIC CHARLES Assembly instructions

BOBOCHIC

BOBOCHIC CHARLES Assembly instructions

ASKO-NÁBYTEK NODO NODL01 Assembling Instruction

ASKO-NÁBYTEK

ASKO-NÁBYTEK NODO NODL01 Assembling Instruction

Winners Only DB2451SP Assembly instructions

Winners Only

Winners Only DB2451SP Assembly instructions

U-Line H-2489A quick start guide

U-Line

U-Line H-2489A quick start guide

PowellKids 517-117 Assembly instructions

PowellKids

PowellKids 517-117 Assembly instructions

Round Hill Furniture B138NQ Assembly instruction

Round Hill Furniture

Round Hill Furniture B138NQ Assembly instruction

burmeier ROYAL instruction manual

burmeier

burmeier ROYAL instruction manual

Dorel Home Products DA2023169 Assembly instructions

Dorel Home Products

Dorel Home Products DA2023169 Assembly instructions

ofinto TA-CLA-01 user manual

ofinto

ofinto TA-CLA-01 user manual

Seconique NEVADA 6 DRAWER CHEST WHITE GLOSS Assembly instructions

Seconique

Seconique NEVADA 6 DRAWER CHEST WHITE GLOSS Assembly instructions

manuals.online logo
manuals.online logoBrands
  • About & Mission
  • Contact us
  • Privacy Policy
  • Terms and Conditions

Copyright 2025 Manuals.Online. All Rights Reserved.