Page 4
EZFSTL8_2H
1000003507 (Rev. B - 01/19)
B CA
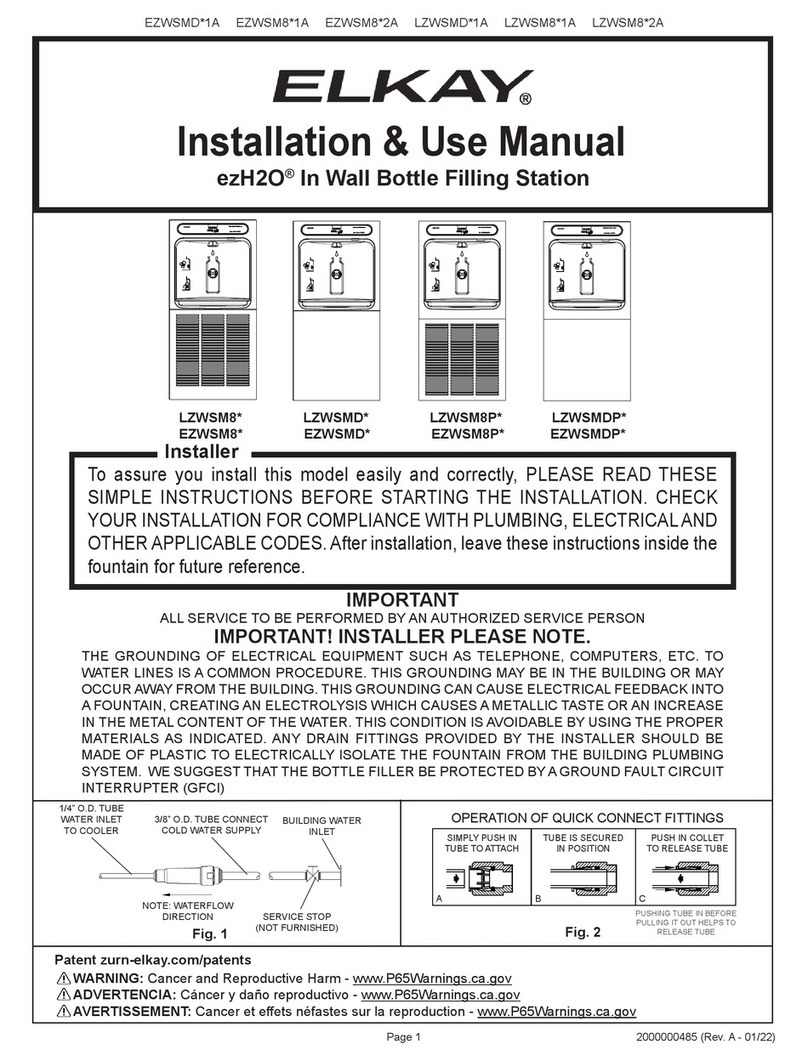
SIMPLY PUSH IN
TUBE TO ATTACH
TUBE IS SECURED
IN POSITION
PUSH IN COLLET
TO RELEASE TUBE
OPERATION OF QUICK CONNECT FITTINGS
PUSHING TUBE IN BEFORE
PULLING IT OUT HELPS TO
RELEASE TUBE
OPERATION OF QUICK CONNECT FITTINGS
SIMPLY PUSH IN
TUBE TO ATTACH
TUBE IS SECURED
IN POSITION
PUSH IN COLLET
TO RELEASE TUBE
PUSHING TUBE IN BEFORE
PULLING IT OUT HELPS TO
RELEASE TUBE
A B C
Service
For proper and safe servicing, please read these instructions completely.
DANGER
• All Service and Maintenance must be performed by an authorized service personnel.
• Disconnect electrical supply to the unit before any service work to reduce risk of electrocution.
• Shut o water supply serving the unit before any service work to reduce risk of water damage.
CAUTION
• Tools/Items required but not provided, for Servicing:
a) Safety Glasses
b) Protective gloves
c) 5/16” (8mm) Hex Socket or Flathead Screwdriver
Service: Adjustments
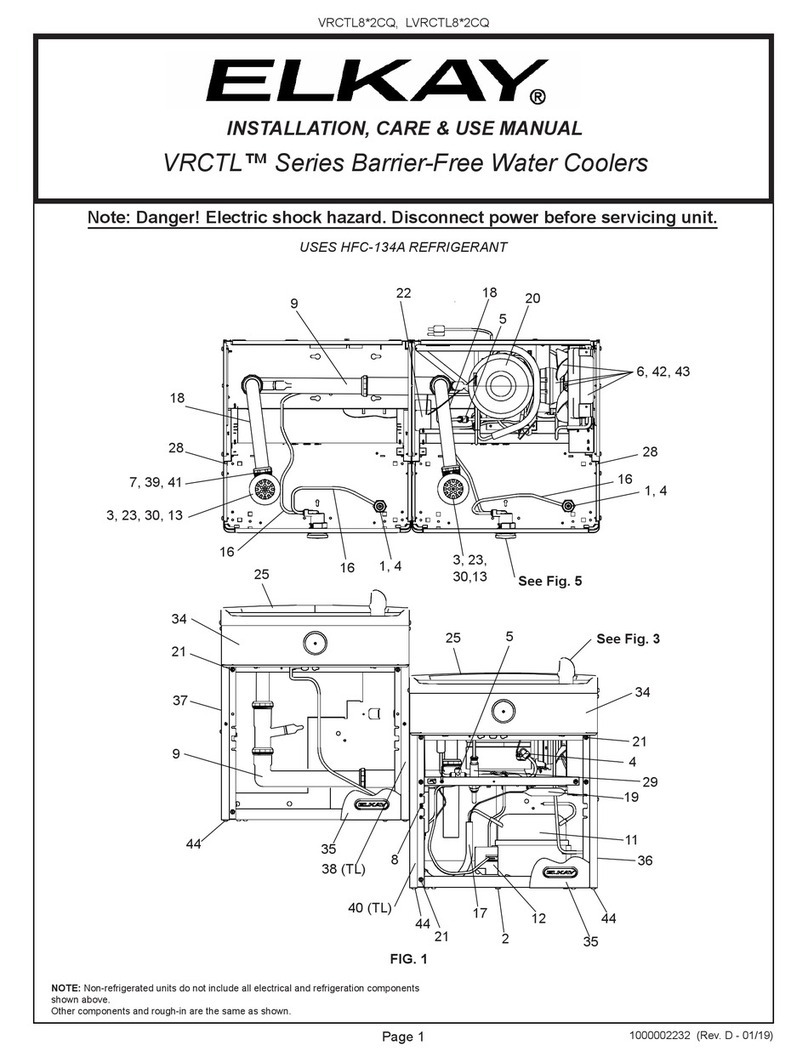
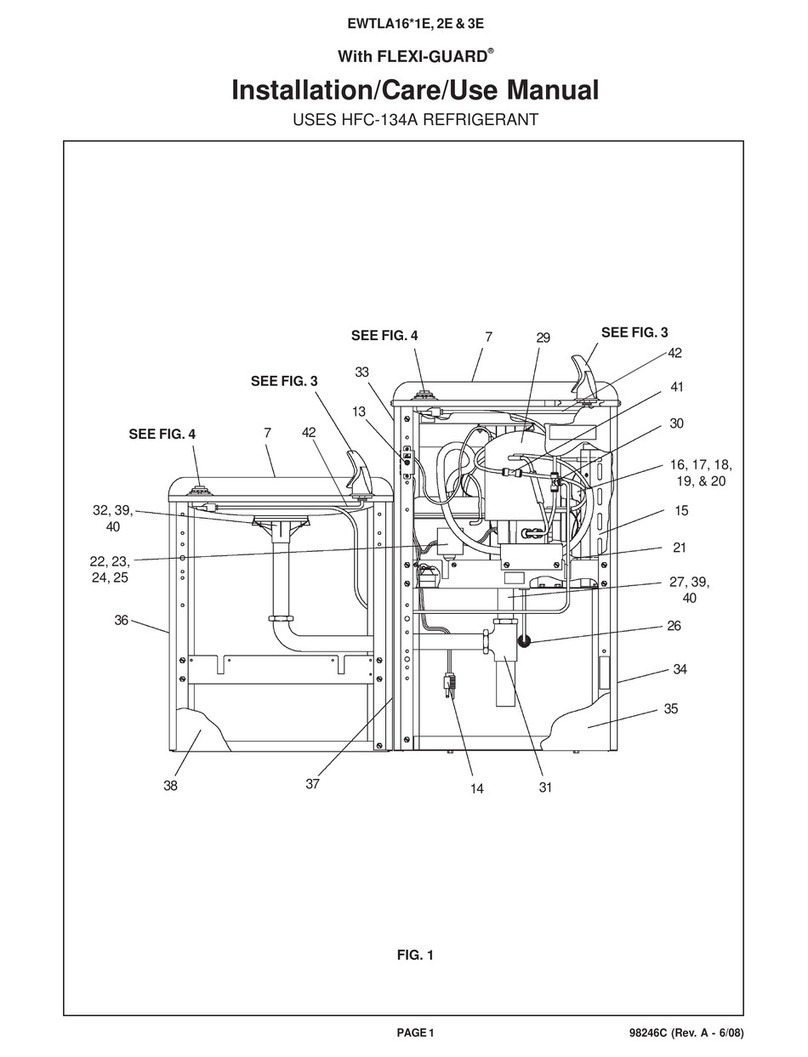
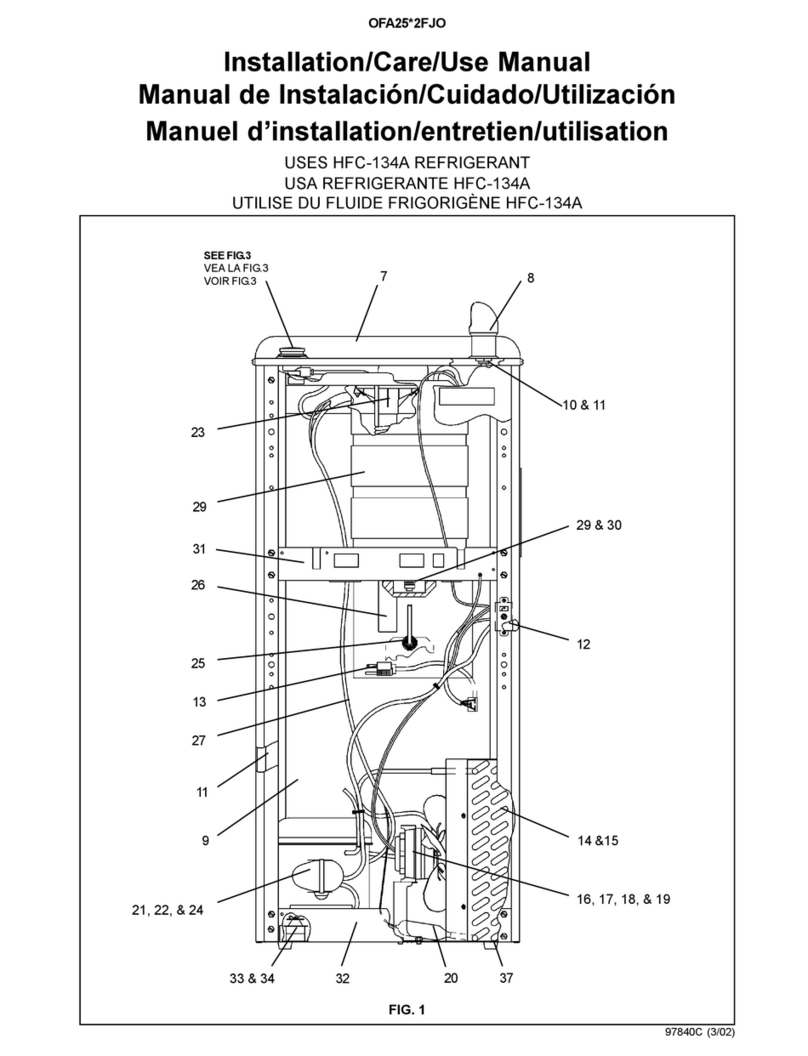
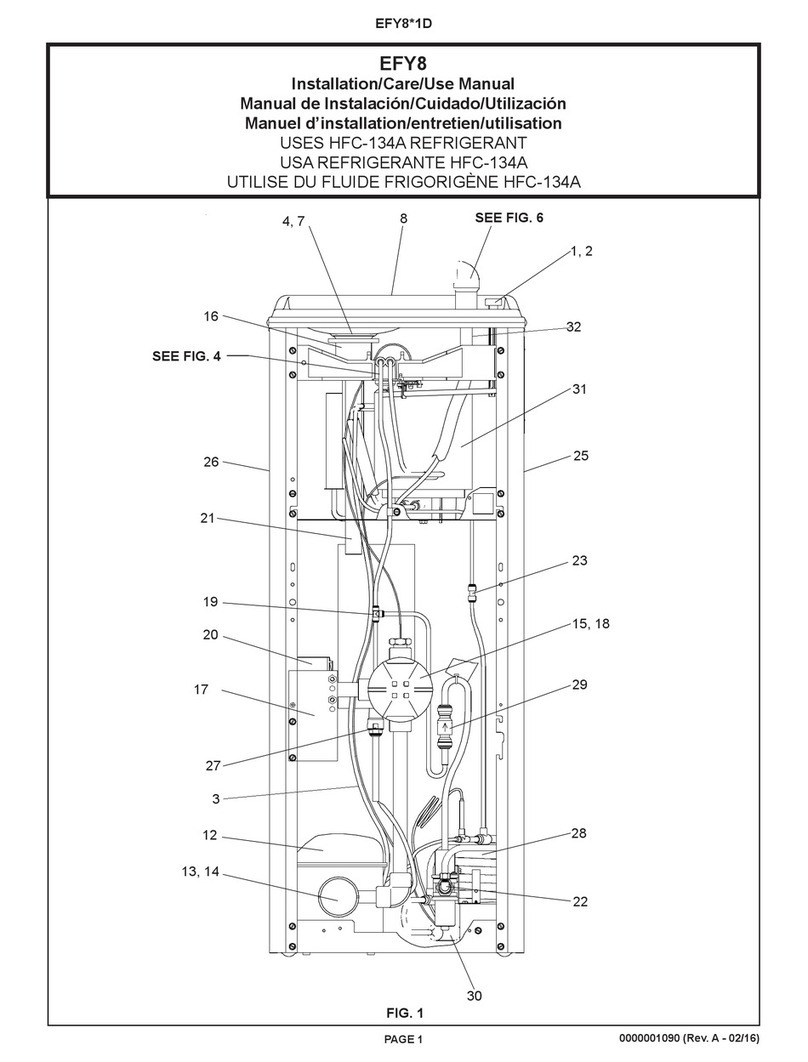
1. Temperature Control: Factory set for 50ºF ± 5º (10ºC ± 2.8º) water under normal conditions. To adjust water temperature, turn screw on Item No.
25 clockwise for colder, counter clockwise for warmer.
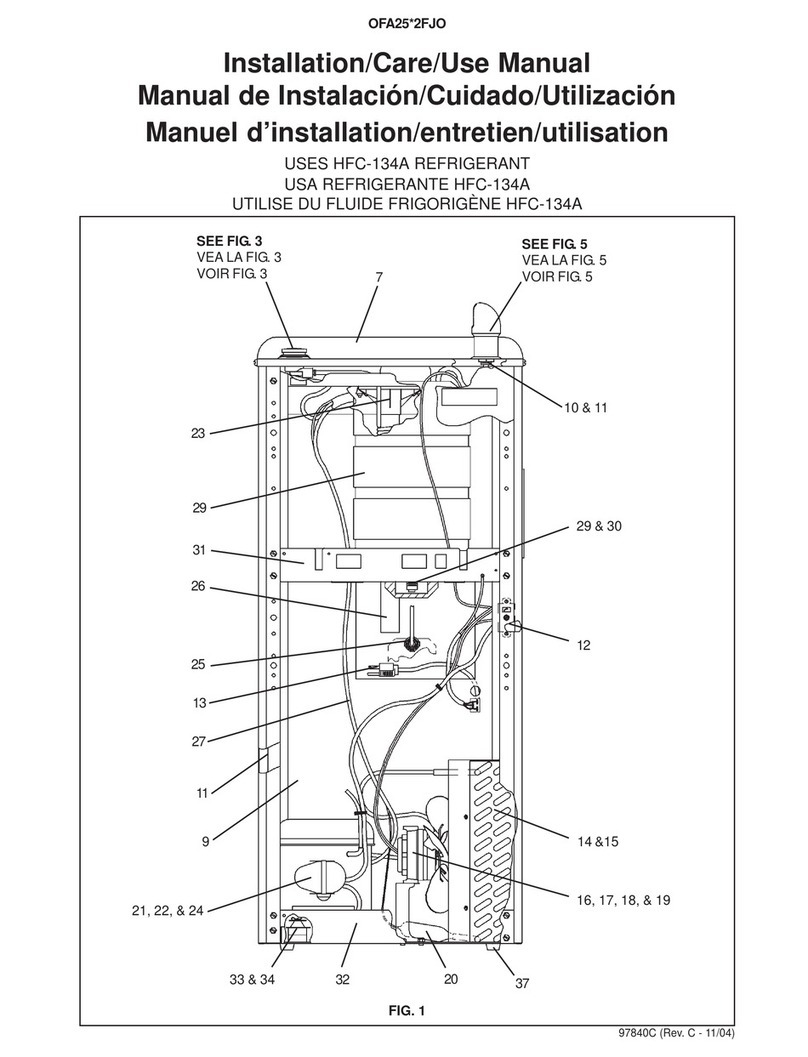
2. Water Stream Height: Stream height is fact`ory set at 35 psig (0.24 MPa). If supply pressure varies greatly from this, adjust screw located on the
right knee clearance area side at bottom of the switch shroud. Clockwise adjustment will raise stream and Counterclockwise adjustment will lower
stream. For best adjustment, stream should hit basin approximately 6-1/2” (165mm) from bubbler on the downward slope of the basin.
3. Water coming out of Bubbler continuously: When this occurs at the end of the compressor cycle, turn the cold control warmer (counterclockwise)
¼ turn.
Service: Inspection/Cleaning
• Inspect Cooler twice each year for proper operation and performance.
• Inspection of the unit will require disconnecting electrical supply, removal of panels, etc. and reassembly and return to service practices.
1. Cleaning: Warm, soapy water or mild household cleaning products can be used to clean the exterior panels. Extra caution should be used to clean
the mirror nished stainless steel panels. They can be easily scratched and should only be cleaned with mild soap and water or Windex glass
cleaner and a clean, soft cloth. Use of harsh chemicals or petroleum based or abrasive cleaners will void the warranty.
2. Bubbler: Mineral deposits on the orice can cause water ow to spurt or not regulate. Mineral deposits may be removed from the orice with a
small round le not over 1/8” (3 mm) diameter or small diameter wire.
• CAUTION : DO NOT le or cut orice material. Care must be taken not to damage the orice(s)
3. Condenser Fan Motor: Conrm condenser fan turns freely. If the condenser fan does not spin freely, have an authorized service personnel replace.
4. Ventilation: Cabinet louvers and condenser ns should be periodically cleaned with a brush, air hose or vacuum cleaner. Cleaning should be done
twice each year or more frequently if needed due to environment. Excess dirt or poor ventilation can cause no cold water and compressor cycling
on the compressor overload protector.
5. Water Flow: Conrm proper water ow. If water ow is slow, inspect lter or inline strainer for restriction. Replace lter cartridge if required.
Disassemble inline strainer and clean if required.
6. Lubrication: Motors are lifetime lubricated.
7. Actuation of Quick Connect Water Fittings: Cooler is provided with lead-free
connectors which utilize o-ring water seal. To remove tubing from
the tting, relieve water pressure, push in on the gray collar before pulling
on the tubing. To insert tubing, push tube straight into tting until it reaches a
positive stop, approximately 3/4” (19mm).
Operation: Start-Up
1. Turn on the building water supply and check all connections for leaks.
2. Rotate fan to insure proper clearance and free fan action.
3. Connect plug-end of International Power Cord Set (sold separately) into electrical outlet.
WARNING
• Exposed, electrically energized components. Use extreme caution.
4. Purge air from all water lines by depressing button or front push bar of cooler/fountain.
5. Recheck all water and drain connections with water owing through system.
6. After verifying that the water cooler is properly connected and operational, replace and reattach the cooler front panel by retightening
screws
Stream Height Adjustment Location
View of Underside of Basin Shroud

