in morning and again automatically opened and closed in the afternoon or evening. The same time of opening or closing commands programmed
to many control channels will cause commands to be send with time shift sequence.
HOLIDAY MODE
Selecting this mode allows rolling shutters to be automatically opened/closed at random time to simulate occupied house. Timer operated channels
(1..8) only can have this function set on, confirmed by parasol symbol displayed on LCD. Random control commands are time shifted within +/-
15 minutes of programmed automatic times.
NOTE! Holiday security mode can be set on in channels with timer operation mode set on first.
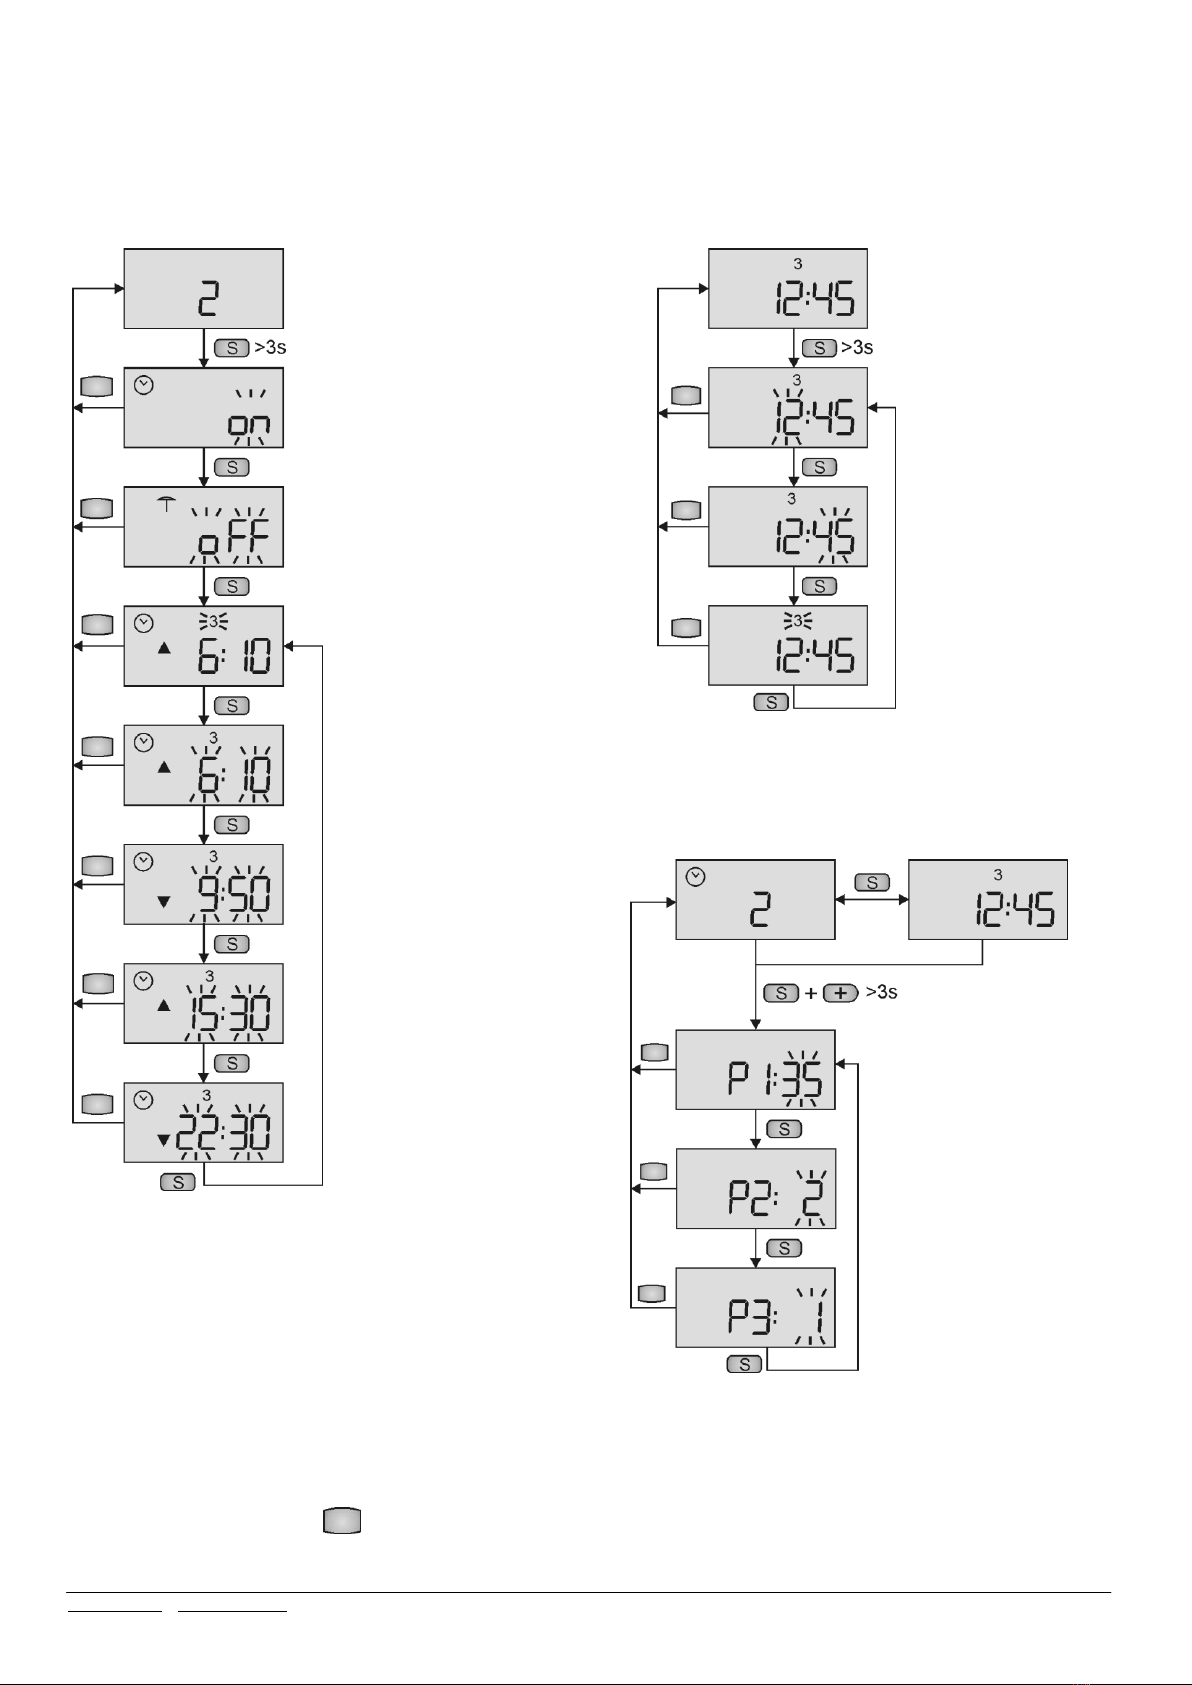
PREFERENCE PARAMETERS P1, P2, P3
To facilitate STX transmitter handling, a set of three preference setup parameters are provided (see also fig. 3 for programming):
Parameter P1 allows user to limit number of displayed channels to that exactly used (range 1 to 35),
Parameter P2 allows user to define whether one or two automatic control modes are to be set daily (within 24h),
Parameter P3 allows user to define whether next control command should be LCD auto displayed alternately with current control channel
(1 sets function on, 0 sets off).
Access to programming parameters P1, P2 and P3 is made by longer pressing buttons (+) and S simultaneously. Selection of parameter is with the
use of S button while parameter value is set up using -/+ buttons. Accept settings and exit programming mode with STOP button.
OPERATION WITH ELMES MADE CONTROLLERS
STX transmitter operates with Elmes made controllers of rolling shutters, rolling garage doors and moving gates in following manner:
Controller STM: active manual control buttons: ▲ ■ ▼. Timer mode operation is available.
Controllers ST100H, ST6H: active manual control buttons: ▲ ▼. Button ■ is inactive. Timer mode operation is available.
STX Transmitter Operation with Elmes Universal Receivers
NOTE! Operating STX transmitter with any Elmes made universal receiver certain conditions and limitations described below apply:
Receiver UMB:in manual mode active only one of ▲ ■ ▼ buttons used at STX learning to receiver. If STX timer mode is used, corresponding
receiver output should have pulse (monostable) mode selected. Learning the transmitter to the receiver button ▲ or ▼ must be used and, while
programming automatic mode, only open time (if ▲ button was used at learning), or close time (if ▼ button was used) can be programmed.
Receivers DWB: in manual mode active control buttons are ▲ & ▼. Button ■ is inactive. If STX timer mode is used, corresponding receiver
outputs should have pulse (monostable) mode selected. Programmed in STX timer mode open time will set on output 1 of the receiver while close
time will set on output 2.
Receivers CH4H, CH8H, CH20H: in manual mode active ▲ ■ ▼ buttons. Example of STX operation with CH20H receiver: if button ■ is pro-
grammed to output 5 of the receiver, then button ▲ will control output 3, button ▼ will control output 4 and button ■ will control output 5. If
STX timer mode is used, corresponding receiver outputs should have pulse (monostable) mode selected. Open times programmed in STX timer
mode will set on receiver outputs to which button ▲ is learned, while close times will set on outputs to which button ▼ is learned. Receiver out-
put to which button ■ is learned cannot be controlled automatically.
NOTE! STX transmitter can be considered as 35 hand transmitters with three control buttons meaning, that in operation with many CH8H or
CH20H universal receivers up to 105 outputs can be remotely controlled (35 transmitters x 3 buttons = 105).
LEARNING STX TRANSMITTER TO CONTROLLERS AND RECEIVERS
To use STX transmitter in wireless remote control (manual or automatic), it must be learned to corresponding receiver or controller it would oper-
ate with. Learning is done in few simple steps. First, select required control channel in the transmitter with -/+ buttons (1..35). Next, set on trans-
mitter learning mode in the receiver or controller (for details see manuals). Final, when learning mode is on, send two radio commands from STX
transmitter to selected receiver or controller by pressing twice one of the following transmitter buttons:
If learning to Elmes ST, STM and ST6H controller –double press one of ▲ ▼ buttons.
If learning to Elmes UMB one output receiver –double press one of ▲ ■ ▼ selected control button.
If learning to Elmes DWB or DW two outputs receiver –double press any of ▲ ▼ buttons.
If learning to Elmes CH4H, CH8H or CH20H multi output receiver - double press any of ▲ ■ ▼ buttons.
Example: learning STX transmitter to CH4H four output receiver by double pressed ■ button will program all three STX ▲ ■ ▼ buttons in ▲(1)
▼(2) ■(3) sequence.
Receivers and controllers confirm correctly learned STX transmitter by flashing LED.
NOTE! Selected control channel in STX transmitter can be learned to many controllers or receivers allowing manual or automatic (timer) control
of group of shutters. In addition, a receiver may have many control channels of the same STX transmitter learned in. This option is best described
in the following example: STX control channel 4 has been learned to three (1,2,3) Elmes made rolling shutters controllers STM. Control channel 1
of the STX has also been learned to controller 1, channel 2 of the STX learned to controller 2, and channel 3 of the STX learned to controller 3. In
effect, one STX transmitter controls all three controllers individually (in channels 1,2 & 3) and all, as group (in channel 4).
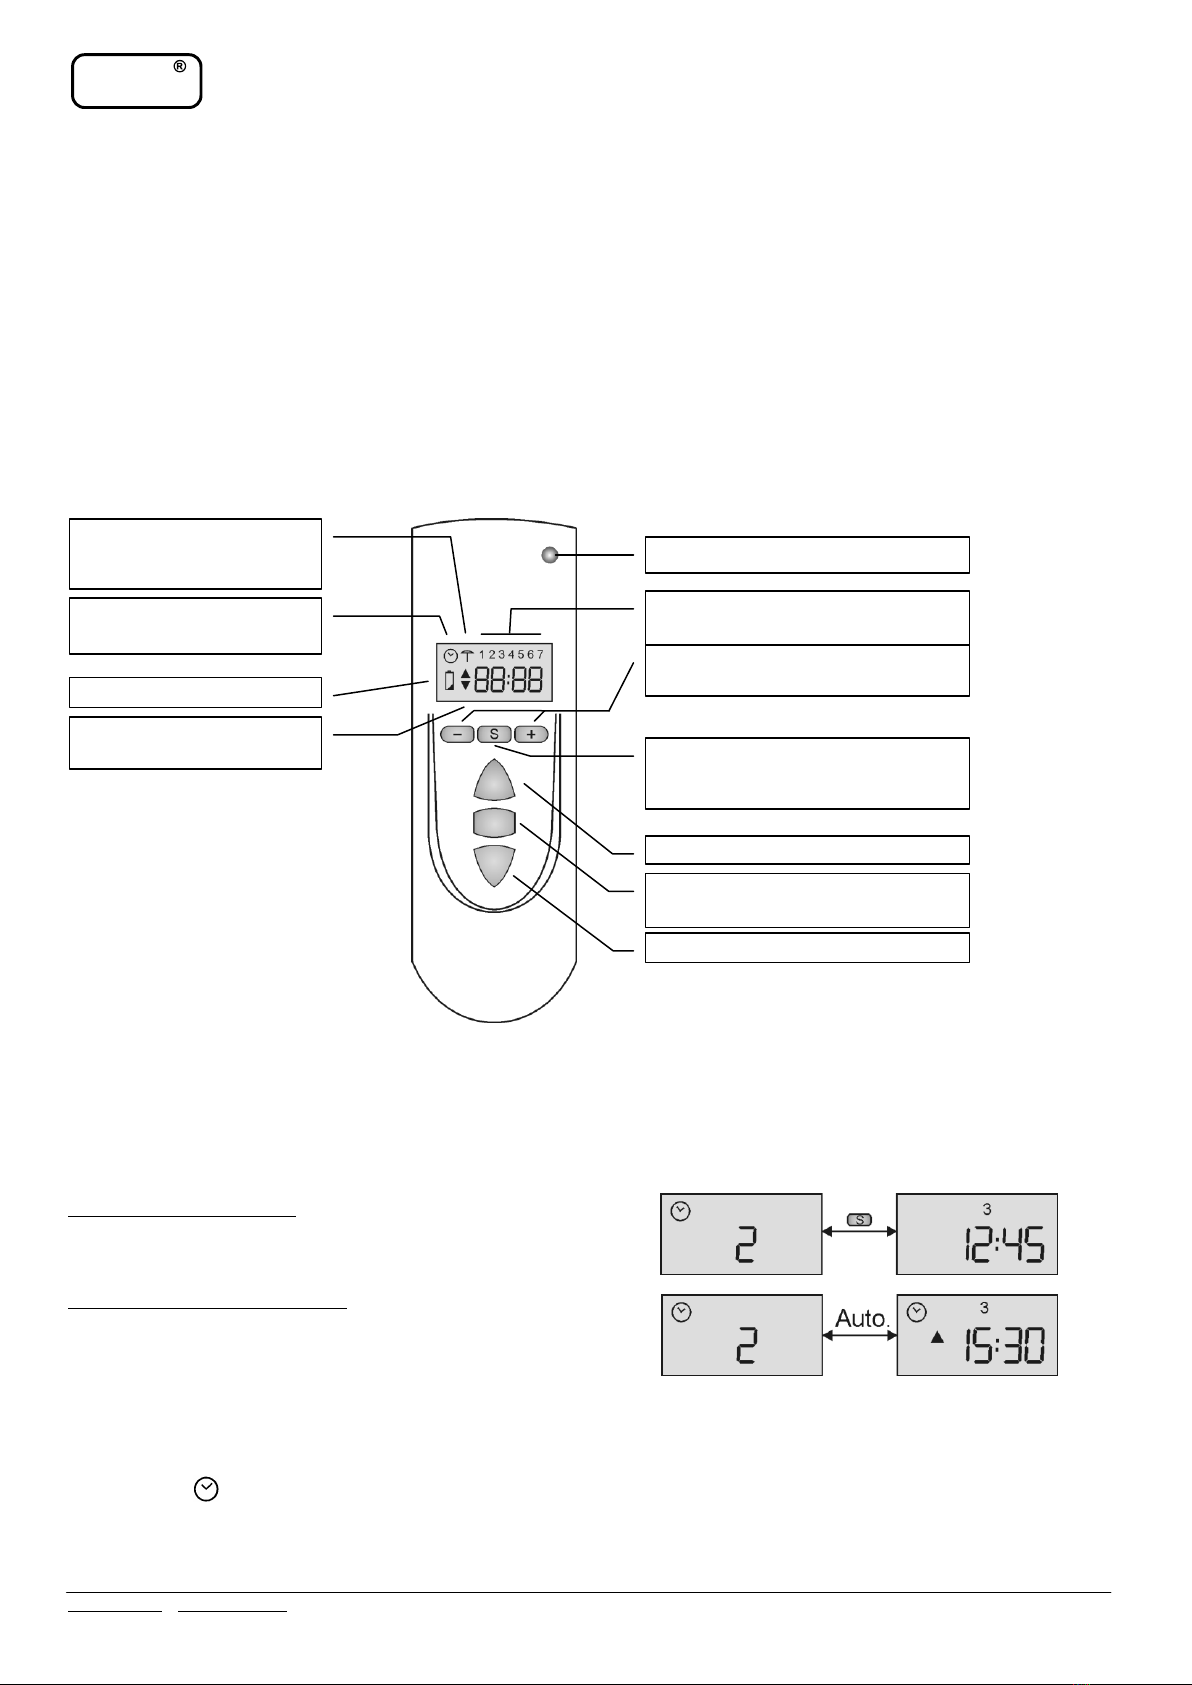
CLOCK SETTING
Current time and day of the week setting can be made when LCD displays clock. To enter the procedure longer press (more than 3 seconds) S
button and made adjustments with -/+ buttons. Exit procedure at any time by pressed STOP (■) button. Clock and day programming steps are
shown in detail in schematic diagram 2.
TIMER PROGRAMMING
Control channels 1 to 8 of STX transmitter may be timer programmed before or after the transmitter is learned to controller or receiver. To enter
procedure longer press S button only, if LCD shows one of 1..8 channels. Adjust automatic open/close timing with -/+ buttons and move to next
adjustment with S button. Accept adjustments and exit procedure at any time by pressed STOP (■) button. Detailed timer programming steps are
shown in schematic diagram 1.