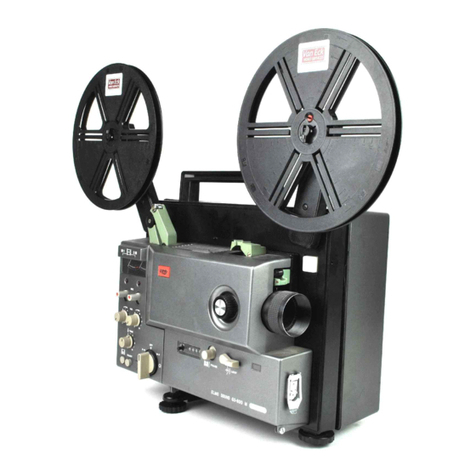
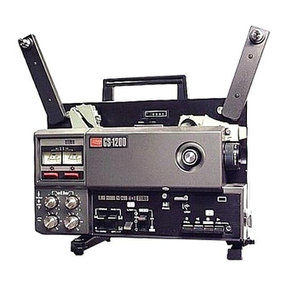
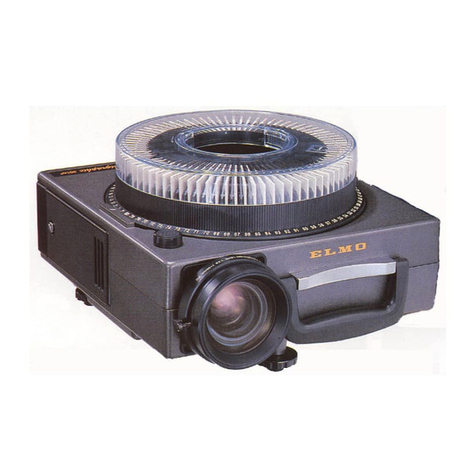
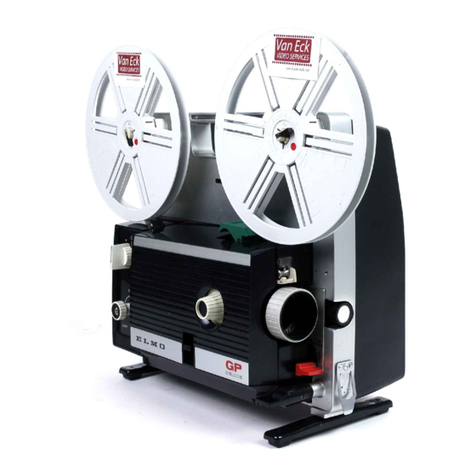
Elmo ST-1200 D User manual

8mm
SOUND PROJECTOR
Instruction
Manual
'
..

IMPORTANT
SAFEGUARDS
When using your photographic equipment,
basic
safety
precautions should always be followed, including the
following:
1.
Read
and understand all
in
struction
s.
2.
Close supervision
is
necessary when any appliance
is
used
by or near
ch
ildren.
Do
not leave appliance
unattended wh
il
e
in
use.
3.
Care
must
be taken
as
burns can occur from touch-
I
ng
hot parts.
4.
Do
not operate
app
li
ance wi
th
a damaged cord
or
,if the
appliance
has been dropped
or
damaged until
it
has been examined by a qualified serviceman.
5.
Do
not let cord hang over edge
of
table
or
counter
or
touch hot surfaces.
6.
If an extension cord IS necessary, a cord with a
suitable current rat
in
g should be
used
, Cords rated
for l
ess
amperage than the
app
liance may overheat.
Care should be taken to arrange the cord
so
that
it
will not be tripped over
or
pulled.

7.
Always
unplug appliance from electrical outlet when
not
in
use.
Never yank cord to
pu
II
pi
ug
from outl
et.
Grasp plug and
pu
ll
to disconnect.
S.
Let
app
li
ance cool completely before putting away.
Loop cord loosely around
app
lian
ce
when storing.
9.
To protect against electrical shock hazards,
do
not
immerse this
app
lian
ce
in
water or other liquid
s.
'
1
O. To avoid electric shock hazard,
do
not disassemble
this
app
li
ance but take
it
to a qualified serviceman
when
some
service
or
repair work is required.
In
cor-
rect reassembly can cause electric shock hazard
when the
app
li
ance
is
used
subsequentl
y.
SAVE
THESE
INSTRUCTIONS

Specifications·
·
......................................................
1
Nomenclature
··
··
····
··
··
···················
··
············
··
········· 2
Preparation
for
projection
..
···································
4
Sound
projection
" ...............
..
...
..
..
...
.....................
6
Image
adjustment
············
··
······
··
···········
··
·········.....
..
. 8
Single
frame
projection
··
..
·
..
···································· 9
Reverse
projection
........
..
.
....
.................................
..
9
Rewinding
the
film···
··············
··
···························
··
·
·10
Removing
the
film
in
the
midway
projection
··········
11
Various sound
projection·
···········
········
··
·········
··
·····12
[
Now
To Use Extension Speakers
How
To Reproduce Sound
Through
Stereo Set
How
To Use
Earphone
or
Headphone
How
To Use Public Address System (P.A.)
Recording
·
··
......................................................
···
·14
[
Recording
Procedure········
··
·······························
··
····14
Recording
Technic
··········
··
·································
··
··
·18
.
Normal
Recording
18
.
Mixing
----------------
19
.Double Recording (Double
Rec)
20
.Overlap Recording
22
.Record
control
and its Release
_______
24
(For
re-recording
o~
dubbing)
When
using
1200ft
(360m)
reel
(Optional accessory)··
···25
Cleaning·················
·· ··
···
··
·················
·············
·
··
·····
26
Replacing
projection
lamp
·······
··
·················
··
····
··
··27
Replacing
exciter
lamp
·······························
·········
··
28
Replacing
amplifier
and
exciter
lamp
fuse ......
······28
Replacing
power
fuse ········
··
·····
··
·····
··
··
···
··
·············29
Voltage
selection·
·······················..........................
·30
Frequency
selection
··
····················
··
··········
·············30
Trouble
shooting
hints·
·············
··
············
···
···········3
1
How
to
change
projection
lens
··
························:··31
Jack
for
synchronizer
R-1
.........................
.......
····32
Optional
accessories .........
...............
....................
·33
Projection
distance
and
image
size···········
··
········
··38
Projection
time
and
film
length
··········
········
··
····
··
··39

<Projector>
Power
so
ur
ce
:
Pro
j
ect
ion
speed:
Motor:
Usable
film:
F iIm loadi
ng
:
Reel
ca
pacity :
Specifications
Single
ph
ase
AC
,
50/60
Hz
18 &
24
fp
s.
(Lever
changing)
Induction m
oto
r
S
up
er
8/S
ingle 8 sound a
nd
sile
nt
f
ilm
Automatic
Max. 1200ft (360m)
St
ill
pict'ure
pr
oj
ect
io
n:
Possib
le
Reverse
pr
oj
ec
ti
o
n:
Film
rewindin
g:
<Light
so
ur
ce
>
Pro
j
ect
ion lamp:
Pro
jec
tion
lens :
<Sound recording &
Sound
sys
te
m:
Ampl
ifi
er
:
Tone co
ntrol
:
Leve
l co
ntrol:
Doubl e r
ecor
ding:
Input t
er
minal:
Output t
er
minal:
R
ecor
ding
h
ead:
Erasing
h
ea
d:
Possib
le
High
spee
d
rew
inding
15V-150W halogen lamp
with
co
ld
hi-l
ow
br
i
ghtness
is
possible.
F 1.3 f =
15
-25mm zoom lens
reprodu~tion
>
mirr
or
Choice of
Mod
el
M-O;
Magn
et
i
c/o
pti
ca
l r
epro
duc
ti
on and ,
magne
ti
c
record
ing
Model M Magne
ti
c re
pr
o
ducti
on and
recording
IC
circuit
is
built
in.
Music
power
output>; 15W
Continuous
power o
utput;
(5
% ) 12W
High tone
contro
l type
Automatic/Manua
l le
vel
contro
l
Possibl
e
anywhere
in
the
film
during
proj
ec
ti
on
Mixing is p
oss
ible
on
both AUX and
MI
C te
rminal
s.
EXT.
SP
.
(Imp
edance 8
Q)
AUX
OUT
(Imp
edance 600
Q)
Moni
(L
ow impedance type)
Specia
l a
ll
oy magne
tic
h
ea
d
(AI
te
rnate
bias
system)
Al te
rnat
e
eras
ing
system
Photo
el
ectric
element :
So
l
ar
batt
e
ry
Exc
it
er
lamp :
Speaker
:
Mi
crop
hon
e:
Leve
l met
er
:
Indication
l
amp:
Attachm
e
nts:
4V-0. 75A
Dir
ec
t-curr
ent I
ighting
system
(Model M-O)
Bui
lt-in
5"
(12.5cm) dynamic sp
ea
ker
Electret
condenser
type
(Imp
edan
ce
600
Q)
Bui
It-in
Re
cor
ding lamp,
Pilot
lamp
800ft (240m) Auto r eel,
Power
cord,
Carrying
case
,
Microphone Mo
nit
or
rece
iv
e
r,
Aperture
cl
ea
ning
brush
es
and
Projection
lamp
)I{
Specifications
are
subject
to
change
without
pri
or
notice.

2
~J.
....
"._
..
",~~'11
Nomenclature
._J.u;:~
..
¥.~~~&..,~
~
0
@I
~
~
~
O
Front
housing
cover
f}
Focusing
knob
@}
Auto
-
threadi
ng lever
O
Reel
spindle
0Feed reel arm
0Film
threading
slot
OReel arm
lock
(i)
Rewinding lever
0Single
frame
feed
knob
C@
Zoom
lens
G)
Synchronizer
R-1
jack
f)
Film
trimmer
o 0
'-----
--
0
41.1
Elevation
control
knob
CIl
Exciter
lamp
window
0
0
0
~
4D
~
~
(Model
M-O
only)
.,
M-O
changing
lever
(Model
M-O
only)
4D
Loop
restorer
4D
Framing
knob
4D
Film
counter
Gl
Tone
control
knob
~
Volume
control
knob
<Slf
with
amp
.
switch
fD
Motor
switch
~
Lamp
switch
~
Pilot
lamp
t}) Recording
indicator
lamp

~
Level
meter
tD
Auto
threading
release lever
oRear
film
guide
~
Take
-
up
reel arm
~
Reel
lock
~
P.A.
-ALe
selection
switch
;;n
Normal
Rec
-
Double
Rec
IW
selection
switch
~
Auxiliary
volume
control
knob
Q)
Mon
itor
jack
~
Microphone
indicator
lamp
4)
AUX
IN
jack
~
Microphone
jack
oDouble
recording
control
knob
@)
Double
recording
indicator
lamp
~
Record
control
button
~
Recording
button
(D
Speaker
$
Power
fuse
holder
Q)
Power
cord
socket
GI
Project
i
on
speed changi
ng
lever
$
Vol
tage
indication
window
$ Extension speaker con
nector
$
AUX
OUT
jack
I
3

4
Preparation
for
projection
50/60HI
UVt!OW
300w
Uw(ln)
FUSE
..
~
~
... l
..
..
J .3A
•
---
Arm
lo
ck
button
R
ee
l spindl
es
R
ee
l
10
k
oP lug
In
the
pow
er
cor
d and
th
e pilot
lamp w
ill
light.
Arm
lo
ck
button
f)
Pull
up
the f
eed
ree
l
ar
m and
take-up
r
ee
l
arm
.
After
pro
j
ect
io
n,
fold
th
e
r
ee
l
arms
with
th
e
ree
l
arm
locks
depressed.
8
Put
the f
ee
d
reel
(full
ree
l) and
the
ta
ke
-up
r
ee
l on
th
e
ir
ree
l spindl
es
,
and
fasten
the
re
els
with
th
e
reel
locks.
Turn
down the
ree
l lock to
the
right
dir
ect
ion
in
accor
dan
ce
with
the
thic
k·
n
ess
of r
ee
l.

For
magnetic
sound film
lM11
I
1tQ}1
For optical sound film
Volume
control
knob
Projection
speed
M-O
changing
lever Exciter l
amp
window
o
Se
t the M- O changing lever in a
cc
ord
-
an
ce
with the film to be
pr
oj
ec
ted.
(App
licable for model
M-
O only)
oMake sure that the
pr
oj
ec
tion sp
ee
d
changing lever is
se
t at co
rr
ec
t p
os
i-
tio
n.
Fo
r 24 fps,
se
t the lever to upper
s ide, and
for
18, to lowe
r.
Important
Be sure to tu
rn
off the motor when
changing the
pr
oj
ec
t ion sp
ee
d.
5

6
Sound projection
Film
trimmer
Motor
switch
oTo
in
s
ur
e smooth automa
ti
c
thr
e
ad
in
g,
trim
the end of the film l
ea
der
with
th
e film
trimm
er. L
oca
te a film pe
rf
or·
ati
on over the fixed pin and
trim
off
the end of the film.
Caution :
When
th
e t ip of l
ea
der is be
nt
or snapped,
trim
o
ff
acco
rdin
gly.
8 De
pr
es
s the
gr
ee
n auto
-thr
ea
ding lever
until
it is locked.
Th
e
thr
ea
ded film
will
relea
se
the lev
er
aut
o
matically.
To manually rel
ease
th
e
automatic
threading
sys
te
m,
de
pr
ess
the
aut
o-
thr
ea
ding rel
ease
lever.
8
Turn
the mot
or
s
wit
ch to \
\.
"
p
os
iti
on, then turn it to \\F " p
os
iti
on
aft
er motor sta
rt
s.

Lamp switch
LAMP
(]
(]~
(]~
L-L--e
Volume
contorol knob
Tone contorol knob
In
se
rt
th
e film l
ea
d
er
in
to th
e
trea
din
g
slot
as
indi
ca
ted by
th
e r ed a
rr
ow on
the slot. The au
to
m
at
ic th
read
ing
syste
m p
at
h
up
to the
ta
k
e-
up r
ee
l
will
be compl eted in a few
seco
nds,
at which
tim
e the au
to
-t
hr
ea
ding lever
will
be
re
l
ease
d autom
at
i
ca
lly.
Se
t
th
e la
mp
s
wit
ch
to
"
Ck
"P
?s
itio
n.
If
more
brill
ian
ce
is
re
quir
ed, s
hif
t
th
e la
mp
swi
tc
h
fur
th
er
to
"Clf
"posi-
tion for 30%
ex
t
ra
br
illi
an
ce
.
Th
e la
mp
sa
vin
g "
Cl~
"
pos
iti
on
will
giv
e
th
ree
tim
es
no
rm
al la
mp
lif
e.
A
dju
st volume and tone by t
urnin
g
th
e
volume co
ntr
ol
kn
ob and
to
ne co
nt
ro
l
kn
o
b.
7

8
Image adjustment
ring
knob
Framing
knob
Loop
restorer
levation
control
knob
fil
ls
the
picture
size
on screen desired one?
A
dju
st
th
e size of pi
ct
u
re
to
fit
th
e
scree
n s i
ze
by
turning
zooming
ring.
4D
Is
the
focus sharp?
Ad
ju
st
th
e
fo
cus
by
turning
focusing
kn
ob.
(i)
Doesn't
appear a
frame
line on the screen?
When the f
ra
me line
appears
, t
urn
the
framing
kn
ob
to
e
limin
ate
th
e
line.
(i)
When
th
e film loo
p,
set
by
the autom
at
ic
thr
ea
ding
syste
m,
is l
ost
during
pro
j
ec
tion due to an im
proper
sp
li
ce
or
any
ot
h
er
reaso
n,
it
ca
n
be in
sta
ntly
resto
r
ed
by pus
in
g the loop r
esto
rer
diag
onally downwa·rd.
@
Is
the
height
of
picture
right?
Adju
st
th
e heig
ht
of pic
tur
e
by
turnin
g eleva
ti
on co
ntr
ol
kn
ob.

Single frame projection
S
in
gle f
ra
me feed k
nob
•
Durin
g
pr
oj
ec
tio
n,
you may
wi
sh to
stop the movie to show a s
in
gle
fr
ame.
Thi
s
ca
n be done by
turnin
g the motor
s
wit
ch
to
"e"
(Still)
p
os
iti
o
n.
So
me·
tim
es
the film will
sto
p in the middle
of a frame, or even
wh
en
th
e ape
rtur
e
is cl
ose
d. When
thi
s ha
pp
ens, pull out
the s
in
gle
fr
ame f
ee
d
kn
ob and
turn
it
until
th
e
fu
ll
fram
e is p
ro
j
ec
ted.
Reverse projection
•
Rewind
in
g lever
Turn
th
e motor s
wit
ch to \'e" p
os
iti
o
n.
Th
en
turn
it
to "R"
(R
ever
se)
p
os
ition
aft
er mo
tor
s
tarts
.
• Be
ca
reful not to touch
th
e re
winding
lever
during
rever
se
pr
oje
cti
on.
9

10
Rewinding the film
o Aft
er
the film h
as
b
ee
n wound comple-
tely
on
the take
-u
p
ree
l,
t
urn
off the
la
mp
and moto
r.
•
Insert
th
e end of t he
film
int
o the slot
of the f
eed
r
ee
l hub.
Turn
the m
otor
swi
tc
h co
unt
erc
lockwi
se
to "e " p
os
itio
n,
then
turn
it
to
"R"
position
after
m
otor
s
tart
s.
Lock the
rew
ind
in
g l
eve
r by pushing
down to the
dir
ect
ion of
the
arro
w
as
illu
strated
in
the pi
ct
ur
e.
•
The
rewi
nding l
ever
is rel
ease
d
automa
-
t i
ca
ll
y when
th
e
pr
oj
ec
t
or
ope
rate
s for
f
orwar
d
project
io
n.
So
you may 1
eave
the
rewinding
l
ever
locked
until
the n
ext
pro
j
ect
io
n.
Caution :
When
rew
inding film
aft
er
re
mov
in
g·
the film
during
midway
projection,
t
urn
take-up
ree
l
cl
ockwi
se
over one
round by hand and then
turn
the
opera-
tion
sw
i
tch
to
"
R~
"
.

Removing
the
film
in
the
midway
projection
o
Ret
urn
the m
otor
sw
itch to
"OFF"
.
Open the
fr
ont hous
in
g
cover
by
pu
llin
g
towards
yo
u.
The first
sp
rock
et
shoe
The
second
sprocket
shoe
•
Push
the
fir
st
sproc
k
et
shoe s
id
eways
.
• Open the lens hol
der
to
the
dil'ection
of
arrow.
• De
pr
ess
down
th
e film guide.
•
Take
out the film.
II

12
Various sound projection
How
To
Use Extension Speakers
o
Adapter
cord
(SC
-
002)
In
case
you u
se
Elmo
ex
tra
sp
ea
k
er
(Option),
co
nn
ec
t
th
e speake
r'
s plug
to
EXT.
SP
. co
nn
ector
of
the
proj
ec
tor.
In
case
you u
se
your
o
wn
ex
tension
sp
ea
kers, u
se
an
opt
ional co
rd
a
dapt
er
SC-002
f
or
co
nn
ec
tion
with
the phone
plug 6 ¢.
How
,
To
Reproduce Sound Through
Stereo
Set
AUX. OUT
Jack
EI!:!.2
I.
. .1
, I
.
--
------
-
Level
meter
oCo
nn
ect
AUX.
OUT
j
ac
k of
th
e
pr
oj
ec
-
t
or
to
AUX. IN or
LINE
IN
receptacl
e
of
the stereo
set
wit
h an
accesso
ry
cor
d.
In
thi
s
case,
sound is not re.prod-
u
ced
by
built-in
or
exte
ns ion s p
ea
ker s.
• When using
extra
a
mp
I
ifi
er.
adjust
the
volume co
ntr
ol
to
make
the
n
ee
dl e of level
m
eter
stay
in the
red
area.
Thi
s is
sta
nd
-
ar
d level. (600£2 about
-lOdb)·

How
To
Use Earphone Or Headphone
Monitor
jack •
Connect
th
e
earp
hone
or
h
ea
dphone plug
to MONI j
ac
k of
th
e
pro
j
ec
t
or.
In this
case
, no sound is
reprod
u
ce
d by
bu
ilt·
in
of
ex
tens ion sp
ea
ker
s.
How
To
Use Public Address System
(P.
A.)
P.A.-ALC Selection switch
Microphone
indicator
lamp
•
Se
t the P.A.
-AL
C
se
l
ect
ion s
witch
to
"P.A.".
P l
ug
th
e
attached
mi
crop·
hone into
micr
ophone j
ack.
Th
en s
wit
ch
on
the
amplifi
er
and
th
e
mi
c
roph
one
lamp
will
li
ght. Now
pro
j
ec
tor is
ready
for public
address.
Caution:
It
is r
eco
mm
e
nd
ed to u
se
publ ic
address
system
in comb
in
at
ion
with
e
xt
e
nsi
on
sp
ea
ker. Don
't
a
ppr
oach the
mi
crophone
to
spea
ke
r,
or in
crease
th
e
input
level
too
mu
ch I
es
t the
un
co
mf
o
rtabl
e v i
brat
ed
so
und
(h
o
wling)
should come out.
13

14
Recording ·
Use
film with a magn
et
i
ca
lly
coate
d
so
und
tra
ck
because
this
so
und
record-
ing devi
ce
employs the magne
tic
r
ecor
ding
sys
tem. Not only no
rmal
r
eco
rd-
ing but
also
various
w
ays
of
recording
ca
n be enjoyed such as double r.ecord-
ing, fade
-in/
fade- out,
over
lap, r
eco
rd
contro
l and
it
s
relea
sing.
Recording
procedur~
M-O
changing
lever
----I
----I
~I
o
Set
the M-O changing lev
er
to
"M".
(App
li
ca
ble
for
model M-O only)
8
Load
the
pr
oj
ector
with magne
tic
ally
coated
film.
8
Sw
itch on the ampl ifi
er
by t
urnin
g
volume co
ntr
ol
kn
ob clockwi
se
.
o Co
nn
ect
ion of the
recording
so
ur
ce
.

To connect the recording source to
AUX
.IN
jack
.
AUX.IN
Jack
1 Connect LINE OUT
or
AUX. OUT
connector of tape
recorder
or
record
player
etc. to
AUX
.I jack of the
projector
.
Note
: 1.
If
the output of sound
sources
is
rela·
ti
vely
high (e.g.
record
player,
tape
recor
·
der,
radio
tuner,
tape
deck etc.,
which
incorporate
an amp
lifi
er),
connect them
to
the AUX.
IN
jack.
Note
: 2.
AUX.
IN
ja
ck
is
separate
ly
circuited
wi
th
the
vol ume
control
so
as
to
mix
sounds.
Therefore
the
input level from
AUX.
IN
jack is not
automatica
lly
recorded.
<>
Stereo-to-monaural
adapter
cord
(Re
f
er
to
"MC
-00
3"
on
page
37)
avai
lable
for
sound
reproduction
in combina
tion
with
2 -channel
stereop
h
on
ic
unit.
<>
When
recording
from a
unit
havi
ng
neither
LINE
OUT
nor
AUX.
OUT
jack
connect
AUX.IN
jack of
the
pro
j
ector
to
either
eaL"phone
or
EXT
.
SP.
connector
of
the
unit
with
an
accessory
input
cord
.
(Input
cords
with
resistor
MC-009
is
avaiIable.)
I MC-009 3.
5</;
~
-
----
-
--
---
-
=c:=J
=m3.
5</;
AUX. Volume
control
2 Adjust the auxili
ary
volume
contro
l
knob until the level
meter
indicates
the opt
imum
leve
l.
Note
:
The
ad
j
ustment
of
level
meter
shou
ld
be
done,
after
turning
motor
swi
tch
to
"e"
towards
F,
by
depressing
red
recording
button
sl
ightly.
15

16
£/1'10
I
.•
•
,z
wr
-~----
Level
meter
Note
: 2
Maximum
recording
level
can
be
achieved
when
the
indicator
swings
in
the
LH-side
red
zone.
Connection
to
microphone
jack.
Microphone
jack
I <-
~
~
'O
T
;:)
•
AUX
.
1N
0 I
MIC/
.......JIi
1
~
OFF
rzw-.r
,,,,
..
BH
'-'-
ON
1 Connect the microphone plug to MIC
jack.
Note
:
If
the
output of sound
sources
is
rela
·
tively
low (e.g.
record
player
which does
not
incorporate
an
ampIi
fier),
connect
them
to
the
l
arger
(3
.5mm) microphone
ja
ck
instead
of AUX. IN
jack
.
2
Set
the
P.A.-ALC
selection
sw
it
ch
to
either
ON
(Automatic
recording)
or
OFF
(Manua
l
recording)
on
your
recording
. When the
switch
is
in
the position of
ALC
-O
,
set
the
black point of volume
contro
l knob
to the top
position
. When it is
ALC
-OF
F,
adjust
the volume
contro
l
knob until the
level
meter
indicates
the optimum level.
Note
:
For
the
protection
of
picking
up
noise,
approach
the
microphone
to
sound
source
as
near
as
possible
and
record
the
sound
at
low
level.
Table of contents
Other Elmo Projector manuals

Elmo
Elmo EDP-S10 User manual

Elmo
Elmo HP-L1102 User manual

Elmo
Elmo HP-2850 Solar User manual

Elmo
Elmo TRV-35H User manual

Elmo
Elmo EDP-3600 User manual

Elmo
Elmo 16-CL Optical User manual

Elmo
Elmo Boxi MP-350 User manual

Elmo
Elmo LCD Data Protector EDP-X80A4 User manual

Elmo
Elmo T-200 User manual

Elmo
Elmo iP-40SE User manual