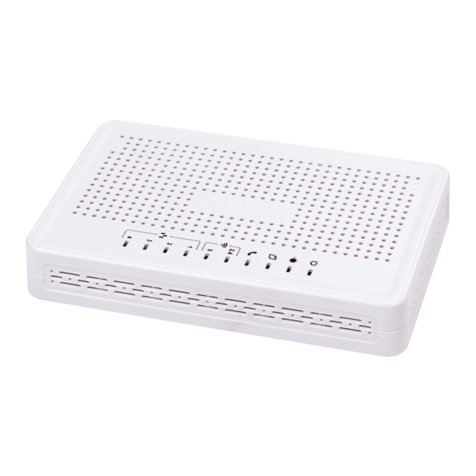
ELTEX RR-11 User manual

Wi-Fi signal repeater
RR-11
User manual
Firmware version1.5.0

RR-11 User manual. Firmware version 1.5.0
2
Сontents
1 Introduction ................................................................................................................................4
1.1 Abstract ........................................................................................................................................4
1.2 Symbols ........................................................................................................................................4
2 Device description......................................................................................................................5
2.1 Purpose.........................................................................................................................................5
2.2 Device specification .....................................................................................................................5
2.3 Connection diagrams forRR-11 ..................................................................................................5
2.4 RR-11use case..............................................................................................................................7
2.5 Technical features........................................................................................................................8
2.6 Design .........................................................................................................................................10
2.6.1 Front panel of the device.................................................................................................... 10
2.6.2 Left panel of the device...................................................................................................... 11
2.6.3 Right panel of the device ................................................................................................... 11
2.6.4 Bottom panel of the device ................................................................................................ 12
2.7 Restoring the factory default settings.......................................................................................13
2.8 WPS button management.........................................................................................................13
2.9 Delivery package ........................................................................................................................13
3 Installation order .....................................................................................................................14
3.1 Safety rules.................................................................................................................................14
3.2 Installation recommendations..................................................................................................14
3.3 Connecting RR-11 to a network.................................................................................................15
3.3.1 Connecting RR-11 to a network router withoutEasyMesh technologysupport ............. 15
3.3.2 Connecting RR-11 to a network with ELTEX router .......................................................... 18
4 Device management using web interface.............................................................................20
4.1 Getting started ..........................................................................................................................20
4.2 Device control panel .................................................................................................................21
4.2.1 Key elements of the web interface .................................................................................... 21
4.3 Repeater mode...........................................................................................................................22
4.3.1 The "Status" tab.................................................................................................................. 22
4.3.2 The "Wi-Fi" tab ................................................................................................................... 24
4.3.3 The "Network" tab .............................................................................................................. 28
4.3.4 The "System" tab ................................................................................................................ 29
4.4 EasyMesh agent mode ..............................................................................................................31
4.4.1 The "Status" tab ................................................................................................................. 31

RR-11 User manual. Firmware version 1.5.0
3
4.4.2 The "EasyMesh" tab ............................................................................................................ 33
5 Possible problems and solutions ...........................................................................................36
6List of changes .........................................................................................................................38

1 Introduction
1.1 Abstract
Despite the variety of modern access points,the problem of insufficient coverage area remains
relevant. Therearemany ways of solvingsuch aproblem,and one of the simplest ways from the
point of view of installation and configuration is to use special network devices —repeaters.
RR-11 is a Wi-Fi signal repeater, designed to expand the coverage area of wireless networks. The
device allows you to eliminate blind spots in detached houses,multi-room apartments,as well as
small offices.
This user manual describes the purpose, main technical features, design, installation procedure,
rules for configuring, monitoring and changing the software of RR-11 wireless signal repeaters.
1.2 Symbols
Tips, notes and warnings
Tips
Tips provide important information, tips or suggestions for using and setting up the
device.
Notes
Notes contain importantinformation, tips or recommendations on device operation and
configuration.
Warnings
Warnings inform the user about situations that can harm the device or a person, lead to
incorrect operation of the device or loss of data.

•
•
•
•
•
•
•
•
•
•
2 Device description
2.1 Purpose
RR-11 is a wireless signal repeater designed to expand the coverage area of wireless networks.
The device allows you to eliminate blind spots and optimize the performance of your Wi-Fi
network.
With support forIEEE 802.11n/ac standards,RR-11 repeaterprovides high data transfer rates.The
use of MIMO technology and internal antennas makes RR-11 a universal solution for expanding
your home network andprovides high-quality multimedia transmission of 4K content.RR-11
supports EasyMesh technology and can be used in EasyMesh network as an agent.
2.2 Device specification
The device is powered from 100 — 240 V, 50 —60 Hz power network.
Interfaces:
LAN: 1 Ethernet port RJ-45 10/100/1000BASE-T;
WLAN:
IEEE 802.11b/g/n 2.4GHz;
IEEE 802.11a/n/ac 5 GHz.
Functions:
Support for WPA/WPA2 encryption standards;
Support for WMM (IEEE 802.11e);
Support for WPS;
Wireless Multicast Forwarding;
Support forSU-MIMO 2x2;
Support forEasyMesh (IEEE 802.11k/v).
2.3 Connection diagrams forRR-11
2.4 GHz repeater:

5 GHz repeater:
Access point:

2.4 RR-11use case
Agent in EasyMesh network
When connected to an ELTEX router with a firmware version that supports EasyMesh,
RR-11 repeater will be automatically configured as an agent in the EasyMesh network.

2.5 Technical features
General parameters
Clock frequency 1 GHz
RAM 128 MB
ROM16 MB
Operating system Linux 3.10
LAN Ethernet interface parameters
Number of interfaces 1
Connector type RJ-45
Data rate, Mbps 10/100/1000,autonegotiation
Standards BASE-T
Wireless interface parameters
Wi-Fi class AC1200
Number of antennas 2
Antenna type internal
Standards 802.11 a/b/g/n/ac/k/v
Frequency range 2402-2482 MHz
5170-5330MHz
5650-5835MHz
MIMO 2.4 GHz2×2SU-MIMO
5GHz2×2 SU-MIMO
Modulation 2.4 GHz: DSSS, CCK, BPSK, QPSK, 16QAM, 64QAM
5 GHz: BPSK, QPSK, 16QAM, 64QAM, 256QAM

Data transfer rate 802.11b: up to 11Mbps
802.11a: up to54Mbps
802.11g: up to54Mbps
802.11n(HT20): up to 144Mbps
802.11n(HT40): up to 300Mbps
802.11ac(HT80): up to 867Mbps
Maximum output power of the transmitter12.4 GHz: up to 20dBm
5 GHz: up to 20dBm
Antenna gain 2.4 GHz: 3.5 dBi
5 GHz: 3dBi
Receiver sensitivity 2.4 GHz: up to -90 dBm (MCS0, HT20)
up to -71 dBm (MCS7, HT20)
5 GHz: up to -93 dBm (MCS0, HT20)
up to -73 dBm (MCS7, HT20)
Security WPA (TKIP+AES), WPA2 (TKIP+AES), WPA/WPA2
(TKIP+AES)
Control
Remote control web interface
Access restriction by password
Physical specifications
Power from 100–240 V, 50–60 Hz power network
Maximum power consumption not more than 7 W
Operating temperatures from +5 to +40 °С
Relative humidity at25 °Сup to 80 %
Dimensions (W×H×D) 68×131×73 mm
Weight 0.172 kg
1The number of channels and the maximum output power will vary according to the Radio
Frequency Regulation in your country.

2.6 Design
RR-11 wireless signal repeater is implemented in a plastic case.
2.6.1 Front panel of the device
Description of front panel LED indicators
LED LED status Device state
1Power Solid red The device is launching (1 minute max.)
Red, flashing The firmware is updating/the device is resetting
Solid green The device is powered on
2WPS Green, flashing The device is connecting to an access point (router)
using WPS technology
3Signal Not lit No connection to an access point (router)
Solid green The device has been
connected to an access
point (router) and has
access to the Internet
The signal level is good, more
than -70 dBm
Green, flashing The device is connected
to an access point
(router), no access to the
Internet
Solid red There is an Internet
connection
The signal level is weak,
-70dBm or less
Red, flashing There is no Internet
connection

2.6.2 Left panel of the device
RR-11 left panel
Description of the leftpanel elements
Leftpanel elements Description
1 F Button for restoring the factory default settings
2.6.3 Right panel of the device
RR-11 right panel
Description of the right panel elements
Right panel elements Description
1 WPS Button for connecting the client via the WPS protocol

2.6.4 Bottom panel of the device
RR-11 bottom panel
Description ofRR-11 bottom panel elements
Bottom panel elements Description
1 LAN 10/100/1000BASE-T port (RJ-45 connector) for network connection
2 LEDs LAN connector LEDs
LAN connection indication
LED status Device state
Only green lights The connection is established at 10/100 Mbps
Green and orange light The connection is established at 1000 Mbps
Green flashes The process of packet data transmission via LAN interface is going on

1.
2.
2.7 Restoring the factory default settings
To restore the device factory default settings, press and hold the "F" button for more than 3
seconds until indicator on the front panel starts flashing red. When indicator stops
flashing,the factory reset has been completed, the device is rebooting.
2.8 WPS button management
The device supports connection to the router Wi-Fi networks via WPS. To configure the connection,
enable the WPS function on the router, also press and hold the WPS button on the device right
panel for 3 seconds.
After that, the device will connect to the router automatically. Connection to the router takes no
more than two minutes. In case the connection is not successful, try again and make sure that the
WPS function on the repeater was activated no later than 2 minutes after the WPS function was
enabled on the router.
2.9 Delivery package
RR-11 standard delivery package includes:
RR-11 Wi-Fi signal repeater;
Device quick configuration guide.
•
•
By default, the DHCP server is running on all interfaces;
LANinterfaceaddress is192.168.0.1, the subnet mask is255.255.255.0;
The username/password for access via the web interface: admin/password.
Configuring with WPS technology as a client is only available for non-configured
devices.Beforeusing the WPS button, you must reset your device to the factory settings.
Once configured, a DHCP client is launched on the device.

1.
2.
3.
4.
5.
1.
2.
3.
4.
•
•
•
•
•
3 Installation order
3.1 Safety rules
Do not install this device near any heat sources or in places where temperature is below 5 °C
or above 40 °C.
Keep this device away from the direct sunlight.
Do notsubject this device tosmoke,dust, water or other liquids. Prevent mechanical
damage to the device.
Do not open the device case. There are no user serviceable parts inside.
At the end of the useful life, do not dispose of the device with normal household waste.
3.2 Installation recommendations
Checkthedeviceforvisible mechanical damage before installingandturningit on.If the
device is damaged, stop the installation process, fill in a corresponding document and
contact your supplier.
Ifyourdevicehas beenexposedto thecoldfor a long periodoftime, let it warm upat room
temperature for two hours before starting work. Ifyourdevicehas beenexposedtohigh
humidity for a long period of time,letitstay under normal conditionsfor atleast 12 hours
before turningit on.
The device shall be installed horizontally, following the safety rules.
When placing your device, in order to provide the best Wi-Fi coverage consider the following
rules:
Install the device in the area where the wireless network of the router is securely
received;
Minimize the number of barriers (walls, ceilings, furniture, etc.) between RR-11, the
router, and other wireless network devices;
Do not install the device near (about 2 m) electrical and radio devices;
It is not recommended to use radiotelephones and other equipment operating at the
frequency of 2.4 GHz, 5 GHz, within the range of a Wi-Fi network;
Obstacles like glass/metal constructions, brick/concrete walls, water cans and mirrors
can significantly reduce Wi-Fi action radius.
In order to avoid components overheating and device malfunctioning, do not place any
objects on the device surface.

1.
2.
1.
2.
a.
3.3 Connecting RR-11 to a network
To extend Wi-Fi coverage area, connect RR-11 to a network of your access point (or router).
3.3.1 Connecting RR-11 to a network router withoutEasyMesh technologysupport
3.3.1.1 Method 1. Using WPS button
Plug RR-11 into the power socket near the Wi-Fi router (or access point) you want to connect
to.Wait until ledturns green.
Press WPS button on the Wi-Fi router.
3.Press and hold WPS button on RR-11 untill indicator starts flashing. When RR-11 is
connected to the Internet, its indicatorwill turn green (successful connection) or flash green
(no Internet access).
3.3.1.2 Method 2. Via web interface in repeater mode
Plug RR-11 into the power socket near the Wi-Fi router (or access point) you want to connect
to.Wait until ledturns green.
Connect to the repeater using smartphone or PC via Wi-Fi or Ethernet cable (not supplied in
the delivery package).
Via Wi-Fi: connect PC (smartphone) to a Wi-Fi network of the repeater — RR-WiFi-XXXX
(where XXXX — the last 4 characters of SSID, specified on the label on the device case
top panel);
The way of connection ofRR-11 with EasyMesh technologysupport and without
EasyMesh technologysupport is different.
IfRR-11 is connected to the equipmnet withoutEasyMesh technology support,RR-11 is
not launched in EasyMesh agent mode.
The way of WPS connection may vary for different routers. Please read the manual for
your router.
For a successful connection, the user has 2 minutes after pressing WPS button on the
router to press WPS on RR-11.
By default, the repeater copies the name and Wi-Fi settings of the network to which it will
be connected in both ranges: 5 GHz and 2.4 GHz. If necessary, you can change the name
and Wi-Fi network settings via the web interface.
EasyMesh network settings
When connecting to ELTEX router with a firmware version that supports EasyMesh, RR-11
repeater will be automatically configured as an agent in the EasyMesh network. In the
EasyMesh network, all network parameters are synchronized between the controller and
the agent.

b.
3.
4.
5.
Using Ethernet cable: connect LAN port of the repeater to LAN port of your PC using
Ethernet cable(not supplied in the delivery package).
Open a web browser and type the address of the device into URL bar:http://rr.loc/orhttp://
192.168.0.1.
Enter username and password to the authorization window. By default, adminandpassword
are used for username and password correspondingly. Click "Log in".
The "Wizard" window will open. Set the username and password to access the repeater web
interface.Click "Next".
6. In the list that appears, select your Wi-Fi network and click on the line with its name.

1.
2.
a.
b.
3.
4.
5.
6.
7. Specify your Wi-Fi network password, as well as the repeater network name, then click
"Connection".When the repeater is connected to the Internet, its indicator will turn green.
3.3.1.3 Method 3. Via web interface in access point mode
Plug RR-11 into the power socket near the Wi-Fi router (or access point) you want to connect
to.Wait until ledturns green.
Connect to the repeater using smartphone or PC through Wi-Fi network or Ethernet cable
(not supplied in the delivery package):
Through Wi-Fi network: connect PC (smartphone) to a Wi-Fi network of the repeater —
RR-WiFi-XXXX (where XXXX — the last 4 characters of SSID, specified on the label on
the device case top panel);
Through Ethernet cable: connect LAN port of the repeater to LAN port of your PC using
Ethernet cable (not supplied in the delivery package).
Open a web browser and type the device address into URL bar—http://rr.loc/orhttp://
192.168.0.1.
Enter username and password into the authorization window. Default username and
password are adminandpasswordcorrespondingly. Click "Log in".
Go to the "Wi-Fi"> "Extended Network" page. Set the required network name (SSID), security
mode, password, channel and channel bandwidth for an extended 5 GHz and 2.4 GHz
network. Click "Apply".
In case of connection via Wi-Fi, reconnect to the repeater using the extended Wi-Fi network
parameters configured in step 5. In case of connection using Ethernet cable, please skip this
step.
By default, the repeater copies the name and Wi-Fi settings of the network to which it will
be connected in both ranges: 5 GHz and 2.4 GHz. If necessary, you can change the
networkname at the lastwizard step. It is also available to change the name and
settings later via web interface.
EasyMesh network configuration via web interface is not available in firmware version
1.5.0. When connecting a repeater to an EasyMesh network via web interface, its IP
address will not be displayed in the EasyMesh topology, but it will be displayed in the list
of DHCP clients.
It is necessary to connect using WPS orEthernet.

7.
8.
9.
1.
2.
3.
4.
Update the device web interface page in the browser. The "Wi-Fi"> "Extended Network" page
with updated parameters will be loaded.
Go to the "Network" page. In the network settings, set "Attain IP Address Automatically".
Click "Apply".
Connect the LAN port of the repeater via an Ethernet cable to the LAN port of your router.
When the repeater is connected to the Internet, its indicator will turn green.
3.3.2 Connecting RR-11 to a network with ELTEX router
3.3.2.1 EasyMesh agent mode
When using the RR-11 repeater together with the router (with firmware version that supports
EasyMesh) it is possible to operate in EasyMesh agent mode.
3.3.2.2 Connecting to EasyMesh network using WPS button
Plug RR-11 into the power socket nearEasyMesh controller (router).Wait until ledturns
green.
Ensure thatEasyMesh controller mode is enabled on the router.Press WPS button on the
router.
Press and hold WPS button on RR-11 untill indicator starts flashing. When the repeater is
connected to the Internet, indicator will turn green.
The router web interface will display changes in the EasyMesh network topology:
5. Now it is available to change agent name in the repeater web interface:
You have 2 minutes after pressing WPS button on the router to press WPS on
RR-11 for a successful connection.

1.
2.
3.3.2.3 Connecting to EasyMesh network throung Ethernet
Plug RR-11 into the power socket near the Wi-Fi router (or access point) you want to connect
to.Wait until ledturns green.
Ensure thatEasyMesh controller mode is enabled on the router. Connect LAN port of the
repeater to a free LAN port of your router throughan Ethernet cable (not supplied in the
delivery package).
3. When RR-11 is connected to EasyMesh network, indicator will turn green.
4.The router web interface will display changes in the EasyMesh network topology.
5. In the RR-11 web interface, the EasyMesh tab will allow you to change the agent name.
Once RR-11 has been successfully connected to the router, you can disconnect the Ethernet cable.
The device in auto-detection mode will connect via the 5GHz Wi-Fi wireless connection.
In EasyMesh agent mode the repeater will copy the name and Wi-Fi network parameters
from the EasyMesh controller for the 5 GHz and 2.4 GHz bands separately. In the
EasyMesh network, theparameters that are changed on the controller, are synchronized
between the controller and the agent.
Please note that the web interface will be automatically changed in EasyMesh agent
mode. It will not beavailable to changeWi-Fi parameters on the repeater. All changes in
Wi-Fiparameters should be made on the EasyMesh controller.
By default, the EasyMesh network interface on the RR-11 is set to auto-detection.
Upon getting access to RR-11 web interface,it will be possible to manually configure the
interface for connecting to EasyMesh network.

•
•
4 Device management using web interface
4.1 Getting started
1.To start, you need to connect the device using LAN or Wi-Fi interface:
Wireless connection (Wi-Fi):
Connect your PC, phone or tablet to the device Wi-Fi network(RR-WiFi-XXXX, whereXXXX —
the last 4 characters of RR-11 MAC address);
Wired connection (LAN):
Connect your PC to the device using an Ethernet cable.
2. Open a web browser, enter the device address into theaddress bar of the browser.
If the device is successfully detected, a web interface login page will be displayed in the browser
window asking for a username (login) and password.
Web interface authorization page
3.Enter login and password.
4. Click "Log in". The "Wizard" page will be displayed in the browser window.
Factory device address:http://rr.loc/ , IP address: 192.168.0.1,subnet mask:
255.255.255.0.
If you are connected to a Wi-Fi network with an already configured repeater, make sure
that you are connected to the repeater and not to the access point (router), otherwise it
will not be available to get access tohttp://rr.loc.
Factory default: login – admin, password – password.
If the device was already configured, the "Status" page will open. The "Wizard" page is
only available on a device with factory default settings.
Table of contents
Other ELTEX Network Hardware manuals
Popular Network Hardware manuals by other brands

LG
LG N2R1D - NAS Server User guide and instruction manual

Pioneer
Pioneer DRM-6NX operating instructions

B&B Electronics
B&B Electronics Parallel & Serial Port Checker PPC user manual

Telco
Telco T-Marc 3306 installation guide

Aaeon
Aaeon FWS-2150 user manual

Cisco
Cisco GS7000 Installation and operation guide