emaux 8686 User manual

EMAUX WATER TECHNOLOGY CO., LTD
STRIVE FOR CLEAR WATER
www.emauxgroup.com
USER MANUAL
pH/Temperature Meter
Operation Manual
EMSW22021201
Model: 8686

USER FRIENDLY AND EASY TO CALIBRATE
TABLE OF
CONTENT
PAGE
2
....
....
1 Product Overview
1.1 Feature
1.2 Material Supplied
2 Power Supply
3 LCD Display & Keypad
4 Operation
5 Auto Power off
(sleep function)
6 AUTOMATIC TEMPERATURE
COMPENSATION (ATC) &
TEMP. UNIT SETTING
7 CALIBRATION MODE(CAL)
8 MAINTENANCE
9 TROUBLESHOOTING
10 SPECIFICATION
11 TERMS OF THE WARRANTY
....
pH/Temperature Meter
P1 CONTENT
3
4
5
....
....
6
....
7
....
8
....
9
P10

P2 Product over view
1. Product overview
Congratulations on your purchase of this pen type pH
meter. Please read the manual completely before using
this meter. Filing and keeping the manual for future
reference. Recommended to soak the electrode for at
least 30 min. before using to clear up the lazy effect or
to make the electrode wet if the pH electrode dries out.
1.1 Features:
- IP65 Waterproof housing.
- Dual display with ATC
- Data hold to freeze readings. Pen size, easy to fit in
pocket. Low battery indicator.
- Auto power off.
- C/F unit switchable.
- Power by 4pcs LR44 batteries.
- Multi points calibration.
- One touch only for calibration.
1.2 Material Supplied
This package contains:
- The meter x 1
- LR44 button battery x 4
- Operation manual
- Color box or plain box
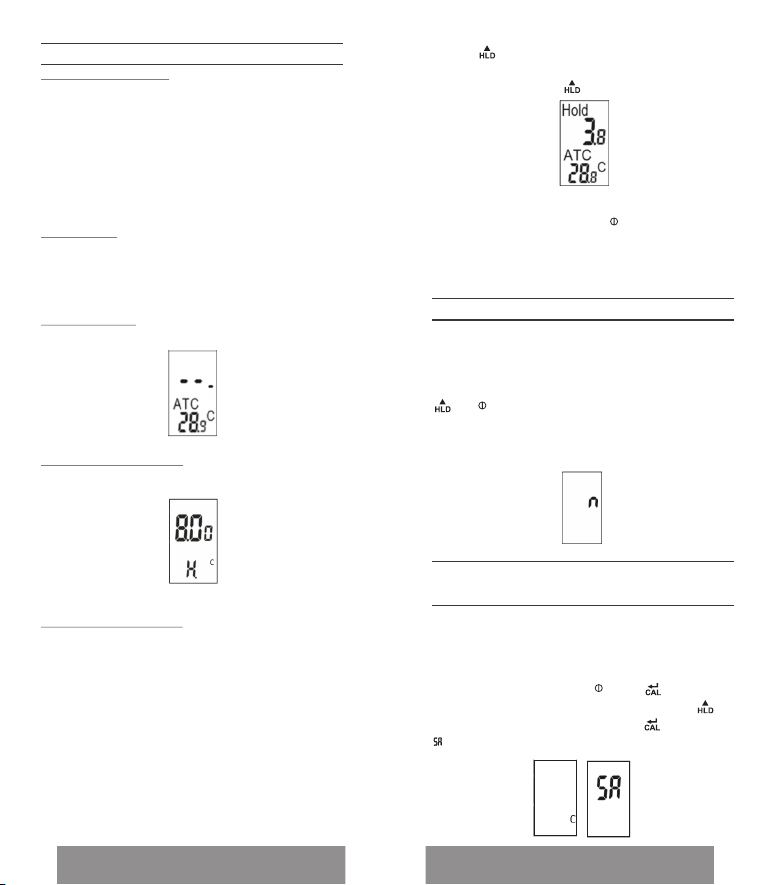
2. Power Supply
The meter is powered by 4 pcs LR44 batteries. To check
the battery when:
1. First time use
2. The battery symbol appears on LCD
3. The meter cannot power on
To install the batteries:
1. Turn off the meter.
2. Loose the battery cover in counter-clockwise
direction. (DON'T discard the black washer!)
3 Replace the old batteries
with four new button cells
LR44.
4. Make sure the batteries are
in place and the polarity is
correct.
.
P9 TERMS OF THE WARRANTY
11. TERMS OF THE WARRANTY
As original purchaser of this equipment have
purchased from Emaux Water Technology Co Ltd,
through Authorized International Distributor or
Dealer, warrants its products free from defects in
materials and workmanship under normal use
during warranty period. The warranty period begins
on the day of purchase and extends only to the
original purchaser. It is not transferable to anyone
who subsequently purchases the product from you.
It excludes all expendable parts.
During the warranty period, Emaux authorized
reseller will repair or replace defective parts with
new parts or, at the option of Emaux, serviceable
used parts that are equivalent or superior to new
parts in performance.
This Limited Warranty extends only to products
purchased from Emaux authorized reseller. This
Limited Warranty does not extend to any product
that has been damaged or rendered defective
(a) as a result of accident, misuse or abuse;
(b) as a result of an act of God;
(c) by operation outside the usage parameters
stated herein;
(d) by the use of parts not manufactured or sold by
Emaux;
(e) by modification of the product;
(f) as a result of war or terrorist attack ; or
(g) as a result of ser vice by anyone other than Emaux
authorized reseller or authorized agent.
E XCE P T A S E X P R E S S LY SET F O R T H I N T H I S
W A R R A N T Y , E M A U X M A K E S N O O T H E R
WARRANTIES EXPRESSED OR IMPLIED, INCLUDING
ANY IMPLIED WARRANTIES OR MERCHANTABILITY
AND FITNESS FOR A PARTICULAR
PURPOSE. EMAUX E XPRESSLY DISC L AI MS ALL
WARR A N T IES NOT STATED IN TH I S L I M ITED
WARRANTY. ANY IMPLIED WARRANTIES THAT MAY
BE IMPOSED BY LAW ARE LIMITED TO THE TERMS OF
THIS EXPRESS LIMITED WARRANTY.

P3 LCD Display & Keypad
NOTE:
1. Please re-calibrate the meters after changing batteries.
2. Remove battery from instruments that you do not plan
to use for a month or more. Do not leave battery in
instrument.
5. Put back the battery cover & washer and turn it tightly
in clockwise direction.
3. LCD Display & Keypad
- The 1st display shows the measured pH reading.
- The 2nd display shows the temp.
- Cal=Calibration mode
- ATC=Auto Temp. Compensation
- Hold=Data hold
4. Operation
1. Remove the probe cover from meter to expose the
electrode out. For 8686, it is normal if you find white
crystals are present on the cap or electrode assembly.
WARNING:
For pH meters, please always make the sponge wet to
keep the electrode in a good storage condition.
Electrode
Remove the cover
from the bottom
of meter to expose
the electrode.
2. Dip the electrode into the test solution. Press " to
power on the meter and stir it to get a stable reading.
3. A small dot " " is flashing while the meter is in
measurement mode. The LCD not only shows the
measured pH value but also displays the temperature.
"
P8 SPECIFICATION
10. SPECIFICATION
Accuracy ±
0.05pH
Calibration Point
4.7 or 10
Power Saving
Auto Power Off
Measurement
range
0.00-14.00
Temp. Accuracy
± 0.5 C
Temp. Resolution
0.1 C/ F
Resolution
0.01pH
Hold Data
√
Unit
C/ F
ATC
0~50 C
Self-Calibration
√
Waterproof
IP65
Size
165mm(L)x35m
m(W)x32mm(T)
o o o
Operating Temp.: 0 ~50 C (32~122 F)
Operating Humidity: 0~80% RH pH
calibration buffer suggested:
Standard USA buffers
Standard NIST buffers
Standard DIN buffers
Battery Life: >80 hrs continuous use
-
-
-

P7 TROUBLESHOOTING
pH value fluctuates quickly
It is normal when the electrode is not immersed in the
water but exposed in air.
9. TROUBLESHOOTING
Power on but no display
1) Make sure the time of pressing power key is more
than 1 second.
2) Check the battery are in place and make good
contact and correct polarity.
3) Replace with new batteries and try again.
4) Move away the batteries for one minute and then
put back again.
Slow response
Clean probe by immersing the electrode in tap water
for 10-15 minutes, then rinse thoroughly with distilled
water or use a general-purpose electrode cleaner.
LCD display “- - -”
Out of pH range, too acidic/or too alkaline.
“H." Or "L." ( For pH meter)
Out of temp. range, too cold/or too hot.
P4 Auto Power off (sleep function)
4. Press " to freeze current readings. The text "Hold"
will appear on the LCD and the small dot (8684/85/86)
will not flash. Press " " again to release the hold
mode.
"
5. Turn off the meter by pressing
6. Once finishing the measurement, clean the electrode,
put back the cap, store the meter under the 0~50 C.
7. Please see page 7 for the calibration procedures.
" " button.
5. Auto Power off (sleep function)
This meter will shut off automatically 20 minutes of
inactivity. For operating longer time, you can disable the
sleep mode.
To disable the auto power off: Before power on, pressing
" " + " " keys simultaneously until a "n" appeared on
the screen and then release keys to return to normal
mode.
NOTE: The disable sleep mode will be invalid after
every power off.
6. AUTOMATIC TEMPERATURE COMPENSATION
(ATC) & TEMP. UNIT SETTING
The meters are capable of measuring with Automatic
Temperature Compensation. “ATC” will show in the middle
of the LCD.
o
To select the temp. unit ( C or F), turn off the meter first.
When the meter is off, press " " and " " at the same
time until the C or F appears on the LCD. Press " " to
select the preferred unit and then press " " to save.
“ " will appear on the LCD for one sec and then go back
to normal.
o

P5 CALIBRATION MODE(CAL)
Calibration is necessary and should be done regularly,
recommended everyday if the meter is used often. The
unique calibration design of the meter features
automatic buffer recognition to avoid errors.
1. Power on the meter.
2. Place the electrode into a buffer solution (4,7or10),
pH7 should be calibrated first and then 4 or 10 pH for
better accuracy.
7. CALIBRATION MODE(CAL)
3. Press ” ” or " CAL " to enter pH calibration mode.
The text "CAL" will appear on the LCD for one second
and then pH value (4,7 or 10) will be displayed on the
LCD.
4. If probe or buffer is in error:
If the buffer is incorrectly inserted or the probe is
damaged or the probe cannot detect buffer in below
voltage range, the meter will escape calibration
mode automatically after 10 seconds. Text "En" or
"End" will appear on the LCD in one second and then
will go back to normal status.
Acceptable voltage range of each point:
PH 4.00 : 97mV…250mV
PH 7.00 : -60mV…60mV
PH10.00 : - 250mV…-97mV
5. If the probe recognizes the buffer:
If the probe successfully recognizes the buffer, the
buffer pH value (4 or 7 or 10) will appear on the
display in 2 seconds.
If the calibration buffer is not 4,7,10 but another
value, such as 4.01, just press “ ” to change the
value.
P6 MAINTENANCE
6. The adjustable cal. point range for 4.0 pH is from 3.50
to 4.50. For 7.0 pH is from 6.50 to 7.50. For 10.0 pH is
from 9.50 to 10.50
8. Rinse the probe with de-ionized water or a rinse
solution (tap water...) after each measurement to last
the meter's life.
9. Repeat above steps until the 3 point calibration are
finished.
7. To save the calibration value:
When the electrode reads a stable value and user
stops pressing any keys, the meter will automatically
save the value and then escape the calibration mode.
8. MAINTENANCE
- Please always keep the pH glass bulb wet by using the
cap to protect and store the electrode.
- Always rinse the pH electrode in de-ionized water or
rinse solution (tap water…? before next use.
- Never touch or rub glass bulb in order to last pH
electrode life.
- Make sure the electrode is clean. Between
measurements, rinse the electrode with deionized
water. If the electrode has been exposed to a solvent
immiscible with water, clean it with a solvent miscible
with water e.g. ethanol or acetone and rinse carefully
with water.
- Store the electrode carefully.
Table of contents
Other emaux Measuring Instrument manuals
Popular Measuring Instrument manuals by other brands

UEi
UEi C165 instruction manual

CCi
CCi RailFly Mark I user guide

Hanna Instruments
Hanna Instruments HI99111 instruction manual

Siemens
Siemens FIDAMAT 6 operating instructions

Mirion Technologies
Mirion Technologies RDS-31 S user manual

Swan Analytical Instruments
Swan Analytical Instruments AMU Inducon Operator's manual