embrace TALK User manual
User’s Manual
Manual De Usuario

Blood Glucose Monitoring System
1
Dear Embrace TALK Owner
Thank you for choosing the Embrace TALK Blood Glucose Monitor
to help you manage your diabetes. We designed the Embrace TALK
Blood Glucose Monitor to be accurate and easy to use. The added
convenience of the bi-lingual talking feature can be used as a verbal
aid for using the monitor. This manual contains all of the information
needed to use and maintain your new blood glucose monitor. Please
read it carefully before use.
Your Embrace TALK Blood Glucose Monitor provides an easy and
precise way to measure blood glucose using fresh capillary whole
blood taken from ngertips, palm, or forearm. The added convenience
of auto-coding can help reduce the chance of inaccurate readings
caused by incorrect coding of the monitor. Testing is done outside the
body (in vitro diagnostic use). The test results are plasma-calibrated
for easy comparison to lab results. The Embrace TALK Blood Glucose
Monitor is a portable battery operated monitor intended for use as
an aid by persons with diabetes and by health care professionals to
monitor glucose concentration in whole blood.
If you have questions or simply need more information, please
call Omnis Health at 1-877-979-5454 or visit our web site at www.
embracetalk.com. Again thank you for choosing the Embrace TALK
Blood Glucose Monitor.

Blood Glucose Monitoring System
2
Table of Contents
Understanding Your New Blood Glucose Monitor ........................1
The Embrace TALK Monitor .............................................................5
The Embrace TALK Blood Glucose Test Strip ..................................7
Monitor Display Screen ....................................................................8
Setting Up Your New System
The Set Up Screen .........................................................................10
Setting the Clock ............................................................................11
Setting the Alarm ............................................................................14
Talking and Horn Function..............................................................16
Talking Function Table...................................................................19
Control Solution Testing................................................................24
Performing a Control Solution Test.................................................25
Control Solution Trouble Shooting..................................................28
Testing Your Blood Glucose..........................................................29
Preparing Your Lancing Device ......................................................30
Performing a Blood Glucose Test ...................................................31
Important Information on Alternate Site Testing (AST) ...................34

Blood Glucose Monitoring System
3
Understanding Your Blood Glucose Test Results.......................36
Viewing Stored Readings and 7, 14, 30 Days Average ...............39
Caring For The Monitor
Changing the Battery......................................................................41
Cleaning the Monitor ......................................................................43
Storage and Precautions ................................................................43
Solving Problems ...........................................................................44
Product Warranty ...........................................................................47
Specications .................................................................................47
Blood Glucose Monitoring System
4
Understanding Your New Blood Glucose Monitor
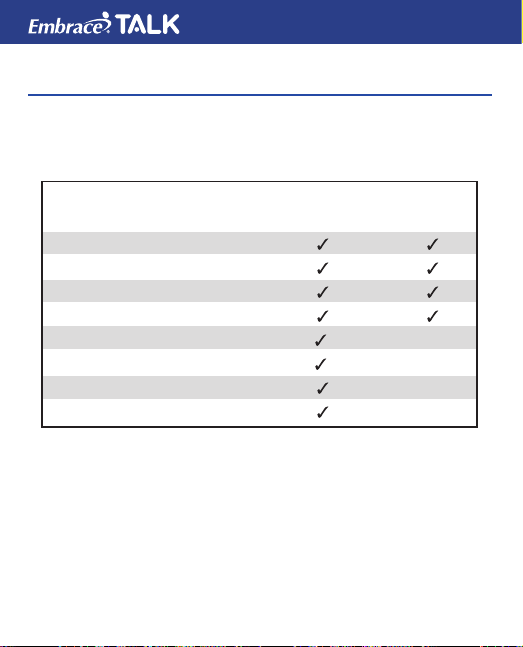
Embrace TALK Blood Glucose Monitor may be sold individually or as
part of a complete Monitoring System (starter kit). Package contents
are described in the table below.
CONTENTS PACKAGE CONFIGURATION
Monitoring System Monitor
Embrace TALK Monitor
Instruction Manual
Carrying Case
Log Book
Lancing Device With Clear Cap
Test Strips
Lancets
Glucose Control Solution
Blood Glucose Monitoring System
5
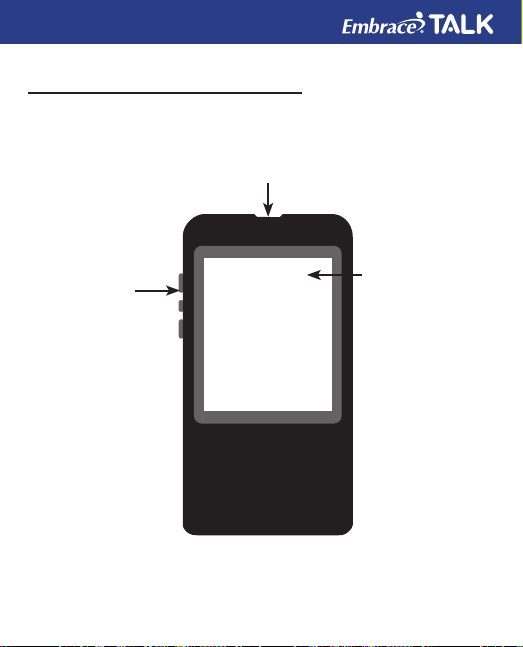
Front of the Embrace TALK Monitor
Monitor Buttons
Press and hold the
middle button located
on the left side of the
monitor to turn off
and on. Press and
release middle button
for monitor option
screen. (See page
10)
Control Solution Test
(see page 24).
Monitor Display
Show your blood
glucose test results,
memory values,
averages, language
selection, data
port connection,
and alarm times.
(See page 8)
Test Strip Port
Insert test strip to turn
on the Monitor.
Blood Glucose Monitoring System
6
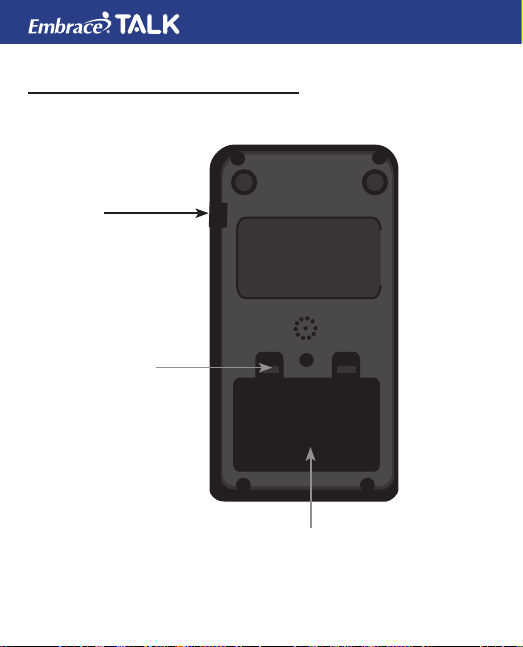
Back of the Embrace TALK Monitor
Data Port
This function is not yet
available.
Battery Compartment
Holds two AAA batteries
battery cover.
BATTERY COVER
TABS USED
FOR REMOVING
BATTERY COVER.
Blood Glucose Monitoring System
7
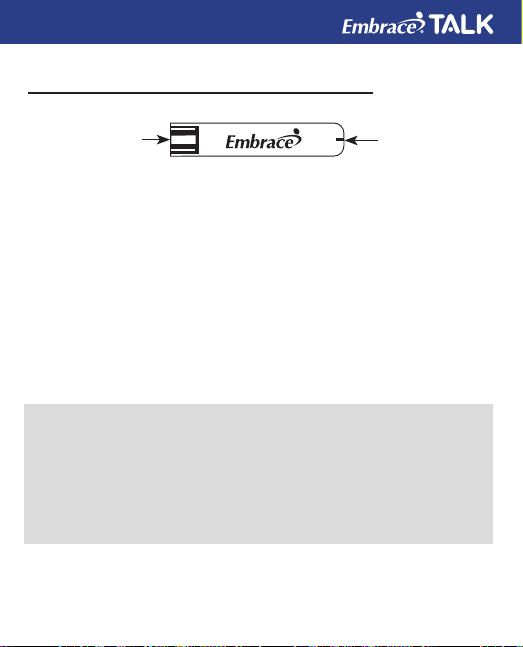
The Embrace TALK Blood Glucose Test Strip
The Embrace TALK are glucose specic, biosensor-based test strips
that requires very little blood sample to quickly test glucose in fresh
capillary whole blood. The test results are plasma-calibrated for an
easy comparison to lab results, but may be 10 to 15% higher than
results obtained from whole blood referenced blood glucose analysis.
The test strip is also equipped with under-ll detection to alert you
when there is not enough blood to perform a test, so you can be
assured that each reading you get is an accurate and meaningful
result.
IMPORTANT:
• Immediately close the vial cap of the test strip bottle tightly after
each use. Keep the unused test strips in the original bottle. DO NOT
leave any test strips outside the bottle while not in use.
• DO NOT reuse test strips. Test strips are for single use only.
• Carefully discard used test strips and lancets in proper waste
containers.
Contact Points
Insert this end of
the test strip into the
top of the monitor.
Sampling End
Dip this end of the
strip into the blood
or control solution
drop.

Blood Glucose Monitoring System
8
Monitor Display Screen
HORN
MEM
TEMPERATURE
LANGUAGE
SELECTION
UNITS
BLOOD DROP
and ARROW
Display of the date, time,
am/pm of past and present
blooding readings. As well as
the day averages 7, 14, or 30
(see page 38).
CLOCK
ALARM
CTL
TEST STRIP
CABLE
BATTERY

Blood Glucose Monitoring System
9
CABLE............... Indicates the Monitor is in data transfer mode to
PC*. *This function is not available yet.
MEM .................. Blood glucose readings are stored (see page 38).
ALARM .............. To set Alarm or indicates Alarm has been set (see
page 14).
CTL.................... This icon indicates a control solution test (see page
24). To view the control solution test (see page 38).
BATTERY .......... Appears when batteries need to be changed (see
page 41).
HORN................ Beeps when voice is turned off. Set sound volume
(see page 16).
TEMPERATURE
.. Appears when it is either too hot or too cold to test
(outside the ranges of 50°F~104°F).
CLOCK .............. Indicates the Monitor is ready to set up the year,
date and time (see page 11).
UNITS................ Unit of measurement for your blood glucose is mg/
dL.
TEST STRIP...... Flashes to prompt you to insert a test strip for
testing.
BLOOD DROP and ARROW
........................... Indicates the Monitor is ready for testing.
LANGUAGE SELECTION
........................... Indicates the language selection (see page 17).
Blood Glucose Monitoring System
10
Setting Up Your New Monitor
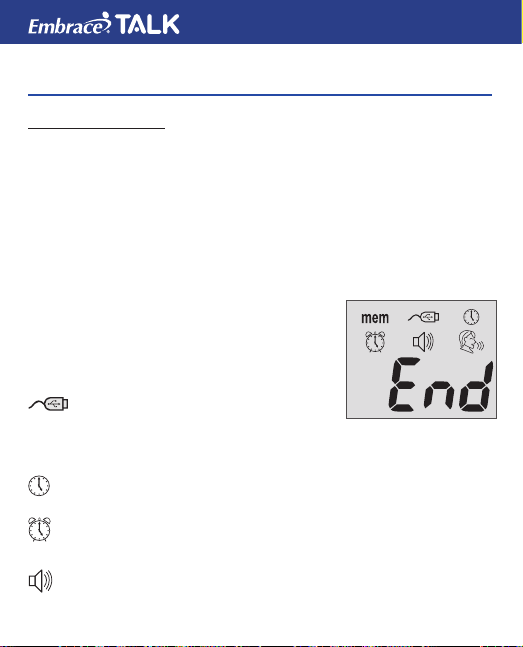
The Setup Screen
The Setup Screen of the Embrace TALK Monitor allows you take
advantage of the advance functions of this Monitor. Simply press
and release the middle button for setup screen. Use the ▲▼ buttons
to navigate to the desired function icon. When the icon is ashing
press and release middle button to enter that function. Use the up
or down arrows for the desired setting then press and release the
middle button to set . To exit use the up or down button to navigate to
the END of Function mode press and release the middle button. The
monitor will announce each function when the
voice feature is on.
MEM .................. Stored blood and control
solution test (see page 38).
CABLE............... Press the buttons to enter PC
Link Mode for data transfer to
PC*
*This function is not available yet.
CLOCK: ............. For setting the year, date & time (see page 11).
ALARM CLOCK
.. For setting up the Alarms (see page 14). The
monitor has 3 alarm settings (see page 14).
HORN:............... Set sound volume or turn off the voice feature. Setup
(see page 16).
mem
Blood Glucose Monitoring System
11
LANGUAGE SELECTION
........................... Press the buttons to enter Language Selection (see
page17).
End .................... Exit Setup Screen and return to testing screen.
Setting the Clock
You will need:
Your Embrace TALK Monitor
NOTE:
If the date and time on the Embrace TALK Monitor has not been set,
test or control result will not be stored in memory.
Step 1:
Press and hold the middle button to turn on
the monitor.
Step 2:
Press and release middle button for setup screen and then press and
release the up or down buttons until the clock (3rd icon on the top
row)is ashing. When the clock icon is ashing press and release the
middle button to enter the clock setup function. If the talking feature is
on the monitor will say “set date and time”.
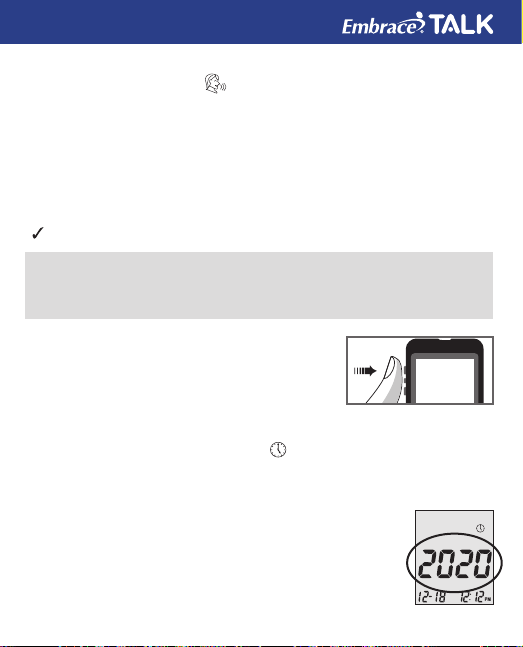
Step 3: Set Year.
If the talking feature is on, the monitor will say, “Set Year.”
Press the up or down button until the desired year is
reached and then press and release the middle button.
Blood Glucose Monitoring System
12
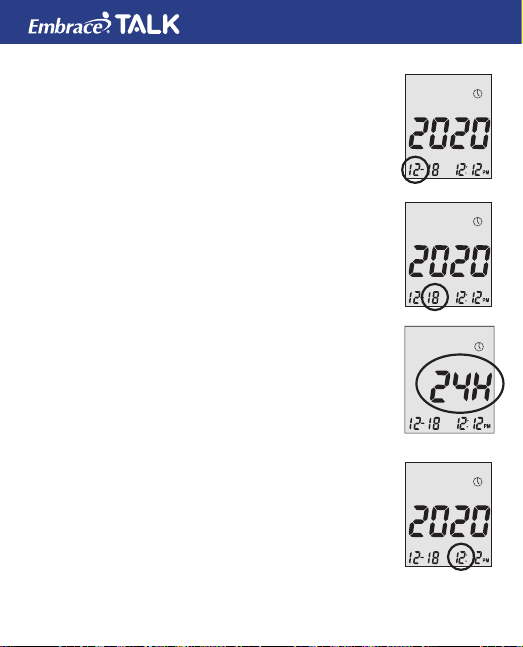
Step 4: Set Month:
The current month will ash. If the talking feature is
on, the monitor will say, “Set Month.” Press the up or
down button to reach the desired month. Once the
desired month is reach press and release the middle
button.
Step 5: Set Day:
The current date will ash. If the talking feature is on
the monitor will say “Set Day”. Press and release the
up or down button to reach the desired day. When the
desired day is reached press and release the middle
button.
Step 6: Set Time Format to 12-hours or 24-hours:
The current time format will ash. If the talking feature
is on, the monitor will say “Set 12 hour/Set 24-hour.
When the desired format is reached press and release
the middle button.(12 hour is standard time/24 hour is
military time).
Step 7: Set Hour:
The current hour will ash. If the talking feature is
on, the monitor will say, “Set Hour.” Press the up or
bottom button to reach the correct hour.
(AM or PM will be determine by the HOUR)
By pressing & releasing the up or down buttons and

Blood Glucose Monitoring System
13
passing the 12 this will change (AM to PM) or (PM to
AM). When the desired hour and AM or PM is reached
press and release the middle button to set the correct
hour and if it’s AM or PM.
Step 8: Set Minutes:
The current minutes will ash. If the talking feature
is on, the Monitor will say, “Set Minutes”. Press and
release the top or bottom button to the desired minute.
Press and release middle button to set the minutes.
• Anytime during set up, inserting a Embrace TALK
Test Strip will begin testing. Any changes made so
far will be stored.
• You may need to reset the Year, Date and Time after changing the
batteries.
After date and time have been set, the monitor will announce the
year, date and time if the talking feature is on. Begin testing by
inserting an Embrace TALK Blood Glucose Test Strip (see page 29,
Testing Your Blood Glucose), or press and hold the middle button
to turn off the monitor, or see the next section on how to set up the
alarm feature on your monitor.
Blood Glucose Monitoring System
14
Setting the Alarms
You can set up to three alarms on the Embrace TALK Monitor. You
must set the clock before you can set the alarms. When an alarm
sounds, the Monitor will turn on, and a melody will sound for 30
seconds. Pressing the middle button or inserting a test strip will
silence the alarm. You can set up one or all three alarms.
You will need:
Embrace TALK Monitor
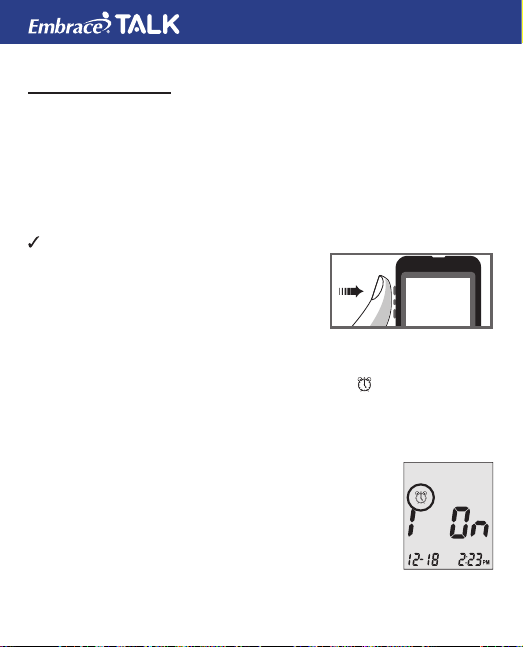
Step 1:
Press and hold the middle button to turn on
the monitor.
Step 2:
Press and release the middle button to enter the set up screen. Then
press and release the up or down button until the on the second
row starts to ash. If the talking feature is on, the monitor will say,
“Set Alarm.” Press and release the middle button to enter the alarm
setting.
Step 3:
The display screen will indicate alarm 1 ON or OFF.
If the alarm is OFF and the voice feature is on the
monitor will say “Set Alarm 1” Press and release the
top button to turn the alarm on. The monitor will now
show 1 ON. Press and release the middle button to
set alarm 1. Press and release the up or down button
to desired HOUR.
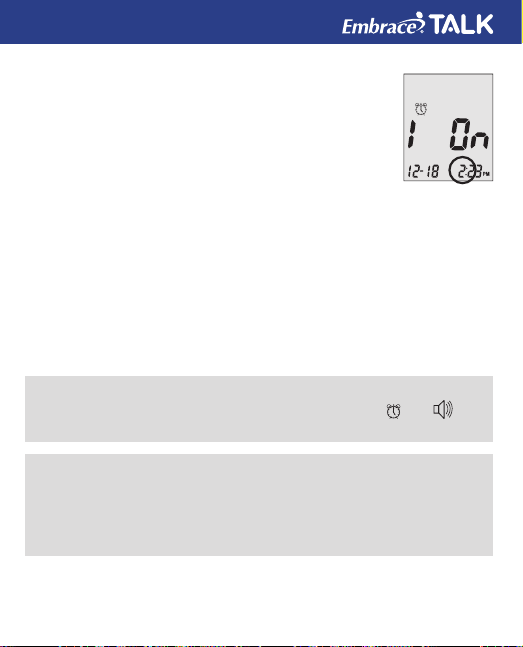
Blood Glucose Monitoring System
15
(AM or PM) will be determined by setting the hour. By
pressing and releasing the top or bottom and passing
the 12 will change (AM to PM) or (PM to AM).
Press and release the middle button to set the
hour. The minutes will begin ashing. Press and
release the top or bottom button to desired minute.
Press and release the middle button to set the minute.
Repeat step 3 to Set Alarms 2 and 3.
Step 4:
You may set 1 alarm or all 3 alarms. If you choose to only set one
alarm and have completed that desired alarm press and release the
middle button until you have exited the alarm set up screen.
If you choose to set all 3 alarms and the desired alarm times have
been set press and release the middle button to exit the alarm set up
screen.
NOTE:
• When the alarm or alarms have been set the icons ( and )
should be displayed on the display screen of the monitor.
NOTE:
• Alarm will not sound during testing.
• Alarm will follow the time format (12-hour or 24-hour) you choose
when setting the clock.
• Alarm will not be erased when changing the batteries.

Blood Glucose Monitoring System
16
Begin testing by inserting an Embrace TALK Blood Glucose Test Strip
(see page 29, Testing Your Blood Glucose) or press and hold the
middle button to turn off the monitor, or see the next section on how to
turn on or off the talking feature on your monitor.
Talking and Horn Function
Your Monitor has a Language Feature Option for English or Bilingual
which can be used as a verbal aid for using the Monitor or hearing
test results. The default Language is English which can be changed to
Bilingual if desired. If the speaking feature is turned off the monitor will
beep instead of speak.
You will need:
Your Embrace TALK Monitor
Setting The Volume
Step 1:
Press and hold the middle button to turn on the monitor.
Step 2:
Press and release the middle button.
Step 3:
Press and release the top button until the
starts to ash. Press and release the middle
button to enter volume setting.

Blood Glucose Monitoring System
17
Press and release the top or bottom button to turn UP
or DOWN the volume. (1 being lowest volume and
5 being loudest volume) Once the desired volume is
reached press and release the middle button to set the
desired volume.
To turn off the voice press and release the bottom
button until 0 appears. Press and release the middle
button to set VOICE FEATURE OFF. The monitor will now beep
instead of speaking. To turn the voice feature on if turned off follow
steps 1-3.
Language Selection
Step 1:
Press and hold the middle button to turn on
the monitor.
Step 2:
Press and release the middle button to enter set up screen. Press
and release the bottom button until the language icon is ashing.
If the voice feature is on the monitor will say “Language Selection”.
Press and release the middle button to enter the Language Selection
Option.
Step 3:
The default language ENGLISH is announced (graph).
To change the Language from the default (English) to
another Language. Press and release the top button.
The monitor will announce the Language change and
the number 1 (English) will change to the number

Blood Glucose Monitoring System
18
2, and will announce that Language. Once the desired Language
has been selected press and release the middle button to set that
Language and exit the Language Selection Option.
NOTE:
• Anytime during set up you can insert an Embrace TALK Test Strip
and begin testing. Any changes made so far are stored.
• Your choice of language and volume settings will not be erased
when changing batteries.
Begin testing by inserting an Embrace TALK Blood Glucose Test Strip
(see page 29, Testing Your Blood Glucose) or press and hold the
middle button to turn off the monitor.

Blood Glucose Monitoring System
19
Talking Function Table
The talking function can be used as an aid for you to hear the test
results and use of the monitor. The following table lists WHEN the
monitor will speak and WHAT the monitor will say. Testing Blood and
Control Solutions (see page 24, Control Solution Testing, and page
29, Testing Your Blood Glucose).
WHEN the Monitor will speak...
Turned on
Prompt user to insert test strip
Test strip is inserted and
the Monitor is ready to test (with
ashing arrow and blood drop)
Blood Glucose test is completed
and the result is shown on screen
Blood Glucose test result is
ABOVE the measurement range
of 600 mg/dL
Blood Glucose test result is
BELOW the measurement range
of 20 mg/dL
WHAT the Monitor will say...
Greeting Tone
“Please insert test strip”
“Blood glucose test. Please
apply blood onto the test strip”
“Your blood glucose reading
is (number) milligram (mg) per
deciliter”(dL).
“Your blood glucose reading is
above 600mg/dL”.
“Your blood glucose reading is
below 20mg/dL”.
Table of contents
Other embrace Blood Glucose Meter manuals


