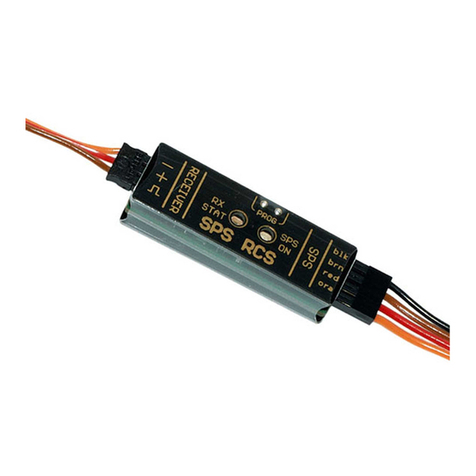
Emcotec DPSI Ampere User manual


DPSI Ampere Operating Instructions Version 1.0
Page 2 of 28

DPSI Ampere Operating Instructions Version 1.0
Page 3 of 28
Contents
1. Preface .............................................................................................4
2. Safety Instructions..........................................................................5
3. Connection Scheme of DPSI Ampere ...........................................6
4. Characteristics ................................................................................8
4.1. CSHC Circuitry ......................................................................10
4.2. IVM (Intelligent Voltage Monitoring).......................................10
4.3. MBOOST...............................................................................11
5. Packing Contents..........................................................................11
6. Connecting the Batteries..............................................................12
7. Selecting the Batteries .................................................................12
8. Charging the Batteries..................................................................13
9. Programming the Battery Types..................................................14
10. Operating .....................................................................................17
11. Error Indications .........................................................................19
12. Connecting an external Switch Actuator..................................21
12.1. Switch Actuator by Pin.........................................................22
12.2. Tank Cap Switch Actuator...................................................24
12.3. Magnetically Switch Actuator...............................................25
13. Technical Data of DPSI Ampere.................................................26
14. Warranty.......................................................................................27
15. Conformity Declaration ..............................................................28
16. Disposal of Devices ....................................................................28
17. Legal information........................................................................28

DPSI Ampere Operating Instructions Version 1.0
Page 4 of 28
1. Preface
With the EMCOTEC DPSI Ampere you purchased a high grade,
modern and secure product. We appreciate your trust and assure you
that you made the right choice!
More than 25 years of experience in development and manufacturing
of electronically systems as well as the knowledge of the world’s best
model airplane pilots has influenced the development of the DPSI
systems. All products are manufactured at EMCOTEC GmbH in
Germany on our own production line. Extensive optically and
electronically end tests for every system, which leaves our house,
assure that you, our customer acquire an absolute reliable product,
which considerably increases the reliability of your valuable RC-Model.
Of course, the products of the DPSI-Family not only have been tested
extensively in the laboratory, but also went through intensive flight-
testing. Like done in the automobile industry an FMEA (Failure Mode
and Effect Analysis) reduce the possibility of damage and malfunction
on operating errors to a minimum.
We kindly ask you to read these operating instructions carefully and to
observe the installation hints. Thus, errors can be avoided in advance.
We are all ears for your wishes and questions. Challenge us!
Wehringen, August 2012
The Staff of EMCOTEC GmbH

DPSI Ampere Operating Instructions Version 1.0
Page 5 of 28
2. Safety Instructions
In general, all connecting lines should be run so that they do not
come into contact with moving or hot parts of the model (such as
servos, gears or mufflers).
High current carrying cables of electrically drives must keep a
distance of at least 3cm (1.2") to the DPSI Ampere.
The DPSI must be protected from humidity and moisture.
The DPSI must be located at a sufficient distance from
neighboring surfaces to enable good heat dissipation of the
cooling element.
Improper handling of the DPSI can result in serious damage/injury
to property or persons!
Carry out a general inspection of all connections in your model
before each use! All plugs must be correctly polarized and have
clean contacts (i.e. fit tightly). Loose cables present a potential
hazard!
Under no circumstances may power sources that do not meet the
specified voltages be used.
The current-conducting contacts of the connector plugs may not
be short-circuited. If you fail to observe this warning, the short-
circuited cables may overheat and even melt.
The DPSI may not be taken apart or technically altered under any
circumstances.
Never use the DPSI for purposes other than for RC model making
as a hobby. Above all, their use in passenger-carrying equipment
is strictly prohibited.
Operate the DPSI only with the remote control components
provided for model making.
Always ensure that you have fully charged batteries when
operating your model. Empty batteries inevitably lead to failure of
the RC components, which cause the model to crash.

DPSI Ampere Operating Instructions Version 1.0
Page 6 of 28
Do not expose the DPSI to any extremely hot or extremely cold
temperatures, moisture or humidity. This would lead to danger of
malfunction, damage or decreased efficiency.
Only use accessories approved by EMCOTEC with the DPSI (e.g.
Switch Actuators, external voltage indicators and so on).
3. Connection Scheme of DPSI Ampere

DPSI Ampere Operating Instructions Version 1.0
Page 7 of 28
Switching Magnet:
Hint:
The magnet is quite strong and therefore should not come in close distance to
magnetic data storage medium in order to avoid data loss.

DPSI Ampere Operating Instructions Version 1.0
Page 8 of 28
4. Characteristics
The DPSI Ampere is the most powerful dual current supply (battery
backer) for RC modeling worldwide. It can be utilized as dual current
supply for receiver sets, turbines or other consumers in RC models.
The DPSI Ampere contains integrated power switches and can switch
very high currents (up to 60 amps) and voltages (up to 3S LiPo)
because NO diodes are used for decoupling of the connected
batteries. System stability of the total system is ensured by connecting
two batteries. If one battery fails, safe operation is guarantied by the
second battery. Normally, both batteries are discharged symmetrically
and simultaneously (at the same time). Due to the parallel connected
batteries the current is split in half for each battery.
Hint:
Both connected batteries of the DPSI Ampere discharge symmetrically
(maintaining identical voltages).

DPSI Ampere Operating Instructions Version 1.0
Page 9 of 28
Powering on or off of the supply voltage is completely done
electronically by an external magnet, which is to be placed momentarily
onto the corresponding switching position on the devices housing.
Electrically switches are built in for each battery separately, i.e. the
electronics are doubled. The switches are fail proof and are controlled
by a self-locking circuitry (NOT by a microcontroller). This means, a
DPSI Ampere stays turned on, even if the microcontroller fails. The
logic for turning off is also doubled. Here too, a malfunctioning part can
not cause the current supply to turn off.
With the help of a DPSI Ampere a new dimension of safety is reached
for current supplies of RC models!
The DPSI Ampere in buzzwords:
Most powerful dual current supply worldwide with a peak load up to
60 amps
Operates with up to 3S LiPo batteries or up to 13.2 volts input voltage
Lossless switching function WITHOUT diodes
Separately built in integrated electronically fail-proof switches for
each battery without using the microcontroller (CSHC)
Dual safeguarded power off logic – even a failing part does not lead
to turn the output voltage off
An external switch actuator can be optionally connected (pin switch
actuator, tank cap switch actuator, magnetically switch actuator)
Battery switching function, i.e. a failing battery does not lead to a
failing output voltage
IVM (Intelligent Voltage Monitoring) battery voltage monitoring with
acoustically warning indications for different battery types (NiMH,
LiIon, LiPo, LiFePO4)
Booster for safe control of the power switches even at extremely low
voltages or short interruptions of the battery voltage (MBOOST)
Integrated charging connector for simultaneously charging of both
batteries using just one charging device

DPSI Ampere Operating Instructions Version 1.0
Page 10 of 28
Special grounding concept for interference free operation and highest
safety
High grade aluminum housing, which serves as heat sink at the same
time
Developed and produced by the market leader (Made in Germany)
4.1. CSHC Circuitry
CSHC Circuitry (Controllerless Self Holding Circuitry): turning on or off
is not done via microcontroller and therefore is even more safe. A
failing microcontroller does not cause the output voltage to fail.
Thanks to the elaborate CSHC switches the batteries need not to be
disconnected from the DPSI Ampere during long breaks (e.g. in winter
time). Self discharging of the batteries is much higher than the
quiescent current of the DPSI Ampere which actually is not
measurable.
4.2. IVM (Intelligent Voltage Monitoring)
An internal microcontroller monitors all voltages using an intelligent
algorism and indicates various errors using a buzzer (low voltage,
interrupts and voltage errors).
Furthermore, these errors are displayed by an indicator LED using
blink codes. In order to utilize different battery types, the DPSI Ampere
can be set up to the desired battery. By simple programming, one can
select between different battery types.
Hint:
At delivery, the DPSI Ampere is programmed to recognize 2-cell LiPo batteries.
If other battery types are desired, the corresponding battery type must be
programmed (see chapter 9)!

DPSI Ampere Operating Instructions Version 1.0
Page 11 of 28
4.3. MBOOST
A special circuitry (Booster) makes sure that the internal semi-
conductors are always supplied with the optimal voltage in order to
assure perfect switching. Therefore, the DPSI Ampere functions even
with very low voltages or voltage drops reliably and safely.
Here too, all parts of the circuitry are completely doubled and substitute
each other if one part fails.
Decoupling of both batteries and even the electronically switches is
completely (inclusive peripheral electronics) separately designed.
There are NO diodes used for decoupling of the batteries. Only this
makes these extremely high currents possible.
5. Packing Contents
Contents of Delivery of DPSI Ampere:
DPSI Ampere base device
Magnet (On/Off-switch actuator) with key ring
2 pieces spare magnets "just in case…"
Operating instructions
EMCOTEC 3D sticker
Hint:
The delivered spare magnets should be readily available at a free spot in the
model (fuselage) and at / in the transmitter housing to be able to turn the DPSI
Ampere on or off in case of loss of the original magnet!
Each DPSI Ampere is tested for its functions several times prior to
delivery!

DPSI Ampere Operating Instructions Version 1.0
Page 12 of 28
6. Connecting the Batteries
The DPSI Ampere is equipped with MPX compatible high current
connectors. Therefore, each battery with a MPX high current socket
fits. Of course, the EMCOTEC EMC connector system (100% MPX
compatible) is suitable, too. Observe correct polarity because the DPSI
Ampere is not protected against reverse polarity by design.
7. Selecting the Batteries
All battery types in the market (NiCd and NiMH) are suitable as well as
Lithium-Ion (LiIon), Lithium-Polymer (LiPo) or Lithium-Ferrum-
Phosphate (LiFePO4). Maximum input voltage must not exceed 13.2
volts. This means, the DPSI Ampere is suitable for 4-cell NiMH
(approx. 4.8 volts) as well as for a 3S LiPo battery (12.6 volts
maximum voltage).
Depending on the demanded current when selecting the batteries
make sure that the connecting cables are thick enough. For receiver
current supplies 0.5mm2up to 1.0 mm2suffice, for a turbine ECU
1.5mm2up to 3.0mm2 wire cross section are in order because the
current can be up to 30 amps.

DPSI Ampere Operating Instructions Version 1.0
Page 13 of 28
We recommend using EMCOTEC EMC Lithium Polymer batteries.
These are delivered readily wired and can be connected to the DPSI
Ampere right away.
Hint:
Always use two identical battery types (e.g. 2S LiPo with 2.2Ah capacity). Only
this guaranties for problem free charging via the built in charging connector of the
DPSI Ampere.
8. Charging the Batteries
The DPSI Ampere has its own charging connector (red color). When
connecting the charging cable (e.g. EMCOTEC part number A63025)
both batteries are connected in parallel automatically. This allows for
charging both batteries simultaneously using just one charging device.
When using Li++ batteries a balancer is to be connected to each
battery. Alternatively, an EMCOTEC LiProtector (part number A52070)
can be connected directly to the balancing connector of the battery
(and remain there). In this case no additional balancer is necessary.
Hint:
During recharging, the batteries are connected in parallel by the charging
connector. TWO LiPo batteries 2S1P become now ONE LiPo battery 2S2P.
Therefore, the charging current can be doubled – number of cells stays the same
(charging end voltage).
Hint:
Maximum charging current should not exceed 5A, even if the batteries
allow for higher charging currents!
Hint:
The batteries must be disconnected and charged separately if not to be charged
together via the charging connector of the DPSI Ampere.

DPSI Ampere Operating Instructions Version 1.0
Page 14 of 28
9. Programming the Battery Types
Because the DPSI Ampere works with intelligent battery voltage
monitoring, the connected battery type must be known to it (e.g.
whether 5 or 6 cell batteries or LiPo batteries are used). The battery
type must be programmed once – the programmed state remains in
the microcontroller of the DPSI Ampere until reprogramming takes
place.
Programming starts by connecting just one battery (no matter what
type and which battery connector) to the DPSI Ampere and turning it
on.
After power on, the internal buzzer (signal actuator) of the DPSI
Ampere turns on for 3 seconds and then pauses for another 3
seconds. This indicates operating mode "Programming".
Now, one beep sounds, indicating "battery type 1". When connecting
the second battery to the DPSI Ampere within 3 seconds, "battery type
1" is selected and programmed.
If the second battery is not connected within 3 seconds, two beeps
sound for "battery type 2". Here again, the user has 3 seconds to
connect the second battery in order to select (program) this battery
type.
This principle repeats until the buzzer beeps nine times (battery type
9). If no second battery is connected within 3 seconds, no
programming takes place and the systems returns to normal operation.

DPSI Ampere Operating Instructions Version 1.0
Page 15 of 28
Battery types are defined as follows:
Buzzer Code Battery Type / Programming
1x beep 5 cell Battery (NiCd / NiMH)
2x beeps 6 cell Battery (NiCd / NiMH)
3x beeps 2 cell LiIon Battery
4x beeps 2 cell LiPo Battery
5x beeps 2 cell LiFePO4 Battery (A123)
6x beeps 7 cell Battery (NiCd / NiMH)
7x beeps Deactivate all tests
8x beeps 3 cell LiPo Battery
9x beeps 3 cell LiFePO4 Battery (A123)
At delivery "battery type 4" (2 cell LiPo battery) is programmed by
default. When selecting "7 times beep" (all tests deactivated) the DPSI
Ampere now executes no voltage tests from now on. No empty
batteries or other errors are indicated anymore!
Hint:
Always use two identical batteries, i.e. same battery type (NiCd, NiMH or LiPo)
and same number of cells.
Hint:
Don't rely to low voltage detection to 100% for LiFePO4 batteries, because the
voltage of these batteries drops rapidly at the end of their capacity. A reliable
recognition of the remaining capacity is not realizable based on the current
voltage. Here, the responsibility of the pilot is in order to assess correctly the
batteries capacity (and therefore the duration of flight).
Hint:
Low voltage detection for batteries other than the types mentioned (e.g. 4 cell or
8 cell NiMH) is not planned or implemented.

DPSI Ampere Operating Instructions Version 1.0
Page 16 of 28
Programming of battery types at a glance:

DPSI Ampere Operating Instructions Version 1.0
Page 17 of 28
10. Operating
The actual power on or off process of the DPSI Ampere is
accomplished by using an external magnet which is just hold to the on
or off position (ON or OFF symbol on housing) momentarily. Due to
this contact free, electronically switching process no erroneous power
off can happen. There is no more safety!
Hint:
The distance of the magnet to the surface of the housing of the DPSI Ampere
must not exceed 6mm in order to guaranty reliable switching.
Hint:
Power on takes about 0.2 seconds, turning off lasts about 0.8 seconds.

DPSI Ampere Operating Instructions Version 1.0
Page 18 of 28
Hint:
If the DPSI Ampere buzzes for 3 seconds after power on, only one battery is
connected and the DPSI Ampere starts programming mode. If no reprogramming
is desired, turn the DPSI off or wait for approx. 40 seconds, then connect the
second battery.
Hint:
If the DPSI Ampere starts indicating error codes after a short time, although the
batteries are fully charged, possibly a wrong battery type is programmed.
Perhaps a battery is in usage which has a too high internal resistance and which
breaks down under high loads (e.g. NiMH batteries of "AA" size). Therefore only
use batteries suitable for high current load!

DPSI Ampere Operating Instructions Version 1.0
Page 19 of 28
11. Error Indications
The DPSI Ampere contains an internal microcontroller which
constantly monitors all voltages. An intelligent algorism makes sure
that low voltage of connected batteries is not only detected due to
momentarily dropping voltages (e.g. movement of all servos). The
algorism is especially designed for operating RC models (i.e. cyclic
loads of batteries). Herewith, relatively safe recognition of low voltage
is possible.
Different error types are indicated by the internal piezo-buzzer and the
indicator LED.
1. System error: ⎯⎯⎯⎯⎯⎯⎯⎯⎯⎯⎯⎯⎯⎯⎯⎯⎯
error signal: constant beep
If a hardware error is detected in the DPSI Ampere or the input voltage
exceeds 13.2 volts, this error is indicated. In case of a hardware
malfunction send the device in for repair.
2. Error low supply: ⎯⎯⎯⎯⎯ ⎯⎯⎯⎯⎯
error signal: constantly 0.5 seconds beeps, then 0.5
seconds pause
If the output voltage of the DPSI Ampere drops below 3.6 volts this
error code is output. For this low voltage the error recognition of the
DPSI Ampere is not designed – therefore, this error is output until
power off.
3. Error excessive supply: ⎯⎯⎯⎯⎯ ⎯⎯⎯⎯⎯⎯ ⎯
error signal: constantly 0.5s beeps, then 0.1s pause,
again 0.1s beep and 0.2s pause
If the output voltage exceeds 13.0 volts this buzzer code is output. For
this high voltage, the DPSI Ampere is not designed – therefore this
error is output (until power off).

DPSI Ampere Operating Instructions Version 1.0
Page 20 of 28
4. Battery interruptions: ⎯⎯⎯⎯⎯⎯⎯⎯⎯
error signal: constantly 0.1s beeps / 0.1s pause
In case a battery encounters an interruption (e.g. loose contact) this
error is indicated. This error type is active until powering the DPSI
Ampere down.
5. Low voltage battery 1: ⎯⎯⎯⎯⎯⎯⎯⎯⎯⎯⎯
error signal: 3 x 0.1s beeps with 0.1s pause each,
then 1s beep
When battery's 1 voltage drops below a certain value (corresponding to
approx. 60% discharge) this error is indicated. The capacity of the
battery suffices normally for one more flight prior to recharge.
Nevertheless, it is better to recharge right away when hearing this error
code. It is mandatory that the correct battery type is programmed. This
error code is output every 7 seconds until the DPSI Ampere is
powered off.
6. Low voltage battery 2: ⎯⎯⎯⎯⎯⎯⎯⎯ ⎯⎯⎯⎯⎯
error signal: 3 x 0.1s beeps with 0.1s pause each,
then 2 x 0.65s beeps with 0.1s pause
Analogous to battery 1: When battery's 2 voltage drops below a certain
value (corresponding to approx. 60% discharge) this error is indicated.
If battery 1 as well as battery 2 encounter low voltage both error codes
are output alternatively. These error types have lower priority than
earlier mentioned errors and therefore can be interrupted.
Hint:
The algorism limits for recognizing low voltage are especially designed for
operating RC models. If the DPSI Ampere is used otherwise, wrong information
can be output. If this is the case, the error indication (if disturbing) can be totally
turned off (see "Programming the Batteries").
Table of contents
Other Emcotec Switch manuals
Popular Switch manuals by other brands

ANTIFERENCE
ANTIFERENCE Clear Switch CF-POE8 user guide

Accton Technology
Accton Technology SwitcHub-2se installation manual
Siemens
Siemens 3KC8348 - 0FA22 - 0GA3 operating instructions
Girard Systems
Girard Systems 98GC2763B Product description
Advantech
Advantech EKI-9728G Series user manual

Erbe
Erbe 20186-007 manual
RHINO
RHINO Auta-lite I Series quick start guide
Juniper
Juniper EX8200 Series Installing manual

Parvus
Parvus PRV-1059 user manual
SMART
SMART DPA 21 user manual

Brocade Communications Systems
Brocade Communications Systems A7533A - Brocade 4Gb SAN Switch Base reference guide
3Com
3Com OfficeConnect WX4400 Reference manual
