Air Sw itch ( Evolution 2 00, Ev olut ion 10 0, Mode l 65,
Mode l 55-1B A/ S, 55 -3B A/S an d 45 -1B A/S ):
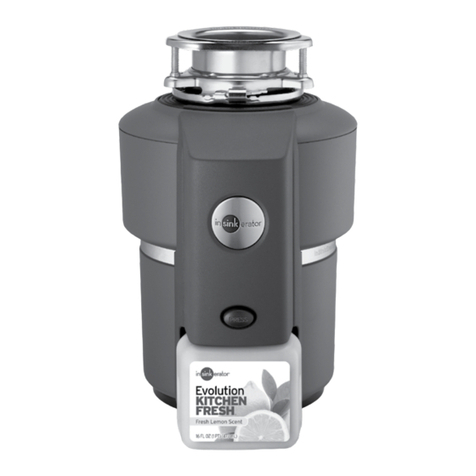
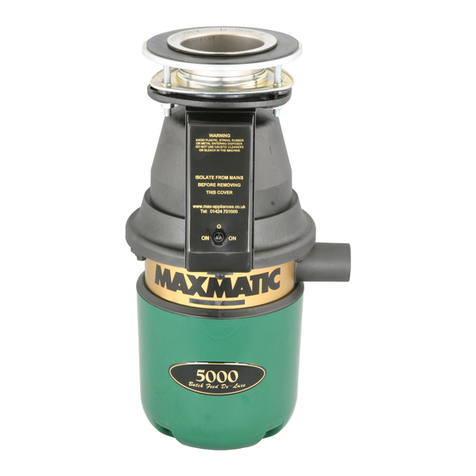
The Evolu tion 200 , Evolutio n 100, and Mo del 65 dis poser s inclu de a
built-in a ir switch ( Satin Nickel and C hrome fi nishes ). An a ir switch
activat es/t urns of f the unit b y sendin g a pulse of a ir to the co ntrol box .
AIR SWI TCH INS TALLATION
The air sw itch inc ludes t wo diffe rent bu tton fini shes. If yo u wish to
change t he butt on finish ( optio nal) , simply p ry of f the exist ing but ton
and sna p the other b utton fi nish onto t he bello ws. (Se e Figur e 11.2)
1. Dri ll a 33 mm wid e hole into t he kitch en work top, o r the cor ner of
the sink uni t, at the mo st conve nient po int for us e. Some si nk units
may alrea dy have a suit able ho le in them w hich ca n be expos ed by
removing t he cap.
2. Rem ove the nut fr om the pu sh butto n bellow s, while ke eping th e
stainle ss stee l washer a nd rubb er gaske t in plac e. Push one e nd of
the PVC tubin g onto the sp out of the p ush but ton bel lows, fee d the
other end o f the tube th rough th e hole in th e work top a nd throu gh
the nut und ernea th the work t op. (Se e Figure 11.3)
3. Fit th e push bu tton be llows in the h ole and th en scre w up the nut
undern eath the wo rk top unti l it is han d tight. D o not use a w renc h
to tigh ten th e nut. ( See Figure 11.4)
4. Take the othe r end of th e air tube a nd firml y push it ove r the spou t
of the air swi tch, whic h is loca ted on the u nders ide of the wa ste
dispose r. (See Fi gure 11.5)
DISA BLING T HE AIR SW ITCH
The air sw itch can b e disab led if wall s witch op eratio n is prefe rred.
The disp oser is s hippe d with the sw itch in the “ off ” pos ition.
1. Push o ne end of th e PVC tubin g provid ed onto the s pout of th e push
button b ellows. ( See Fi gure 11.3)
2. Take the othe r end of th e air tube a nd push i t over the sp out of the
air switch , which is l ocated o n the unde rside o f the waste d ispos er.
(See Fi gure 11.5)
3. Dep ress th e air switc h one time u ntil you he ar the swi tch “click .”
Remove and d iscar d the push b utton b ellows an d PVC tubin g. The
dispose r may now be a ctivate d by a wall swit ch.
The dis pose r inst alla tion is c ompl ete. Re ad all op erat ing an d
safet y instru ctions in In struc tion 12 befor e operati ng the disp oser.
Last ly, pla ce sto pper i n sink i n clos e posit ion . Fill si nk wit h wate r,
remov e stop per, tur n disp oser o n and ch eck fo r leaks .
CONNECT DISPOSER TO E LECTRICAL SUPPLY
ELECTR ICAL SH OCK
• To avoid ele ctric al shoc k, disco nnect p ower befo re inst alling o r
serv icing di spose r.
• If you a re not tho roughl y familia r with el ectri c power, cont act a
qualifi ed elec trici an to conn ect disp oser to e lectr ical cir cuit.
• If thr ee-p rong, ea rth ( ground ed) pl ug is use d, plug mus t be
inser ted into t hree- hole, ea rth ( ground ed) re cepta cle.
• Do no t modif y plug pro vided wi th unit ( if appli cable ).
• Imp roper co nnect ion of equ ipmen t eart h (grou nded ) conduc tor
can res ult in ele ctric s hock.
• All w iring mu st comp ly with lo cal ele ctric al code s.
• Do no t attac h eart h wire (g round wi re) to ga s supply p ipe.
• Do no t reconn ect ele ctric al curr ent at ma in ser vice pan el until
prope r eart h (grou nded ) outlet s are inst alled.
• If the s upply c ord is dam aged, it m ust be re place d by the
manufa cture r, its serv ice agen t or simil arly qu alified -per sons
in order t o avoid a haz ard.
11
11
8.3
8.2
8.1
8.4
MODEL XX – XX
S/N XXXX XXXXX X
PUSH RED BUTTON
TO RESET
Clear a ny objec ts from in side the d ispos er grind c hambe r before
mounti ng the disp oser to th e sink.
1. Thi s produc t must be i nstall ed so tha t the motor r eset bu tton
located o n the bot tom of the di spose r is readi ly acces sible .
Keep this sp ace cle ar of all ob jects.
2. Prio r to conne cting d ispose r to mount ing ass embly, deta ch the
perfo rated po rtion o f the spe cificat ion labe l found a t the base
of the disp oser, and se t aside fo r Instr uction 9 ( See Figure 8.1).
3. Posi tion dis poser w ith thre e mounti ng tabs (1) a ligned i n
positio n to slide ove r mounti ng track s (2) . (Se e Figure 8 .2)
4. Lif t dispo ser, inser t top end (mount ing gaske t) into mo unting
assemb ly, and turn l ower moun ting rin g to right ( with
wrenche tte or ad justab le plie rs) un til mount ing tab s lock over
ridges ( 3) on m ountin g ring tra cks (s ee Figur e 8.3) . Make s ure
all thr ee mou nti ng tab s are lo cked ove r ridg es. Dis poser w ill
now hang by it self.
EVOLUT ION 20 0 AND EVOLUTIO N 100, MO DEL 6 5
Inser t sound b affle in to sink op ening, w ith flat si de upward. ( See
Figure 8 .4)
CONNECT DISPOSER TO MOUNTING ASSEMBLY
P ERSO NAL INJ URY
To avoid perso nal inju ry, do not po sition y our head o r body
under di spose r; the uni t could fa ll duri ng insta llatio n.
8
8
MODEL XX – XX
S/N XXXXXXXXXX
PUSH RE D BUTTON
TO RESE T
10.3 10.4
10.5 10.6
10.210.1
(FLANGED DISCHARGE
PIPE NOT PROVIDED)
(FLANGED DISCHARGE
PIPE NOT PROVIDED)
AUSTRALIA ONLY
AUSTRALIA ONLY
DISCH ARGE T UBE IN STALLATIO N (E VOLUTIO N 200 A ND
EVOLUT ION 100 )
1. Plac e discha rge tub e (2) in to Anti-V ibrati on Tailpipe M ount™. Secu re
with spri ng type h ose cla mp (1). ( See Fig ure 10.1)
UK, NE W ZEA LAN D, HONG KON G AND IR ELA ND DISCH ARGE
TUBE INSTALLATION ( MODEL S 65, 55, 45 )
1. Plac e metal fl ange ( 6) over d ischar ge tube ( 8) . Inser t rubb er
gasket ( 5) with g asket lip f acing th e metal fl ange into d ischa rge
tube. (S ee Figu re 10.3)
2. Sec ure meta l flange a nd disc harge tu be to disp oser wit h two
13 mm bolts (7 ).
ATTACH DISCHARGE TUBE TO WASTE DRAIN PIPE
This sp ecifica tion lab el cont ains imp ort ant infor matio n you will
need to kn ow in the eve nt ser vice is re quired .
1. Apply the la bel to the fro nt side of the d ispose r, where it can
be easily re ad.
ATTACH SPECIFICATION LABEL
10
9
10
OPERATING INSTRUCTIONS (EVOLUTION 200 AND EVOLUTION 100)
1. Remove strainer basket and plug from sink opening and run cold water.
2. Turn on wal l switch or p ress ai r switch ( see Fig ure 12.1) to
start d ispose r.
3. Slow ly inse rt food w aste into di spose r and pos ition st raine r basket
and plug in u prigh t positi on (all owing wate r to run thr ough ) to
minimize n oise and p ossib le ejec tion of ma terial w hile gri nding
(See Fi gure 12.2) .
4. Af ter grin ding is co mplete, t urn disp oser of f and ru n water for a t
least 15 sec onds to flu sh drain l ine.
5. Str ainer ba sket and p lug als o acts as a st opper in t he lower p ositio n.
(See Fi gure 12.3)
OPER ATING INS TRUCTI ONS ( MODE LS 65 , 55, 45 , LC-5 0)
1. Rem ove stoppe r from si nk openi ng and ru n cold wate r.
2. Turn on wal l switch or p ress ai r switch ( see Fig ure 12.1) to
start d ispose r.
3. Slow ly inse rt food w aste into di spose r and pos ition st opper to
minimize n oise and p ossib le ejec tion of ma terial w hile gri nding.
(See Fi gure 12.4)
4. Af ter grin ding is co mplete, t urn disp oser of f and ru n water for a t
least 15 sec onds to flu sh drain l ine.
DO...
• G rind fo od waste wi th minim um cold wat er flow of 5.7 lite rs per
minute (1-1/2 G.P.M.).
• G rind ha rd mater ial suc h as small b ones an d fruit p its to cle an
inside of g rind cha mber.
• G rind ci trus, me lon rin ds, vege table s, and cof fee gro unds.
• A fter gr inding , run water f or at lea st 15 secon ds to flush dr ain line .
• S witch of f or unpl ug the app liance b efore at tempti ng to free a
jammed ro tor with a n implem ent.
• M ainta in the are a under neath th e dispos er of any ob jects to b e sure
you have acce ss to the di spose r reset b utton.
DON’T...
• D on’t use ho t water whe n grind ing food w aste (a lthoug h hot water
can be dra ined into d ispos er betw een gri nding pe riods ).
• D on’t turn o ff water o r dispo ser unti l grindi ng is com pleted a nd only
sound of mo tor and wate r runni ng is hea rd.
• D on’t grin d large a mounts o f egg she lls or fibr ous mate rials li ke corn
husks, ar ticho kes, etc., to av oid pos sible pi pe block age.
• D on’t grin d non-fo od waste of a ny kind.
• D on’t use th is appli ance to di spose o f hard mate rials s uch as gl ass
and meta l.
• D on’t ever po ur fats , oils or gr ease dow n the sink – i t will bloc k your
drains an d the sewe rage sys tem.
INSTRUCTIONS PERTAINING TO RISK OF FIRE, ELECTRICAL SHOCK , OR INJURY TO PERSONS ( SAVE THESE INSTRUCTIONS )
InSink Erator p roduct s are gua rantee d again st defec ts in mate rial an d
workmanship for the period of the guarantee from the date of purchase.
Evolution 20 0: 6 yea rs Evolutio n 100: 5 yea rs
Model 65 : 4 years Model 55 : 3 year s
Model 45 : 2 years LC-50 : 1 year
SERVI CE
If ser vice is re quired , contac t an InSi nkErat or Autho rized Se rvic e
Center ( see en close d list) o r your dea ler. Guara ntees a re void if you
remove you r dispo ser aft er insta llatio n and at tempt to re pair it, o r if
the disp oser is u sed for c ommerc ial pur poses .
IN-HOME FULL S ERVICE GUARANTEE
12.4 12.612.5
12.312.2
12.1
MODEL XX – XX
S/N XXXXXXXXXX
PUSH RED BUTTON
TO RESET
MODEL XX – XX
S/N XXXXXXXXXX
PUSH RED BUTTON
TO RESET
When usi ng elect ronic a pplian ces, ba sic pre cautio ns are alw ays
to be foll owed, inc luding :
• In Aus trali a, produ ct may re quire ap proval of th e releva nt regul ator
and/ or the sewe rage sys tem ope rator.
• If the a ir switch o r wall swit ch fails to s hut off o r turn on d ispose r,
unplug p ower cor d plug and c ontac t your qua lified tr ade per son.
• Thi s produc t is desi gned to di spose of n ormal h ouseh old food
waste; i nser ting mate rials o ther tha n food was te into dis poser
could ca use per sonal i njur y and/ or prop ert y damage . To reduce
the risk o f injur y, do not use the s ink cont aining t he disp oser for
purpo ses othe r than foo d prepa ration ( such as baby bathi ng or
washin g hair) .
• Thi s applia nce is not i ntende d for use by p erso ns (inc luding
childr en) wit h reduc ed physi cal, sen sory o r menta l capab ilities ,
or lack of ex perie nce and k nowledge, unles s they have been given
supervi sion or inst ructi on conce rning u se of appl iance by a p erso n
respo nsible fo r their s afety. Chil dren sh ould be su perv ised to
ensure t hat they d o not play wi th dispo ser. To reduce th e risk of
injur y, close sup ervi sion is re quire d when an ap plian ce is use d
near chi ldren.
• Whe n attem pting to lo osen a jam i n the food w aste disp oser,
switch of f or unpl ug the app lianc e before a ttempt ing to fre e a
jamme d rotor. Use a sel f serv ice wre nchet te as desc ribed i n
the Rele asing D ispos er Jam se ction.
• Use l ong-ha ndled to ngs or pl iers to re move obje cts fro m dispos er.
• To reduce the risk of injury by materials that are expellable by a waste
dispos er, do not ope rate Evolu tion dis poser s witho ut the sou nd
baffle in place (See Figure 8.4). Place stopper in sink opening as shown
in Figure 12.2 or 12.4. Do not put the fo llowing into a dis poser: cl am
or oyster shel ls, causti c drain clea ners or sim ilar produ cts, glas s,
china, o r plast ic, larg e (whole) bon es, metal (suc h as bottle caps,
steel shot, tin cans, or utens ils), hot greas e or other hot liquids.
• Replac e sound baffle /mounting gas ket/splas h baffle when worn to
help prevent entry or eje ction of material and wate r.
• Whe n not usin g dispos er, leave stop per in pl ace to red uce ris k of
object s fallin g into disp oser. Make su re disp oser powe r switch i s
turned o ff.
• Befo re pres sing re set but ton, atte mpting t o clear ja m, or rem oving
object s from in side dis poser, make s ure disp oser po wer switc h is
turned o ff.
• Do no t inser t hands o r finger s into dis poser.
• FIRE H AZA RD: D o not store fl ammab le items s uch as ra gs, paper,
or aerosol cans near disposer. Do not store or use gasoline or other
flamma ble vapo rs and liq uids in vi cinit y of dispo ser.
• Do no t dispos e of the foll owing in th e dispos er: pai nts, sol vents,
househo ld cleane rs and chem icals, auto motive fluids , plastic wr ap.
• Don’t fill disposer with a lot of vegetable peels all at once. Instead, turn
the water and disposer on first an d then feed the peels in gradual ly.
• D on’t waste f ood. Nea rly a qua rter of t he food we b uy is throw n
away untouc hed: s alad, br ead and c akes and f ruit hea d the list .
Three tip s to stop was te and save yo u money: o nly buy, or co ok,
the por tions you n eed for th e meal ; check t he fridg e and cup board
for food you h aven’t eate n–m ake it your n ext snac k or free ze it;
and make su re you leave t hat food of f your next shoppi ng list !
CLEA NING DI SPOS ER
Over time , greas e/fo od par ticles m ay accum ulate in th e grind
chambe r and baf fle, cau sing an u npleas ant odo r. To clean
the disp oser:
1. Turn of f disposer a nd disco nnect p ower sup ply.
2. Rea ch throu gh sink op ening an d clean u nders ide of sp lash
baffle an d insid e upper li p of grind c hambe r with sco uring pa d.
3. Plac e stoppe r in sink op ening a nd fill sink h alfwa y with
warm water.
4. Mix 6 0 ml bakin g soda wi th water. Turn disp oser on a nd
remove stop per fro m sink at sa me time to wa sh away
loose pa rticl es.
RELE ASIN G DISPO SER JA M
If the moto r stops whi le the dis poser i s opera ting, the d ispos er
may be jam med. To relea se jam :
1. Turn disp oser p ower and wat er off.
2. Ins ert on e end of the s elf-se rvice w rench ette into the cen ter
hole on the b ottom of th e dispo ser (s ee Figur e 12.5). Wor k the
wrenche tte bac k and for th until i t turns on e full revo lution.
Remove wre nchet te.
3. Rea ch into the d ispose r with ton gs and re move obje ct( s). A llow
the dispo ser moto r to cool fo r 3 - 5 minutes a nd light ly push
red rese t button o n the disp oser bo ttom ( see Figu re 12.6). ( If
the motor re mains in opera tive, che ck the se rvice p anel fo r
tripped c ircui t breaker s or blow n fuses .)
12
12
UK, NE W ZEA LAN D, HONG KON G AND IR ELA ND DISC HARG E
TUBE IN STALLATI ON (LC -50 )
1. Plac e metal fl ange (11) over disc harge tu be (12). ( See Fi gure 10.4)
2. Ins ert ru bber ga sket (9 ) with the gasket lip f acing th e metal fl ange
into disch arge tub e (gas ket may be pr e-fitt ed in disc harge tu be) .
Secure m etal flan ge and di scharg e tube to di spose r with one
19 mm bolt (10) ( Gasket w ill hold i n place ).
AUSTR ALIA DI SCHA RGE TUB E INSTAL LATION ( MODELS 65, 5 5,
45 ) (Opt ional s traig ht pip e conne ction ; connection t o Caro ma
Conne ction n ot supp lied. A ttac h disch arge t ube to wa ste pip e.)
1. Ins ert ru bber ga sket (13) int o discha rge outl et. (S ee Figu re 10.5)
2. Att ach flang ed disc harge p ipe (no t provide d) usi ng washe rs (14) and
19 mm 1/4 -20 bolts (15) .
AUSTRALIA DISCHARGE TUBE INSTALLATION (LC-50 ) (O ptiona l
stra ight pi pe conn ectio n; con nect ion to Ca roma Co nnect ion not
suppl ied. At tach d isch arge tu be to was te pipe .)
1. Plac e rubbe r gasket (16 ) betwe en disp oser an d flange (17) . (See
Figure 10.6 )
2. Tig hten flan ge with on e 19 mm bolt (18) . Attac h flange d discha rge
pipe (no t provide d) us ing washe rs (19) an d nuts ( 20) .
ALL DIS POSE RS CONT INUE W ITH STE PS 3- 5
3. Rota te dispo ser so th at disch arge tub e is align ed with d rain tra p.
(To prevent le aks, do no t pull or be nd disc harge tu be to drai n trap.)
If discha rge tube i s too shor t, you ca n purch ase an ex tensio n from
hardwar e store. ( Disp oser mus t remai n in vert ical po sition to
prevent vi bratio n.)
4. Plac e nut, the n ferru le on disc harge tu be (no t suppli ed) an d tighten
on drain tr ap. (If y ou have a doub le sink, u se sepa rate dra in trap s for
both side s of sink. )
5. Ensu re lower m ounting r ing is sti ll secu rely loc ked over ri dges on
mountin g flange. ( See Fi gure 8.2 )
NOTE : You must have ac cess to a n eart h (grou nded ) wall soc ket.
Any addi tional s ocket sh ould be fit ted by a qua lified e lectr ician an d
prope rly ear thed ( groun ded) . The dis poser i s fitted w ith a mold ed plug
and cab le.
ON/ OFF CON TROL
There a re two ty pes of co ntrols fo r contin uous-f eed dis poser s:
a double -pole s witch an d an air swit ch (bui lt in for Evol ution 20 0,
Evolutio n 100, and Mo del 65; a vailabl e as an acc esso ry on all
other mo dels ).
Doub le Pole S witc h (1) :
If a wall swi tch (not s upplie d) is re quire d for your in stalla tion, it m ust
have on/ off ma rkings a nd be ins talle d by a qualifi ed trad epers on. It
should b e locate d in a conve nient po sition a bove the wor k surf ace
with a mini mum of 3 mm co ntact s epara tion bet ween ea ch pole ( 20
ADP switc hes to BS 3 676). In N ew Zeala nd, ple ase refe r to AS/ NZS
3000 :2007 for elec trica l instal lation. C onnec t to a 13 amp ear th
(grounded) wall socket (2 ) using a 13 amp cable. (See Figure 11.1)
11.1 11.3
11.4
33 mm
11.5
11.2
P ROPE RTY DAM AGE
• Wear ing safe ty glas ses is re comme nded du ring the i nstall ation
of the foo d waste dis poser.
• All Evo lution 2 00 and Evol ution 100 m odels m ust be co nnecte d
to the supp lied ta ilpipe w ith the sup plied s pring t ype hos e clamp.
(See F igure 10.1) In Austr alia it i s requir ed to use th e suppli ed
straig ht disch arge tu be with su pplied s pring t ype hos e clamp.
(See F igure 10.2 ) Failur e to use the s upplie d tubes a nd sprin g
type ho se clam p will void th e guara ntee and p ossib ly caus e
premat ure fail ure of the A nti-Vib ration Tail pipe Mou nt™.
• Do no t use plum ber’s put ty on any o ther dis poser c onnec tion
other th an on sink fl ange. Do n ot use thr ead sea lants o r pipe
dope. Th ese may ha rm disp oser an d cause p roper ty dam age.
• Reg ularly i nspec t dispo ser and p lumbin g fittin gs for wate r leaks,
as water le aks can c ause pr oper ty dama ge. Manu factur er cann ot
be held responsible for property damage as a result of water leaks.
