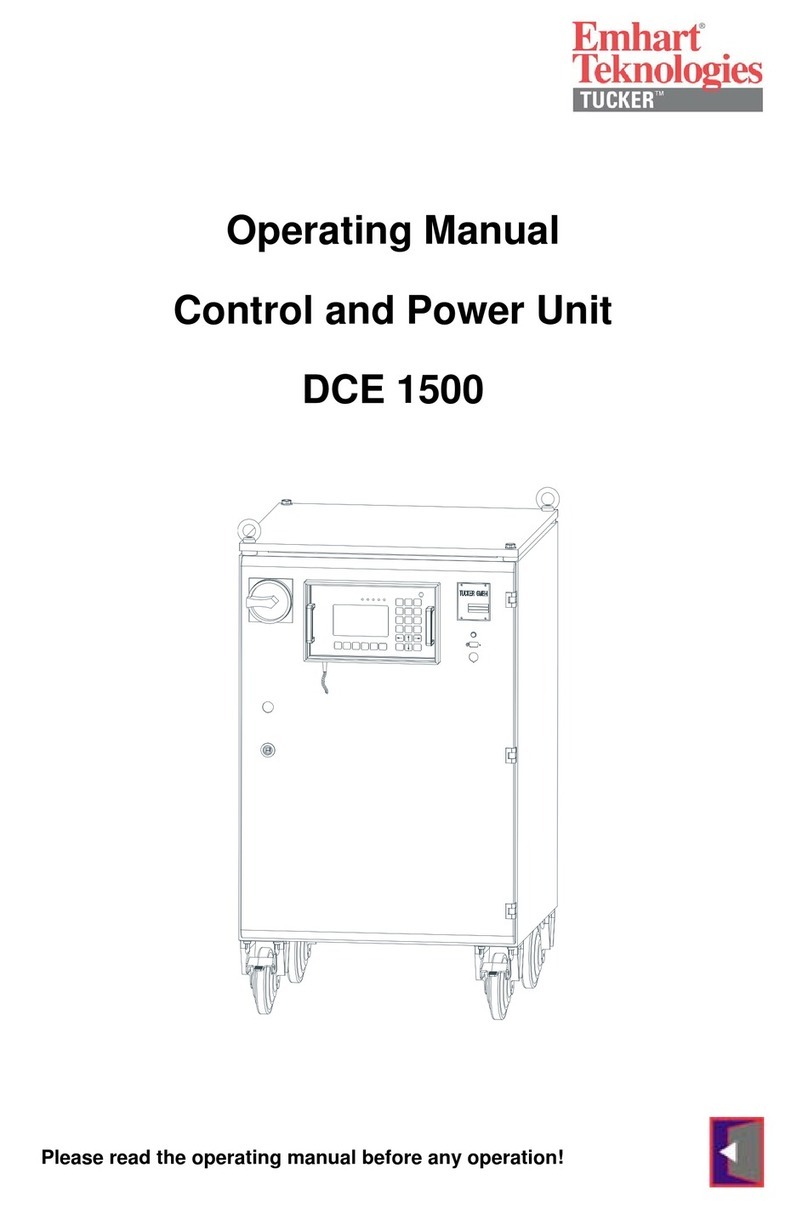
Emhart Teknologies Tucker TMP Series Owner's manual

Artisan Technology Group is your source for quality
new and certied-used/pre-owned equipment
• FAST SHIPPING AND
DELIVERY
• TENS OF THOUSANDS OF
IN-STOCK ITEMS
• EQUIPMENT DEMOS
• HUNDREDS OF
MANUFACTURERS
SUPPORTED
• LEASING/MONTHLY
RENTALS
• ITAR CERTIFIED
SECURE ASSET SOLUTIONS
SERVICE CENTER REPAIRS
Experienced engineers and technicians on staff
at our full-service, in-house repair center
WE BUY USED EQUIPMENT
Sell your excess, underutilized, and idle used equipment
We also offer credit for buy-backs and trade-ins
www.artisantg.com/WeBuyEquipment
REMOTE INSPECTION
Remotely inspect equipment before purchasing with
our interactive website at www.instraview.com
LOOKING FOR MORE INFORMATION?
Visit us on the web at www.artisantg.com for more
information on price quotations, drivers, technical
specications, manuals, and documentation
Contact us: (888) 88-SOURCE | sales@artisantg.com | www.artisantg.com
SM
View
Instra

Emhart Teknologies
TUCKER GmbH, Max-Eyth-Straße 1, 35394 Gießen
Tel.: 0641/405-0; Fax.: 0641/405-383; Mail: Info@tucker.de
Programming Manual
Control and Power Unit
TMP
Artisan Technology Group - Quality Instrumentation ... Guaranteed | (888) 88-SOURCE | www.artisantg.com

Table of Contents
1. Menu Access and Selection 1
1.1 Sub-Menu “Keyboard Functions“2
1.2 Sub-Menu “Weld Parameter Monitor“3
1.3 Sub-Menu “Programming“5
1.3.1 Functions Menü“Programming Weld Parameters“5
1.3.2 Functions Menü“Programming Output/Feeder“8
1.4 Sub-Menu “Statistics“9
1.4.1 “Fault Memory“9
1.4.2 “WOP-Memory“11
1.4.3 “Weld Output Statistics“13
1.4.4 “Weld Program Statistics“14
1.4.5 “Maintenance“15
1.5 Sub-Menu “Clear Fault Condition“17
1.6 Sub-Menu “Status Weld Sequence“20
1.7 Sub-Menu “Status Customer Interface“22
1.8 Sub-Menu “Status Feeder/Stud Divider“24
1.9 Sub-Menu “Status TMP ....“25
1.10 Sub-Menu “Functions“27
1.10.1 Functions Menu “Display System Configuration“27
1.10.2 Functions Menu “Test Mode Cycle Functions“28
1.10.3 Functions Menu “Test Mode Outputs Interface“30
1.10.4 Functions Menu “Test Mode Weld Process“31
1.10.5 Functions Menu “TEST Mode Power Supply“32
1.11 Sub-Menu “Warnings“34
1.12 Sub-Menu “Extended Functions“35
1.12.1 Functions Menu “System Parameters“36
1.12.2 Functions Menu “Mechanical Parameter“37
1.12.3 Functions Menu “Weld Program“40
1.12.4 Functions Menu “Copy Programs“42
1.12.5 Functions Menu “Clear Funktions“44
1.12.6 Functions Menu “ZCPU System Test“45
1.12.7 Functions Menu “De/Activate Program“46
1.12.8 Functions Menu “Stud Length Detection“47
1.12.9 Functions Menu “Set Date and Time“49
Appendix A Main Menu TMP Systemsoftware 50
Appendix B DIP-Switch information 61
Appendix C Fault Messages 62
Appendix D Error Memory Messages 79
Appendix E Messages regarding pilot arc voltage 80
Artisan Technology Group - Quality Instrumentation ... Guaranteed | (888) 88-SOURCE | www.artisantg.com

1
1. Menu Access and Selection
When switching the TMP weld unit on the screen display will be activated. The
TMP will identify itself by presenting unit and peripherals types as well as the
corresponding software versions.
Software version 1 Software version 2
T U C K E R #########
System software V ##.##
Keypad/Display V ##.##
Central CPU V ##.##
SMPS V ##.##
Interface ########### V ##.##
Output 1 #### / #### V ##.##
Output 2 #### / #### V ##.##
Output 3 #### / #### V ##.##
Output 4 #### / #### V ##.##
Output 5 #### / #### V ##.##
<F1..F5> <ESC>
Now please press the key to open the main menu.
OPERATION
Weld parameter monitor
Programming
Statistics
Fault reset
Status weld sequence
Status customer interface
Status Feeder/Stud-Divider
Status TMP
Functions
Warnings
<↓↑> <ENTER> <F1..F5>
As soon as the main menu appears on the screen the sub-menues listed can be
selected.
1. Position the cursor with the direction keys and on the corresponding
submenu and confirm your selection with .
2. Sub-menus with alterable contents may also be selected by pressing one of the
function keys listed below directly.
•Function key : open main menu "Function Keys"
•Function key : open main menu "OPERATION"
•Function key : open main menu "Programming"
•Function key : open main menu "Monitor Parameters"
•Function key : open main menu "Reset Fault"
•Function key and open changing over languages.
T U C K E R #########
System software V ##.##
Keypad/Display V ##.##
Central CPU V ##.##
SMPS V ##.##
Interface ########### V ##.##
Output 1 #### / #### V##.## LM V ##.##
Output 2 #### / #### V##.## LM V ##.##
Output 3 #### / #### V##.## LM V ##.##
Output 4 #### / #### V##.## LM V ##.##
Output 5 #### / #### V##.## LM V ##.##
<F1..F5> <ESC>
Artisan Technology Group - Quality Instrumentation ... Guaranteed | (888) 88-SOURCE | www.artisantg.com

2
1.1 Sub-Menu “Keyboard Functions“
The sub-menu “Keyboard Functions“is selected via the key. This menu informs
the user about the configuration of the operation control keys.
Key Functions
F1 - Display key functions
F2 - Main menu
F3 - Programming
F4 - weld parameter monitoring
F5 - fault reset
F6 - Release Manual Functions
ESC - ESCAPE, abort
ENT - ENTER, confirmation
0..9 - input SKK/PK, program no.
+ - - change, set/reset values
<↓↑> - select menu, value
Exit the menu by pressing any key.
Display- and Control Panel
Artisan Technology Group - Quality Instrumentation ... Guaranteed | (888) 88-SOURCE | www.artisantg.com

3
1.2 Sub-Menu “Weld Parameter Monitor“
Having selected the sub-menu "Weld Parameter Monitor" using or through the
direction keys the cursor will move to the first menu line requesting selection of the
TMP output (1-5) to be monitored as well as the program no. (1-27) of the weld
program to be monitored.
Remark: Output "0" described below has a special function.
Weld parameter monitor
SKK/PK outlet : # Program.No.:. . . . ###
Weld part ident : ################
Autoplunge : #### Optimization. . . . .####
Ref +tol -tol Act
Vp ## ## ## ## V #
Vw ## ## ## ## V #
Iw #### ### ### #### A #
tw ### ## ## ###,# ms #
td ##,# ##,# ms #
#Lift #,## ,## ,## #,## mm #
Fault : ####################################
< 0..5> <ENTER> <F1..F5> <ESC>
Select output and program number and confirm with . The individual menu lines
of the display signify the following:
SKK/PK Output 0 The parameters of the weld tool that welded last will be
displayed in the table.
SKK/PK Output 1-5 The parameters of the last weld of the selected weld
tool will be listed.
Progr.-Nr. 0 The parameters of the last weld program will be
displayed in the table.
Progr. Nr. 01 - 127 The parameters of the selected weld program will be
displayed in the table.
Weld part ident Display of the program ident for the weld part.
Autoplunge: Yes
(tw = weld time) The deenergization time of the solenoid will be auto-
matically adjusted to the reference stud drop time.
Autoplunge No Automatic autoplunge is not activated.
Optimization: Yes
(Up to max. 800A/60ms) Automatic adjustment of the weld current Iw / weld time
tw when welding through impurities on work surfaces.
Optimization: No No optimization of weld current (Iw) and weld time (tw).
Artisan Technology Group - Quality Instrumentation ... Guaranteed | (888) 88-SOURCE | www.artisantg.com

4
Ref Preset value set according to weld program.
+ tol Positive tolerance. "0" selections will not be monitored.
- tol Negative tolerance. "0" selections will not be monitored.
Act Actually measured weld parameters of last weld.
Vp [V]Arc voltage in pilot current phase. *
Vw [V]Arc voltage in weld current phase.
Iw [A]Weld current.
tw [ms]Weld time.
td [ms]Stud drop time.
Lift [mm]Lift distance.
An exclamation mark before the text Lift signifies that the
stud length measurement function for SD2 has been
deactivated in terms of position.
*Some voltage values are of particular importance (see Annex E).
Fault The fault will be displayed that has occured during welding.
Possible fault indications are:
None Weld cycle without fault.
SMPS Defect within SMPS, welding was stopped.
Lift Cycle On Fault when enabling the solenoid.
No arc Voltage Defective lift; short circuit in weld circuit.
Short circuit weld The last weld performed was a short circuit operation.
Lift Cycle Off Fault when disabling the solenoid.
Drop Time
Timeout Monitoring time in weld sequence was exceeded.
No Weld Current The last weld performed was an open circuit operation.
Faults will be recorded under a fault number in the fault memory.
Selecting the function keys .. will open the corresponding sub-menu. By
pressing or you will access the main menu.
Artisan Technology Group - Quality Instrumentation ... Guaranteed | (888) 88-SOURCE | www.artisantg.com

5
1.3 Sub-Menu "Programming"
Please note that opening of the sub-menu "Programming" is
exclusively reserved for authorized and qualified personnel.
The sub-menu "Programming" is to be selected for programming of the weld
parameters as well as the weld outputs and the specific feed times.
Direct access will be accomplished via the function key or by positioning the
cursor on the second line of the main menu and pressing .
Programming
Weld parameters
Output/feeder
<↓↑> <ENTER> <F1..F5> <ESC>
1.3.1 Function Menu "Programming Weld Parameters"
The function menu "Programming Weld Parameters" is selected via the and
keys and confirmed via .
Programming weld parameters
Output No . . . . . . . . . . . : #
Weld programm no . . . . : ###
Weld programm activ. . . ####
Weld diameter. . . . . . . . . #####
Workpiece gauge . . . . . . #####
Workpiece coating . . . . . ########
Energy adjustment . . . . . ### %
<1..9> <↓↑> <+,-> <ENTER> <F1..F5> <ESC>
The significance of the individual menu lines is described on the following pages.
Note
Artisan Technology Group - Quality Instrumentation ... Guaranteed | (888) 88-SOURCE | www.artisantg.com

6
Output No.: The output number defines the weld tool which will be
addressed based on the TMP connector configuration.
When indicating the output the following operation modes are to be differentiated:
Standard
operation In standard operation (feeder - SKK/PK) the output no. must
be entered corresponding to the TMP connector configuration.
For example: "TMP-pin 1 - feeder 1 - SKK/PK no. 1".
SD2 operation When using a 2-way stud divider "SD2" only output no. 1 is to
be addressed.
SD5 operation When using a 5-way stud divider the output no. is to be
entered corresponding to the "SD5" configuration. For
example: "SD5 connector configuration 3 - SKK no. 3".
SD5 operation When using a 5-way stud divider the output no. is to be
entered corresponding to the "SD5" configuration. For
example: "SD5 connector configuration 3 - SKK no. 3".
Weld Program
No. For each weld task a specific weld program should be
available which is to be addressed via the corresponding
program no. (1 - 127).
Enter a number between 1 and 5 for the weld output as well as between 1 and 127
for a weld program via the numerical keypad and confirm with or press
to exit the input mode.
Yes External program selection enabled.
No External program selection disabled.
Remark: if no external program selection is requested only
weld program 1 may be activated for the corresponding
output.
Weld diameter Selection of weld flange diameter.
Flange diameter Selection of flange diameter in a range from 2 mm - 8 mm
(step size: 1 mm).
SWB10 When welding T-studs with a length of 3,8 mm and a flange
diameter of 3 mm the TUCKER-name SWB10 is to be entered.
Workpiece
Gauge Selection of sheet thickness of work surface: 0,8 mm, 1,2 mm,
2 mm or >2 mm.
Artisan Technology Group - Quality Instrumentation ... Guaranteed | (888) 88-SOURCE | www.artisantg.com

7
Coating Selection of work surface coating.
none Untreated work surface.
galvanized Galvanized work surface.
Energy adjustment Weld energy adjustment in a range from -50% - +50%
(step size: 5%).
Programming is to be executed by the and keys. The selections of the
individual parameters can be either confirmed with or rejected with .
By pressing the or the key the cursor will move to the field "output no." and
enables further programming. By pressing you will return to the sub-menu
"programming".
Artisan Technology Group - Quality Instrumentation ... Guaranteed | (888) 88-SOURCE | www.artisantg.com

8
1.3.2 Function Menu "Programming Output / Feeder"
The function menu "Programming Output / Feeder" will be selected via the
and keys in the sub-menu "Programming" and confirmed with .
Programming output/feed time
Weld output No . : #
Output active....... ####
Feed time............. #### ms
<1..9> <↓↑> <+,-> <ENTER> <F1..F5> <ESC>
Weld output no. The weld output no. will define the weld tool which will be
addressed based on the TMP connector configuration.
Yes The output of the TMP weld unit is activated.
No The output of the TMP weld unit is not activated.
Feed time The time between feeding signal and arrival of the stud in the
stud receiver is to be selected in a range from 50ms - 1600ms.
Remark: Programming is to be performed via the numerical keys, the and
keys as well as the and keys.
Artisan Technology Group - Quality Instrumentation ... Guaranteed | (888) 88-SOURCE | www.artisantg.com

9
1.4 Sub-Menu "Statistics"
The sub-menu "Statistics" will be selected by positioning of the cursor on the third
line of the main menu and by presing the key. The sub-menu "Statistics"
contains sub menus in which information on faults, welds and maintenance are
recorded.
Statistics
Fault memory
WOPs memory
Weld output statistics
Weld program statistics
Maintenance
<↓↑> <ENTER> <F1..F5> <ESC>
1.4.1 Sub-Menu "Fault Memory"
By positioning the cursor on the first line of the sub-menu "Statistics" and then
pressing the key you can access the "Fault Memory" screen.
Fault memory Fault no. ###
O Prg Fault type No. Date Time
# ### ########### ### ##.##.## ##:##:##
# ### ########### ### ##.##.## ##:##:##
# ### ########### ### ##.##.## ##:##:##
# ### ########### ### ##.##.## ##:##:##
# ### ########### ### ##.##.## ##:##:##
# ### ########### ### ##.##.## ##:##:##
Fault description:
<↓↑> <F1..F5> <ESC>
The individual menu lines will be described on the following page:
Fault Memory All faults of the equipment will be recorded.
Fault No. Number of fault on which the cursor is positioned.
Artisan Technology Group - Quality Instrumentation ... Guaranteed | (888) 88-SOURCE | www.artisantg.com

10
ADisplay of output 1 - 5.
Prg If faults occur during the weld sequence the weld program
will be displayed.
Fault Type Information at which component the fault occurred
(unit / SKK/PK / feeder / stud divider).
No. No. of fault message.
Date Date of fault.
Time Time of fault.
Fault Description Short fault description (according to current cursor position).
With the keys and you can alternately display the fault memory.
By pressing you will return to the sub-menu "Statistics". By pressing you
will return to the main menu.
Trouble Shooting Information:
•Faults can be reset based on the information "Fault Messages".
•Faults which can not be reset on location through the listed remedial measures
require the replacement of the weld unit.
•Faults occurred at a peripheral unit are to be remedied based on the information
given in the corresponding operating manual.
•Faults will be reset in the menu "Clear Fault Condition".
Artisan Technology Group - Quality Instrumentation ... Guaranteed | (888) 88-SOURCE | www.artisantg.com

11
1.4.2 "WOP- Memory"
The "WOP-Memory" contains messages and information about welds out of
tolerance (Weld Outside Parameter = WOP)
The "WOP-Memory" screen can be accessed by positioning of the cursor on the
second line of the sub-menu "Statistics" and by pressing .
WOP-mem Outlet:# Prog:### Page:###
Weld part ident : ################
Date........ ##.##.## Time .......... .##:##:##
Autoplunge. ..#### Optimization.... ...####
Ref +tol -tol Act
Vp ## ## ## ## V #
Vw ## ## ## ## V #
Iw #### ### ### #### A #
tw ### ## ## ###,# ms #
td ##,# ##,# ms #
#Lift #,## ,## ,## #,## mm #
Fault : #################################
<0..5> <↓↑> <ENTER> <F1..F5> <ESC>
Select output number and confirm with . The individual menu lines of the
display signify the following:
WOP-Memory Record for all welds out of tolerance.
Weld part ident Display of the program ident for the weld part
O Those outputs for which WOP‘s are to be displayed
can be entered with the numerical keys 1 - 5.
With the key 0 all WOP‘s will be displayed in
sequence of their occurrence.
The selection must be confirmed with .
Prog. Display of current weld program.
Page Display of current page.
Date Date when WOP occurred.
Time Time when WOP occurred.
Autoplunge: Yes
(tw = weld time) The de-energization time of the solenoid will be auto-
matically adjusted to the reference stud drop time.
Autoplunge: No Automatic autoplunge was not activated.
Optimization: Yes
(up to max. 800A/60ms) An automatic adjustment of the weld current Is / weld
time ts when welding through impurities on work
surface was performed.
Optimization: No No optimization of weld current lw and weld time tw
performed.
Artisan Technology Group - Quality Instrumentation ... Guaranteed | (888) 88-SOURCE | www.artisantg.com

12
Ref Preset value set according to weld program.
+ tol Positive tolerance. "0" selections will not be measured.
- tol Negative tolerance. "0" selections will not be measured.
Act Actually measured weld parameters of the last weld
performed.
Vp [V]Arc voltage in pilot current phase.
Vw [V]Arc voltage in weld current phase.
lw [A]Weld current.
tw [ms]Weld time.
td [ms]Stud drop time.
Lift [mm]Lift distance.
Fault The fault will be displayed that has occured during welding.
•Possible fault messages are:
None Weld sequence without fault.
SMPS Defect within SMPS, welding was stopped.
Lift Cycle On Fault when enabling the solenoid.
No arc voltage Defective lift; short circuit in weld circuit.
Short circuit weld The last weld performed was an short circuit operation.
Lift Cycle Off Fault when disabling the solenoid.
Drop Time
Timeout Monitoring time in weld sequence was exceeded.
No weld currentt The last weld performed was an open circuit operation.
The WOPs can be alternately displayed with the keys and .
By pressing you will return to the sub-menu "Statistics". By pressing you
will return to the main menu.
Artisan Technology Group - Quality Instrumentation ... Guaranteed | (888) 88-SOURCE | www.artisantg.com

13
1.4.3 "Weld Output Statistics"
By positioning the cursor on the third line of the sub-menu "Statistics" and then
pressing the key you can access the memory menu "Weld Output Statistics"
screen.
Weld outlet statistics
ONumber of
WIP&WOP Number of
WOP
WOP
repeat
lim act Number
of faults
auto
rep.-
feed
1 ####### ####### # # ###### #####
2 ####### ####### # # ###### #####
3 ####### ####### # # ###### #####
4 ####### ####### # # ###### #####
5 ####### ####### # # ###### #####
<F1..F5> <ESC>
The individual menu lines signify the following:
Output Display of the output the statistics are related to.
Number of WIP & WOP Total number of welds.
Number of WOPs Total number of welds out of tolerance.
WOP repeat limit Display of programmed acceptable sequential welds
that may be out of tolerance.
Actual WOP repeat Actual number of sequential welds out of tolerance.
Number of faults Total number of faults occurred.
Auto refeed No. of studs automatically supplied due to missing
SOW-signal during internal slide rail control.
The information for the individual weld programs can be alternately displayed with
the keys and .
By pressing you will return to the sub-menu "Statistics".
By pressing you will return to the main menu.
Artisan Technology Group - Quality Instrumentation ... Guaranteed | (888) 88-SOURCE | www.artisantg.com

14
1.4.4 "Weld Program Statistics"
By positioning the cursor on the fourth line of the sub-menu "Statistics" and then
pressing the key you can access thememorymenu"Weld Program Statistics"
screen.
Weld program statistics Outlet:#
Prog
number
of
WIP&WOP
number
of
WOP
WOP
repeat
lim act
auto.
rep.
feed
####### ####### # # #####
####### ####### # # #####
####### ####### # # #####
####### ####### # # #####
####### ####### # # #####
####### ####### # # #####
####### ####### # # #####
####### ####### # # #####
<↓↑> <F1..F5> <ESC>
Select output number and confirm with . The individual menu lines of the
display signify the following:
Weld Program Statistics Statistics of welds within and out of tolerance for the
individual outputs.
Output Selection of the ouput for which statistical information
is to be displayed.
Prog Display of the program the statistics are related to.
Number of WIP & WOP Total number of welds.
Number of WOPs Total number of welds out of tolerance.
WOP repeat limit Display of programmed acceptable sequential welds
that may be out of tolerance.
Actual WOP repeat Actual number of sequential welds out of tolerance.
Auto refeed No. of studs automatically supplied due to missing
SOW-signal during internal slide rail control.
The information for the individual weld programs WOP‘s can be alternately
displayed with the keys and .
By pressing you can select another output, by pressing again you will
return to the sub-menu "Statistics".
By pressing you will return to the main menu.
Artisan Technology Group - Quality Instrumentation ... Guaranteed | (888) 88-SOURCE | www.artisantg.com

15
1.4.5 "Maintenance"
The "Maintenance" screen contains information about the condition of the
connected weld tools due to wear.
By positioning the cursor on the fifth line of the sub-menu "Statistics" and then
pressing the key you can access the "Maintenance" screen.
Maintenance
Collet maint. –No. welds
12345
Act. ###### ###### ###### ###### #####
Warn. ###### ###### ###### ###### #####
Fault ###### ###### ###### ###### #####
Monitor - drop time (ms)
Act. ###,# ###,# ###,# ###,# ###,#
Warn. +# -# +# -# +# -# +# -# +# -#
Fault +# -# +# -# +# -# +# -# +# -#
<F1..F5> <ESC>
The individual menu lines signify the following:
Maintenance The wear of the collet as well as the drop time of the connected
weld tools will be displayed.
Collet Maint.-
No. of Welds Weld statistics will begin with assembly of new collet.
Remark: After replacing the collet the maintenance meter must
be reset.
Act. Actual number of welds performed with a collet.
Warn. Programmed number of welds with which, when exceeded, the
corresponding maintenance warning will become active.
Fault Programmed number of welds with which, when exceeded, the
weld output will be set into fault condition.
Monitor Drop
Time (ms) Monitoring of the mechanical parameter "stud drop time".
Remark: The difference refers to the established drop time of
the past 8 welds in relation to the programmed (!) drop time.
Act. Deviation of actual measured stud drop time from the pro-
grammed one will be displayed.
Warn. Programmed deviation with which, when exceeded, the corres-
ponding maintenance warning will become active.
Fault Programmed deviation with which, when exceeded, the corres-
ponding weld output will be set to fault condition.
Artisan Technology Group - Quality Instrumentation ... Guaranteed | (888) 88-SOURCE | www.artisantg.com

16
Maintenance Information:
•The maintenance warning will be transmitted to the customer interface and will
appear as " ! " in the corresponding field of the sub-menu " Status TMP . . . . ".
•Irrespective of the TMP unit maintenance warnings the prescribed maintenance
intervals of the unit components must be maintained.
•Information on the specific maintenance works can be read from the
corresponding operating manuals.
•Having repaired the unit components the maintenance statistics in the menu "
Clear Functions" must be reset to " 0 ".
Artisan Technology Group - Quality Instrumentation ... Guaranteed | (888) 88-SOURCE | www.artisantg.com

17
1.5 Sub-Menu "Clear Fault Condition"
The sub-menu "Clear Fault Condition" can be selected directly with the function
key or by positioning the cursor on the fourth line of the main menu
"OPERATION" and then pressing .
In case of no fault condition the following will be displayed on the monitor when the
sub-menu "Clear Fault Condition" is selected:
OPERATION
Weld parameter monitoring
Programming
Statistics
Fault reset
No fault exist
Status TMP
Functions
Warnings
<↓↑> <ENTER> <F1..F5>
In case of a TMP system fault all fault sources will be displayed
Fault condition
To continue operation clear
the fault condition. <F1..F5> <ESC>
If system faults requires the opening of the weld unit it is exclusively
reserved for authorized and qualified personnel. All fault messages
will be cleared when the TMP unit is switched on again, following
the remedy of the fault condition.
Artisan Technology Group - Quality Instrumentation ... Guaranteed | (888) 88-SOURCE | www.artisantg.com
Table of contents
Other Emhart Teknologies Control Unit manuals
