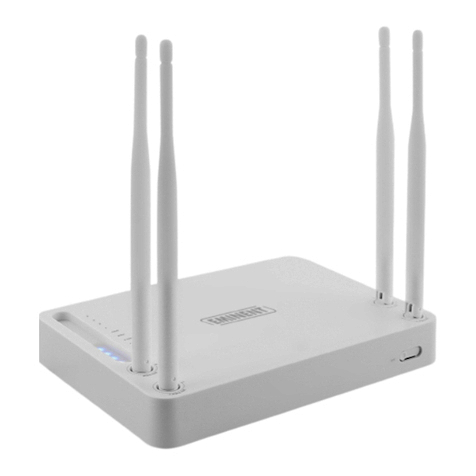
Eminent EM4700 User manual

EM4700
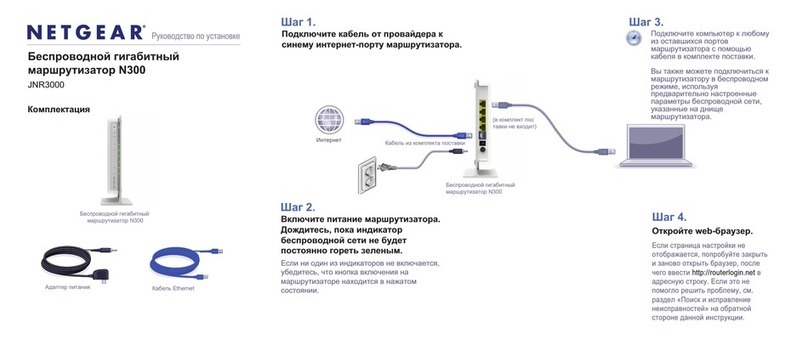
Wireless 300N Router

2
|
ENGLISH
EM4700 – Wireless 300N Router
Table of contents
1.0 Introduction ...........................................................................................................3
1.1 Packing contents...............................................................................................3
2.0 Device overview ....................................................................................................4
Front Panel.......................................................................................................... 4
Rear, Right Panel and bottom Side ..................................................................... 5
2.1 Connecting the router wired...............................................................................7
2.2 Configuring the router for connection with the Internet via DHCP.......................7
2.3 Configuring the router for connection with the Internet via Static IP ...................9
2.4 Configuring the router for connection with the Internet via PPPoE...................10
2.5 Configuring the router for connection with the Internet via PPTP .....................11
2.6 Configuring the router for connection with the Internet via L2TP......................12
3.0 Securing a wireless network................................................................................14
3.1 WPA2 AES security.........................................................................................14
3.2 WEP Security..................................................................................................17
3.3 Access Control ................................................................................................18
3.4 Finishing the installation procedure of your wireless router..............................22
4.0 Setting up a secured connection using WPS .......................................................22
4.1 Using the WPS button (Router and Wireless WPS adapter) ............................22
5.0 Multi SSID – Guest network.................................................................................24
6.0 Operation mode...................................................................................................27
6.1 Access Point ( AP )..........................................................................................27
6.2 Repeater .........................................................................................................31
7.0 Parental Control ..................................................................................................37
8.0 Firewall................................................................................................................38
8.1 QOS................................................................................................................38
8.2 URL Filtering ...................................................................................................41
8.3 IP Filtering.......................................................................................................43
8.4 MAC Filtering...................................................................................................45
8.5 Port Filtering....................................................................................................47
8.6 Port Forwarding...............................................................................................49
8.7 DMZ ................................................................................................................51
9.0 Management .......................................................................................................52
9.1 Admin..............................................................................................................52
9.2 Time and Date.................................................................................................53
9.3 System............................................................................................................54
9.4 Upgrade ..........................................................................................................55
10.0 Frequently Asked Questions and other related information................................55
11.0 Service and support...........................................................................................55
12.0 Warning and points of attention .........................................................................56
13.0 Warranty conditions...........................................................................................57

3
|
ENGLISH
1.0 Introduction
Congratulations with the purchase of this high-quality Eminent product! This product
has undergone extensive testing by Eminent’s technical experts. Should you
experience any problems with this product, you are covered by Eminent
warranty. Please keep this manual and the receipt in a safe place.
Register your product now on www.eminent-online.com and receive product updates!
1.1 Packing contents
The following parts need to be present in the packing:
•EM4700 Wireless 300N Router
•Power adapter
•UTP network cable
•Quick install guide

4
|
ENGLISH
2.0 Device overview
Front Panel
Label Color Function
POWER Green On: device is powered on
Off: device is powered off
WAN Green On: WAN link established and active
Off: No LAN link
Flashing: Ethernet packets being transferred
2.4GHz Green On: WLAN link established and active
Flashing: Wireless packet being transferred
WPS Green Off: WPS link isn’t established and active
Flashing: WPS packets being transferred
LAN
1/2/3/4 Green On: LAN link established and active
Off: No LAN link
Blink: Valid Ethernet packet being transferred

5
|
ENGLISH
Rear, Right Panel and bottom Side
Figure 1: Rear Panel Connections
Figure 2: Right Panel Connections

6
|
ENGLISH
Bottom label
Rear, Right Panel and bottom Side decription
Label Function
ANTENNA (Optional) 2 fixed ANTENNA
ON/OFF SWITCH Power on/off the device
POWER Connects to the supplied power adaptor
LAN 4/3/2/1 Connects the device via LAN Ethernet to up to 4 PCs
WAN Connects the device via WAN Ethernet to xDSL / Cable Modem
WPS
Press this button for at least 3 full seconds and the WPS LED will
flash to start WPS.
Now go to the wireless adapter or device and press its WPS button.
Make sure to press the button within 120 seconds (2 minutes) after
pressing the router's WPS button.
RESET Reset button. RESET the 802.11ac WLAN Router to its default settings.
Press this button for at least 6 full seconds to RESET device to its default
settings.

7
|
ENGLISH
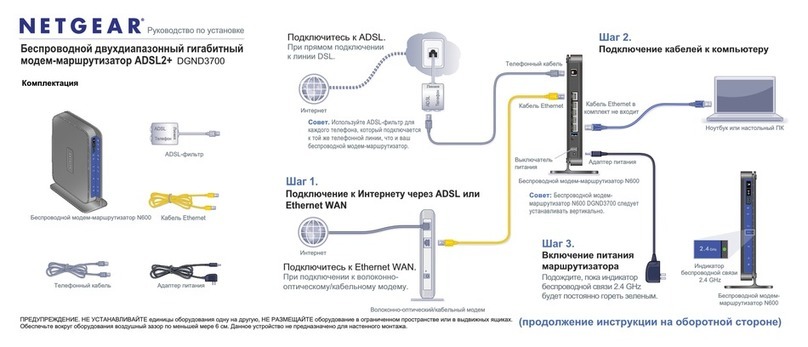
2.1 Connecting the router wired
1. Turn off your computer.
2. Connect the router to a wall outlet using the supplied power adapter.
3. Connect the supplied UTP network cable to the ‘WAN’ port of the router.
4. Connect the other end of the UTP network cable to the ‘LAN’ port of your cable
modem.
5. Connect a UTP network cable to one of the four ‘LAN’ ports of your router.
6. Connect the other end of the UTP network cable to the network adapter in your
computer.
Do I have a proper network connection? Turn on the computer and verify if the LED on
the router, corresponding with the LAN-port to which you connected the UTP
networking cable, is lit. The LED on the network adapter of your computer should also
be lit.
2.2 Configuring the router for connection with the Internet
via DHCP
Before you can configure the router for a connection with the Internet, you will first
need to connect to the router. Follow the instructions below to connect to the router.
1. Launch your internet web browser on your computer and type http://192.168.8.1 in
your browsers address bar.
2. Please enter the User Name: admin and Password: admin and then click on “OK”
button.
3. Click on “Setup Wizard”.
4. Please make sure WAN Access Type “DHCP Client”is selected and press “Next”

8
|
ENGLISH
5. If your provider requires you to make a connection by using a Static IP-
address, then please proceed with chapter 2.3.
If your provider requires you to make a connection by using PPPoE (with
username and password), then please proceed with chapter 2.4.
For PPTP internet connection, please proceed with chapter 2.5.
For L2TP internet connection, please proceed with chapter 2.6.
6. Fill out a Wireless Network Name (SSID). Default this is Eminent. Click on
“APPLY & REBOOT”. Wait until the internet configuration is completed

9
|
ENGLISH
7. Your router will apply the settings and reboot.
8. The internet configuration is now completed.
2.3 Configuring the router for connection with the Internet
via Static IP
1. Launch your internet web browser on your computer and type http://192.168.8.1 in
your browsers address bar.
2. Please enter the User Name: admin and Password: admin and then click on “OK”
button.
3. Click on “Setup Wizard”.
4. Please make sure WAN Access Type “Static IP” is selected. Enter IP Address,
Subnet Mask, Default Gateway and DNS which was given by your Internet
Service Provider (ISP) and click on “Next”

10
|
ENGLISH
5. Your router will apply the settings and reboot.
6. The internet configuration is now completed.
2.4 Configuring the router for connection with the Internet
via PPPoE
1. Launch your internet web browser on your computer and type http://192.168.8.1 in
your browsers address bar.
2. Please enter the User Name: admin and Password: admin and then click on “OK”
button.
3. Click on “Setup Wizard”.
4. Please make sure WAN Access Type “PPPoE” is selected. Enter User Name and
Password which was given by your Internet Service Provider (ISP) and click on
“Next”.

11
|
ENGLISH
5. Your router will apply the settings and reboot.
6. The internet configuration is now completed.
2.5 Configuring the router for connection with the Internet
via PPTP
1. Launch your internet web browser on your computer and type http://192.168.8.1 in
your browsers address bar.
2. Please enter the User Name: admin and Password: admin and then click on “OK”
button.
3. Click on “Setup Wizard”.
4. Please make sure WAN Access Type “PPTP” is selected. Enter your Servers’s IP
address including “User Name” and “Password” and click on “Next”.

12
|
ENGLISH
5. Your router will apply the settings and reboot.
6. The configuration is now completed.
2.6 Configuring the router for connection with the Internet
via L2TP
1. Launch your internet web browser on your computer and type http://192.168.8.1 in
your browsers address bar.
2. Please enter the User Name: admin and Password: admin and then click on “OK”
button.
3. Click on “Setup Wizard”.

13
|
ENGLISH
4. Please make sure WAN Access Type “L2TP” is selected. Enter your Servers’s IP
address including “User Name” and “Password” and click on “Next”.
5. Your router will apply the settings and reboot.
6. The configuration is now completed.

14
|
ENGLISH
3.0 Securing a wireless network
To avoid having uninvited guests probing your wireless network we strongly
recommend securing your wireless network. There are several security methods
which can secure the network at different levels. To apply a method to your network it
is required that all wireless network devices support this method. The strongest
method of security is WPA2 (WiFi Protected Access).
The strongest method of security is WPA2 AES. It is recommended to use this type of
security. However, it is possible that (older) wireless hardware is not able to use this
type of security, but can only use WPA-TKIP or WEP. Refer to the documentation of
your hardware to be sure if your hardware can use WPA2 AES.
If you wish to use WPA2 AES security, continue with paragraph 3.1 (recommended). If
you wish to use WEP security, continue with paragraph 3.2
3.1 WPA2 AES security
1. Launch your internet web browser on your computer and type http://192.168.8.1
in your browsers address bar.
2. Please enter the User Name: admin and Password: admin and then click on
“OK” button. You will see the following screen:
3. From the left-hand menu, click on “Setting” - “WIRELESS 2.4G”.

15
|
ENGLISH
4. You will see the following screen:
5. This page is to configure the wireless settings of your router. See below figure for
wireless network description:

16
|
ENGLISH
Field Description
Status Enable or Disable the Wireless LAN Interface.
Default: ON
Wi-Fi
Network
Name (SSID)
Specify your 2.4GHz network name.
Default: Eminent
Each Wireless LAN network uses a unique Network
Name to identify the network. This name is called the
Service Set Identifier (SSID). If you keep default
network name ( SSID ) Eminent, then this is the
network you want to connect to using your mobile
device. You are also free to change the SSID name.
This new made network name will then be the one to
make a wireless connection with.
Broadcast
SSID At default = Enabled.
Disable SSID broadcasting to hide the network name
and make it more secure. Please note, if you disable
this function then you have to manually add a wireless
network connection in your mobile device.
Wireless
Mode Specify the WLAN Mode. Supported = B/G/N
Channel
Width Choose a ChannelWidth from the pull-down menu.
Supported = 20/40 MHz
Channel
Number Choose a Channel Number from the pull-down menu.
Select between channel 1 and 13, depending which
channel width is selected, to determine what will be the
most stable channel for your wireless 2.4GHz network.
Select “Auto” to let the router determine the most
stable connection.
Maximum
Downlink Adds a restriction for the maximum downlink
throughput speed. At default = 0, which means no
restriction.
Maximum
Uplink Adds a restriction for the maximum uplink throughput
speed. At default = 0, which means no restriction.

17
|
ENGLISH
6. Select “Security” to open the security settings. You will see the following screen:
7. At the field ‘Encryption’ select “WPA2”.
8. At default is the SSID Eminent password protected. This password is also printed
at the bottom label of your EM4700 router. At the field “Pre-Shared Key” is the
password listed. You can enter another password for your wireless network if you
like.
Please note, if you change the password for this wireless network all the wireless
devices which were already connected to this wireless network need to be connected
again with the new chosen password.
9. Click on “SAVE AND REBOOT NOW” to let the router save and apply the
settings. If you want to make other changes first for this wireless network, then
please select “SAVE AND REBOOT LATER”. Once you are ready please do not
forget to click on “SAVE AND REBOOT NOW”.
3.2 WEP Security
If you would like to use WEP security, please follow the above security steps in
paragraph 3.2 and select ‘WEP’ at step 7.
You can select ‘Key Length: 64 bits or 128 bits’’. For WEP key 64-bits please enter
maximum of 5 characters. For WEP key 128-bits please enter maximum of 13

18
|
ENGLISH
characters. For WEP encryption you are only allowed to use numbers from 0 till 9 and
the letters a till z. Do not enter special characters or space bar.
Please note, if you have chosen WEP as wireless encryption, the WPS functionality
will be disabled.
3.3 Access Control
A MAC Address Access List ( ACL )has the ability to let only authorized clients
connect to the network. MAC addresses can be added/deleted and edited from the
ACL list depending on the MAC Access Policy.
If you choose 'Allowed Listed', only those clients whose wireless MAC addresses are
in the access control list will be able to connect to your router. When 'Deny Listed' is
selected, these wireless clients on the list will not be able to connect to your router. To
access the Wireless NetworkAccess Control:
1. Launch your internet web browser on your computer and type http://192.168.8.1
in your browsers address bar.
2. Please enter the User Name: admin and Password: admin and then click on
“OK” button.
3. From the left-hand menu, click on “Setting” - “WIRELESS 2.4G”.

19
|
ENGLISH
4. You will see the following screen:

20
|
ENGLISH
5. Select Access Control. You will see the following screen:
This manual suits for next models
2
Table of contents
Other Eminent Wireless Router manuals

Eminent
Eminent EM4543 User manual

Eminent
Eminent EM4630 User manual

Eminent
Eminent EM4544 R1 User manual

Eminent
Eminent EM4543 User manual

Eminent
Eminent EM456 Series User manual

Eminent
Eminent EM4561 / EM4567 User manual

Eminent
Eminent EM4510 R1 User manual

Eminent
Eminent EM4600 User manual

Eminent
Eminent EM4450 User manual

Eminent
Eminent EM4569 User manual