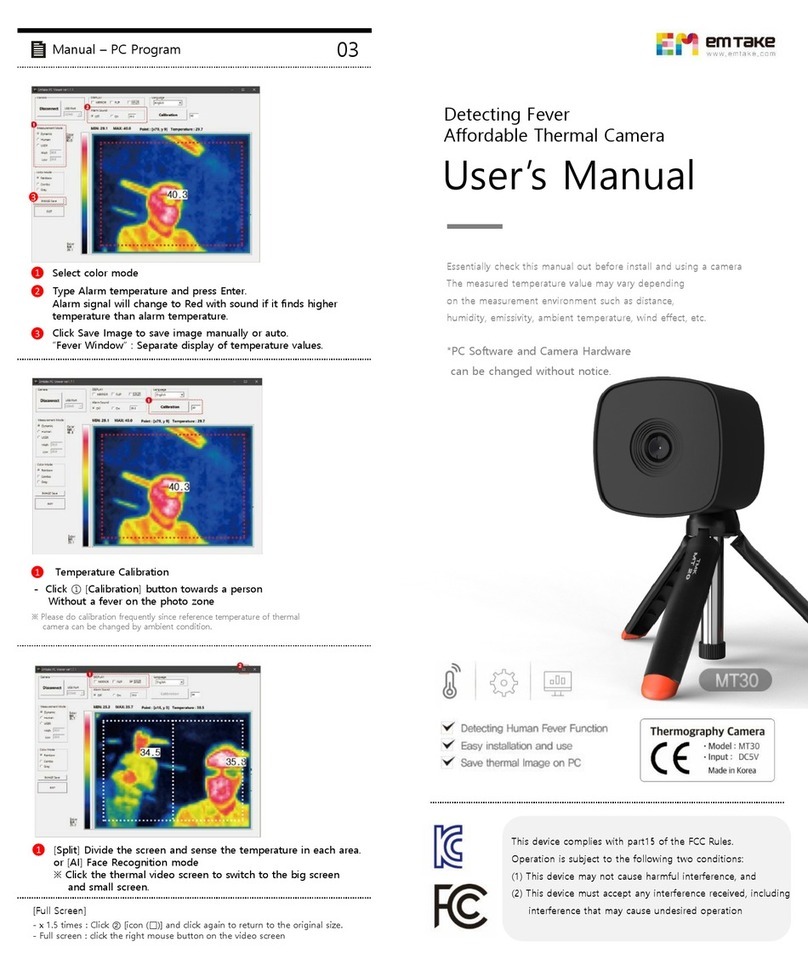
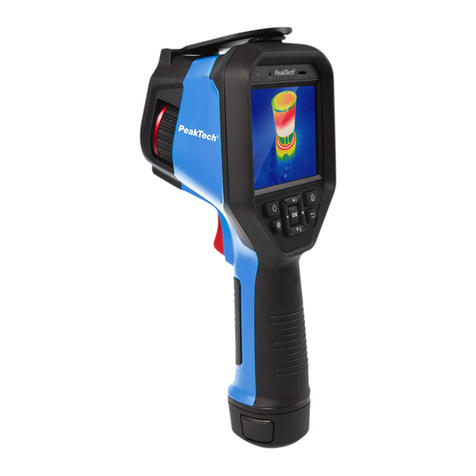
emtake MT30 User manual

Very affordable but High Accurate EMTAKE Low-end Thermal Imaging
Camera (MT30)
Use like This!
[Manual & Guide ]
[notice]
- Essentially check this manual out before install and using a camera
- The measured temperature value may vary depending on the measurement environment
such as distance, humidity, emissivity, ambient temperature, wind effect, etc.
- PC Software/Firmware and Camera/EBB Hardware can be changed without notice.
[*] EBB (Emtake BlackBody) : The interlocked Set-Top Blackbody with EMTAKE Thermal camera
supports very accurate/stable temperature measurement.
-EMTAKE BLACKBODY (EBB*)
-NONE BLACKBODY

[Components / Spec.]
Resolution
Viewing of angle
Measuring range
Temp. Step
Connection
Power
Size / Weight
Operation environment
80 X 60, Micro Bolometer Array
30。Lens / 50。Lens / 100。Lens
0.1℃(@ 30℃)
USB 5 pin Data
USB 5 pin DC 5V
55.5x55.5x53.7mm/100g
10 ~ 45℃
20℃~ 50 ℃
[Camera] [Wall Bracket] [USB, 5 pin Cable] [Powered USB extension] [EMTAKE Blackbody (EBB)] [USB C type Cable]
[MT30 Components] [EBB Components]
[Software]
Download from USB Memory Card or website (www.emtake.com)
- PC monitoring program (for Windows 10 / 64bit)
- Camera USB Device Driver (VCP_V1.4.0_setup.exe) - Install if necessary
- User Guide
This device complies with part15 of the FCC Rules.
Operation is subject to the following two conditions:
(1) This device may not cause harmful interference, and
(2) This device must accept any interference received, including
interference that may cause undesired operation
[MT30 Spec.]
Temperature
Error rate
Connection
Power
Operation environment
Fixed Temp. ±0.3 ℃
USB C type Data
USB C type DC 5V
20 ~ 43 ℃(Indoor)
[EBB Spec.]
[MT30 Certification]
This device complies with part15 of the FCC Rules.
Operation is subject to the following two conditions:
(1) This device may not cause harmful interference, and
(2) This device must accept any interference received, including
interference that may cause undesired operation
[EBB Certification]
[EBB Role / Function]
- Using the built-in heating wire and thermometer, it generates
constant temperature in the EBB.
- Built-in thermometer reads EBB temperature in real time
and delivers it to PC
- Automatically corrects real-time EBB temperature value with
measured human body temperature.
- Very accurate fever detection regardless of environment changes.
- Minimizes limitation on camera install sites,
and minimizes additional adjustments after installation.
25 ~45℃(Fixed Temp)
Embedded Blackbody (EBB)
Input: DC 5.0V
Emtake Ltd. Made in Korea
Certification Number: R-R-Y2H-MT30
Company Name: Emtake Ltd.
Product: Thermography Camera
Manufactured: Made in Korea
Certification Number: R-R-Y2H-EBB
Company Name : Emtake Ltd.
Product: Blackbody
Model Name: EBB
Manufacturer/Made in: Emtake Ltd. / Korea
2 / 10

1. Install Thermal Camera PC Software on Windows 10 / 64bit PC.
- Download MT30 PC viewer software(MT30-EBB_Viewer-x.x.x.zip) from the provided USB memory card or www.emtake.com .
- Unzip MT30-EBB_Viewer-x.x.x.zip (Password is EMTAKE_MT30) and Execute “MT30-EBB_Viewer x.x.x.exe” on PC.
2. Connect EBB directly to PC USB Port or to USB Hub (5V DC & Data).
(Notice) The EBB must be connected to the PC before the camera to supply power.
3. Connect the USB port on the bottom of the thermal imaging camera to the USB port on the PC (or use a powered USB
-[Normal] : Directly connect the camera's USB port and the PC's USB port(5V DC output) using the provided “USB 5 pin cable”.
-[For more stable power supply] : Use separate the “Powered USB Extension” (in the Package Box).
Reason why : Sometimes the camera does not work because the output voltage of the USB port of an old PC or some PCs is unstable.
[Setup]
Camera and PC connection
(Connection 1) Direct USB connection between camera and PC
(Connection 2) Powered USB extension between camera and PC
EBB and PC connection
(1) Attaching EBB to the top of the camera( Tape +Band)
=
(2) Connect EBB directly to PC USB port or USB Hub(DC 5V & Data)
(Method 2) EBB and USB Hub
Powered USB Extension
※
Tripod is not included.
(Method 1) EBB and PC
connection
Without
Blackbody
3 / 10

4 / 10
1) As in Page 3, connect the camera to the PC, and connect the EBB to the PC USB port or power adapter for supply power.
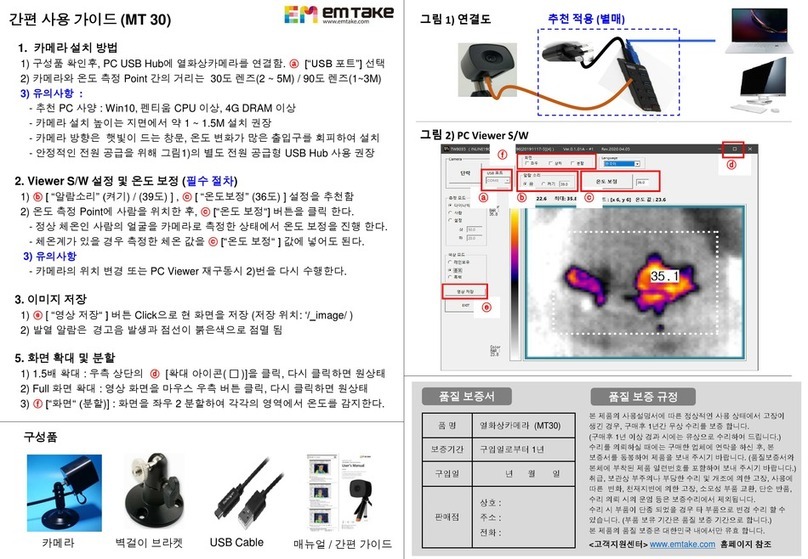
2) EBB LED lamp : blue color (Normal Operation), red color (warm-up time 7 Minutes)
3) Setting
- Camera Connection : After Selecting “ⓐUSB port #”, click “ⓑConnect” to display the thermal image on the screen. (It takes about 6 Min to stabilize ⓚ)
-Emtake Blackbody (EBB) Position Adjustment: As shown in the figure below adjust the EBB’s position so that EBB’s “ⓒHot Spot” appears in the
“ⓔBlackbody Area” at the top of the screen →select “ⓓEBB” →Click the “Set Point ⓙ” button. (It takes about 3 minutes to stabilize ⓚ)
(Note) Whenever the location of the black body “ⓒHot Spot” area is changed, click the “Set Point ⓙ” button, and input the “ⓞTemperature as 40.0 ℃”
-Blackbody Area: To change the location and size of “ⓔBlackbody area”, click “ⓔBlackbody area” and drag with the left mouse button on the screen.
-Monitoring: After click “ⓕMonitoring” drag with the left mouse button on the screen to set the area. →Select “ⓖDone” to start monitoring
4) Temperature Correction : Put a person with normal body-heat at the measuring position in front of the camera. And after entering “ⓜ36.5” degrees at
the reference temperature location. Click “ⓛSet” to adjust the temperature so that the human body temperature is “ⓘ36.5”. If you select Fahrenheit
unit, adjust it to “ⓘ97.7 ℉” degrees.
After that, you can adjust the temperature through “ⓗCalibration”. When you click the “ⓝTimer” button, temperature calibration is set after5 seconds.
[Note] If the temperature display “ⓘ” is displayed as LOW, click “ⓛSet” to perform the calibration.
[Installation method 1/2 : Connect the EMTAKE Blackbody and a EMTAKE Camera]
ⓕ
ⓒ
ⓔ
ⓘ
36.5 ⓚ
ⓑⓐⓙ
ⓖ
ⓔ
ⓕ
ⓓ
ⓞ
ⓗ
ⓜ
ⓛ
ⓝ

1) As in page 3, connect the camera to the PC.
2) It takes 6 minutes to warm up after power is supplied to the thermal imaging camera (normal temperature is detected after 6 minutes of camera
operation)
3) Setting
-Camera Connection : After Selecting “ⓐUSB port #”, click “ⓑConnect” to display the thermal image on the screen.(It takes about 6 Min to stabilize ⓚ)
-Blackbody Selection: Select “Noneⓓ”.
- Monitoring: “: Click “ⓕMonitoring area” and drag with the left mouse button on the screen to set the area
→Start monitoring by selecting “ⓖDone”.
4) Temperature Correction : Put a person with normal body-heat at the measuring position in front of the camera. And after entering “ⓜ36.5” degrees at
the reference temperature location. Click “ⓛSet” to adjust the temperature so that the human body temperature is “ⓘ36.5”. If you select Fahrenheit
unit, adjust it to “ⓘ97.7 ℉” degrees.
After that, you can adjust the temperature through “ⓗCalibration”. When you click the “ⓝTimer” button, temperature calibration is set after 5 seconds.
[Note] If the temperature display “ⓘ” is displayed as LOW, click “ⓛSet” to perform the calibration.
5 / 10
[Installation method 2/2 : None Blackbody]
ⓑⓐ
ⓘ
36.5
ⓕ
ⓚ
ⓕ
ⓖ
ⓓ
ⓗ
ⓜ
ⓛ
ⓝ

36.5
ⓛ
ⓜ
ⓝ
6/ 10
36.5
ⓚ
[Operation 1/3]
1. Menu
ⓐ“Display“ : [AI], it recognizes the human head and measures the temperature like ⓝhead detecting line.
- Intel Pentium class CPU / 8G DRAM or higher performance recommended.
[Mirror / Flip] Rotate the monitoring image vertically and horizontally.
ⓑ“Alarm sound” : Set the temperature value at which the alarm occurs(38 degrees is recommended).
Select the alarm sound On/Off and the alarm sound type.
ⓒ“Language” : Select monitoring program User Interface language.
ⓓ“Temperature” : Set the temperature units Celsius or Fahrenheit.
ⓔ“Measurement mode” : Changes the color of the image on the screen based on the ⓕ“Color Bar’s Min/Max value.
[Dynamic] The highest/lowest temperature of the monitored
thermal image is the Min/Max value of the ⓕ“Color Bar”.
[User] User sets Color Bar Min/Max temperature.
ⓖ“Color Mode” : Select the Color type of “Color Bar” .
ⓗ“Auto Save” : Automatically saves the screen image to
“/_image/” directory when an alarm occurs.
ⓘ“Image Save” : Manually save the screen image.
ⓙ“Fever Window” : View a separate large temperature
window like ⓚ.
ⓛ“Monitoring area” : The area where temperature can be
measured.
ⓜ“Blackbody area” :
- The area where the black body is located.
- Even if it is located at the monitoring area, it does not
measure the temperature.
ⓑ
ⓐ
ⓔ
ⓒ
ⓓ
ⓕ
ⓕ
ⓖ
ⓗ
ⓘ
ⓙ

2. Operation
2-1. Camera install Position.
- Install preparation : Windows 10/64bit PC, tripod, fence, Queue belt, table, stop sign, etc.
- Measurement distance: Measurement distance varies depending on the camera lens angle.
- Measuring distance : [30 degree : 1 ~ 4 M] / [50 degree : 1 ~ 3M] / [90 degree : 1 ~ 2M].
- Camera position : (Important) Install the camera in a place where the wind is not directly
exposed. external wind/air conditioner/fan/heater, etc.)
- Big Hall (Exhibition hall, Shopping mall, etc.) : 30 degree lens(MT30-3) recommended.
- Metro station (train station, airport, bus terminal, etc.): 30 degree lens(MT30-3) recommended.
- Narrow tunnels (path, stairs, escalators, elevators, etc.): 90 degree lens(MT30-9) recommended.
- Building entrance (religious facilities, small building entrance, general hospital, school, kindergarten, etc.) :
90 / 50 degree lens(MT30-9 / MT30-5) recommended.
- Store entrance (indoor gym, clinic, shop, restaurant, etc.): 90 / 50 degree lens(MT30-9 / MT30-5) recommended.
- How to fix the camera :
- Camera fixing method : [Fixed to the wall or ceiling using a wall bracket], [Installed on the floor using a tripod for camera].
- Dual display method : [Notebook + Monitor], [Windows Tablet + Monitor], [Desktop + HDMI Splitter + 2 Monitors].
[Operation 2/3]
STOP
[Preparation for installation]
[Entrance] Gate
Hall
Queue
Line
Measuring
line
Moving Line
[Narrow Path]
Moving Line
[Wall/Ceiling fix]
[Tripod fix]
Gate
Hall
gate
Hall
[Curved Path]
indoor
7/ 10

2-2. Monitoring.
- The camera avoids the direction of Wind, sunlight, entrances (outdoors), windows, lights etc..
→Reason : Measurement accuracy is reduced by interference from light, wind and heating elements.
-The measurement value may change depending on the surrounding environment.
Monitoring operators should check the measuring temperature from time to time.
- If there is an abnormality in the measured value, put a normal person in front of camera and key in the
number of “Calibration” to adjust.
[Operation 3/3]
2-3. Alarm.
- Only one person with the highest temperature is displayed on the screen.
- When measuring temperature is higher than the alarm set value, an alarm line(red line) is displayed on the
screen and an alarm sound is generated.
-If the alarm does not sound even though the “alarm sound” is turned on, check the volume of the PC sound.
- When the alarm sounds, re-measure the people who have passed simultaneously.
2-4. Display.
-[When “AI” is On] It recognizes the human head and measures and displays only the head temperature.
- It is possible to measure only a person's body temperature by removing hot objects and ceiling lamps.
- It is recommended to use the AI function at a distance of 1M or more and 30 degree / 50 degree lens.
- Pentium CPU/4G RAM or higher PC Spec. is recommended for muchAI computing resources.
- View on a large full screen : Clicking the left mouse button on the screen image expands to Full Screen.
If you click the mouse button again, it is reduced to the existing screen size.
-[“Fever window”] : You can see the measured temperature value in an additional larger size .
38.5
38.5
36.5
[AI On : Alarm]
[AI On : normal]
[AI 0ff : Alarm]
36.5
[Fever Window]
36.5
8 / 10

Powered USB extension
(Q-1) USB # does not appear in “USB Port” menu.
→(A-1) Connect the camera and PC using the “Powered USB extension”.
→(A-2) : Install the USB Device Driver (VCP_V1.4.0_setup.exe).
Download from the provided USB Memory Card or www.emtake.com (Password: EMTAKE_MT30).
→(A-3) : Check the USB Cable. (Check the operation using another USB 5 Pin Cable (supporting Data + 5V DC Power).
(Q-2) There is no alarm sound.
→(A-1) : Check if “Alarm Sound” is selected as On in the monitoring program.
→(A-2) : Check if there is an alarm sound files in the “/alarm/” directory.
→(A-3) : Check the volume at PC system sound setup.
→(A-4) : Check if there is speaker function of monitor connected to PC.
(Q-3) Head recognition (AI) function does not work.
→(A-1) : Check whether “AI” is on in the monitoring program.
→(A-2) : Measure at a distance of 1M or more and check the use of a 30 degree lens camera.
→(A-3) : It is recommended to use a PC with Windows 10/64bit, Pentium CPU, 4G DRAM or higher performance.
(Q-4) When the image is indistinguishable (All black, All white or in one color on the screen)
→(A-1) : Select to “Dynamic” at “Measurement Mode” and “Combo” at “Color Mode”.
→(A-2) : Recheck the “EBB” & “Blackbody area” location and “Blackbody Temperature” in the monitoring program.
(Q-5) When the measured temperature changing value is very large from time to time
→(A-1) : Check the warm-up time for about 10 minutes after the camera and EBB power on.
→(A-2) : Checking the indoor environment changes such as wind, air conditioner and heater.
→(A-3) : Checking “Blackbody Temp”, “Calibration”, “Blackbody Area” and “Monitoring Area”.
→(A-4) : When connecting the camera and EBB to a PC using a USB hub, check whether EBB's USB Driver is connected.
(Q-6) Can I create a log file in case of an alarm occur and use it for other functions?
→(A-1) : Yes. If you contact us separately, we will guide you.
(Q-7) Is it possible to change the alarm sound such as a human voice, etc.?
→(A-1) : Create a new alarm sound as “09_user.wav”, save it in “/alarm/” directory, and select “09” in the monitoring program.
(Q-8) Is it possible to use the new EBB on previously purchased MT-30 Camera?
→(A-1) : Yes, EMTAKE sells the new EBB. (Contact us at [email protected])
Download and use the new EBB Monitoring program from www.emtake.com. (Password : EMTAKE_MT30)
[Q & A]
9 / 10

[Product Warranty]
Limited Warranty
ㆍModel
ㆍWarranty Period
ㆍPurchase Date
ㆍSeller
MT30
one (1) year from the Purchase Date
/ /
Name :
Address :
Contact :
According to the manual, the malfunction may occur If it occurs,
the warranty is guaranteed for one year after purchase.
( will repair it for a fee after more than one year after purchase.)
When requesting repairs, contact the purchased company, and
Please enclose the warranty and send the product. (Please
include the quality assurance and the product with serial number)
The warranty does not cover carelessness in storage, failure due
to repair or modification, changes due to use, failure due to natural
disasters, replacement of consumable parts, return of normal
products, and shipping costs when requesting repairs.
If parts are discontinued during repair, it may be changed to other
parts for repair. (Parts retention period is the warranty period.).
<Contact> www.emtake.com
Limited Warranty
ㆍModel
ㆍWarranty Period
ㆍPurchase Date
ㆍSeller
EBB
one (1) year from the Purchase Date
/ /
Name :
Address :
Contact :
According to the manual, the malfunction may occur If it occurs,
the warranty is guaranteed for one year after purchase.
( will repair it for a fee after more than one year after purchase.)
When requesting repairs, contact the purchased company, and
Please enclose the warranty and send the product. (Please
include the quality assurance and the product with serial number)
The warranty does not cover carelessness in storage, failure due
to repair or modification, changes due to use, failure due to natural
disasters, replacement of consumable parts, return of normal
products, and shipping costs when requesting repairs.
If parts are discontinued during repair, it may be changed to other
parts for repair. (Parts retention period is the warranty period.).
<Contact> www.emtake.com
10 / 10

Affordable Fever Detecting Thermal Camera [MT-30]
Notes on measurement
[Measurement precautions]

1. A thermal imaging camera is never a 'thermometer'.
➔It is a principle that shows the temperature value by detecting the human body
heat(infrared emissivity) by the camera and then calibrating it with software.
➔Therefore, the result is not the same as the thermometer, since it shows the measured
value through S/W programming.
※The detected temperature value changes depending on the surrounding environment
such as summer / winter or air conditioner / heater.
Therefore, it is necessary to be able to always detect the correct temperature through
the temperature calibration function.
[Measurement precautions]
2/ 5

2. The thermal imaging camera aims to screen suspected fever by checking
‘relative temperature difference’.
➔Based on the person who does not have fever, the person with relatively fever is selected.
➔If a suspected fever has been screened, be sure to check the heat accurately once again
with a thermometer.
[Measurement precautions]
3 / 5

3. There must always be a monitoring operator.
➔For accurate measurements, the monitoring operator should be able to do
a thermal check.
- Make sure to set the measurement distance (1 ~ 4m) from a fixed camera
position. Attach a separate sticker to the bottom of the measuring point.
➔When the fever screening effect is poor.
- Operate only with 'temperature alarm sound' without monitoring operator.
- When changing the distance between the camera and the heating check person
frequently during measurement.
STOP
[Measurement precautions]
4 / 5

School Pre-School AcademyPlay Room
Office Building
Clinic & Hospital & Pharmacy
Café & Restaurant
Court & Police station Government office Church & Cathedral
Hotel & Motel
[Measurement precautions]
5 / 5

Thank you
Other manuals for MT30
2
Table of contents
Other emtake Thermal Camera manuals
