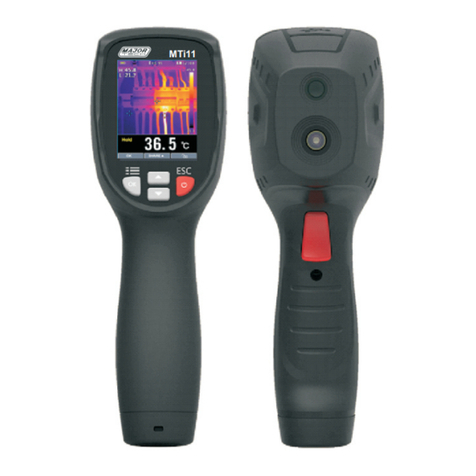
Bosch MIC 612 Series User manual

MIC612 Thermal Camera
MIC612
en Operation Manual


Table of contents
1Safety 5
1.1 About this Manual 5
1.2 Legal Information 5
1.3 Safety Precautions 5
1.4 Important Safety Instructions 5
1.5 Customer Support and Service 7
2Unpacking 8
2.1 Parts List 8
2.2 Additional Products Required 8
2.3 Additional Tools Required 8
3Product Description 10
4Electrical Connections 11
4.1 About the MIC Shielded Composite Cable 11
4.2 Composite Cable Color-coding 12
5Install the MIC (standard) PSU 14
5.1 MIC PSU Overview 14
5.2 About the MIC Shielded Composite Cable 14
5.3 Composite Cable Color-coding 15
5.4 Earth Link on PCB 16
5.5 Fuse Ratings 17
5.6 Alarm Inputs 17
5.7 Layout of MIC Power Supply Units (PSUs) 17
5.8 Installation Instructions (Power Supply) 19
5.9 Commissioning the Camera with Heater Option Fitted 25
5.10 Simultaneous IP and Analog Video/Control ("Hybrid" Operation) 27
6Fit the Sunshield (MIC612) 28
7Getting Started 30
7.1 Establishing Control of the Camera 30
7.1.1 Establishing Control of the Camera via Biphase Protocol 30
7.1.2 Establishing Control of the Camera via RS-485 Protocol 30
7.2 Powering On 31
7.3 Controlling the Camera 31
7.3.1 Basic Keyboard Operation 31
7.3.2 Navigating the On-Screen Display (OSD) Menus 32
7.3.3 Keyboard Commands, Bosch Protocol 32
7.3.4 Keyboard Commands, Pelco Protocol 33
7.3.5 Special Preset Commands, Pelco Protocol 34
7.4 About Setting the Camera Address via FastAddress 34
7.5 Setting the Addresses of the Two Cameras of the MIC612 35
7.6 FastAddress, Bosch Protocol 36
7.7 FastAddress, Pelco Protocols 37
7.8 Active Commands in FastAddress 38
7.9 Setting Passwords 38
7.9.1 Special Passwords 38
7.9.2 Setting Passwords, Bosch Protocol 38
8On-Screen Display (OSD) Menus (Bosch Protocol) 39
8.1 Camera Setup Menu 41
MIC612 Thermal Camera Table of Contents | en 3
Bosch Security Systems Operation Manual 2016.03 | 2.1 | F.01U.249.416

8.2 Thermal Camera Setup Menu 43
8.3 Lens Setup Menu 45
8.4 PTZ Setup Menu 47
8.5 Display Setup Menu 49
8.6 Communication Setup Menu 51
8.7 Alarm Setup 52
8.8 Language Menu 58
8.9 Diagnostics Menu 59
9On-Screen Display (OSD) Menus (Pelco Protocol) 63
9.1 Bosch Menu 65
9.2 Camera Setup 66
9.3 PTZ Setup 67
9.4 AUX Setup Menu 69
9.5 Other Menus 70
10 Operation of the Thermal Camera 71
10.1 Switching Video 71
10.2 Flat-Field Correction (FFC) 71
10.3 Displaying Thermal Camera Temperature 71
10.4 Triggering Alarms On Detection of Objects Outside of Set Thermal Temperature
Threshold
72
11 Common User Commands 73
11.1 Configuring Preposition Tours 73
11.2 Recording Tours 73
11.3 Using the Wiper/Washer (Bosch Protocol) 74
12 Advanced Features 75
12.1 Alarm Rules 75
12.1.1 Controlling Alarm Rules 75
12.1.2 Alarm Rule Examples 75
12.2 Pre-position Tour 76
12.3 Privacy Masking 76
12.4 Image Stabilization 77
12.5 Azimuth, Elevation, and Compass Directions 77
12.5.1 Setting the Azimuth Zero Point 78
12.5.2 Displaying Azimuth, Elevation, and Compass Headings 78
13 Maintenance and Troubleshooting 79
14 Technical data 82
15 Appendices 83
15.1 Keyboard Commands (Bosch Protocol) By Number 83
15.1.1 Commands, Optical Camera 83
15.1.2 Commands, Thermal Camera 86
4en | Table of Contents MIC612 Thermal Camera
2016.03 | 2.1 | F.01U.249.416 Operation Manual Bosch Security Systems

Safety
About this Manual
This manual has been compiled with great care and the information it contains has been
thoroughly verified. The text was complete and correct at the time of printing. Because of the
ongoing development of products, the content of the manual may change without notice.
Bosch Security Systems accepts no liability for damage resulting directly or indirectly from
faults, incompleteness, or discrepancies between the manual and the product described.
Legal Information
Copyright
This manual is the intellectual property of Bosch Security Systems, Inc. and is protected by
copyright. All rights reserved.
Trademarks
All hardware and software product names used in this document are likely to be registered
trademarks and must be treated accordingly.
Safety Precautions
In this manual, the following symbols and notations are used to draw attention to special
situations:
Danger!
High risk: This symbol indicates an imminently hazardous situation such as “Dangerous
Voltage” inside the product. If not avoided, this will result in an electrical shock, serious bodily
injury, or death.
!
Warning!
Medium risk: Indicates a potentially hazardous situation. If not avoided, this may result in
minor or moderate injury.
!
Caution!
Low risk: Indicates a potentially hazardous situation. If not avoided, this may result in
property damage or risk of damage to the unit.
Notice!
This symbol indicates information or a company policy that relates directly or indirectly to the
safety of personnel or protection of property.
Important Safety Instructions
Read, follow, and retain all of the following safety instructions. Heed all warnings on the unit
and in the operating instructions before operation.
1
1.1
1.2
1.3
1.4
MIC612 Thermal Camera Safety | en 5
Bosch Security Systems Operation Manual 2016.03 | 2.1 | F.01U.249.416

!
Caution!
TO REDUCE THE RISK OF ELECTRIC SHOCK, DISCONNECT THE POWER SUPPLY BEFORE
OPENING THE POWER SUPPLY UNIT.
POWER DISCONNECT: POWER SUPPLY UNITS HAVE POWER SUPPLIED WHENEVER THE
POWER CORD IS INSERTED INTO THE POWER SOURCE.
!
Warning!
INSTALLATION SHOULD BE CARRIED OUT BY QUALIFIED PERSONNEL ONLY, IN
ACCORDANCE WITH THE NATIONAL ELECTRIC CODE, ANSI/NFPA, CANADIAN ELECTRICAL
CODE, AND ALL LOCAL COUNTRY CODES.
!
Warning!
INSTALL EXTERNAL INTERCONNECTING CABLES IN ACCORDANCE TO NEC, ANSI/NFPA70
(FOR US APPLICATION) AND CANADIAN ELECTRICAL CODE, PART I, CSA C22.1 (FOR CAN
APPLICATION) AND IN ACCORDANCE TO LOCAL COUNTRY CODES FOR ALL OTHER
COUNTRIES. BRANCH CIRCUIT PROTECTION INCORPORATING A 20 A, 2-POLE LISTED
CIRCUIT BREAKER OR BRANCH RATED FUSES ARE REQUIRED AS PART OF THE BUILDING
INSTALLATION. A READILY ACCESSIBLE 2-POLE DISCONNECT DEVICE WITH A CONTACT
SEPARATION OF AT LEAST 3 mm MUST BE INCORPORATED.
!
Warning!
ROUTING OF EXTERNAL WIRING MUST BE DONE THROUGH A PERMANENTLY EARTHED
METAL CONDUIT.
!
Warning!
THE CAMERA MUST BE MOUNTED DIRECTLY AND PERMANENTLY TO A NON-COMBUSTIBLE
SURFACE.
– Do not place a canted (45°) camera upright; it can fall over easily. Place the canted
camera on its side.
– Do not open the camera unit. Doing so will invalidate the warranty.
– Ensure that the unit case is properly earthed. If the product is likely to be struck by
lightning, ensure that earth bonding connections are made correctly to the mounting of
the base of the unit.
– Do not point the camera at the sun. Bosch Security Systems will not be liable for any
damage to cameras that have been pointed directly at the sun.
– Do not manually back drive the pan or tilt axis of the camera. Doing so will damage the
motor drive gear train and will invalidate the warranty.
– Before transporting, power on the camera and rotate the ball so that the window points
toward the base. This will help to protect the wiper and the window during transit.
6en | Safety MIC612 Thermal Camera
2016.03 | 2.1 | F.01U.249.416 Operation Manual Bosch Security Systems

Customer Support and Service
If this unit needs service, contact the nearest Bosch Security Systems Service Center for
authorization to return and shipping instructions.
Service Centers
USA
Telephone: 800-366-2283 or 585-340-4162
Fax: 800-366-1329
Email: [email protected]
Customer Service
Telephone: 888-289-0096
Fax: 585-223-9180
Email: [email protected]
Technical Support
Telephone: 800-326-1450
Fax: 585-223-3508 or 717-735-6560
Email: [email protected]
Repair Center
Telephone: 585-421-4220
Fax: 585-223-9180 or 717-735-6561
Email: [email protected]
Canada
Telephone: 514-738-2434
Fax: 514-738-8480
Europe, Middle East & Africa Region
Please contact your local distributor or Bosch sales office. Use this link:
http://www.boschsecurity.com/startpage/html/europe.htm
Asia Pacific Region
Please contact your local distributor or Bosch sales office. Use this link:
http://www.boschsecurity.com/startpage/html/asia_pacific.htm
More Information
For more information please contact the nearest Bosch Security Systems location or visit
www.boschsecurity.com
1.5
MIC612 Thermal Camera Safety | en 7
Bosch Security Systems Operation Manual 2016.03 | 2.1 | F.01U.249.416

Unpacking
– This equipment should be unpacked and handled with care. Check the exterior of the
packaging for visible damage. If an item appears to have been damaged in shipment,
notify the shipper immediately.
– Verify that all the parts listed in the Parts List below are included. If any items are
missing, notify your Bosch Security Systems Sales or Customer Service Representative.
– Do not use this product if any component appears to be damaged. Please contact Bosch
Security Systems in the event of damaged goods.
– The original packing carton is the safest container in which to transport the unit and must
be used if returning the unit for service. Save it for possible future use.
!
Caution!
Take extra care lifting or moving MIC612 cameras because of their weight (10.66 kg (23.5
lb)).
Parts List
The package containing the MIC Series 612 camera should include the following items:
Quantity Part
1 MIC Series 612 Camera
1 MIC Series 612 Installation Manual
4 M8 stainless screws and washers
1 Nebar gasket
Additional Products Required
Mounting accessories are sold separately by Bosch. (Refer to the chapter Product Description
for a list.) Users must supply all wiring/cabling for power, video, and telemetry.
The following table lists additional products, sold separately by Bosch, required to operate
each MIC camera:
Quantity Product Part Number Size
1 per camera
Shielded Composite Cable for MIC612 cameras
(See the model numbers and lengths at right.)
MIC-THERCBL-2M 2 m
MIC-THERCBL-10M 10 m
MIC-THERCBL-20M 20 m
MIC-THERCBL-20M 25 m
Quantity Product Part Number
1 per camera Power Supply Unit (PSU) for MIC cameras
MIC-240PSU-2,
MIC-115PSU-2,
MIC-24PSU-2
Additional Tools Required
The following table lists additional tools (not supplied by Bosch) that are or may be required
to install a MIC camera:
2
2.1
2.2
2.3
8en | Unpacking MIC612 Thermal Camera
2016.03 | 2.1 | F.01U.249.416 Operation Manual Bosch Security Systems

Quantity Part
1 13 mm wrench for the mounting bolts
1 3 mm screwdriver for the terminal blocks in the MIC PSU
1 8 mm screwdriver for captive screws for the MIC PSU enclosure
1 Silicone sealant for ensuring a water tight seal [if not using the Nebar gasket]
1 Roll of PTFE tape
MIC612 Thermal Camera Unpacking | en 9
Bosch Security Systems Operation Manual 2016.03 | 2.1 | F.01U.249.416

Product Description
MIC Series 612 cameras are high-performance, weatherproof, ruggedized, fully functional day/
night PTZ cameras that have been designed to offer a reliable, robust, and high-quality
surveillance solution for extreme security applications.
MIC612 models have a 36x optical zoom (12x digital) and flexible mounting options (upright
or inverted) to achieve the perfect field of view.
Precision-engineered to exacting standards, MIC cameras offer numerous benefits over
traditional dome and PTZ cameras. Rated to an industry-leading IP68, the compact, vandal-
resistant, cast aluminum camera housing is pre-treated and then painted with polyester
powder coat paint (black, white, or grey). Brushless motor technology ensures ultra-reliable
operation with full 360° continuous pan and up to 320° tilt control. The optically perfect, flat
viewing window and integrated wiper ensure that razor-sharp images are captured in even the
most demanding environmental conditions.
A long-life silicone wiper blade mounted on a spring-loaded arm is standard on all MIC
cameras.
The following table identifies the optional accessories for MIC cameras. Refer to the
datasheets of each accessory for details. Some accessories may not be available in all regions.
Accessories Description
MIC-DCA Deep Conduit Adapter
MIC-SCA Shallow Conduit Adapter
MIC-CMB Corner Mount Bracket
MIC-PMB Pole Mount Bracket
MIC-WMB Wall Mount Bracket
MIC-SPR Spreader Plate
MIC-ALM Alarm and washer pump drive card for non-IR PSU; 8 inputs.
MIC-WKT Washer kit, containing mounting bracket, nozzle, and washer pump drive card.
MIC-BP4 Bosch Biphase converter card for MIC power supplies with an available
expansion slot.
MIC412SUNSHIELD
A two-part plastic sunshield to provide additional protection in sunny climates
for MIC cameras Comes with stainless steel bosses, washers, and retaining
screws.
3
10 en | Product Description MIC612 Thermal Camera
2016.03 | 2.1 | F.01U.249.416 Operation Manual Bosch Security Systems

Electrical Connections
About the MIC Shielded Composite Cable
All connections (power, telemetry, video) to the MIC camera are provided through the screw
terminal connections in the MIC power supply. MIC shielded composite cables are multi-
conductor cables of various lengths (and gauges ranging from 14 - 18) that provide all power,
video, and telemetry connections between the MIC PSU and the MIC camera. The cables are
pre-made with a female terminated connector (14-pin) at one end for attachment to the male
connector installed into the base of the camera. The other end of the cables has free (non-
terminated) wires for wiring into terminals in the MIC PSU. The composite cable consists of
two pairs (24AWG) plus 4 cores of (22 AWG), 2 cores of (24 AWG), and one coax core for the
video signal to a maximum distance of 25 m.
Notice!
Bosch Security Systems does not recommend using the shielded composite cable for
distances greater than 25 m between the MIC camera and the MIC power supply.
For installations that require the camera to be more than 25 m from the power supply, Bosch
recommends that a 2 m cable be connected to a junction box (Exd rated for MIC440) from
which telemetry, video, and power can be broken out into separate cables and appropriate
wiring used to extend the distance to suit.
!
Warning!
Bosch recommends connecting the cable to the unit before taking the unit for mounting on-
site.
Figure 4.1: MIC shielded composite cable connection before cable is connected to a MIC612 camera
4
4.1
MIC612 Thermal Camera Electrical Connections | en 11
Bosch Security Systems Operation Manual 2016.03 | 2.1 | F.01U.249.416

Figure 4.2: MIC shielded composite cable connected to a MIC612 camera
Composite Cable Color-coding
The standard color coding used in MIC composite cables is as follows:
Figure 4.3: Exploded View of Composite Cable Connections
Camera
Cable
Connector
Pin
Signal Name Description Cable Wire
Color
1 Washer Drive Rtn Auxiliary Connection Grey
2 Tamper Sw Rtn Auxiliary Connection Brown
3 Washer Drive Wash Signal Orange
4 Tamper Sw Alarm Communications Black
5 Video Return Video Signal Ground Coax
Screen
6 Video Output Video Output to Control Room Coax Core
7 Full Duplex Tx B+ Telemetry I/O to RS-422/485 Violet
8 Full Duplex Tx A- Telemetry I/O to RS-422/485 Blue
9 0v Ground Shield
10 Full Duplex Rx A-
Half Duplex Tx/Rx A
Telemetry I/O to RS-422/485 Yellow
4.2
12 en | Electrical Connections MIC612 Thermal Camera
2016.03 | 2.1 | F.01U.249.416 Operation Manual Bosch Security Systems
Camera
Cable
Connector
Pin
Signal Name Description Cable Wire
Color
11 Full Duplex Rx B+
Half Duplex Tx/Rx B
Telemetry I/O to RS-422/485 White
12 Power Input 2 Low Voltage Power Input Green
13 Power Input 1 Low Voltage Power Input Red
MIC612 Thermal Camera Electrical Connections | en 13
Bosch Security Systems Operation Manual 2016.03 | 2.1 | F.01U.249.416

Install the MIC (standard) PSU
MIC PSU Overview
!
Caution!
Use only the power supply specified for your specific model of camera.
Bosch provides a range of power supply units (PSUs) for MIC Series cameras. These units
have a variety of common voltages and provide all the connections needed for power,
telemetry and video.
Model Number Input Voltage Dimensions
(H x W x D)
Weight
MIC-24PSU-2 24 VAC 90 x 260 x 160 mm
(3.54 x 10.24 x 6.3 in.)
3.2 kg (7.1 lb)
MIC-115PSU-2 115 VAC 90 x 260 x 160 mm
(3.54 x 10.24 x 6.3 in.)
3.2 kg (7.1 lb)
MIC-240PSU-2 230 VAC 90 x 260 x 160 mm
(3.54 x 10.24 x 6.3 in.)
3.2 kg (7.1 lb)
Table 5.1: PSUs for MIC612
Each MIC PSU provides all of the connections needed for power, video, and telemetry for a
single MIC camera. Each MIC PSU has CE and FCC approval and has a cast-aluminum
enclosure that is weather-resistant (rated IP65). Features include:
– A provision for driving various optional interface cards mounted internally to the MIC
power supply enclosure (for example, an 8-input alarm card (MIC-ALM))
– A provision for a signal interface card (MIC-BP4) to connect telemetry to Bosch Biphase
equipment
– Screw termination of all cables (composite, telemetry, and ancillary) into and out of the
enclosure
– Earth isolation and termination within the unit to control video earthing correctly and
thus prevent earth loops
Each MIC PSU ships with the following parts:
– Three (3) M12 cable glands for telemetry, video and ancillary equipment
– One (1) M16 gland for connection of the shielded composite cable to the MIC camera
– One (1) 1/2 in. NPT cable gland for the power cable connection
– One (1) 1/2 in. NPT and one (1) M12 blanking plug
About the MIC Shielded Composite Cable
All connections (power, telemetry, video) to the MIC camera are provided through the screw
terminal connections in the MIC power supply. MIC shielded composite cables are multi-
conductor cables of various lengths (and gauges ranging from 14 - 18) that provide all power,
video, and telemetry connections between the MIC PSU and the MIC camera. The cables are
pre-made with a female terminated connector (14-pin) at one end for attachment to the male
connector installed into the base of the camera. The other end of the cables has free (non-
5
5.1
5.2
14 en | Install the MIC (standard) PSU MIC612 Thermal Camera
2016.03 | 2.1 | F.01U.249.416 Operation Manual Bosch Security Systems

terminated) wires for wiring into terminals in the MIC PSU. The composite cable consists of
two pairs (24AWG) plus 4 cores of (22 AWG), 2 cores of (24 AWG), and one coax core for the
video signal to a maximum distance of 25 m.
Notice!
Bosch Security Systems does not recommend using the shielded composite cable for
distances greater than 25 m between the MIC camera and the MIC power supply.
For installations that require the camera to be more than 25 m from the power supply, Bosch
recommends that a 2 m cable be connected to a junction box (Exd rated for MIC440) from
which telemetry, video, and power can be broken out into separate cables and appropriate
wiring used to extend the distance to suit.
!
Warning!
Bosch recommends connecting the cable to the unit before taking the unit for mounting on-
site.
Figure 5.1: MIC shielded composite cable connection before cable is connected to a MIC612 camera
Figure 5.2: MIC shielded composite cable connected to a MIC612 camera
Composite Cable Color-coding
The standard color coding used in MIC composite cables is as follows:
5.3
MIC612 Thermal Camera Install the MIC (standard) PSU | en 15
Bosch Security Systems Operation Manual 2016.03 | 2.1 | F.01U.249.416

Figure 5.3: Exploded View of Composite Cable Connections
Camera
Cable
Connector
Pin
Signal Name Description Cable Wire
Color
1 Washer Drive Rtn Auxiliary Connection Grey
2 Tamper Sw Rtn Auxiliary Connection Brown
3 Washer Drive Wash Signal Orange
4 Tamper Sw Alarm Communications Black
5 Video Return Video Signal Ground Coax
Screen
6 Video Output Video Output to Control Room Coax Core
7 Full Duplex Tx B+ Telemetry I/O to RS-422/485 Violet
8 Full Duplex Tx A- Telemetry I/O to RS-422/485 Blue
9 0v Ground Shield
10 Full Duplex Rx A-
Half Duplex Tx/Rx A
Telemetry I/O to RS-422/485 Yellow
11 Full Duplex Rx B+
Half Duplex Tx/Rx B
Telemetry I/O to RS-422/485 White
12 Power Input 2 Low Voltage Power Input Green
13 Power Input 1 Low Voltage Power Input Red
Earth Link on PCB
The printed circuit board (PCB) of each MIC PSU (IR and non-IR) has one Earth Link option,
near terminal block HD1, to allow the PSU to be set up for different earthing schemes:
– If there is a separate connection between video screen and earth, the Earth Link should
be broken. This usually occurs on copper-connected systems where all of the copper
video coaxes are taken back to the control room to be connected to a central earth point.
– If fiber optics or other indirect connections are used to get data and video to and from
the control room, then the Earth Link should be left intact, as long as it is the only
camera-end earth reference point.
5.4
16 en | Install the MIC (standard) PSU MIC612 Thermal Camera
2016.03 | 2.1 | F.01U.249.416 Operation Manual Bosch Security Systems
Fuse Ratings
The MIC PSUs for MIC612 cameras have four (4) off 20 mm fuses (numbers 13 - 16 in the
figure “Layout of MIC-240PSU-2 and MIC-115PSU-2”) in fuse holders. The ratings for these
fuses are fixed on the low voltage secondary side but change with input voltage on the high
voltage primary side. The following table shows the fuse values that should be fitted to
provide proper protection for the MIC-240PSU-2 and MIC-115PSU-2 power supplies. Note: FS
4 does not exist.
Fuse
ID
Fuse Function Type Rating for 240 V
Primary
Rating for 115 V
Primary
Rating for 24 V
Primary
FS 1 MIC camera
protection
Glass 1.6 A anti-surge (T) 1.6 A anti-surge (T) 1.6 A anti-surge (T)
FS 2 Primary protection Glass 200 mA quick blow 500 mA quick blow 2.5 A quick blow
FS 3 Heater protection 1 Glass 1.6 A anti-surge (T) 1.6 A anti-surge (T) 1.6 A anti-surge (T)
FS 5 Heater protection 2 Glass 1.6 A anti-surge (T) 1.6 A anti-surge (T) 1.6 A anti-surge (T)
Alarm Inputs
The table below identifies the number of alarm inputs and outputs available in MIC power
supply units, depending on whether or not an 8-input alarm card is installed.
MIC PSU 8-input Alarm Card
(MIC-ALM)?
Number of
Alarm Inputs
Number of
Alarm Outputs
MIC-24PSU-2,
MIC-115PSU-2,
MIC-240PSU-2
No 1 0
Yes 8 2
Table 5.2: Number of alarm inputs and outputs in MIC PSUs
Layout of MIC Power Supply Units (PSUs)
Layout of MIC-240PSU-2 and MIC-115PSU-2
The figure below displays the layout of the PCB in the MIC PSUs for non-IR cameras, with call-
out numbers to the side of or below the connection/terminal ID or the terminal, and ’on’ the
fuses. The table below the figure identifies the connections.
5.5
5.6
5.7
MIC612 Thermal Camera Install the MIC (standard) PSU | en 17
Bosch Security Systems Operation Manual 2016.03 | 2.1 | F.01U.249.416

Figure 5.4: Layout of MIC-240PSU-2 and MIC-115PSU-2
No. PCB
Marking
Description/Function of
Connection / Terminal
Type of Connection/
Terminal
1 HD1 AC Power input connector
Live (HD1-1); Neutral (HD1-2)
[Ground wire connects to earth termination post
Screw terminal
2 HD3 Shielded composite cable header (connections to camera) Screw terminal
3 HD5 RS-485 control header Screw terminal
4 HD4 Telemetry header Molex connector
5 HD8 USB to RS-485 converter
[Not used for MIC440.]
Molex connector
6 HD6 [Optional] Auxiliary, heater
[Not used for MIC440.]
Screw terminal
7 HD7 Video (composite cable) Screw terminal
8 HD2 Tamper switch header Screw terminal
9 CN3
Video Switched
Coax connection (Switched visible/thermal video out)
[Not used for MIC440.]
BNC socket
10 CN1
Video Out
Coax connection header
(Visible video out)
BNC socket
11 CN2 Auxiliary / add-on card terminal Plug in
12 Earth Link Earth Link
18 en | Install the MIC (standard) PSU MIC612 Thermal Camera
2016.03 | 2.1 | F.01U.249.416 Operation Manual Bosch Security Systems

No. PCB
Marking
Description/Function of
Connection / Terminal
Type of Connection/
Terminal
13 FS2 Fuse 2 - Primary protection --
14 FS1 Fuse 1 - MIC camera protection --
15 FS3 Fuse 3 - Heater protection 1 --
16 FS5 Fuse 5 - Heater protection 2 --
17 -- Earth termination post Ring terminal
Installation Instructions (Power Supply)
Danger!
ELECTRICAL SHOCK HAZARD
To reduce the risk of electrical shock, disconnect power before opening or working on any
power supply unit. Power must be disconnected before replacing any fuse in the MIC PSU.
Power supply units have power supplied whenever the power cord is inserted into the power
source.
MIC PSUs have a separate internal shield covering the power cable input terminal block
(HD1). Only suitably qualified persons should remove this shield and connect the mains power
cable. The shield MUST be re-installed and fully secured before connecting the power.
The power supply cable shall have conductors of a maximum size of 12 AWG.
Branch circuit protection incorporating a 15 A, 2-pole, listed circuit breaker or branch rated
fuses are required. A readily accessible 2-pole disconnect device with a contact separation of
at least 3mm must be incorporated externally to the equipment.
!
Warning!
To meet UL standards and ratings, all external wires (power and I/O cabling) for installation
applications to the device must be routed separately through different permanently earthed
metal conduits (not supplied).
Notice!
Use only UL-listed liquid tight strain reliefs for conduits to the power supply box to ensure
that water cannot enter the box. You must use watertight conduits and fittings to meet NEMA
6P or to maintain IP68 standards.
!
Caution!
Except for the Earth Link, heater links, and applicable fuses, the MIC PSUs have no user-
adjustable parts. MIC cameras have no user-serviceable parts.
!
Caution!
Bosch recommends using an uninterruptible power supply (UPS) in connection with a MIC
camera/PSU installation.
5.8
MIC612 Thermal Camera Install the MIC (standard) PSU | en 19
Bosch Security Systems Operation Manual 2016.03 | 2.1 | F.01U.249.416

Notice!
To maintain the IP rating of the power supply enclosure, install only listed or recognized
conduit hubs or fittings with the same environmental rating as the enclosure in compliance
with the installation instruction of the hub or fitting.
Notice!
Refer to the MIC Series Power Supply Installation Manual included with the PSU for full details
on installing a MIC Series PSU and connecting to a MIC Camera.
To install the power supply unit (PSU), follow these steps:
1. Select a secure installation location for the PSU. Ideally, this is a location where the device
cannot be interfered with either intentionally or accidentally.
Bosch recommends using an environmentally suitable, lockable equipment cabinet.
2. Loosen the four (4) captive Phillips head screws on the top of the lid of the power supply
enclosure. Lift the lid and set it upside down next to the enclosure.
Notice!
Do not stretch or cut, or otherwise disturb, the earth core cable (shown in the figure below)
to the inside of the lid and to the earth termination post.
3. Locate the four (4) mounting holes of the power supply enclosure.
Figure 5.5: Holes for screws for mounting enclosure mounting; holes for screws for enclosure lid
Number Description
1 Hole for mounting screw in enclosure
2 Hole for lid screw in enclosure
4. Drill four (4) holes in the mounting surface for the mounting anchors appropriate for M6
screws (not supplied).
5. Secure the enclosure to the mounting surface using four (4) M6 stainless steel screws and
washers (not supplied), which fit through the large holes in the enclosure.
Notice!
If you are securing the power supply enclosure in a vertical position (for example, on a wall),
one person should hold the enclosure lid while another secures the enclosure body in place,
to avoid damage to any part of the enclosure, and/or injury to the installer(s).
6. Unscrew the two (2) M3 screws on the internal high voltage input head-end shield (marked
with "Danger") covering the mains cable terminal HD1; retain the screws.
20 en | Install the MIC (standard) PSU MIC612 Thermal Camera
2016.03 | 2.1 | F.01U.249.416 Operation Manual Bosch Security Systems
Other manuals for MIC 612 Series
4
Table of contents
Other Bosch Thermal Camera manuals

Bosch
Bosch MIC 612 Series User manual

Bosch
Bosch GTC 400 C Professional User manual

Bosch
Bosch GTC 400 C Professional User manual

Bosch
Bosch GTC 400 C Assembly instructions

Bosch
Bosch MIC 612 Series User manual

Bosch
Bosch MIC 612 Series User manual

Bosch
Bosch MIC Series 412TF User manual

Bosch
Bosch MIC412TIBUP13636N User manual

Bosch
Bosch Professional GIS 500 User manual

Bosch
Bosch GTC 400 C Professional User manual