Emtec S801 User manual

Presto! PVR
Analog
Digital TV – DVB-T
Digital TV – ATSC
User’s Guide
507100-02-01-W-E-052507-09
ii

Copyright
© 2005-2007, Emtec Technology Corp. All Rights Reser ed. No portion of
this document may be copied or reproduced in any manner without prior
written permission from Emtec Technology Corp. (Emtec)
Emtec has no warranties to this documentation and disclaims any implied
warranty of merchantability or fitness for a particular purpose. All
information contained herein is subject to change without notice.
All sample images and electronic files included in the documentation and
distribution materials are copyrighted by their respecti e photographers
and are not to be copied or reproduced in any manner.
Trademarks
Windows 2000, Windows XP, and Windows Vista are registered
trademarks of Microsoft Corporation.
Pentium is a registered trademark of Intel Corporation.
All other trademarks are the properties of their respecti e owners.
www.emtec-international.com
ii
i

Contents
Chapter 1 Introducing Presto! PVR 1
System Requirements...........................................................1
Features..................................................................................2
Chapter 2 Using Your Presto! PVR 3
Installing Presto! PVR............................................................
Receiving a Channel..............................................................5
Receiving S-Video and Composite Signals.........................8
Receiving FM Radio...............................................................8
Choosing a Channel to Watch..............................................9
Channel List.......................................................................10
Channel Surfing Window....................................................11
Teletext (a ailable for DVB-T or PAL Analog TV)..............11
Recording a Program...........................................................12
Scheduling Your Program Recording................................1
Adjusting the Schedule Settings........................................15
Task..............................................................................15
Time..............................................................................16
Quality..........................................................................16
Using EPG (Electronic Program Guide).............................16
Time Shifting........................................................................17
Adjusting the Volume..........................................................18
Taking Snapshots................................................................18
Chapter 3 Menus and Settings 20
Main Screen..........................................................................20
Program Viewer....................................................................27
Screen Menu.........................................................................27
i

Settings.................................................................................
De ice................................................................................34
De ice...........................................................................35
Audio............................................................................36
Channel..............................................................................36
Video..................................................................................39
Record................................................................................40
Recording.....................................................................42
Time Shifting.................................................................43
Schedule............................................................................44
Ad anced...........................................................................46
Skin....................................................................................47
Li e Update........................................................................48
Channel Surfing...................................................................49
History...................................................................................50
Taskbar Commands.............................................................51
Shortcut Keys ......................................................................52
Chapter 4 Appendi 53
Frequently Asked Questions..............................................5
Troubleshooting...................................................................54
Glossary................................................................................57


Chapter 1 Introducing Presto! PVR
Presto! PVR is a ideo recorder for your computer. It takes tele ision
signals and records them onto your hard dri e. You ha e all the
con enience of a VCR (recording, playback, fast forwarding, rewinding,
pausing) without ha ing to rewind any tape. Here are the requirements
and features of the program.
•System Requirements
•Features
System Requirements
•Presto! PVR will run on Microsoft Windows 2000,
-Windows XP, or Windows Vista. A Pentium 4 or AMD
Athlon 2.0 GHz processor is required. (Pentium 4, 2.4
GHz is recommended.)
•At least 256 MB RAM is needed (512 MB is
recommended).
•A least 100 MB of hard disk space is required for
installing the program. An additional 500 MB of space will
be needed working with files.
•A True Color or HiColor display card supporting DirectX
9.0, 16-bit high color mode and with at least 1024 x 768
pixel resolution.
•DirectX 9.0 or higher is installed.
•An AC'97 compatible sound card.
•Digital or analog TV antenna.
1

Chapter 1 Introducing Presto! PVR
Features
•Record programs to a hard disk or DVD. (This feature
is a ailable only when your program supports Direct
Disc Recording (DDR).)
•Schedule your recordings for the future.
•Use the EPG (Electronic Program Guide) function to
get the program guide for current TV listings and add
them to your recording schedule with the click of a
button. This function also has support for multiple
languages.
•Easily play the shows that you ha e recorded on the
hard disk. Just look in the History section.
•Pause the program while watching (to do things like
answer the door or make a sandwich) and then resume
watching without missing any of the show.
•Watch ideo in a resizable pre iew window. Choose to
freely resize or retain the original ratio. Adjust the
brightness and color. The pre iew window changes
while the adjustments are made.
•Recei e analog or digital TV programs.
•Digital tuner supports AC3 audio, DVB radio, and
HDTV.
•View Subtitles and Closed Captions in multiple
languages.
•Take snapshots of your fa orite TV moments.
•Browse many channels in one window with Tile mode.
2

Chapter 2 Using Your Presto! PVR
This program has e erything a personal ideo recorder needs—pre iew,
full screen iew, snapshot, channel selection, channel surfing, recording,
programmed recording, time shifting, settings, help, and a link to our
website. Here are explanations of how to perform the most common
tasks.
•Installing Presto! PVR
•Recei ing a Channel
•Recei ing S-Video and Composite Signals
•Recei ing FM Radio
•Choosing a Channel to Watch
•Recording a Program
•Scheduling Your Program Recording
•Time Shifting
•Adjusting the Volume
•Taking Snapshots
Installing Presto! PVR
3

Chapter 2 Using Your Presto! PVR
Before you begin, make sure that the antenna or Cable is connected to
the Presto! PVR de ice. Insert the Presto! PVR disc into your computer
disc dri e and follow the installation instructions. After the installation, the
Wizard will open to let you choose what type of signal you will be using.
The image above is for reference only. This dialog box
may vary depending on the version of your Presto! PVR
program.
After selecting the signal type, the Settings Wizard for the selected option
will open.
Analog TV Digital TV
4

Chapter 2 Using Your Presto! PVR
Click the desktop icon to start using your Presto! PVR program.
Receiving a Channel
5

Chapter 2 Using Your Presto! PVR
To recei e a channel through your network, please connect the antenna
to the Presto! PVR de ice and make the proper settings.
1. Click to open the Settings dialog box, and then click the Device
tab.
2. Choose a de ice from the Device list. The options will be different
depending on the type of TV signal selected.
Analog TV Digital TV
For Analog TV signals, you can choose an audio de ice and source.
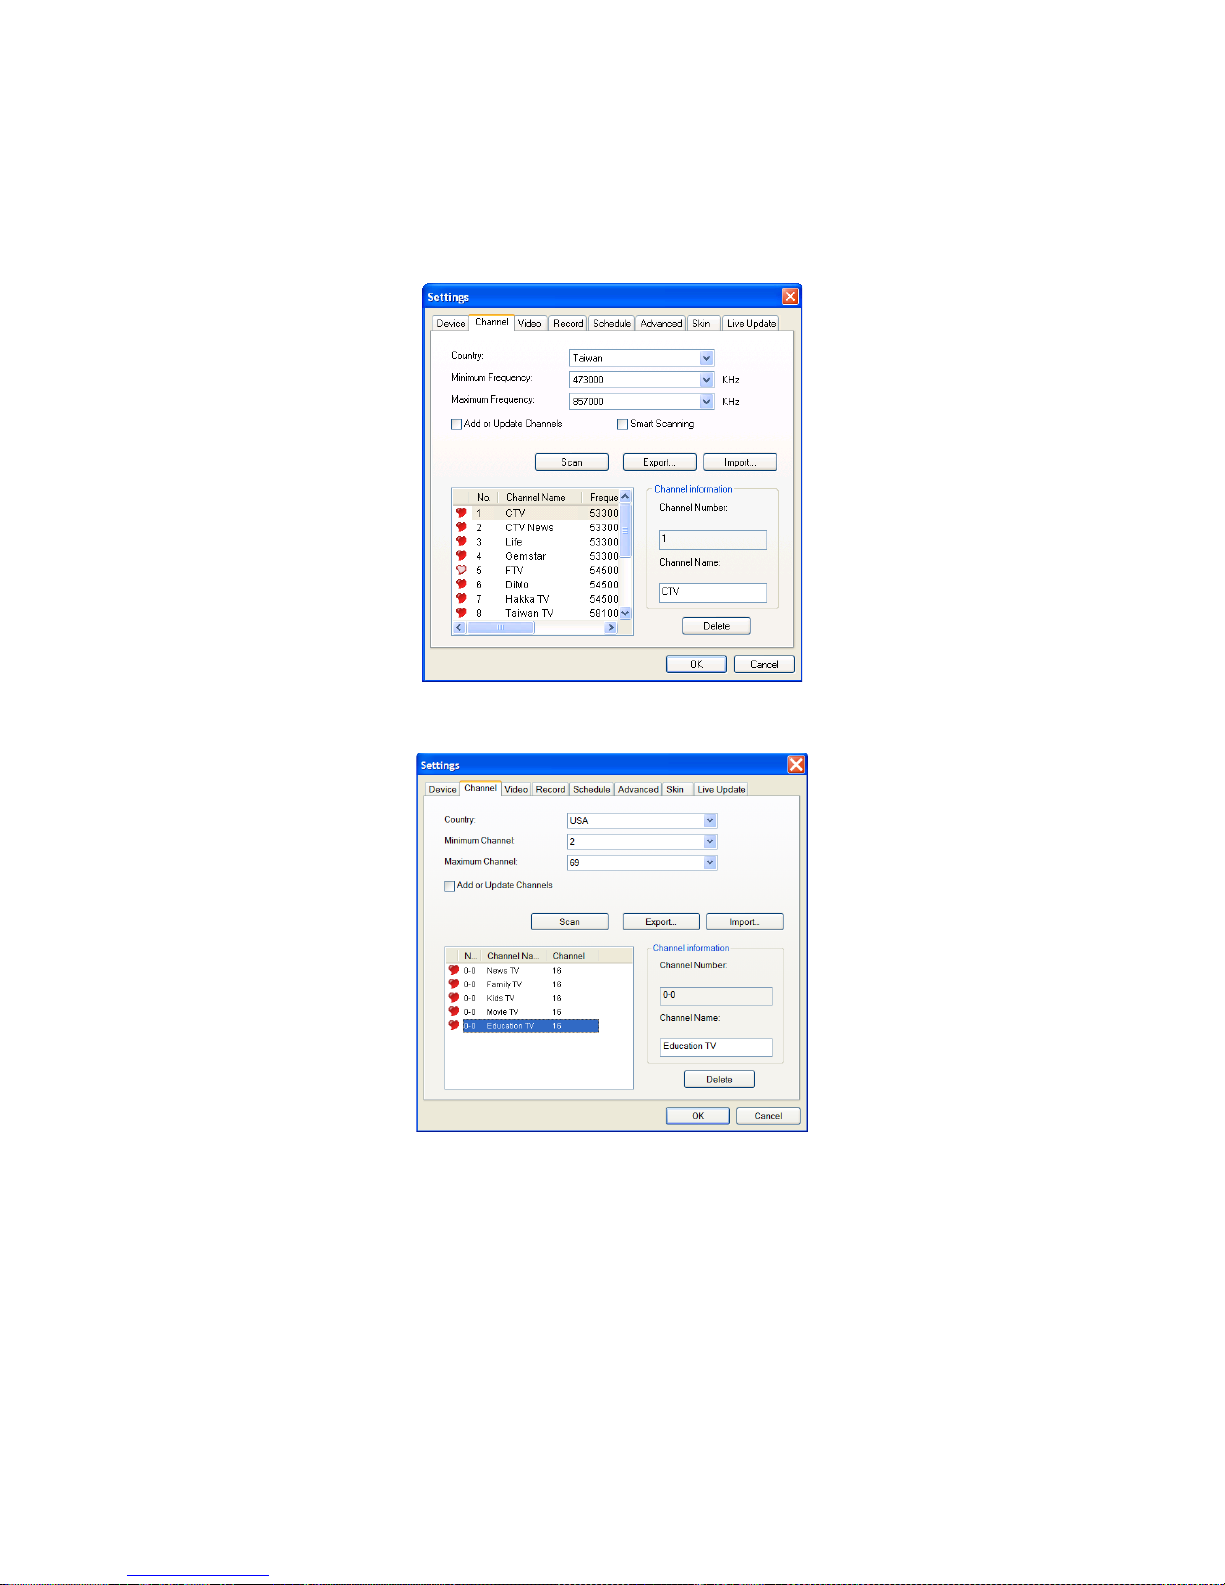
3. Click the Channel tab on the Settings dialog box, and then click
Scan or Auto Scan to search for channels. If a channel is found, it
will be included in the channel list. When finished, you can choose a
channel and change its name. You can also scan for changes by
selecting Add or Update Channels, or use the Minimum Frequency
and Maximum Frequency boxes to limit the frequency range to be
scanned. Other options include importing and exporting channel lists.
You can remo e selected channels by clicking the Delete button.
6
Chapter 2 Using Your Presto! PVR
Digital TV - DV -T
Digital TV - ATSC
7

Chapter 2 Using Your Presto! PVR
Analog TV
4. Click OK to close the Settings dialog box and watch some TV.
Receiving S-Video and Composite Signals
1. Click and choose S-Video or Composite from the source type.
2. PVR will pick up ideo and audio signals.
These two features may not be available on all devices.
Please refer to the user guide for your device.
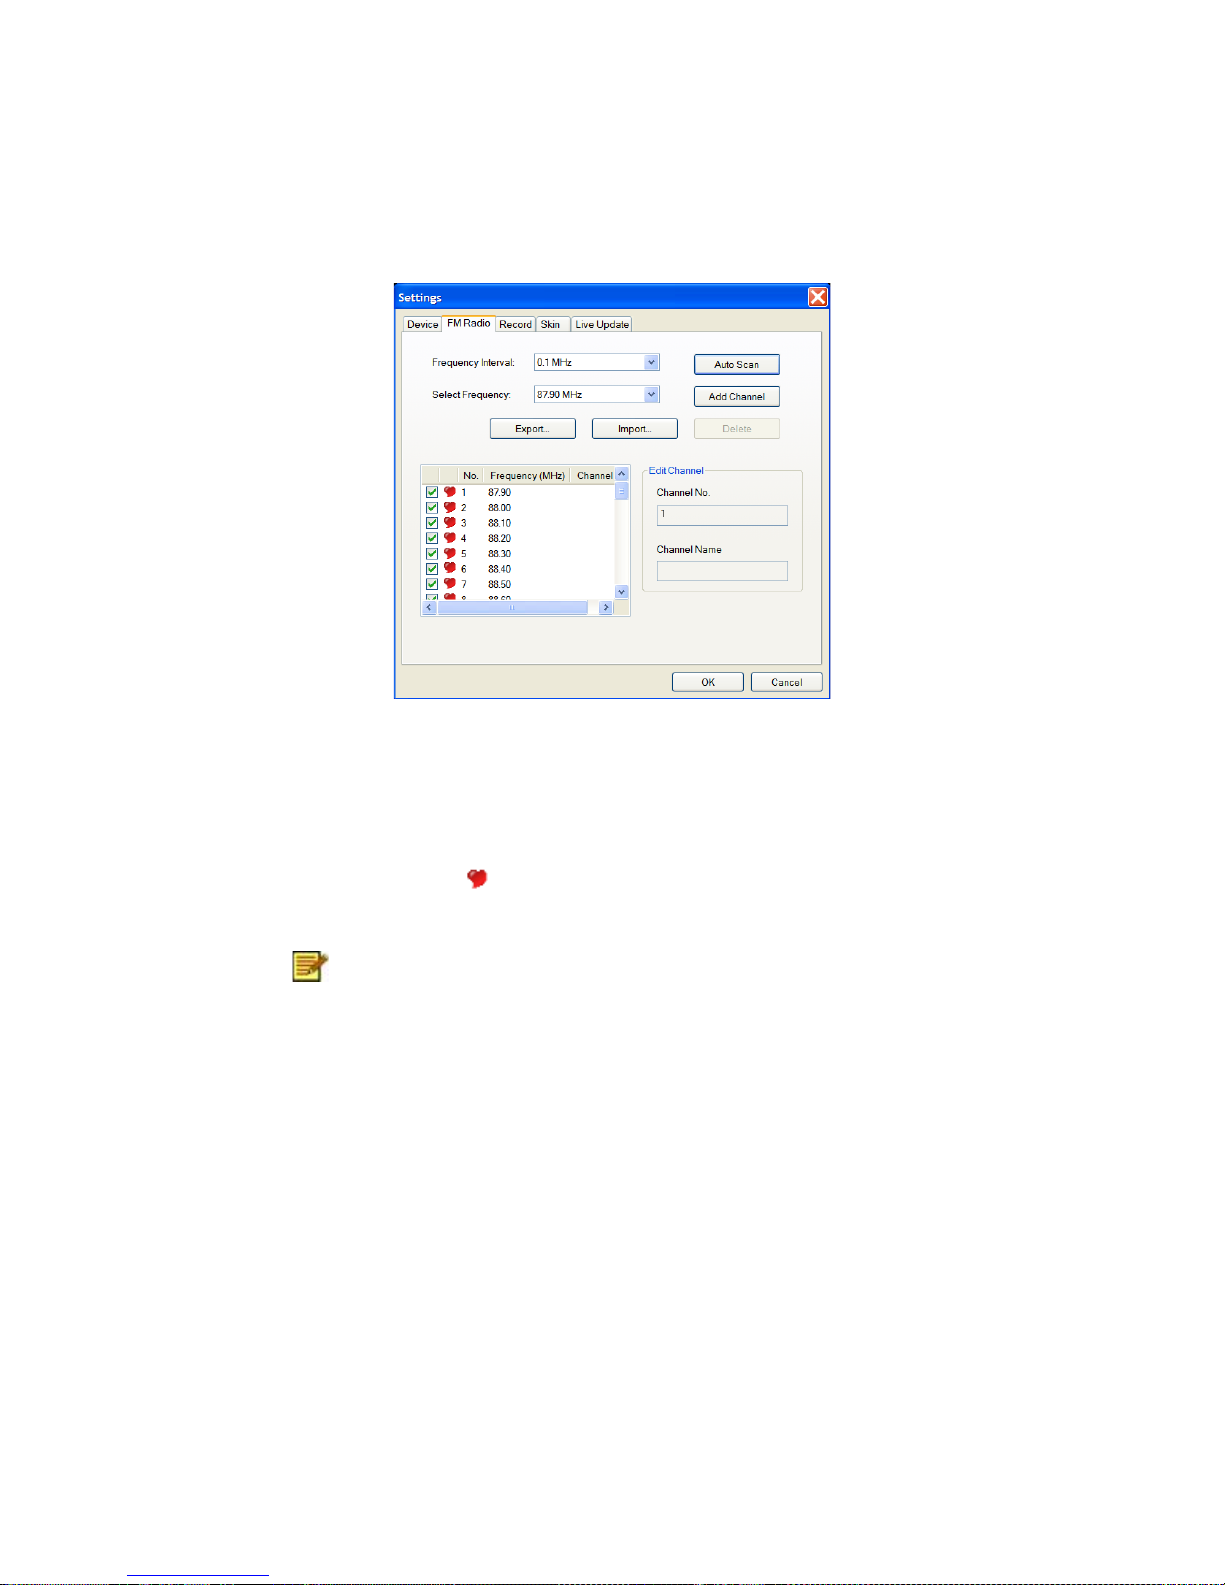
Receiving FM Radio
To get the latest cool and hip music and news through your computer, you
can set it up to recei e FM Radio.
1. Click and choose FM Radio from the source type.
2. Click Auto Scan to find all the a ailable radio stations.
8
Chapter 2 Using Your Presto! PVR
When scanning is finished, you can choose a station and change its
name. You can also select a frequency and click the Add Channel button
to add the corresponding station directly to the list of stations, or remo e
selected channels by clicking the Delete button. Other options include
importing and exporting lists of stations.
Select the red heart to identify a station as your fa orite. Clear it to
remo e the station from the fa orites list.
Search results vary from device to device. If your device
doesn’t support radio, you won’t be able to receive FM
Radio. Please refer to the user guide for your device.
Choosing a Channel to Watch
9
Chapter 2 Using Your Presto! PVR
After you ha e installed Presto! PVR and scanned for channels, you can
click and select a channel from the channel list to watch. Click or
to switch between channels, and to go to the last channel iewed.
•Channel List
•Channel Surfing Window
•Teletext (a ailable for DVB-T or PAL Analog TV)
Channel List
10

Chapter 2 Using Your Presto! PVR
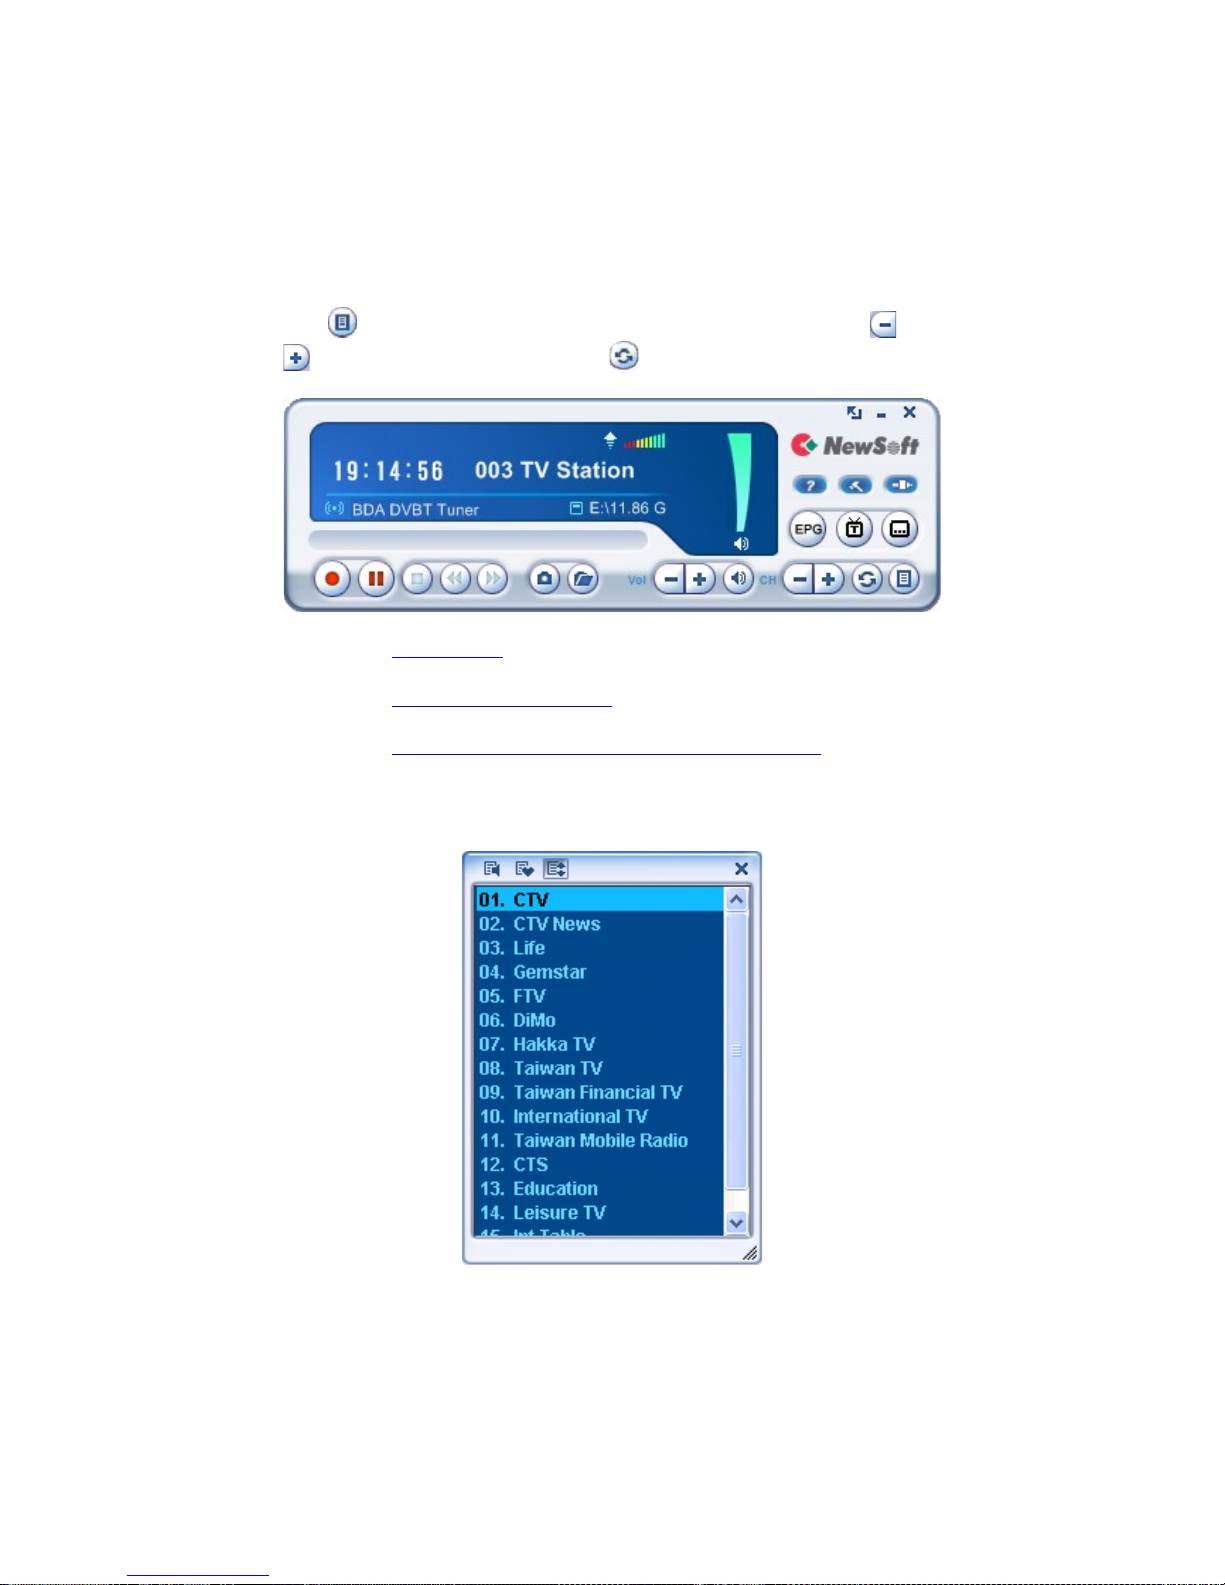
This is a quick way to select a channel. There are three buttons at the top
of the window. Each shows different channels based on the settings you
made on the Channel tab of the Settings dialog box. Here are some
details for the channel list.
TV Radio : Click this button to listen to the TV radio. Please note that
this button is not a ailable when the input source is Analog TV.
Favorite Channels : Click this button to show your fa orite channels.
Fa orite channels are chosen on the Channel tab of the Settings dialog
box.
All Channels : Click this button to list all a ailable channels.
Channel Surfing Window
You can browse all the TV channels from the Channel Surfing window.
Right-click the program iewer and select Channel Surfing from the
screen menu. Presto! PVR pro ides different options for tiling the
channels in thumbnails. You can play a channel by clicking the thumbnail.
To change the Channel Surfing window settings, click
and choose the Advanced tab.
Teletext (available for DVB-T or PAL Analog TV)
11
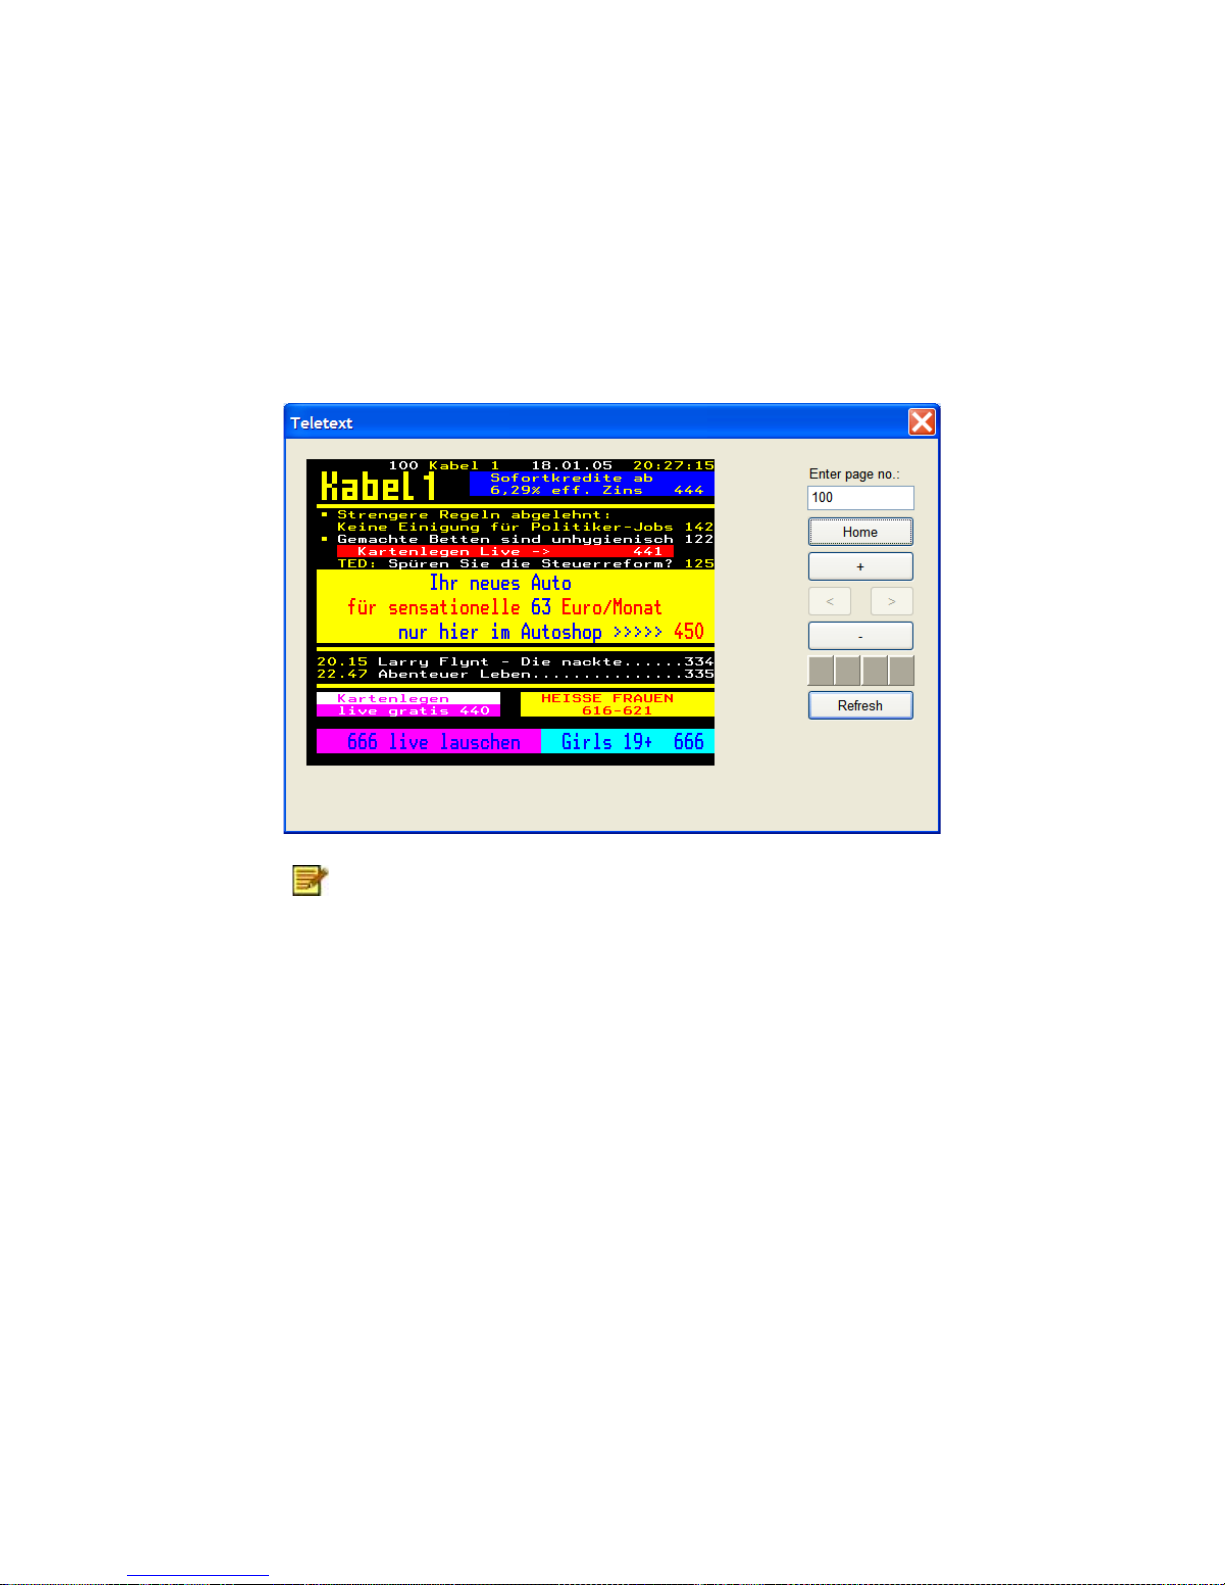
Chapter 2 Using Your Presto! PVR
Teletext is a quick and easily accessible ser ice that gi es you useful
information for free. As long as a signal is present at the tuner and the
channels are already scanned and stored, you will see the Teletext
information offered by the corresponding TV station.
This service varies for different areas. It may not be
available in all the countries.
Recording a Program
12

Chapter 2 Using Your Presto! PVR
When you find a good show, click to start recording. The button will
change to . The recorded program will be sa ed in the working folder.
You can click to pause recording. If you click while you are
watching, recording will stop and the pre iew screen will return to the li e
program.
When recording, you can go to full screen, minimize, and
restore, but you cannot change programs, or close the
program.
Scheduling Your Program Recording
You can add, modify, or delete items for recording shows in the future. For
this, you will ha e to open the Settings dialog box by clicking and
selecting the Schedule tab.
13

Chapter 2 Using Your Presto! PVR
The message about encrypted programs will not appear
when the input source is analog TV.
•Click Add… to schedule additional recording, or click Modify to
change the schedule for selected recordings.
•Click Delete to cancel a selected recording, or Delete All to cancel all
scheduled recordings.
•Click EPG to get an online listing to current TV programs.
•If you want to use Silent mode while recording, click When a
scheduled recording starts, it will be in silent mode.
•You can choose the action to be taken when a scheduled recording is
finished from the After scheduled recordings from Hibernate or
Standby mode are completed box.
For more information see:
•Adjusting the Schedule Settings
14
Table of contents
Other Emtec TV Tuner manuals


 USB 150e user manual")