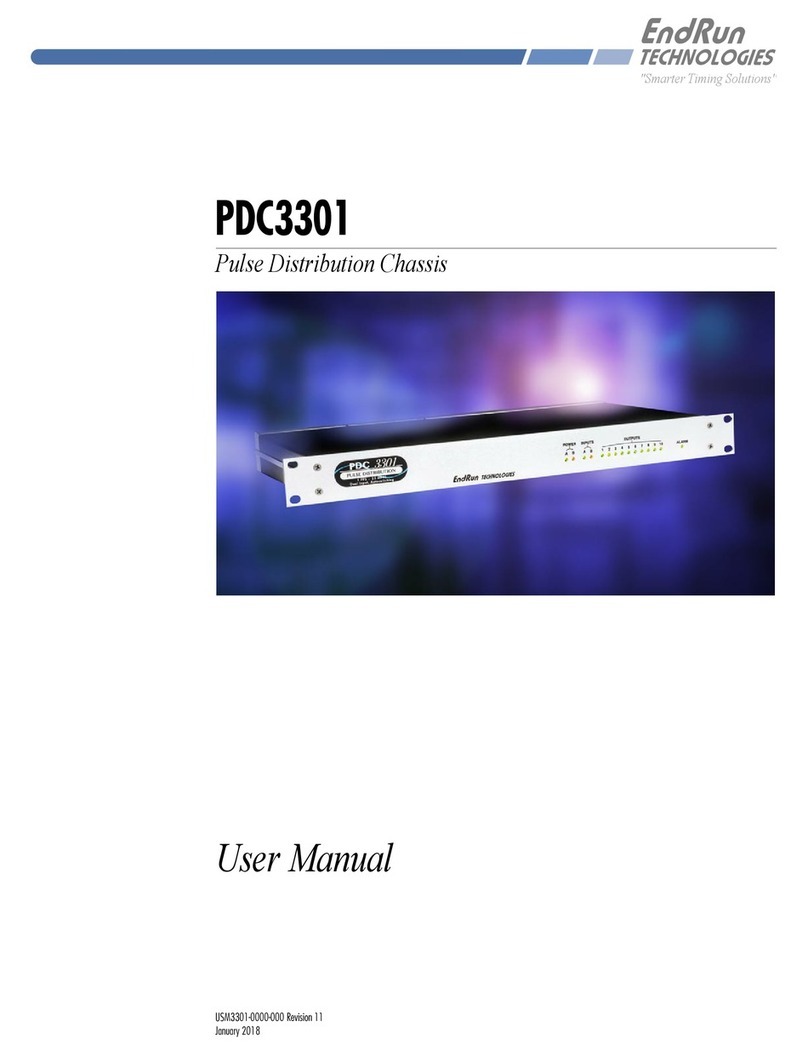
EndRun FDC3300 User manual

"Smarter Timing Solutions"
FDC3300
Frequency Distribution Chassis
User Manual


FDC3300 User Manual
FDC3300
Frequency Distribution Chassis User Manual
Preface
Thank you for purchasing the Frequency Distribution Chassis. Our goal in developing this product
is to bring you a distribution chassis that will quickly, easily and reliably meet or exceed your system
requirements. Your new FDC3300 is fabricated using the highest quality materials and manufactur-
ing processes available today, and will give you years of trouble-free service.
About EndRun Technologies
EndRun Technologies is dedicated to the development and renement of the technologies required to
fulll the demanding needs of the time and frequency community.
The instruments produced by EndRun Technologies have been selected as the timing reference for a
variety of industries and applications - computer networks, satellite earth stations, power utilities, test
ranges, broadcast and telecommunications systems and more.
EndRun Technologies is committed to fullling your precision timing needs by providing the most
advanced, reliable and cost-effective time and frequency equipment available in the market today.
Trademark Acknowledgements
IBM-PC, UNIX, Windows NT are registered trademarks of the respective holders.
Part No. USM3300-0000-000 Revision 1
June 2008
Copyright © EndRun Technologies 2007-2008

FDC3300 User Manual
FDC3300 User Manual
About This Manual
This manual will guide you through simple installation and set up procedures.
Introduction – The Distribution Chassis, how it works, where to use it, its main features.
Basic Installation – How to connect, congure and test your Distribution Chassis.
Console Port – Description of the console commands for use over the serial port or optional network
port.
If you detect any inaccuracies or omissions, please inform us. EndRun Technologies cannot be held
responsible for any technical or typographical errors and reserves the right to make changes to the
product and manuals without prior notice.
Warranty
This product, manufactured by EndRun Technologies, is warranted against defects in material and
workmanship for a period of two years from date of shipment, under normal use and service. During
the warranty period, EndRun Technologies will repair or replace products which prove to be defec-
tive.
For warranty service or repair, this product must be returned to EndRun Technologies. Buyer shall
prepay shipping charges to EndRun Technologies and EndRun Technologies shall pay shipping
charges to return the product to Buyer. However, Buyer shall pay all shipping charges, duties, and
taxes for products returned to EndRun Technologies from another country.
Products not manufactured by EndRun Technologies but included as an integral part of a system (e.g.
peripherals, options) are warranted for ninety days, or longer as provided by the original equipment
manufacturer, from date of shipment.
Limitation of Warranty
The foregoing express warranty shall not apply to defects resulting from improper or inadequate
maintenance by Buyer or User, Buyer-supplied software or interfacing, unauthorized modication or
misuse, operation outside of the environmental specications for the product, or improper site prepa-
ration or maintenance.
TO THE EXTENT PERMITTED BY LAW, THIS WARRANTY AND REMEMDIES SET FORTH
ABOVE ARE EXCLUSIVE AND IN LIEU OF ALL OTHER WARRANTIES, REMEDIES AND
CONDITIONS WHETHER ORAL OR WRITTEN, STATUTORY, EXPRESS, OR IMPLIED. AS
PERMITTED BY APPLICABLE LAW, ENDRUN SPECIFICALLY DISCLAIMS THE IMPLIED
WARRANTIES OF MERCHANTABILITY OR FITNESS FOR A PARTICULAR PURPOSE.

FDC3300 User Manual
FDC3300 User Manual
Warranty Repair
If you believe your equipment is in need of repair, call EndRun Technologies and ask for a customer
service agent. It is important to contact us rst as many problems may be resolved with a phone call.
Please have the serial number of the unit and the nature of the problem available before you call. If
it is determined that your equipment will require service, we will issue an RMA number. You will be
asked for contact information, including your name, address, phone number and e-mail address.
Ship the unit prepaid in the original container or a container of sufcient strength and protection to
EndRun Technologies. EndRun will not be responsible for damage incurred during shipping to us.
Be sure the RMA number is clearly identied on the shipping container. Our policy is to x or repair
the unit within 5 business days. If it is necessary to order parts or if other circumstances arise that
require more than 5 days, an EndRun service technician will contact you.
Repair After Warranty Expiration
If the warranty period has expired, we offer repair services for equipment you have purchased from
EndRun. Call and ask for a customer service agent. It is important to contact us rst as many prob-
lems may be resolved with a phone call. Please have the serial number of the unit and the nature
of the problem available before you call. If it is determined that the equipment has failed and you
want EndRun to perform the repairs, we will issue you an RMA number. Ship the unit prepaid in
the original container or a container of sufcient strength and protection to EndRun Technologies.
EndRun will not be responsible for damage incurred during shipping to us. Customer is responsible
for shipping costs to and from EndRun Technologies. Be sure the RMA number is clearly identied
on the shipping container. After the equipment has been received we will evaluate the nature of the
problem and contact you with the cost to repair (parts and labor) and an estimate of the time neces-
sary to complete the work.
Limitation of Liability
The remedies provided herein are Buyer’s sole and exclusive remedies. EndRun Technologies shall
not be liable for any direct, indirect, special, incidental or consequential damages, whether based on
contract, tort or any other legal theory.
EndRun Contact Information
Address: EndRun Technologies
2270 Northpoint Parkway
Santa Rosa, CA 95407
Phone: (707)573-8633
Fax: (707)573-8619
Sales: 1-877-749-3878 or (707)573-8633
Support: 1-877-749-3878 or (707)573-8633

FDC3300 User Manual
FDC3300 User Manual

FDC3300 User Manual
FDC3300 User Manual
Table of Contents
Preface . . . . . . . . . . . . . . . . . . . . . . . . . . . . . . . . . . . . . . . . . . . . . . . . . . . . . . . . . . . . . . . . . .i
About EndRun Technologies . . . . . . . . . . . . . . . . . . . . . . . . . . . . . . . . . . . . . . . . . . . . . . . . . . . .i
Trademark Acknowledgements . . . . . . . . . . . . . . . . . . . . . . . . . . . . . . . . . . . . . . . . . . . . . . . . . . i
About This Manual . . . . . . . . . . . . . . . . . . . . . . . . . . . . . . . . . . . . . . . . . . . . . . . . . . . . . . . . . ii
Warranty . . . . . . . . . . . . . . . . . . . . . . . . . . . . . . . . . . . . . . . . . . . . . . . . . . . . . . . . . . . . . . . . ii
Limitation of Warranty . . . . . . . . . . . . . . . . . . . . . . . . . . . . . . . . . . . . . . . . . . . . . . . . . . . . . . ii
Warranty Repair . . . . . . . . . . . . . . . . . . . . . . . . . . . . . . . . . . . . . . . . . . . . . . . . . . . . . . . . . .iii
Repair After Warranty Expiration . . . . . . . . . . . . . . . . . . . . . . . . . . . . . . . . . . . . . . . . . . . . . . .iii
Limitation of Liability . . . . . . . . . . . . . . . . . . . . . . . . . . . . . . . . . . . . . . . . . . . . . . . . . . . . . . .iii
EndRun Contact Information . . . . . . . . . . . . . . . . . . . . . . . . . . . . . . . . . . . . . . . . . . . . . . . . . .iii
Chapter One - Introduction . . . . . . . . . . . . . . . . . . . . . . . . . . . . . . . . . . . . . . . . . . . . . . . 1
Main Features . . . . . . . . . . . . . . . . . . . . . . . . . . . . . . . . . . . . . . . . . . . . . . . . . . . . . . . . . . . . 1
Overview . . . . . . . . . . . . . . . . . . . . . . . . . . . . . . . . . . . . . . . . . . . . . . . . . . . . . . . . . . . . . . 1
Performance, Reliability and Reasonable Cost . . . . . . . . . . . . . . . . . . . . . . . . . . . . . . . . . . . . . . . . . . 1
Flexibility . . . . . . . . . . . . . . . . . . . . . . . . . . . . . . . . . . . . . . . . . . . . . . . . . . . . . . . . . . . . . . 1
Easy Installation . . . . . . . . . . . . . . . . . . . . . . . . . . . . . . . . . . . . . . . . . . . . . . . . . . . . . . . . . . 1
Free FLASH Upgrades . . . . . . . . . . . . . . . . . . . . . . . . . . . . . . . . . . . . . . . . . . . . . . . . . . . . . . . 2
Theory of Operation . . . . . . . . . . . . . . . . . . . . . . . . . . . . . . . . . . . . . . . . . . . . . . . . . . . . . . . . 2
Overview . . . . . . . . . . . . . . . . . . . . . . . . . . . . . . . . . . . . . . . . . . . . . . . . . . . . . . . . . . . . . . 2
Chapter Two - Basic Installation . . . . . . . . . . . . . . . . . . . . . . . . . . . . . . . . . . . . . . . . . . . 5
Checking and Identifying the Hardware . . . . . . . . . . . . . . . . . . . . . . . . . . . . . . . . . . . . . . . . . . . 5
FDC3300 Physical Description . . . . . . . . . . . . . . . . . . . . . . . . . . . . . . . . . . . . . . . . . . . . . . . . . . 6
Installing the FDC3300 . . . . . . . . . . . . . . . . . . . . . . . . . . . . . . . . . . . . . . . . . . . . . . . . . . . . . . 7
Mount the FDC3300 . . . . . . . . . . . . . . . . . . . . . . . . . . . . . . . . . . . . . . . . . . . . . . . . . . . . . . . . 7
Connecting the DC Power Option . . . . . . . . . . . . . . . . . . . . . . . . . . . . . . . . . . . . . . . . . . . . . . . . . 7
Connect Serial I/O to Host Computer . . . . . . . . . . . . . . . . . . . . . . . . . . . . . . . . . . . . . . . . . . . . . . . 8
Connect Signal Inputs and Outputs . . . . . . . . . . . . . . . . . . . . . . . . . . . . . . . . . . . . . . . . . . . . . . . . 8
Connect Disable Inputs (External Alarm Inputs) . . . . . . . . . . . . . . . . . . . . . . . . . . . . . . . . . . . . . . . . . 8
Connect Alarm Output . . . . . . . . . . . . . . . . . . . . . . . . . . . . . . . . . . . . . . . . . . . . . . . . . . . . . . . 8

FDC3300 User Manual
FDC3300 User Manual
Chapter Three - Control and Status Commands . . . . . . . . . . . . . . . . . . . . . . . . . . . . . 9
Available User Commands . . . . . . . . . . . . . . . . . . . . . . . . . . . . . . . . . . . . . . . . . . . . . . . . . . . . 9
Detailed Command Descriptions . . . . . . . . . . . . . . . . . . . . . . . . . . . . . . . . . . . . . . . . . . . . . . . 10
alarmlist . . . . . . . . . . . . . . . . . . . . . . . . . . . . . . . . . . . . . . . . . . . . . . . . . . . . . . . . . . . . . . 10
alarmstat . . . . . . . . . . . . . . . . . . . . . . . . . . . . . . . . . . . . . . . . . . . . . . . . . . . . . . . . . . . . . 10
disablemode . . . . . . . . . . . . . . . . . . . . . . . . . . . . . . . . . . . . . . . . . . . . . . . . . . . . . . . . . . . 10
disablestat . . . . . . . . . . . . . . . . . . . . . . . . . . . . . . . . . . . . . . . . . . . . . . . . . . . . . . . . . . . . 11
help . . . . . . . . . . . . . . . . . . . . . . . . . . . . . . . . . . . . . . . . . . . . . . . . . . . . . . . . . . . . . . . . 12
port . . . . . . . . . . . . . . . . . . . . . . . . . . . . . . . . . . . . . . . . . . . . . . . . . . . . . . . . . . . . . . . . 12
pwrstat . . . . . . . . . . . . . . . . . . . . . . . . . . . . . . . . . . . . . . . . . . . . . . . . . . . . . . . . . . . . . . 12
reset . . . . . . . . . . . . . . . . . . . . . . . . . . . . . . . . . . . . . . . . . . . . . . . . . . . . . . . . . . . . . . . . 12
respmode . . . . . . . . . . . . . . . . . . . . . . . . . . . . . . . . . . . . . . . . . . . . . . . . . . . . . . . . . . . . . 12
return . . . . . . . . . . . . . . . . . . . . . . . . . . . . . . . . . . . . . . . . . . . . . . . . . . . . . . . . . . . . . . . 13
selectedin . . . . . . . . . . . . . . . . . . . . . . . . . . . . . . . . . . . . . . . . . . . . . . . . . . . . . . . . . . . . . 13
settings . . . . . . . . . . . . . . . . . . . . . . . . . . . . . . . . . . . . . . . . . . . . . . . . . . . . . . . . . . . . . . 13
siginstat . . . . . . . . . . . . . . . . . . . . . . . . . . . . . . . . . . . . . . . . . . . . . . . . . . . . . . . . . . . . . . 14
sigoutstat . . . . . . . . . . . . . . . . . . . . . . . . . . . . . . . . . . . . . . . . . . . . . . . . . . . . . . . . . . . . . 14
status . . . . . . . . . . . . . . . . . . . . . . . . . . . . . . . . . . . . . . . . . . . . . . . . . . . . . . . . . . . . . . . 14
switchmode . . . . . . . . . . . . . . . . . . . . . . . . . . . . . . . . . . . . . . . . . . . . . . . . . . . . . . . . . . . . 14
upload . . . . . . . . . . . . . . . . . . . . . . . . . . . . . . . . . . . . . . . . . . . . . . . . . . . . . . . . . . . . . . . 15
ver . . . . . . . . . . . . . . . . . . . . . . . . . . . . . . . . . . . . . . . . . . . . . . . . . . . . . . . . . . . . . . . . . 15
RS-232 Serial I/O Port Signal Definitions . . . . . . . . . . . . . . . . . . . . . . . . . . . . . . . . . . . . . . . . . 15
Appendix A - LED Indicators . . . . . . . . . . . . . . . . . . . . . . . . . . . . . . . . . . . . . . . . . . . . . 17
Power LEDs . . . . . . . . . . . . . . . . . . . . . . . . . . . . . . . . . . . . . . . . . . . . . . . . . . . . . . . . . . . . . 17
Input LEDs . . . . . . . . . . . . . . . . . . . . . . . . . . . . . . . . . . . . . . . . . . . . . . . . . . . . . . . . . . . . . 17
Output LEDs . . . . . . . . . . . . . . . . . . . . . . . . . . . . . . . . . . . . . . . . . . . . . . . . . . . . . . . . . . . . 18
Alarm LED . . . . . . . . . . . . . . . . . . . . . . . . . . . . . . . . . . . . . . . . . . . . . . . . . . . . . . . . . . . . . 18
Appendix B - Upgrading the Firmware . . . . . . . . . . . . . . . . . . . . . . . . . . . . . . . . . . . . 19
What You Need To Perform the Upgrade . . . . . . . . . . . . . . . . . . . . . . . . . . . . . . . . . . . . . . . . . 19
Performing the Upgrade . . . . . . . . . . . . . . . . . . . . . . . . . . . . . . . . . . . . . . . . . . . . . . . . . . . . 19
Problems with the Upload . . . . . . . . . . . . . . . . . . . . . . . . . . . . . . . . . . . . . . . . . . . . . . . . . . . 20

FDC3300 User Manual
FDC3300 User Manual
Appendix C - Network Port Option . . . . . . . . . . . . . . . . . . . . . . . . . . . . . . . . . . . . . . . 21
Overview . . . . . . . . . . . . . . . . . . . . . . . . . . . . . . . . . . . . . . . . . . . . . . . . . . . . . . . . . . . . . . . . . . . . . . . . . .21
Available User Commands . . . . . . . . . . . . . . . . . . . . . . . . . . . . . . . . . . . . . . . . . . . . . . . . . . . 21
Detailed Command Descriptions . . . . . . . . . . . . . . . . . . . . . . . . . . . . . . . . . . . . . . . . . . . . . . . 22
netconfig . . . . . . . . . . . . . . . . . . . . . . . . . . . . . . . . . . . . . . . . . . . . . . . . . . . . . . . . . . . . . 22
netmac . . . . . . . . . . . . . . . . . . . . . . . . . . . . . . . . . . . . . . . . . . . . . . . . . . . . . . . . . . . . . . 22
netpass . . . . . . . . . . . . . . . . . . . . . . . . . . . . . . . . . . . . . . . . . . . . . . . . . . . . . . . . . . . . . . 22
netprotocol . . . . . . . . . . . . . . . . . . . . . . . . . . . . . . . . . . . . . . . . . . . . . . . . . . . . . . . . . . . . 23
netreset . . . . . . . . . . . . . . . . . . . . . . . . . . . . . . . . . . . . . . . . . . . . . . . . . . . . . . . . . . . . . . 23
netsnmp . . . . . . . . . . . . . . . . . . . . . . . . . . . . . . . . . . . . . . . . . . . . . . . . . . . . . . . . . . . . . . 23
netsnmpro . . . . . . . . . . . . . . . . . . . . . . . . . . . . . . . . . . . . . . . . . . . . . . . . . . . . . . . . . . . . . 23
netsnmprw . . . . . . . . . . . . . . . . . . . . . . . . . . . . . . . . . . . . . . . . . . . . . . . . . . . . . . . . . . . . 24
Upgrading Firmware . . . . . . . . . . . . . . . . . . . . . . . . . . . . . . . . . . . . . . . . . . . . . . . . . . . . . . 24
What You Need To Perform the Upgrade . . . . . . . . . . . . . . . . . . . . . . . . . . . . . . . . . . . . . . . . . . . . 24
Performing the Upgrade . . . . . . . . . . . . . . . . . . . . . . . . . . . . . . . . . . . . . . . . . . . . . . . . . . . . . 24
Problems with the Upload . . . . . . . . . . . . . . . . . . . . . . . . . . . . . . . . . . . . . . . . . . . . . . . . . . . 25
Appendix D - Specifications . . . . . . . . . . . . . . . . . . . . . . . . . . . . . . . . . . . . . . . . . . . . . . 27

FDC3300 User Manual

FDC3300 User Manual
1
"Smarter Timing Solutions"
Chapter
One
Introduction
The FDC3300 Frequency Distribution Chassis is a 19” rack-mounted, dual-input, ten-output device
for high-performance analog signal distribution with intelligent input fault detection and failover
switching. In addition to reproducing the input signal with very low distortion and propagation
delay, the unit features very good input-to-input, output-to-output and output-to-input isolation. It
adds very low phase noise and spurious components to the distributed signal, making it suitable for
demanding applications where high spectral purity is required. Status is locally observable on a
cleanly designed front panel with LED indicators, and it is fully manageable via RS-232 or an op-
tional Ethernet port. Redundant AC, DC or AC/DC power inputs are optionally available.
For more detailed information that is not included in this manual please visit our website: http:
//www.endruntechnologies.com. There you can also download rmware upgrades, the latest manuals
and other documentation.
Main Features
Overview
The FDC3300 may be employed either as a simple, single-input, ten-output signal distributor for non-
critical applications, or, by making use of its intelligent dual-input failover switching and redundant
power supply capabilities, high-availability signal distribution systems for top tier commercial and
military applications may be efciently implemented. The unit will accept a TTL or Open-Collector
Alarm output signal from the upstream signal source on each of its two Disable inputs so that bank
switching of multiple FDC3300 units may be efciently and synchronously implemented.
Performance, Reliability and Reasonable Cost
It provides high performance and reliability combined with reasonable cost. Its internal sub-as-
semblies are fabricated with state-of-the-art components and processes and are integrated in a solid,
high-quality chassis.
Flexibility
It supports full user conguration of the input switching strategy and complete remote monitoring
and control via multiple industry-standard interfaces.
Easy Installation
Its standard 1U high, 19” rack-mountable chassis makes installation simple. It may be mounted in
any convenient location. All signal input and output connectors are standard BNC female connec-
tors. AC power input is via IEC-320 standard power cord. Connect it to your host computer using
the standard RS-232 serial cable provided, or on Ethernet equipped units, use the rear panel mounted
10/100Base-T RJ-45 connector and CAT-5 patch cable provided to connect it to your network. Initial
network conguration is automatic on networks using the Dynamic Host Conguration Protocol
(DHCP). Manual network conguration is via the RS-232 serial I/O port.

FDC3300 User Manual
2
CHAPTER ONE
3FDC3300 User Manual
Free FLASH Upgrades
Firmware is stored in non-volatile FLASH memory, so the FDC3300 can be easily upgraded in the
eld using the local RS-232 port. We make all rmware upgrades for our products available to our
customers free of charge.
Theory of Operation
Overview
The diagram below illustrates the FDC3300 architecture. Single or dual power supply operation is
supported with any combination of AC or DC input voltages. The presence of proper voltage at the
output of each of the two internal DC-DC converters is detected and monitored by the alarm logic
and CPU. The outputs of these two power supplies are diode “OR’d” to power the FDC3300.
Single or dual signal inputs are detected and monitored by the alarm logic and CPU. In addition,
single or dual TTL level disable inputs are monitored to allow switching based on the alarm output
from the upstream signal source. This external alarm signal can be connected to rear-panel BNC
connectors labeled “DISABLE IN”. These disable inputs are pulled up with 10k ohm resistors so
that they may be connected to an open-collector output signal. Based on the status of the signal input
level detection and the disable inputs, the alarm logic and CPU control the signal input switch. You
can congure a variety of automatic switching strategies and also manually force the selection of
either input.
The output signal from the switch is buffered and drives ten broadband output ampliers. Output
signal level detectors for each of the ten channels are monitored by the alarm logic and CPU so that
output amplier failure or interconnect cable short circuits may be observed.
All status information is reported via the front-panel LEDs and the serial I/O port or optional Ethernet
interface. A summary open-collector alarm output is provided.

FDC3300 User Manual
2
CHAPTER ONE
3FDC3300 User Manual
Functional Block Diagram
Input Detect/
Switch
Input A
Input B
Disable A
Disable B
AC/DC A
AC/DC B
AC-DC/
DC-DC
AC-DC/
DC-DC
Diode
OR/
Fault
Detect
Signal Amp/
Output Level
Detect
Signal Amp/
Output Level
Detect
Signal Amp/
Output Level
Detect
Signal Amp/
Output Level
Detect
Signal Amp/
Output Level
Detect
Signal Amp/
Output Level
Detect
Signal Amp/
Output Level
Detect
Signal Amp/
Output Level
Detect
Signal Amp/
Output Level
Detect
Signal Amp/
Output Level
Detect
Output 1
Output 2
Output 3
Output 4
Output 5
Output 6
Output 7
Output 8
Output 9
Output 10
Alarm Logic/
Front Panel LED Drivers
CPU w/RS-232 & Ethernet
P
W
R
A
P
W
R
B
I
N
A
I
N
B
O
U
T
1
O
U
T
2
O
U
T
3
O
U
T
4
O
U
T
5
O
U
T
6
O
U
T
7
O
U
T
8
O
U
T
9
O
U
T
10
A
L
A
R
M
Alarm Out LED OUTPUTS
Signal Input Status
+12V
-12V
Ethernet I/O
RS-232 I/O
Switch Control

FDC3300 User Manual
4
CHAPTER ONE

FDC3300 User Manual
5
"Smarter Timing Solutions"
Chapter
Two
Basic Installation
This chapter will guide you through the most basic checkout and physical installation of your
FDC3300 Frequency Distribution Chassis. Subsequent chapters and appendices will give you the
information needed to congure your installation for the maximum performance in your operating
environment.
Checking and Identifying
the Hardware
Unpack and check all the items using the shipment packing list. Contact the factory if anything is
missing or damaged. The FDC3300 shipment typically contains:
• FDC3300 (part # 3300-0001-000 or #3300- variant)
• FDC3300 User Manual (part #USM3300-0000-000)
• IEC 320 AC Power Cord (part #0501-0003-000)
(This part will not be present if using the DC power option.)
• DB9F-to-DB9F Null Modem Serial I/O Cable (part #0501-0002-000)
• RJ-45 to RJ-45 CAT-5 patch cable, 2 meters (part #0501-0000-000)
(This part present only with units congured with the Ethernet Interface option.)

FDC3300 User Manual
6
CHAPTER TWO
7FDC3300 User Manual
BASIC INSTALLATION
FDC3300 Physical
Description
Power A/B LEDs These red/green/yellow LEDs indicate power input status. Green
means the power supply is good. Red means the power supply is
installed but has failed. Off means the optional power supply is not
installed.
Input A/B LEDs These red/green/yellow LEDs indicate the signal input status. For a
full description see Appendix A - LED Indicators.
Output 1-10 LEDs These red/green/yellow LEDs indicate the presence or absence of
signals at the output connectors. Green means the output is present and
red means the output is absent or shorted.
Alarm LED This red/green/yellow LED indicates the presence of a fault condition.
Green means there is no alarm condition. Red means an alarm condi-
tion exists. Use the alarmstat or alarmlist commands for more
information (see Chapter 3 - Control and Status Commands).
FOR COPPER CONDUCTORS ONLY - TORQUE TO 9 in-
!
RS-232
OUT 1 2 3 4 5 6 7 8 9 10
SIGNAL IN DISABLE IN ALARM OUT 10/100Base-T
A B
SIGNAL IN DISABLE IN
100-240V~
0.5A.
50-60 Hz
-48V
1.5A
00:D0:C9:55:69:FC
RS-232 Connector This DB-9M connector provides the RS-232 serial I/O interface to the
FDC3300. This allows the user to initialize, monitor and control the
FDC3300. See Chapter 3 - RS-232 Serial I/O Port Signal Definitions
for detailed information.
10/100Base-T Jack This optional RJ-45 connector mates with the ethernet twisted pair
cable from the network.
Signal Input A/B Jacks These two BNC connectors accept the A and B analog signal inputs.
Disable Input A/B Jacks These two BNC connectors accept the A and B logic level external
alarm inputs. If properly congured (see disablemode), a high level
on this input will disable the corresponding Signal Input.
Alarm Output Jack This BNC connector provides the open-collector Alarm output. This
output is asserted during the power-on/startup sequence and when an
alarm condition exists.
EndRun
TECHNOLOGIES
FDC3300 Frequency Distribution Chassis
123 4 5678910
ABAB
OUTPUTS
POWER INPUTS
ALARM

FDC3300 User Manual
6
CHAPTER TWO
7FDC3300 User Manual
BASIC INSTALLATION
Signal Output 1-10 Jacks These ten BNC connectors provide the analog signal outputs.
AC Power Input Jack This IEC 320 standard three-prong connector provides AC power.
DC Power Input Block This optional 3-position terminal block provides connection to the
DC power source, and replaces the AC power input jack. See details
in Appendix D - Specifications.
Installing the FDC3300
FCC NOTICE
This equipment has been tested and found to comply with the limits for a Class A digital device, pursuant
to part 15 of the FCC Rules. These limits are designed to provide reasonable protection against harmful
interference when the equipment is operated in a commercial environment. This equipment generates,
uses, and can radiate radio frequency energy and, if not installed and used in accordance with the instruc-
tion manual, may cause harmful interference to radio communications. Operation of this equipment in a
residential area is likely to cause harmul interference in which case the user will be required to correct the
interference at his own expense.
Mount the FDC3300
Using standard 19” rack mounting hardware, mount the unit in the desired location.
CAUTION
Ground the unit properly with the supplied power cord.
Position the power cord so that you can easily disconnect it from the FDC3300.
Do not install the FDC3300 where the operating ambient temperature might exceed 122°F (50°C).
Connecting the DC Power Option
Connect the safety ground terminal to earth ground. Connect the “+” terminal to the positive output
of the DC power source. Connect the “-” terminal to the negative output of the DC power source.
Note that the FDC3300 has a “oating” internal power supply, therefore either the positive or nega-
tive output of the DC power source can be referenced to earth ground. This unit will not operate if
the +/- connections are reversed; however it will not be damaged by a reverse connection.

FDC3300 User Manual
8
CHAPTER TWO
SHOCK/ENERGY HAZARD
Install in Restricted Access Location.
Use 10-14 AWG copper wire only.
Terminal block screw torque: 9 in-lbs (1 nM).
Branch circuit must have circuit breaker, 15A or less.
Install terminal block cover after wiring.
Connect Serial I/O to Host Computer
Using the standard null-modem DB9F-to-DB9F cable provided, connect one end to the FDC3300
connector labeled RS-232 and the other end to an available DB9M RS-232 connector on your host
computer. The factory default serial port parameters are 19200 baud, 8 data bits, no parity and 1 stop
bit. The FDC3300 does not use hardware or software handshaking, so make sure that your terminal
program is congured appropriately and disable all handshaking.
Connect Signal Inputs and Outputs
Using coaxial cables, connect your analog signal(s) to the Signal Input A and/or Signal Input B on
the FDC3300. The factory default for the FDC3300 switchmode setting is for Signal Input A to be
the primary and Signal Input B to be the secondary. You can change this by using the switchmode
command over the Serial I/O Port.
Connect coaxial cables from each of the FDC3300 signal outputs to your equipment.
Connect Disable Inputs (External Alarm Inputs)
If the source(s) of your reference signal(s) has (have) compatible TTL alarm output(s) that you would
like to use to force signal input switching on your FDC3300, connect these using coaxial cables to the
Disable A and/or Disable B input(s) on the FDC3300. The factory default for the FDC3300 dis-
ablemode setting is to ignore these inputs. If you plan to use them, you will need to use the dis-
ablemode command over the serial I/O port to congure them.
Connect Alarm Output
If you are using the FDC3300 summary alarm output, connect a coaxial cable from the equipment
that will be monitoring the FDC3300 to the Alarm output on the FDC3300.

FDC3300 User Manual
9
"Smarter Timing Solutions"
Chapter
Three
Control and Status Commands
This chapter describes the FDC3300 control and status commands. The FDC3300 supports com-
mands for performing initialization/setup and for monitoring the performance and status of the unit.
The serial I/O port physical and electrical characteristics are dened as well.
Available User Commands
COMMAND FUNCTION
alarmlist Prints a list of all current system alarms and OK if no alarms.
alarmstat Prints system alarm information as a series of zeros and ones.
Where ‘1’ means the alarm is asserted and ‘0’ means it is not.
An ‘x’ means it is not installed.
disablemode Congures Disable A and Disable B inputs.
disablestat Prints the current status of the Disable A and Disable B inputs.
A ‘1’ means the input is asserted and ‘0’ means it is not.
help Prints help for all Distribution Chassis commands.
port Congures serial port baud rate, data bits, parity and stop bits.
pwrstat Prints the current status of the power supplies. A ‘1’ means the
power supply is operational. A ‘0’ means it is not.
reset This command will cause a system reset.
respmode Congures the way the serial port responds to commands,
either TERSE or VERBOSE.
return Tells the Distribution Chassis to return to the primary input.
selectedin Prints the currently selected Signal Input A, B or NONE.
settings Prints all user setting commands which include DISABLE-
MODE, PORT, RESPMODE and SWITCHMODE.
siginstat Prints the current status of Signal Inputs A and B. A ‘1’ means
the signal is present and a ‘0’ means it is not.
sigoutstat Prints the current status of the Signal Outputs 1 through 10 as
a sequence of 10 characters. A ‘1’ means the signal is present
and a ‘0’ means it is not.
status Prints all system status commands which include ALARM-
LIST, ALARMSTAT, DISABLESTAT, PWRSTAT, SELECT-
EDIN, SIGINSTAT, and SIGOUTSTAT.
switchmode Congures the switching mode, AB, BA, A or B.
upload Starts a software upload process.
ver Prints the software and FPGA version information.

FDC3300 User Manual
10
CHAPTER THREE
11 FDC3300 User Manual
CONTROL AND STATUS COMMANDS
All entered commands are assumed to be terminated with a carriage return. Line feeds are ignored.
All responses from the FDC3300 are terminated with a carriage return and a line feed.
Detailed Command
Descriptions
alarmlist
This query-only command displays the current system alarms as a list of descriptive messages. The
following is an example:
Query: alarmlist
Chassis response: Input B signal absent
Disable B asserted
alarmstat
This query-only command displays the current system alarms as a series of characters, listed left to
right. Each character is a ‘0’, a ‘1’ or an ‘x’. A ‘1’ means the corresponding alarm is active. A ‘0’
means it is OK. An ‘x’ means the optional component is not installed in this particular unit.
Group 1 (6 characters) Group 2 (10 characters) Group 3 (4 characters)
Signal Input A absent Output 1 signal absent System Oscillator error
Signal Input B absent Output 2 signal absent Flash error
Disable A asserted Output 3 signal absent FPGA error
Disable B asserted Output 4 signal absent Network port error (option)
Power Supply A failed Output 5 signal absent
Power Supply B failed (option) Output 6 signal absent
Output 7 signal absent
Output 8 signal absent
Output 9 signal absent
Output 10 signal absent
Query: alarmstat
Chassis response: 01000x 0000000000 000x (An alarm exists on
Signal Input B. Also,
Power Supply B and the
Network Port are not
installed.)
disablemode
This command allows you to select external alarm inputs from the reference source (if any) as speci-
ed in Appendix C. (These inputs are labeled “DISABLE IN” on the rear-panel.) When the external
alarm input is asserted it will disable the corresponding reference signal input and/or set a system
alarm. If you are not using external alarms then set disablemode=n,n.
The disablemode syntax is disablemode=a,b,x where Parameter a may be Y (yes) or N (no) for
whether to use the Disable A input or not. Parameter b may be Y or N for whether to use the Dis-
able B input or not. (Depending upon the switchmode setting, either the a or b setting could be a
“don’t care” and would be ignored. For example, if switchmode=a , then Parameter b in the dis-
Table of contents
Other EndRun Chassis manuals