manuals.online logo
Brands
  1. Home
  2. •
  3. Brands
  4. •
  5. Endura
  6. •
  7. Indoor Furnishing
  8. •
  9. Endura Ultimate Flip Lever Astragal User manual

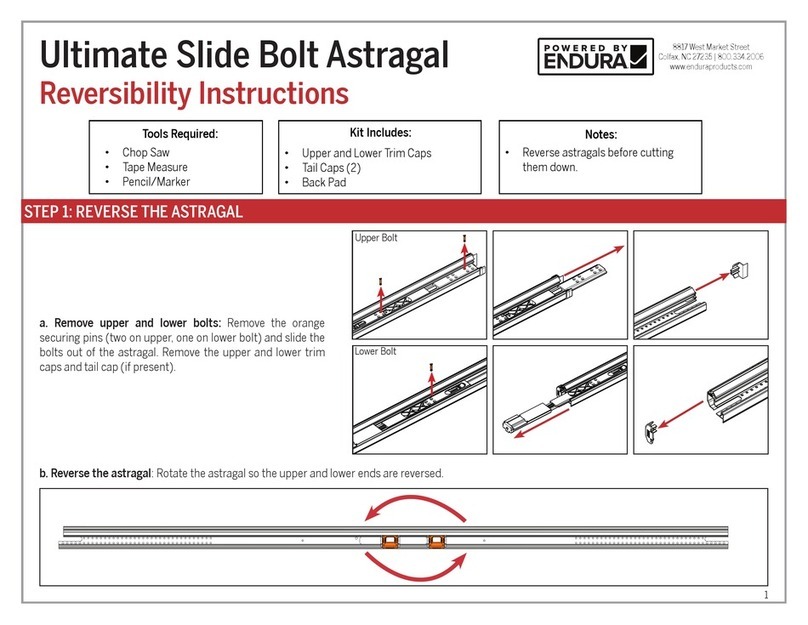
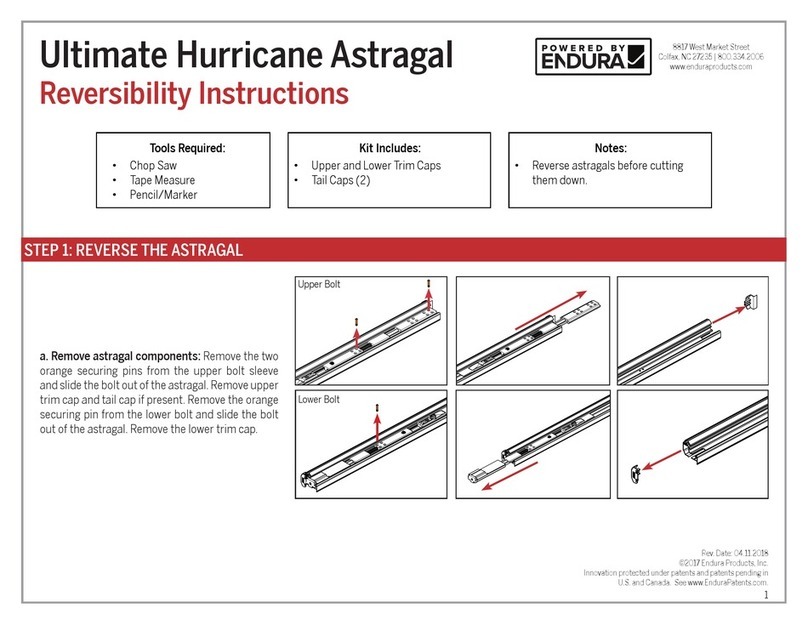
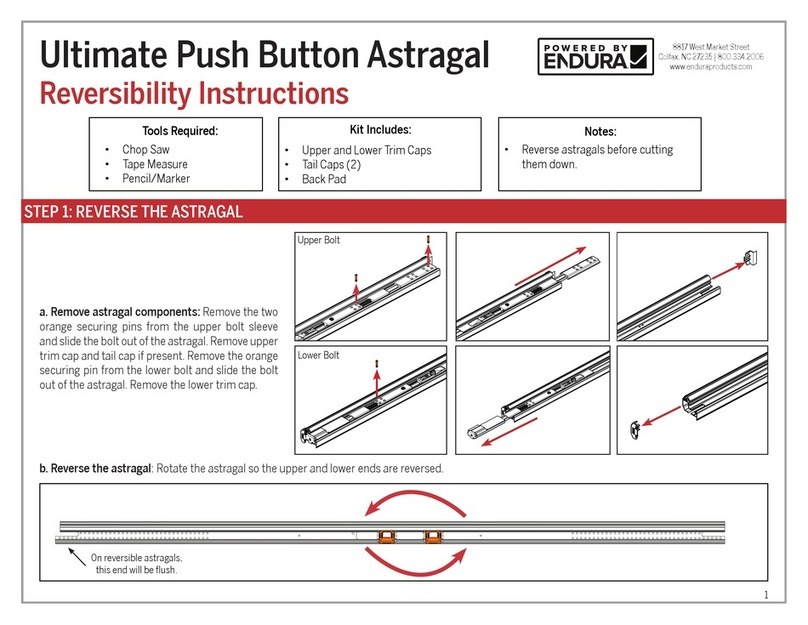
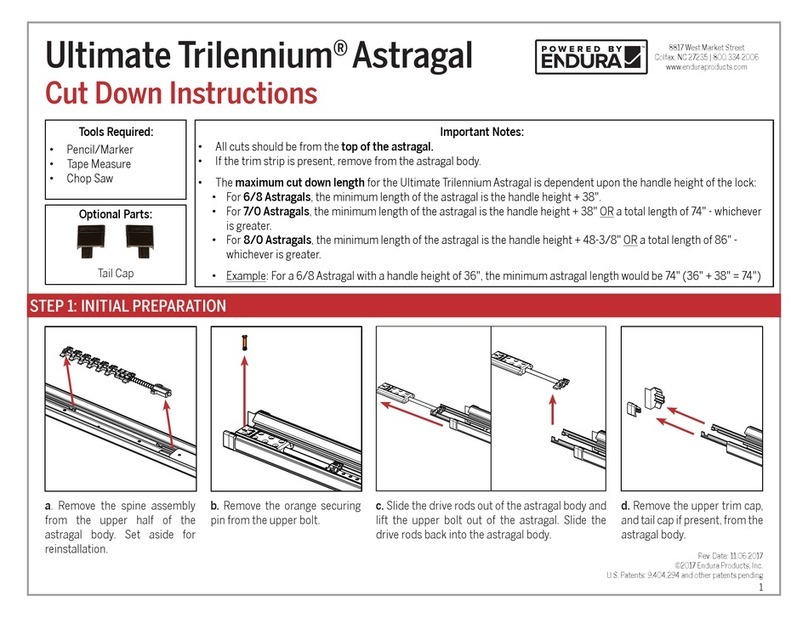
Endura Ultimate Flip Lever Astragal User manual

1
Ultimate Flip Lever™Astragal
Cut Down Instructions
8817 West Market Street
Colfax, NC 27235 | 800.334.2006
www.enduraproducts.com
Rev. Date: 05.07.2018
©2017 Endura Products, Inc.
Innovation protected under patents and patents pending in
U.S. and Canada. See www.EnduraPatents.com.
• All cuts should be from the top of the astragal.
• Ultimate Flip Lever Astragals can be cut down a maximum of 7".
• Bolts should be in the retracted position before beginning.
Notes:
• Pencil/Marker
• Tape Measure
• Chop Saw
• Flathead Screwdriver
• Phillips Screwdriver
Tools Required:
STEP 1: INITIAL PREPARATION
c. If present, remove the trim strip
from the astragal body.
Y
X
a. Measure the length of the door panel (X) and the length of
the astragal (Y) on the narrow edge.
b. Round the length of the door panel (X) and the length of the
astragal (Y) down to the closest inch. Subtract the rounded
length of the door panel from the rounded length of the astragal
to determine your index number.
Example:
To determine index number:
• If the length of the astragal is 79-1/4", round it down to
79".
• If the length of the door panel is 73-3/4", round it down to
73".
• 79" - 73" = 6is the index number.
Tail Cap
Optional Parts:
2Ultimate Flip Lever™Astragal Cut Down Instructions
STEP 1 (CONT.): INITIAL PREPARATION
d. Rotate the bolt head out of the channel in the astragal and
slide the bolt assembly out of the astragal.
f. Remove the upper trim cap, and tail cap if
present, from the astragal body.
Ensure the upper bolt is in the unlocked position
before removing.
!
c. Remove the orange securing pin from the upper bolt
sleeve. Slide the bolt sleeve out of the astragal.
e. Remove the U-clip from the astragal body
and set aside.
3Ultimate Flip Lever™Astragal Cut Down Instructions
STEP 2: REMOVE THE FLIP LEVER ASSEMBLY
Flip Lever Assembly
Upper Drive
Channel
Spring
Bracket
Spring
Pivot
Lower Flip
Lever Lug
Upper Flip
Lever Lug
Lower Drive
Channel
Notches
a. Disengage the spring from the spring
bracket and spring pivot and set aside.
b. Engage the ip lever into the locked position to
access the center mounting screw.
c. Remove the mounting screw and T-nut
from the center of the ip lever assembly
and set it aside.
Center Mounting Screw
STEP 3: REMOVE THE FLIP LEVER ASSEMBLY (SKIP IF INDEX NUMBER IS LESS THAN 4)
4Ultimate Flip Lever™Astragal Cut Down Instructions
d. Remove the ip lever assembly from the astragal body by lifting
it straight up from the astragal body. As you remove the ip lever
assembly, mark the location on the astragal body where the upper ip
lever lug aligns with a notch in the upper drive channel.
Note: The marked notch on the upper drive channel may not be the
last notch.
e. Make a mark on the astragal body
where the lower ip lever lug aligns with
the notch in the lower drive channel.
STEP 2 (CONT.): REMOVE THE FLIP LEVER ASSEMBLY
f. Remove the lower ush bolt and the lower
drive bar from the astragal body.
g. Remove the upper driver bar from the astragal
body.
5Ultimate Flip Lever™Astragal Cut Down Instructions
STEP 3: CUT ASTRAGAL TO SIZE
IF YOU DO HAVE A TAIL CAP AVAILABLE:
b. Insert the tail cap onto the narrow side of the
astragal body. You may receive two tail caps, but
only one will t.
X-9/16"
Cut Flush
X-9/16"
a. Starting at the bottom of the astragal and measuring along the wide side, measure and mark (X- 9/16").Cut the
astragal ush at this location.
IF YOU DO NOT HAVE A TAIL CAP AVAILABLE:
b. To renotch the astragal measure 9/16" from the cut end of the
astragal. Using a chop saw, cut at this point,until the space between
the rows of holes in the astragal body. Do not cut it ush.
9/16"
Cut Flush
X
a. Starting at the bottom of the astragal and measuring along the narrow side, measure and mark
(X) on the astragal .Cut the astragal ush at this location.
X
6Ultimate Flip Lever™Astragal Cut Down Instructions
STEP 4: REINSTALL THE FLIP LEVER ASSEMBLY (ONLY IF INDEX NUMBER IS GREATER THAN 4)
c. Slide the upper drive bar into the astragal bodya. Reinstall the lower drive back into the astragal
body.
b. Reinstall the lower bolt into the astragal body,
connecting the lower drive lug into the lower
drive bar.
d. Subtract 4 from your index number determined
in Step 1a. Slide the upper drive channel down an
equivalent number of notches so that a new notch
lines up with the marks previously made.
Example:
If your index number was 6, slide the upper drive
channel down 2 notches because 6-4=2.
New notch aligns with mark
f. Insert the ip lever assembly into the astragal
body, ensuring the ip lever lugs align with the
marks made on the astragal body. Ensure the ip
lever assembly sits ush in the body with the lugs
securely inserted in the notches.
Do not operate the ip lever until the
screw is reinserted.
!
e. Align the ip lever assembly with the astragal
body so that the handle arm points towards the
bottom of the astragal.
Handle of Flip Lever Assembly is
towards bottom of astragal
Top of
Astragal
Bottom of
Astragal
7Ultimate Flip Lever™Astragal Cut Down Instructions
STEP 4 (CONT.): REINSTALL THE FLIP LEVER ASSEMBLY (ONLY IF INDEX NUMBER IS GREATER THAN 4)
g. Once properly seated, the ip lever assembly will rest
evenly on the drive channels. Holding the T-nut into place
below the ip lever, reinstall the center mounting screw.
When secured, disengage the ip lever.
h. Lift up the spring bracket and move it towards the top of the astragal the
same number of notches the upper drive channel was moved in Step f. Once
the location of the spring bracket is set,reinstall the spring between the spring
pivot and spring bracket.
Example:
If your index number was 6, move the spring bracket up 2 notches because
6-4=2.
STEP 5: REINSTALL THE BOLTS
a. Reinstall the upper trim cap onto the top of the
astragal body.
b. Slide the upper bolt assembly into the astragal
body until the end of the bolt is ush with the end
of the astragal.
c. Check that the bolt head is in the correct
orientation. "THIS SIDE UP" printing should be
visible. Rotate the bolt head into the closest notch
in the upper drive channel.
8Ultimate Flip Lever™Astragal Cut Down Instructions
STEP 5 (CONT.): REINSTALL THE BOLTS
d. Slide the upper bolt sleeve into the astragal body
until it is ush with the end of the body.
f.The holes many not initially align.Adjust the bolt sleeve
until the rst or second row of holes aligns with the holes
in the astragal body. Insert an orange securing pin into
the hole that aligns.
The bolt sleeve should never be more than 1/4"
inset from the top of the astragal.
!
Neither row of
holes align with
astragal body
Bolt may be up
to 1/4" inset
Holes
align
*Body darkened
for contrast
*Body darkened
for contrast
e. Insert the orange securing pin through the bolt
sleeve into the hole that aligns with the holes in the
astragal body.
g. Reinstall the U-clip over the upper bolt pin. Install
the clip using the closest hole to the lug.
Make sure the bolt is retracted when
reinstalling the clip
!
9Ultimate Flip Lever™Astragal Cut Down Instructions
STEP 6: CONFIRM FLIP LEVER OPERATION
b. Operate the ip lever and ensure the bolts move between engaged and
disengaged positions.
Upper Bolt
Lower Bolt
a. Reinsert the presized trim strip between the bottom bolt and the ip lever
assembly. Insert the longer piece of trim strip on the top part of the astragal,
ensuring it completely covers the upper bolt head. (Note the trim will not
securely t over the other components, but do not cut it at this time.)
Trim is hidden
for clarity

Other Endura Indoor Furnishing manuals
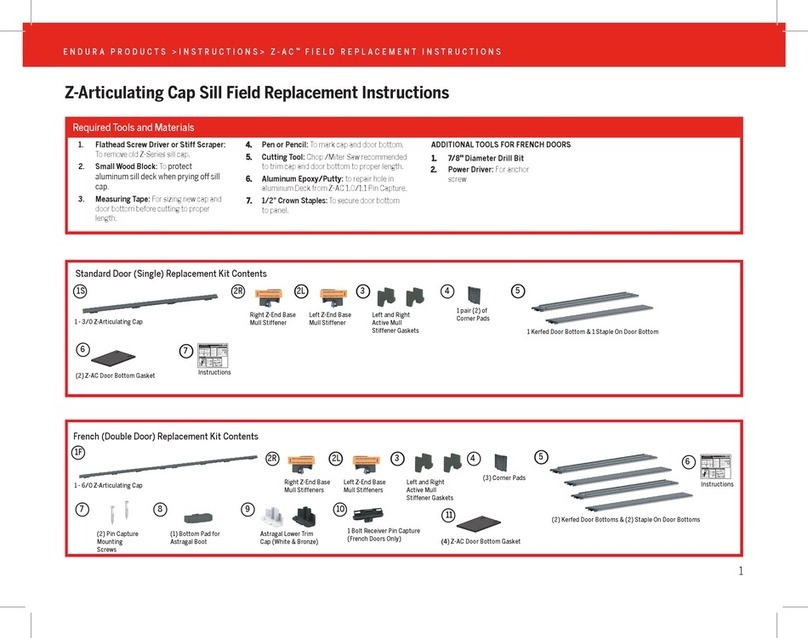
Endura All-Aluminum Z-Articulating Cap Sill Series Guide

Endura

Endura All-Aluminum Z-Articulating Cap Sill Series Guide

Endura Ultimate Trilennium Astragal User manual

Endura

Endura Ultimate Trilennium Astragal User manual

Endura Ultimate Hurricane Astragal User manual

Endura

Endura Ultimate Hurricane Astragal User manual

Endura Ultimate Hurricane Astragal User manual

Endura

Endura Ultimate Hurricane Astragal User manual

Endura Ultimate Slide Bolt Astragal User manual

Endura

Endura Ultimate Slide Bolt Astragal User manual

Endura Ultimate Push Button Astragal User manual

Endura

Endura Ultimate Push Button Astragal User manual

Endura Ultimate Lite Astragal User manual

Endura

Endura Ultimate Lite Astragal User manual

Endura Z-Articulating Cap Sill Series Guide
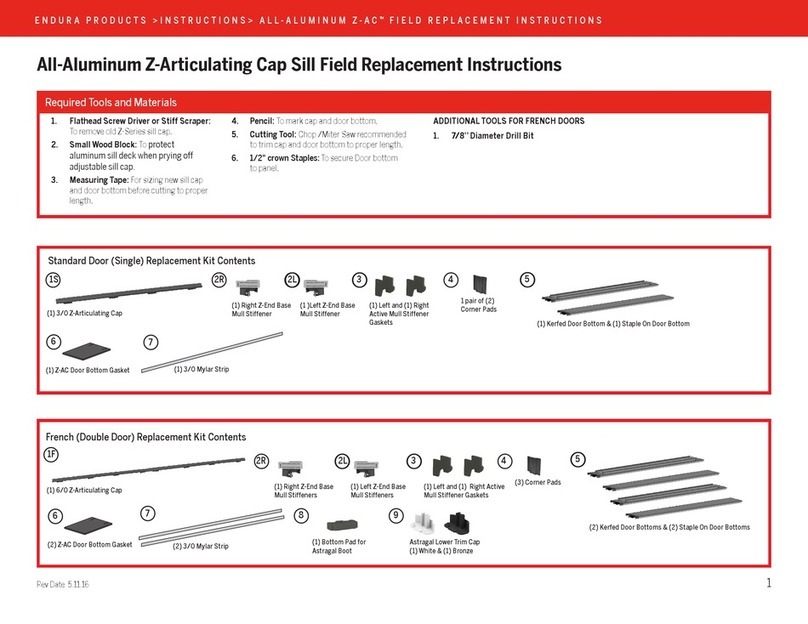
Endura

Endura Z-Articulating Cap Sill Series Guide

Popular Indoor Furnishing manuals by other brands
CAFOM SOURCING GFC-096 Note of assembly

CAFOM SOURCING

CAFOM SOURCING GFC-096 Note of assembly

Furniture of America CM-AC540S Assembly instructions

Furniture of America

Furniture of America CM-AC540S Assembly instructions

Agio 855553 Assembly instructions

Agio

Agio 855553 Assembly instructions

Forte Mokkaro MOKK221L Assembling Instruction

Forte

Forte Mokkaro MOKK221L Assembling Instruction

SUNON T221 installation manual

SUNON

SUNON T221 installation manual

Estate CLDRK16SW Assembly/installation instructions

Estate

Estate CLDRK16SW Assembly/installation instructions

Seconique ZURICH SEC/SH/03/22/CM1 Assembly instructions

Seconique

Seconique ZURICH SEC/SH/03/22/CM1 Assembly instructions

Coaster Nightstand 302352 Assembly instructions

Coaster

Coaster Nightstand 302352 Assembly instructions

mobli Cuckoo 10038663 Assembly instructions

mobli

mobli Cuckoo 10038663 Assembly instructions

Autonomous Poppin Series Assembly instructions

Autonomous

Autonomous Poppin Series Assembly instructions

Office Star Products Space 39006 operating instructions

Office Star Products

Office Star Products Space 39006 operating instructions

Mocka Marlow Desk Assembly instructions

Mocka

Mocka Marlow Desk Assembly instructions

BOMBAY Normandy Dining Table manual

BOMBAY

BOMBAY Normandy Dining Table manual

ADX ACHFBH0116 instruction manual

ADX

ADX ACHFBH0116 instruction manual

The Bradley Collection GLIDERPOLE installation instructions

The Bradley Collection

The Bradley Collection GLIDERPOLE installation instructions

Endon Liz Instruction leaflet

Endon

Endon Liz Instruction leaflet

Compel Pivit Perch Assembly instructions

Compel

Compel Pivit Perch Assembly instructions

modway MOD-6131 manual

modway

modway MOD-6131 manual

manuals.online logo
manuals.online logoBrands
  • About & Mission
  • Contact us
  • Privacy Policy
  • Terms and Conditions

Copyright 2025 Manuals.Online. All Rights Reserved.