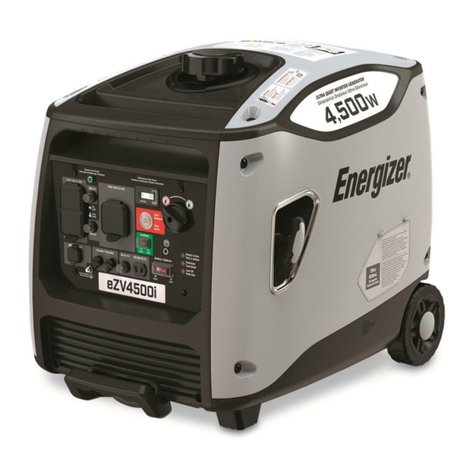
Energizer eZV3200 User manual

eZV3200
USER GUIDE

The engine exhaust from this product contains chemicals known to cause cancer, birth defects
or other reproductive harm.
© 2016 Energizer. Energizer and certain graphic designs are trademarks of Energizer Brands, LLC and
related subsidiaries and are used under license by Midland Power, Inc. All other brand names are trademarks
of their respective owners. Neither Midland Power, Inc. nor Energizer Brands, LLC is affiliated with the
respective owners of their trademarks.
CAN ICES-3 (B)/NMB-3(B) — EZV3200_EN_2016-06-15

Thanks for choosing the EZV Series!
You're excited to power up, so we'll keep this brief. Let's get started!


THIS PRODUCT MEETS ALL
CERTIFICATION REQUIREMENTS FROM:
SEPARATE PROTECTION AND CONTROL MUST BE PROVIDED IN
ACCORDANCE WITH THE CANADIAN ELECTRICAL CODE, PART 1
263521
THIS PRODUCT MEETS ALL CERTIFICATION REQUIREMENTS FROM:
SEPARATE PROTECTION AND CONTROL MUST BE PROVIDED IN ACCORDANCE WITH
THE CANADIAN ELECTRICAL CODE, PART 1
WE’VE GOT YOU COVERED!
Contact us by phone at 1-877-528-3772,
or visit us online at www.energizergenerators.com.
IMPORTANT SAFETY INSTRUCTIONS
This user guide contains important instructions for your product, that should be
followed during installation and maintenance of the generator and batteries.
SAVE THESE INSTRUCTIONS
This user guide covers the safety, operation and maintenance procedures for
the EZV3200. All information in this publication is based on the latest product
information available at the time of print.
Visit www.energizergenerators.com for user guide updates and operation notices.
No part of this publication may be reproduced without written permission.

TABLE OF CONTENTS
1. Safety Information
Safety While Operating Your Generator 1
Understanding AC Safety 2
Safety While Maintaining Your Generator 2
Other Safety Tips 3
2. Components Identification
Control Panel 5
Make Sure You Have Everything 7
3. Pre-Operation Check
Checking the Oil Level 8
Checking the Fuel Level 9
Checking the Air Filter 10
4. Starting the Engine
Carburetor Modification for High Altitude Operation 13
5. Generator Use
Output, Overload and Oil Alert Indicator 14
DC Applications 15
AC Applications 16
6. Stopping the Engine 17
7. Maintenance
Emission Control System 20
Change Oil 22
Air Filter Service 23
Spark Plug Service 24
Spark Arrester Maintenance 25
Replace Battery and Fuse 26

8. Transportation & Storage
Transporting the Generator 27
Storage (Extended Periods) 27
Draining the Fuel Tank 29
9. Troubleshooting 30
10. Technical Specifications 32
11. Wiring Diagrams 33
12. Appendix 34
13. Limited Warranty 35
You can register easily using our online form:
www.energizergenerators.com
1-877-528-3772
support@energizergenerators.com
www.energizergenerators.com
See page (35) for more information.
Product registration is required for all product support and warranty coverage, allowing
you to request warranty support in the future.
Warranty support, operation assistance and product support is provided by Midland
Power Inc., a licensed manufacturer of Energizer Generators. Please contact us directly
for any warranty service questions.
WARRANTY INFORMATION


1
Playing it safe when working with power equipment is always a good idea. Here are
some important precautions to make sure you stay safe.
1.1) Safety while Operating Your Generator
Always perform an oil, fuel and air filter check before starting the engine.
• Properly clean and maintain the equipment.
• Operate the generator according to instructions for safe and dependable
service.
• Before operating the generator, read the user guide carefully. Otherwise, it may
result in personal injuries or equipment damage.
• Never run the generator in an enclosed area to avoid harm from exhaust
emissions of a poisonous carbon monoxide gas.
• The engine exhaust from this product contains chemicals known to cause
cancer, birth defects or other reproductive harm.
• Be careful not to touch the exhaust system or discharge tubing during
operation due to risk of burns.
• Pay attention to the warning labels. The engine exhaust system will become
heated during operation and remain hot immediately after the engine is
stopped.
• Gasoline is a highly flammable and explosive liquid. Refuel in a well ventilated
area with the engine stopped.
• This portable generator is not for use with gasoline/ethanol blends with over
15% ethanol.
• When refueling the generator, keep it away from cigarettes, open flames, smoke
and/or sparks.
• Place the generator at least 3 feet away from buildings or other equipment
during operation.
• Run the generator on a level surface. Tilting the generator may result in fuel
spills.
• Know how to stop the generator quickly and understand operation of all
the controls. Never permit anyone to operate the generator without proper
instructions.
• Keep children, pets and machinery with rotating parts away during operation.
• Do not operate the generator in rain or snow.
• Do not allow any moisture to come in contact with the generator.
1. SAFETY INFORMATION

2
• Do not touch the spark plug while the engine is operating or shortly after the
engine has been shut down
1.2) Understanding AC Safety
Before connecting the generator to an electrical device or power cord:
• Make sure that everything is in proper working order. Faulty devices or power
cords can lead to an electrical shock.
• Turn off the generator immediately if the device begins to operate abnormally.
Then disconnect the device and investigate the problem.
• Make sure that the electrical rating of the device does not exceed that of the
generator. If the power level of the device is between the maximum output
power and the running power of the generator, the generator should not be
used for more than 30 minutes.
• WARNING: Connections for standby power to a building’s electrical system
must be done by a qualified electrician and must comply with all applicable laws
and electrical codes (National Electrical Code, NFPA 70). Improper connections
may cause serious injuries to electrical workers during a power outage, and
when the utility power is restored, the generator may explode or cause fires.
The generator shall be connected through transfer equipment that switches all
conductors other than the equipment grounding conductor. The frame of the
generator shall be connected to an approved grounding electrode.
• For power outages, permanently installed stationary generators are better
suited for providing backup power to the home. Even a properly connected
portable generator can become overloaded. This may result in overheating or
stressing the generator components, possibly leading to a generator failure.
1.3) Safety while Maintaining Your Generator
After any maintenance is performed, wash immediately using soap and clean water
because repeated exposure to lubricant may cause skin irritation.
• Do not clean the filter element with flammable liquids like gasoline because an
explosion may occur.
• Turn off the engine before performing any maintenance. Otherwise it can cause
severe personal injury or death.
• Allow the generator set to cool down before performing any maintenance.
• Always wear safety glasses when cleaning the generator set with air.
• Do not clean the generator set with a pressure washer because it can cause
damage to the generator set.
• Before working with batteries, ventilate the area, wear safety glasses, do not
smoke and always disconnect the negative cable first and reconnect it last.

3
• Use rubber gloves when coming into contact with engine oil.
• Always stop the generator set before removing the oil filler cap.
• Only qualified maintenance personnel with knowledge of fuels, electricity, and
machinery hazards should perform maintenance procedures.
• Lubricate all exposed metal parts regularly. See chapter 5.1 for maintenance
schedule.
1.4) Other Safety Tips
• To avoid breathing in poisonous carbon monoxide from the exhaust gases,
adequate ventilation should be provided if the generator set is running in a
partially enclosed space.
• If the generator set is stored outdoors, check all the electrical components on
the control panel before each use. Moisture can damage the generator and can
lead to an electric shock.
• When storing gasoline or equipment with fuel in tank: store away from furnaces,
stoves, water heaters or other appliances that have a pilot light or other ignition
source because they can ignite gasoline vapors.
• Generators vibrate in normal use. During and after the use of the generator,
inspect the generator as well as extension cords and power supply cords
connected to it for damage resulting from vibration. Have damaged items
repaired or replaced as necessary. Do not use plugs or cords that show signs
of damage such as broken or cracked insulation or damaged blades.
• If you start to feel sick, dizzy, or weak after the generator has been running,
move to fresh air RIGHT AWAY. See a doctor. You could have carbon
monoxide poisoning.

4
Folding Handle
Control Panel
Fuel Gauge
Battery
Maintenance
Panel
Wheel
Air Filter
Maintenance
Panel
Recoil Grip
Oil
Maintenance
Panel
Fuel Cap
Rear Handle
Mufer
2. COMPONENT IDENTIFICATION

5
2.1) Control Panel
1. Power Switch
2. EcoMode Switch
3. Fuel Knob
4. DC Reset
5. DC Outlet
6. Digital Display
7. Reset Button
8. Display Button
9. 23.3A AC Breaker
10. 20A AC Breaker
11. Twist Lock 120V AC Outlet
12. Dual 120V AC Outlet
13. Ground Terminal
14. Output Indicator Light
15. Overload Indicator Light
16. Low Oil Indicator Light
1
47856
2
3
13
9 11 10 12
14
15
16
EcoMode

6
Economy Control Switch (EcoMode)
Turning EcoMode to ON is recommended for minimizing fuel consumption. In this
mode the engine will dynamically meet the demand of the current electrical load
and will automatically go into an idle state if all electrical loads are disconnected.
Before connecting or removing a high load device to the generator, turn EcoMode
to OFF until that device has reached running power.
When EcoMode is OFF, the engine runs at full speed.
Display Button
Press the DISPLAY button once to turn on the backlight. The hourmeter will be
shown, and the backlight will turn off after 10 seconds. Press the DISPLAY button
multiple times to cycle through different information displays.
Reset Button
Use the RESET button in the case of a sudden engine shutdown resulting from
prolonged engine overload.
Disconnect all electrical appliances and then press and hold the reset button for 1
second, this will restart the engine. After restarting, if the overload indicator light has
turned off and the output indicator light has turned back on, reconnect the electrical
appliances. Otherwise, stop the engine by turning the power switch to STOP, and
check the generator.
If the generator is running normally, the RESET button will have no effect.
NOTE
■The RESET button is available a maximum of 5 times for every full start of the
generator. Shut down the generator and restart using the power switch to
refresh the restart times.
AC Circuit Breakers
While the generator is running, the breakers should be put in the ON position.
If the current has exceeded its limits it will automatically pop out to the OFF
position. Reduce the electrical load on the generator and push the button back to
the ON position.

7
Output and Overload Indicator
In normal operation, the output indicator light (green) will remain on.
If the generator is overloaded (producing more than 2800W) or a connected
appliance has short-circuited, the output indicator light will turn off and the overload
indicator light will turn on. In this case, the engine will continue running but the AC
power will disable within 0~30min.
Low Oil Indicator Light
The oil alert system is designed to prevent engine damage caused by an insufficient
amount of oil in the crankcase. Before the oil level in the crankcase reaches an
unsafe limit, the oil alert system will automatically shut down the engine (the power
switch remains in the RUN position).
If the oil alert system shuts down the engine, the low oil indicator light (red) will turn
on. Check the engine oil level.
2.2) Make Sure You Have Everything
Make sure your generator has everything listed in the table below
Part Name Quantity
Inverter Generator 1
User Guide 1
Spark Plug Wrench - Sleeve 1
Spark Plug Wrench - Bar 1
Cross Screwdriver 1
DC Wiring 1
Machine Oiler 1

8
Set the generator on a level surface and the power switch to STOP.
3.1) Checking the Oil Level
1. Unscrew and remove the oil maintenance panel.
2. Unscrew the oil cap and clean the dipstick.
3. Check the oil level by reinserting the oil cap without rotating it. Remove the oil
cap and examine the oil level on the dipstick. If the oil level is at or below the
minimum oil level, refill the oil to the maximum oil level mark.
4. Reinsert the oil cap and tighten securely. Replace the oil maintenance panel and
screws.
NOTE
■Do not tilt the generator when adding engine oil. This could result in overfilling
and damage to the engine.
■Using non-detergent or 2-stroke oil could shorten the engine’s working life.
■Use high quality engine oil with strong detergents
■Handle and store the engine oil with care, avoid getting dirt or dust into the
engine oil.
■Do not mix different engine oils.
■Before the engine oil falls below the safety margin, the low oil alert system will
automatically shut off the engine. The low oil light will turn on.
Oil Cap and Dipstick Max Oil Level
Max Oil Level
Oil Transfer Tool
3. PRE-OPERATION CHECK

9
■To avoid the inconvenience of unexpected stopping, the engine oil level should
be checked as often as possible.
■Use 4-stroke engine oil, certified to meet or exceed API standard SG, SF, SAE
ratings.
3.2) Checking the Fuel Level
• Only use unleaded gasoline (Research Octane 91 or higher, Pump Octane 86 or
higher).
• Never use stale or contaminated gasoline, or an oil/gasoline mixture.
• Avoid getting dirt or water into the fuel tank.
• Do not use a mixture of gasoline containing ethanol or methanol. This will cause
serious damage to the engine.
0 10 20 30 40 50-10-20-30
20 40 60 80 100 120
°C
°F0-20
15W-50
10W-40
10W-30
5W-30
Effective Viscosity Range of Engine Oils
Fuel Cap
Fuel Gauge
Fuel Capacity: 7.4L / 2 Gal.
Maximum Fuel Level

10
3.3) Checking the Air Filter
Clean the air filter before your first use. Check the maintenance schedule for a
complete cleaning guide.
1. Unscrew and remove the engine access panel. Remove the air filter cover.
2. Clean the air filter with soap and water or solvent. Squeeze dry and then soak in
clean engine oil.
3. Squeeze out all excess oil and reinstall. Replace the filter if it is damaged.
NOTE
■Running the engine without the air filter will quickly degrade the engine
Cover Screws
Air Filter
Maintenance Panel
Air Filter
Air Filter Cover

11
The available engine starting methods may vary between different models.
NOTE
■Operate the generator at least 3 feet (1 meter) away from buildings and other
equipment.
■Do not operate the generator in an unventilated area.
■Do not place flammable objects close to the engine.
■Before starting engine, unplug all loads from the generator.
■When fueling for the first time, or after storing for an extended period, the fuel
switch should first be opened for ten or twenty seconds, so that enough fuel can
enter the carburetor.
DANGER
■CARBON MONOXIDE
■USING A GENERATOR INDOORS WILL KILL YOU IN MINUTES
WARNING
■Exhaust contains poisonous carbon monoxide gas that can build up to
dangerous levels in closed areas. Breathing carbon monoxide can cause
unconsciousness or death.
■Never run the generator in a a closed or even partly closed area where people
may be present.
1. Turn the fuel switch to OPEN.
2. Turn the power switch to RUN.
When the power switch is turned to RUN, the unit will enter a stand-by starting
mode. Start the engine within 15 minutes, otherwise the stand-by mode will
deactivate, and the engine will not start. To re-enter the stand-by starting mode,
turn the power switch to STOP, and then back to RUN.
4. STARTING THE ENGINE

12
3. Choose one of the starting modes to start the engine: A, B, C.
If there is no battery in the generator or the battery has died, the generator can
only be started using the recoil method. If there is a battery and it is flat,
running the generator will recharge the battery.
A) Manual Recoil Start
Pull the starting grip slowly until it is engaged, then pull it quickly. Repeat until the
engine starts.
Return the starter grip slowly by hand, do not release the starter grip to let it spring
back quickly.
Table of contents
Other Energizer Inverter manuals

Energizer
Energizer ENK3000 User manual

Energizer
Energizer FORCE S Series User guide

Energizer
Energizer ENA548 User manual

Energizer
Energizer EZG Series User manual

Energizer
Energizer ENK1100 User manual

Energizer
Energizer SOLAR Force Series User manual

Energizer
Energizer Beam Series User guide

Energizer
Energizer EN1100 User manual

Energizer
Energizer EN150 User manual

Energizer
Energizer EZG1300 User manual