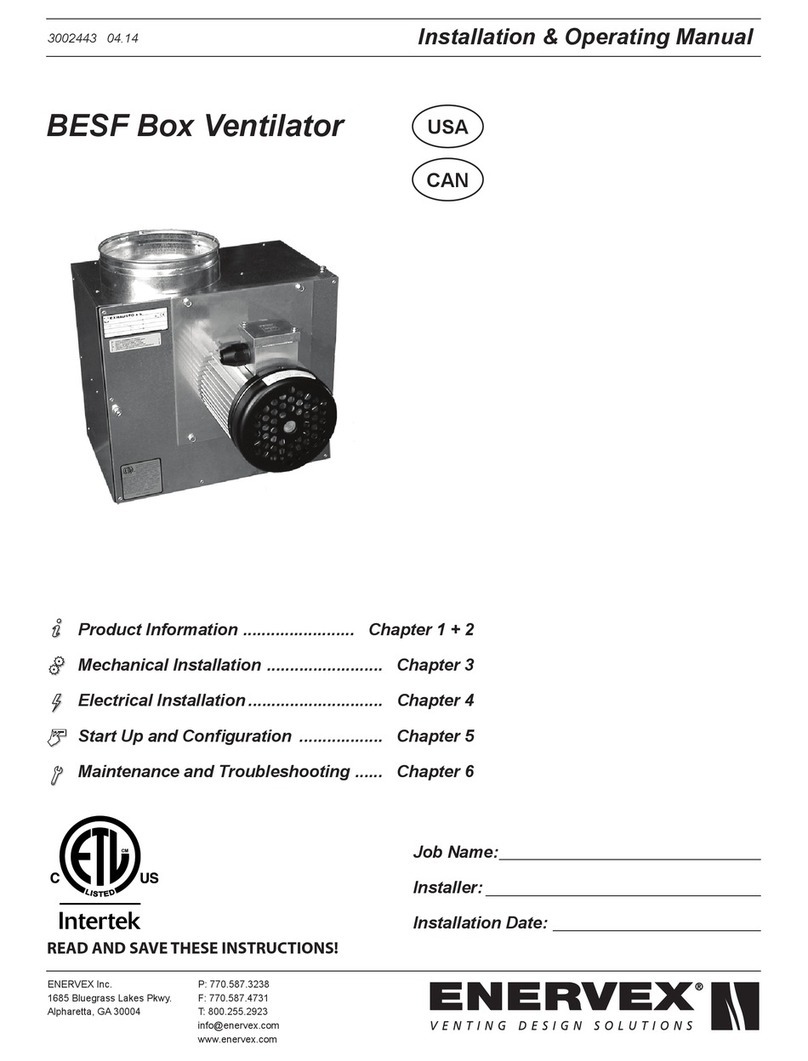
ENERVEX BEF 225x Installation instructions

ENERVEX Inc.
1685 Bluegrass Lakes
Parkway
Alpharetta, GA 30004
USA
P: 770.587.3238
F: 770.587.4731
T: 800.255.2923
www.enervex.com
010.1220.0719 01.21 Installation & Operating Manual
ENERVEX
BEF 225-800X BOX VENTILATOR
MAKE-UP AIR FOR LAUNDRY ROOMS
TYPE I & II RESIDENTIAL & COMMERCIAL
CLOTHES DRYERS
KITCHEN HOOD, BATHROOM EXHAUST
INTAKE AND EXHAUST APPLICATIONS
FOR MULTI-STORY BUILDINGS
File No. E479840
READ AND SAVE THESE INSTRUCTIONS!

2
010.1220.0719 01.21
Symbol Legend
The following terms are used throughout this manual to bring
attention to the presence of potential hazards, or to important
information concerning the product.
DANGER: Indicates an imminent hazardous
situation which, if not avoided, will result in death,
serious injury or substantial property damage.
WARNING: Indicates an imminent hazardous
situation which, if not avoided, may result in
personal injury or property damage.
DANGER: Indicates an imminent electrical shock
hazard which, if not avoided, will result in death,
serious injury or substantial property damage.
How to use this manual
This installation manual does not contain any system design
documentation. System design documentation is available
from any authorized ENERVEX representative. Accessories,
fans, and variable frequency drives are not covered by
this manual. Please refer to these component’s individual
manuals.
TO REDUCE THE RISK OF FIRE,
ELECTRICAL SHOCK OR INJURY TO
PERSONS, OBSERVE THE FOLLOWING:
1. Use this unit in the manner intended by the manufacturer.
If you have questions, contact the manufacturer at the
address or telephone number listed on the front of the
manual.
2. Before servicing or cleaning the unit, switch off at service
panel and lock service panel to prevent power from being
switched on accidentally.
3. Installation work and electrical wiring must be done by a
qualied person(s) in accordance with applicable codes
and standards.
4. Follow the appliance manufacturer’s guidelines and safety
standards such as those published by the National Fire
Protection Association (NFPA), and the American Society
for Heating, Refrigeration and Air Conditioning Engineers
(ASHRAE), and the local code authorities.
5. This unit must be grounded.
This symbol shows that ENERVEX BEFx Box Ventilators are listed under Category Code ZACT.
UL File E479840

3
010.1220.0719 01.21
1. GENERAL INFORMATION
1.1 Introduction......................................................4
1.3 Components ....................................................4
1.4 Shipping...........................................................5
1.5 Accessories ......................................................5
1.6 Listings .............................................................5
1.7 Warranty ...........................................................5
2. SPECIFICATIONS AND DIMENSIONS
2.1 Specications ...................................................6
3. MECHANICAL INSTALLATION
3.1 Positioning........................................................7
3.2 Door Position....................................................8
3.3 Floor Or Roof Mounting....................................9
3.4 Ceiling Mounting...............................................9
3.5 Connection to Duct...........................................10
3.6 Connection to Flexible Duct ..............................10
3.7 Outdoor Termination.........................................10
3.8 Field Junction Box............................................11
4. ELECTRICAL INSTALLATION
4.1 General.............................................................12
4.2 Motor Controller ...............................................12
4.3 Mounting of EDrive Motor Controller .................13
4.4 Grounding Guidelines........................................13
4.5 EMC Filter Disconnect......................................13
4.6 Electrical Connection of the Motor and EDrive..14
4.7 Motor Terminal Connections.............................14
4.8 Wiring Diagram BEF 225-355x / 1x120V...........14
4.9 Wiring Diagram BEF 225-800x / 3x208-480V...15
4.10 Checking and Changing Rotation of Impeller...15
4.11 Installing a Proven Flow System......................16
5. STARTUP AND CONFIGURATION
5.1 Managing the Keypad.......................................17
5.2 Operating the Display........................................17
5.3 Changing Parameters .......................................18
5.4 Read Only Parameter Access ...........................18
5.5 Resetting Parameters.......................................18
5.6 Resetting a Fault ..............................................18
5.7 LED Display......................................................18
5.8 Start Up Sequence (Auto Tune) ........................19
6. MAINTENANCE AND TROUBLESHOOTING
6.1 Cleaning Intervals..............................................20
6.2 Cleaning ...........................................................20
6.3 Service..............................................................20
6.4 Replacement Parts Ordering.............................21
7. WARRANTY TERMS ......................................22
Content
WARNING
This product is equipped with an electronically
commutated (EC-motor) and can not be
connected directly to ac mains. Motor must
be connected to approved motor controller
to ensure proper function. Failure to use approved motor
controller may result in damage to the motor.
ATTENTION
Ce produit est équipé d’un commutateur électronique
(moteur EC) et ne peut pas être connecté directement au
secteur. Le moteur doit être connecté au contrôleur de
moteur approuvé pour assurer un fonctionnement correct.
Ne pas utiliser le contrôleur de moteur approuvé peut
endommager le moteur.
!

4
010.1220.0719 01.21
1. GENERAL INFORMATION
1.1 introduction
These instructions provide both general guidelines and
special requirements for all parts in the BEFx Ventilator Fan
product line. Before specifying a design or beginning an
installation please carefully review these instructions. Contact
local building or re ofcials about restrictions and installation
inspection in your area.
1.2 Features
The BEFx is a highly efcient box ventilator that uses a
backward curved centrifugal impeller for the movement of air
in exhaust and air supply systems by providing high capacity
at high static pressure. It is designed to exhaust lint-laden air
from multiple Type I and Type II residential and commercial
clothes dryers, exhaust commercial hoods, or to provide
make-up air for laundry or mechanical rooms. The ventilator
cannot be used for transport of large particles. Suitable uses
include, but are not limited to: comfort ventilation, make-up
air for laundry and mechanical rooms, and exhaust and air
supply in kitchens/bathrooms in multi-story, multi-family
buildings. The BEFx box ventilator can be installed indoors
as well as outdoors and used in both intake and exhaust
applications.
The BEFx ventilator housing is made in galvanized steel,
while the impeller is welded aluminum. The design is Type
B, Spark Resistant Construction, completely insulated
against re, noise, condensation and heat with 2” berglass
insulation. A service door is provided to allow easy access
to the motor and impeller. The welded aluminum impeller
is statically and dynamically balanced with permanently
attached balancing weights. The BEFx is equipped with
an extremely energy-efcient, totally enclosed, permanent-
magnet motor of class NEMA Super Premium EISA (IE4).
IP54 Protection Class. Sealed ball bearings. The motor
is protected from overloading, blocking, over and under
voltage, and over-heating by a factory programmed EDrive
motor controller by ENERVEX for optimal operation of the
ventilator.
The BEFx Box Ventilator is a component in the MCAS
Modulating Combustion Air System™, MDVS Mechanical
Dryer Venting System™ and MBES Modulating Building
Exhaust System™.
Exhaust temperature must be above 10°F (-12°C) but should
not exceed 400°F (200°C). The ambient temperature must
be within -20°F (-30°C) and 105°F (40°C).
1.3 Components
The box ventilator comes with the components shown in Fig.
1.
Fig 1
Fig 2
WARNING
The ventilator is not to be used to transport solid
particles, nor in areas where there is a risk of
explosive gases.
!
1. Housing
2. Motor
3. Junction Box
4. Support legs with vibration dampers (2)
5. Kit with Allen key for door locking screws for door hinges
and (4 sheet metal screws for mounting junction box)
6. EDrive
7. Installation Manual

5
010.1220.0719 01.21
1.4 Shipping
BEFx ventilator fan units are shipped on a pallet and
protected by packaging.
Do not place other products or items on top of the
packaging.
After unpacking, the product must be handled in a way to
prevent damage to the collars and the ventilator housing.
The door handle should never be used to lift or carry the fan.
If necessary, the access door can be removed to facilitate
transport.
The ventilator is shipped with the motor installed on the
access door with a dedicated motor controller.
If other components are shipped, they will appear on the
shipment packing list.
NOTE: All fans are shipped with a Field Junction Box
connected via exible conduit.
1.5 Accessories (Optional)
• MEC 24 Exhaust Control
• EBC 30/31 Modulating Pressure Control
• Proven Draft Switch PDS
1.6 Listings
UL705, Standard for Power Ventilators with special
consideration for venting lint-laden air from single or multiple
dryers and CSA 22.2 No. 113, Standard for Fans and
Ventilators.
CSA C22.2 NO. 113-12 Fans and Ventilators Edition 9 -
Revision Date 2012/10/01
UL 705 Standard for Power Ventilators Edition 6 - Revision
Date 2013/12/17
Complies with and meets Type B, Spark Resistant
Construction per AMCA standard 99-0401 classications of
Spark Resistant Construction.
1.7 Warranty
2-year factory warranty (see back cover). Complete warranty
conditions are available from ENERVEX Inc.
WARNING
Never use access door handle as a carrying
handle.
AVERTISSEMENT
N’utilisez jamais la poignée de la porte d’accès comme
poignée de transport.
!
WARNING
This duct fan shall be installed a minimum of
one meter from any accessible opening of the
duct.
AVERTISSEMENT
Ce ventilateur de conduit doit être installé au moins un
mètre d’une ouverture accessible du conduit.
!

6
010.1220.0719 01.21
2. SPECIFICATIONS AND DIMENSIONS
2.1 Specifications
Fan Type
Motor
Voltage Conguration
Motor Rating
Max Speed
Max Motor Torque
EDrive Model
EDrive Rating
Supply Voltage
Power
Max Input Current
Max Output Current
Operating Temperature
A - in / mm
B - in / mm
C - in / mm
D - in / mm
E - in / mm
F - in / mm
G - in / mm
H - in / mm
Weight
BEF 315x
1x120 / 3x240 V
2100 RPM
3.0 Nm
321.2208.1200
321.2208.2200
1x120 / 3x240 V
0.75 kW
15.8 / 5.6 A
4.3 / 4.3 A
22.64 / 575
30.79 / 782
12.60 / 320
7.12 / 181
9.80 / 249
24.41 / 620
11.34 / 288
1.97 / 50
84 lbs / 38 kg
BEF 355x
1x120 / 3x240V
1950 RPM
3.0 Nm
321.2208.1200
321.2208.2200
1x120 / 3x240V
0.75 kW
15.8 / 5.6 A
4.3 4.3 A
25.00 / 635
33.35 / 847
13.11 / 333
7.12 / 181
11.77 / 299
24.41 / 620
12.48 / 317
1.97 / 50
99 lbs / 45 kg
BEF 500x
3x240 / 3x480V
1750 RPM
24.0 Nm
321.2214.2200
321.2214.4200
3x240 / 3x480V
5.5 kW
26.4 / 17.2 A
24.0 / 14.0 A
33.54 / 852
42.36 / 1076
16.42 / 417
9.06 / 230
19.65 / 499
31.50 / 800
16.77 / 426
1.97 / 50
208 lbs /95 kg
BEF 800x
3x480V
1750 RPM
137.9 Nm
321.2220.4200
3x480V
22.0 kW
51.9 A
46.0 A
51.26 / 1302
61.69 / 1567
24.09 / 612
20.83 / 529
35.83 / 910
41.77 / 1061
25.63 / 651
1.97 / 50
652 lbs / 296 kg
BEF 710x
3x480V
1750 RPM
70.0 Nm
321.2220.4200
3x480V
15.0 kW
34.2 A
30.0 A
46.10 / 1171
55.98 / 1422
22.36 / 568
14.57 / 370
31.46 / 799
45.71 / 1161
23.03 / 585
1.97 / 50
385 lbs / 175 kg
BEF 630x
3x240 / 3x480V
1750 RPM
50.0 Nm / 44.0 Nm
321.2218.2200
321.2218.4200
3x240 / 3x480V
11.0 / 7.5 kW
33.3 / 21.2
30.0 / 18.0
41.22 / 1047
41.26 / 1048
20.00 / 508
9.69 / 246
27.83 / 707
37.80 / 960
20.63 / 524
1.97 / 50
357 lbs / 153 kg
BEF 560x
3x240 / 3x480V
1850 RPM
50.0 Nm
321.2216.2200
321.2216.4200
3x240 / 3x480V
5.5 kW
26.4 / 17.2 A
24.0 / 14.0 A
37.09 / 942
45.43 / 1154
17.83 / 453
9.69 / 246
23.82 / 605
37.80 / 960
18.54 / 471
1.97 / 50
264 lbs / 120 kg
BEF 450x
3x240 / 3x480V
1500 RPM
6.0 Nm
321.2212.2200
321.2212.4200
3x240 / 3x480V
1.5 kW
12.1 / 7.5 A
10.5 / 5.8 A
30.60 / 777
39.80 / 1011
15.28 / 388
8.35 / 212
15.83 / 402
31.22 / 793
15.32 / 389
1.97 / 50
142 lbs/ 64.5 kg
Centrifugal
EC - motor
NEMA 3R / IP54
NEMA 4X / IP54
14-122°F / -10-50°C
BEF 225x
1x120 / 3x240 V
3100 RPM
3.0 Nm
321.2206.1200
321.2206.2200
1x120 / 3x240 V
0.75 kW
7.8 / 7.8 A
2.3 / 2.3 A
17.33 / 440
17.36 / 441
10.13 / 257
7.12 / 181
7.84 / 199
20.3 / 509
10.36 / 263
2.00 / 51
60 lbs / 27 kg

7
010.1220.0719 01.21
3. MECHANICAL INSTALLATION
3.1 Positioning
The ventilator can be oriented in multiple positions.
Acceptable ventilator orientations are shown in Fig 3.
The BEFx can be installed indoors and outdoors without any
modications.
Wherever the ventilor is installed, make sure there is
space enough to open the access door to an angle of
approximately 90°, as shown in Fig 4, and to access the
locking screws.
Fig 3
Fig 4
CAUTION
Never operate the ventilator with open access
door
MISE EN GARDE
Ne jamais utiliser le ventilateur avec la porte d’accès
ouverte.
A
C
B
D
90°

8
010.1220.0719 01.21
3.2 Door Position
The ventilator can be oriented in multiple positions.
Acceptable ventilator orientations are shown in Fig 3.
The BEFx can be installed indoors and outdoors without any
modications.
Wherever the ventilor is installed, make sure there is space
enough to be able to open the access door to an angle of
approximately 90°, as shown in Fig 4, and to access the
locking screws.
Fig 4

9
010.1220.0719 01.21
3.3 Floor Or Roof Mounting
To minimize transfer of noise and vibration, the ventilator
unit should be mounted on a level, stable and vibration-free
surface. If mounting on a wooden surface, a cement tile
should be placed on the oor prior to mounting as shown in
Fig 5.
Once the installation location is selected the support legs
must be installed. To facilitate support leg installation, keep
ventilator unit on pallet.
For the standard position (Fig 5), bolt holes are pre-drilled
and support legs should be aligned and secured with the
enclosed hardware.
For all other positions, the legs should be placed in proper
position using variable mounting points.
DO NOT FASTEN THE VENTILATOR TO THE BASE.
The ventilator is tted with sound dampers suited to the
requirements of the operating area.
Fig 5
Fig 6
3.4 Ceiling Mounting
If hung from the ceiling, brackets with eye hooks (not
included) must be installed as shown in Fig. 6..
Ceiling bolts must be properly sized to safely carry weight of
the ventilator unit.

10
010.1220.0719 01.21
3.5 Connection To Duct
The ventilator can be connected to a duct. To acheive
maximum performance with minimal energy consumption,
the ventilator should be connected to the duct system with
the specied lengths of duct before and after the ventilator.
NOTE: The distance “3 x D” is not a requirement. It is a
recommendation that will help achieve maximum performance with
minimal energy consumption
3.6 Connection To Flexible Duct
Flexible duct sections can be used to reduce vibrations in the
duct system. If used, the FLF should be connected between
the fan inlet/outlet and the main duct as shown in Fig 8.
This will decrease system vibration and prevent fan housing
deection.
NOTE: The distance “3 x D” is not a requirement. It is a
recommendation that will help achieve maximum performance with
minimal energy consumption
3.7 Outdoor Termination
The BEFx box ventilator is suitable for outdoor installations. It
can mount directly to the roof or on a roof curb as shown in
Fig. 9 and Fig. 10. When the ventilator is used at an exhaust
termination point, local codes may require a gooseneck to
be installed at the outlet, preventing rain entering into the
ventilator. See Fig. 9.
Fig 8
Fig 7
Fig 9

11
010.1220.0719 01.21
Attach the gooseneck directly to the outlet collar of the fan
unit.
DO NOT use sheet metal screws or other fasteners that will
penetrate the gooseneck and obstruct airow. Building code
prohibits the placement of mesh screens on the ventilator
outlet because of the potential re hazard from lint build-up.
Fig 10
3.8 Field Junction Box
The BEFx ventilator comes with a eld junction box that is
attached to the motor via a exible conduit.
After mounting the BEFx in its proper location and
orientation, the Field Junction Box MUST be permanantly
attached to the fan housing with the supplied sheet metal
screws. Orient the the Field Junction Box in a manner that
will minimize water ingress, and verify the BEFx access door
can open without straining, or kinking the exible conduit.
FAILURE TO FOLLOW THIS PROCEDURE VOIDS THE UL
LISTING AND CAN DAMAGE THE MOTOR.
Fig 11
WARNING
Do not install the Field Junction Box on the
service door.
AVERTISSEMENT
N’installez pas la boîte de jonction Field sur la porte de
service.
!

12
010.1220.0719 01.21
4. ELECTRICAL INSTALLATION
4.1 General
All wiring must be in compliance with the local codes or in
their absence, with the National Electric Code, NFPA70.
All wiring should meet these requirements: installed in rigid
metal conduit, intermediate metal conduit, rigid non-metallic
conduit, electrical metallic tubing, or be otherwise suitably
protected from physical damage. All BEFx units are equipped
with an EC-motor and operate at different voltages so it’s
important to pay attention to the wiring details.
Note: If any of the original wire supplied with the system
must be replaced, use similar wire of the same temperature
rating. Otherwise, insulation may melt or degrade, exposing
bare wire.
WARNING
This product is equipped with an electronically
commutated (EC-motor) and can not be
connected directly to ac mains. Motor must
be connected to approved motor controller to
ensure proper function. Failure to use approved
motor controller may result in damage to the motor.
AVERTISSEMENT
Ce produit est équipé d’un commutateur électronique
(moteur EC) et ne peut pas être connecté directement au
secteur. Le moteur doit être connecté au contrôleur de
moteur approuvé pour assurer un fonctionnement correct.
Ne pas utiliser le contrôleur de moteur approuvé peut
endommager le moteur.
!
WARNING
All BEF models must be operated with the
approved factory-programmed motor drive.
DO NOT CONNECT DIRECTLY TO LINE
VOLTAGE!
AVERTISSEMENT
Tous les modèles BEF doivent être utilisés avec
l’entraînement motorisé approuvé en usine.
NE PAS CONNECTER DIRECTEMENT À LA TENSION DE
LIGNE!
!
DANGER
Turn off electrical power before servicing.
Contact with live electric components can
cause shock or death.
DANGER
Éteignez l’alimentation électrique avant de procéder à
l’entretien. Le contact avec des composants électriques
sous tension peut provoquer un choc ou la mort.
ABOUT SHAFT GROUNDING
Bearing currents are very common problem of Variable
Frequency Drives (VFD/Motor Controller) and electronic
commutated motors. The electric-discharge machining
(EDM) bearing currents are generated in motors because
of unbalanced modulated voltage from drive to the motor.
Because of stray capacitances in motor, bearing currents
are generated in rotor and there is usually no other way to
discharge except through bearings. This drastically lowers
the life time of the bearings.
The BEFx’s EC-motor integrates an insulated rotor system,
which means that electrical insulation is inserted between
rotor and motor shaft. This system provide up to 80%
lower shaft voltages and very low bearing current values
which eliminates bearing damage.
DANGER
The motor speed drive is suitable for use in a
circuit capable of receiving not more than 100
KA RMS symmetrical Amperes at the maximum
reated voltage.
DANGER
Le variateur de vitesse peut être utilisé dans un circuit
capable de recevoir des ampères symétriques de plus de
100 KA à la tension maximale.
4.2 Motor Controller
All ENERVEX BEFx fans come with, and must use, a factory
programmed EDrive motor controller with an enclosure rated
to NEMA 4X/IP66 for indoor and outdoor installation.
The EDrive E3 motor controller must be mounted within 300
feet of the BEFx Fan. This distance can be increased up to
600 feet with the addition of a line lter (Contact ENERVEX
for details).
A motor disconnect switch must be installed between the
motor controller and the BEFx Fan, either within sight of the
BEFx Fan, or within 50 feet of the BEFx Fan.
Do not activate the motor service disconnect switch
while the BEFx motor is running - damage could occur to
the motor controller.
For more information about the EDrive E3, please refer to
the Installation & Operating Manual.

13
010.1220.0719 01.21
4.3 Mounting of EDrive Motor Controller
Mount the EDrive motor controller in a location that is only
accessible to qualied personal.
The EDrive must be installed within 300 ft of the BEFx Fan.
See Fig 12. For more information about the EDrive E3 please
refer the Installation & Operating Manual.
4.4 Grounding Guidelines
The ground terminal of each EDrive E3 should be individually
connected DIRECTLY to the source breaker panel ground
bus bar (through the lter if installed). EDrive E3 ground
connections should not loop from one drive to another, or
to, or from any other equipment. Ground loop impedance
must conrm to local industrial safety regulations. To meet
UL regulations, UL approved ring crimp terminals should be
used for all ground wiring connections.
The drive Safety Ground must be connected to system
ground. Ground impedance must conform to the
requirements of national and local industrial safety
regulations and/or electrical codes. The integrity of all ground
connections should be checked periodically.
Protective Earth Conductor
The Cross sectional area of the ground conductor must be at
least equal to that of the incoming supply conductor.
Safety Ground
This is the safety ground for the drive that is required by
code. One of these points must be connected to adjacent
building steel (girder, joist), a oor ground rod, or bus bar.
Grounding points must comply with local codes.
Motor Ground
The motor ground must be connected to one of the ground
terminals on the drive.
Ground Fault Monitoring
As with all inverters, a leakage current to earth can exist.
The EDrive E3 is designed to produce the minimum possible
leakage current whilst complying with worldwide standards.
The level of current is affected by motor cable length and
type, the effective switching frequency, the earth connections
used and the type of RFI lter installed. If an ELCB (Earth
Leakage Circuit Breaker) is to be used, the following
conditions apply:
• A Type B Device must be used.
• The device must be suitable for protecting equipment with
a DC component in the leakage current.
• Individual ELCBs should be used for each EDrive E3.
4.5 EMC Filter Disconnect
Drives with an EMC lter have an inherently higher leakage
current to Ground (Earth). For applications where tripping
occurs the EMC lter can be disconnected (on IP20 units
only) by completely removing the EMC screw on the side of
the product.
Remove the screw as indicated right.
The EDrive product range has input supply voltage surge
suppression components tted to protect the drive from line
WARNING
For installation in the United States, branch
circuit protection must be provided in
accordance with the National Electrical Code
(NEC).
!
AVERTISSEMENT
For installation in Canada, branch circuit
protection must be provided in accordance with
the Canadian Electrical code
Pour l’installation au Canada, la protection de circuit
de branche doit être fournie conformément au Le code
canadien de l’électriticé.
!
Fig 12
DANGER
Only qualied electrical personnel familiar
with the construction and operation of
this equipment and the hazards involved
should install, adjust, operate, or service this
equipment. Read and understand this manual and other
applicable manuals in their entirety before proceeding.
Failure to observe this precaution could result in severe
bodily injury or loss of life.
Seul un personnel qualié en électricité, familiarisé avec
la construction et le fonctionnement de cet équipement
et les risques encourus, doit installer, ajuster, utiliser ou
entretenir cet équipement. Lire et comprendre ce manuel
et les autres manuels applicables dans leur intégralité avant
de continuer. Le non-respect de cette précaution peut
entraîner des blessures graves ou la mort.

14
010.1220.0719 01.21
voltage transients, typically originating from lightning strikes
or switching of high power equipment on the same supply.
When carrying out a HiPot (Flash) test on an installation
in which the drive is built, the voltage surge suppression
components may cause the test to fail. To accommodate
this type of system HiPot test, the voltage surge suppression
components can be disconnected by removing the VAR
screw After completing the HiPot test, the screw should
be replaced and the HiPot test repeated. The test should
then fail, indicating that the voltage surge suppression
components are once again in circuit.
4.6 Electrical Connection of the Motor and EDrive
The motor should be connected to the EDrive E3 U, V, and
W terminals using a suitable 3 or 4 core cable. Where a 3
core cable is utilised, with the shield operating as an earth
conductor, the shield must have a cross sectional area at
least equal to the phase conductors when they are made
from the same material. Where a 4 core cable is utilised, the
earth conductor must be of at least equal cross sectional
area and manufactured from the same material as the phase
conductors.
The motor earth must be connected to one of the EDrive E3
earth terminals.
Maximum permitted motor cable length for all models: 100
meters shielded, 150 meters unshielded.
Where multiple motors are connected to a single drive using
parallel cables, an output choke must be installed..
The BEFx Fan sizes 225-355 require four (4) 14AWG
conductors between the EDrive and the Fan motor. (Three
(3) Power lines, and one (1) dedicated Ground wire.)
The BEFx Fan Sizes 225-800 require four (4) 12AWG
conductors between the EDrive and the Fan motor. (Three
(3) Power lines, and one (1) dedicated Ground wire.)
Make all necessary connections to the power and low-
voltage terminals (see wiring diagram).
4.7 Motor Terminal Box Connections
Do not install any mechanical or electro-mechanical switching
devices between the drive and motor. Where a local isolator
is installed close to the motor, this should be interlocked with
the drive control circuit to ensure the drive is disabled when
the motor is isolated.
Most general purpose motors are wound for operation on
dual voltage supplies. This is indicated on the nameplate
of the motor. This correct voltage setting must be selected
when installing the motor by selecting either STAR or DELTA
connection. STAR always gives the higher of the two voltage
ratings.
4.8 Wiring Diagram - BEF 225-355x / 1X120V
NOTE: All published voltages relate to power supplied to the
EDrive and NOT the motor.
BEF 225-355x fans operate at 1x120 VAC.
The wiring diagram in Fig. 14 is a typical wiring diagram for a
BEF 225-355x with 120V supply voltage to the motor drive.
The BEFx is listed with an EDrive motor controller which is
DANGER
This EDrive contains high voltage capacitors
that take time to discharge after removal of
the main supply. Before working on the drive,
ensure isolation of the main supply from line
inputs. Wait ten (10) minutes for the capacitors to discharge
to safe voltage levels. Failure to observe this precaution
could result in severe bodily injury or loss of life.
Cette EDrive contient des condensateurs à haute tension
qui mettent du temps à se décharger après le retrait de
l’alimentation principale. Avant de travailler sur le variateur,
veillez à isoler l’alimentation principale des entrées de
ligne. Attendez dix (10) minutes que les condensateurs se
déchargent à des niveaux de tension sûrs. Le non-respect
de cette précaution peut entraîner des blessures graves ou
la mort.
Fig 13

15
010.1220.0719 01.21
Fig 14
shipped with the fan. The wiring diagram reects the use of
this controller.
Fan rotation can be changed on the EDrive by switching the
attachment position of any two power leads.
4.9 Wiring Diagram - BEF 225-800x / 3X208-480V
NOTE: All published voltages relate to power supplied to the
EDrive and NOT the motor.
The BEF 225-800x fans operate at 3x208-240 VAC or 3
x 400-480 VAC. The BEF 700-800x can only operate at
3x400-480 VAC.
The BEFxs are listed with an EDrive motor controller which
is shipped with the fan. The wiring diagram in Fig. 14 reects
the use of this controller.
4.10 CHECKING AND CHANGING ROTATION OF
IMPELLER
To check the rotation of the impeller, it is necessary to be able
to see the impeller or the rotation of the cooling vanes at the
end of the motor housing.
Standing in front of the fan with the motor pointing towards
you, the rotation must be counterclockwise. This is indicated
BEF 225-800x
DANGER
Only qualied electrical personnel familiar
with the construction and operation of
this equipment and the hazards involved
should install, adjust, operate, or service this
equipment. Read and understand this manual and other
applicable manuals in their entirety before proceeding.
Failure to observe this precaution could result in severe
bodily injury or loss of life.
Seul un personnel qualié en électricité, familiarisé avec
la construction et le fonctionnement de cet équipement
et les risques encourus, doit installer, ajuster, utiliser ou
entretenir cet équipement. Lire et comprendre ce manuel
et les autres manuels applicables dans leur intégralité avant
de continuer. Le non-respect de cette précaution peut
entraîner des blessures graves ou la mort.
DO NOT CONNECT LINE VOLTAGE
DIRECTLY TO THE MOTOR. IT WILL
DAMAGE THE MOTOR AND VOID
ANY WARRANTY!

16
010.1220.0719 01.21
by an arrow on the motor end cover. There are holes in the
end cover that allow you to see the cooling vanes, but it is
hard to see the rotation unless the fan is running very slowly.
For a more precise determination, you can also look inside
the fan housing as shown in Fig. 15. The arrow shown (not
actually inside fan housing) shows the proper rotation. It
is possible for the fan to operate with improper rotation.
However, the fan will only provide 25–30% of full capacity, will
cause damage to components and should be avoided.
Fan rotation can be changed on the EDrive by switching the
attachment position of any two power leads.
4.11 INSTALLING A PROVEN FLOW SYSTEM
If required by local codes, a safety system can be interlocked
with the appliance(s) to prove fan operation. The safety
system could utilize a Proven Draft Switch (PDS), a thermal
switch, a ow switch or a sail switch. The device must be
interlocked with the appliance(s) so it shuts down in case of
fan failure or power failure.
Please refer to the PDS Installation Manual for wiring
instructions.
If the installation includes a MEC24 Exhaust Control or
EBC 30/31 Modulating Pressure Fan Control, a PDS is not
required as the function is integrated into the control.
For more information about alternative safety system, please
consult ENERVEX.
Fig 15
AVERTISSEMENT
La turbine doit impérativement tourner dans le bon
sens. Une rotation en sens inverse entraînerait de
mauvaises performances de soufage, une surcharge
du moteur voire un grillage du moteur.
!
WARNING
Correct direction of wheel rotation is critical.
Reversed rotation will result in poor air performance,
motor overloading and possible burnout.
!

17
010.1220.0719 01.21
5. STARTUP AND CONFIGURATION
5.1 Managing the Keypad
The EDrive is congured and its operation monitored via the
keypad and display.
NAVIGATE Used to display real-time information, to access and exit parameter
edit mode and to store parameter changes
UP Used to increase speed in real-time mode or to increase parameter
values in parameter edit mode
DOWN Used to decrease speed in real-time mode or to decrease parameter
values in parameter edit mode
RESET / STOP Used to reset a tripped drive.
When in Keypad mode is used to Stop a running drive.
START When in keypad mode, used to Start a stopped drive or to reverse the
direction of rotation if bidirectional keypad mode is enabled
5.2 Operating the Display
Drive Stopped / Disabled Drive is enabled / running,
display shows the output
frequency (Hz)
Press the Navigate key for
< 1 second. The display
will show the motor current
(Amps)
Press the Navigate key for
< 1 second. The display will
show the motor Power (kW)
If P-10 > 0, pressing the
Navigation key for < 1
second will display the motor
speed (RPM)

18
010.1220.0719 01.21
5.4 Read Only Parameter Access 5.5 Resetting Parameter
5.3 Changing Parameters
Press and hold the
Navigate button >2
seconds
Use the UP and
DOWN buttons to
selected the required
parameter
Press the Navigate
button for <1 second
Adjust the value using
the UP and DOWN
buttons
Press for <1 second
to return to the
parameter menu
Press for >2 seconds
to return to the
operating display
To reset parameter
values to their factory
default settings, press
and hold UP, DOWN
and STOP buttons
for >2 seconds. The
display will show
“P-dEF”
Press the STOP
buttons This will
display “StoP”
Press the STOP
button. The display
will show “StoP”.
5.6 Resetting A Fault
5.7 LED Display
The EDrive E3 has a built in 6-digit 7-Segment LED
display. In order to display certain warning, the
following methods are used.
5.7.1 LED Display Layout
See Page 17
5.7.2 LED Display Meaning
See table below
Fig 7

19
010.1220.0719 01.21
5.9 INSTALLING A PROVEN FLOW SYSTEM
If required by local codes, a safety system can be interlocked
with the appliance(s) to prove fan operation. The safety
system could utilize a Proven Draft Switch (PDS), a thermal
switch, a ow switch or a sail switch. The device must be
interlocked with the appliance(s) so it shuts down in case of
fan failure or power failure.
Please refer to the PDS Installation Manual for wiring
instructions.
If the installation includes a MEC24 Exhaust Control or
EBC 30/31 Modulating Pressure Fan Control, a PDS is not
required as the function is integrated into the control.
For more information about alternative safety system, please
consult ENERVEX.
5.8 Start up Sequence (Auto Tune)
This start up process covers a BEFx Box Ventilator with
EDrive E3 controlled by an EBC 24 or EBS 31 Modulating
Draft Controller, which is the most common conguration
for a BEFx Box Ventilator. Start up processes for other
congurations are available from ENERVEX.
Note, that one of the most important steps in the start up
process is to activate “Auto Tune”. Any time a parameter
change is taking place, the last part is always to activate
“Auto Tune”.
These are the steps needed to perform a successful Auto
Tune & start up.
Start Signal: From EBC to Terminal 1 (eDrive).
From EBC to Terminal 2 (eDrive).
Speed Ref: From EBC to Terminal 6 (eDrive).
From EBC to Terminal 7 (eDrive).
1. Remove the control wire from EDrive Terminal 1.
2. Press and hold the button on the eDrive for 5+
seconds. The will take you to the parameter list
(likely P01).
3. Scroll to P14 & Set P14 to “1685” (with the keys),
press the button to accept.
4. Scroll to P38, Set P38 to “0” (with the keys), press the
button to accept.
5. Scroll to P52 and set P52 to “1” then press and hold the
button until the display indicates the drive is in “Auto
Tune”, then let go of the button.
After Auto Tune is complete, the eDrive should display
“STOP”.
6. Program the EBC Controller, if needed.
7. Re-connect the control wire to EDrive Terminal 1. The
EDrive should display H xxx (Hertz to the motor).
8. Conrm that the motor rotation direction is correct.
9. Press & Release the button on the EDrive until
“Amps” is displayed, note the Amp draw. Note the Amp
screen is designated by Axxxx
10. When done: If it is desired to lock the parameters: return
P38 to “0” then return P14 to “1700”.

20
010.1220.0719 01.21
6. MAINTENANCE AND TROUBLESHOOTING
6.1 CLEANING INTERVALS
The BEF ventilator is designed for prolonged use. It must be
inspected and cleaned at least every 12 months. The need
for cleaning is dependent on application type and ventilator
operation. In dryer applications, periodic cleaning is required
and during the rst couple months the ventilator should be
inspected every two weeks to determine lint build up rate. If
lint accumulates, it must be removed to prevent a lint re and
to ensure efcient operation of the dryers.
6.2 CLEANING
Deposits should be removed from the impellers and the
bottom of the ventilator:
1. Turn fan off at the repair switch.
2. When ventilator wheel no longer rotates, open access
door.
3. Clean inside housing and wheel with suitable water
detergent solution.
4. Dry all parts thoroughly with cloth.
5. Close and secure access door.
6. Turn ventilator on.
Vibrations can be caused by a dirty impeller. If necessary,
the impeller wheel can be removed. Prior to removal, mark
the impeller position on the shaft. Do not remove balancing
weight(s) on the impellers. No other maintenance is required.
6.3 SERVICE
Available spare parts are shown in Section 6.4 Replacement
Parts Ordering.
The motor has sealed and permanently lubricated bearings.
Bearing replacement should only be done by ENERVEX or an
authorized motor repair shop.
Fig 16
DANGER
Always disconnect, lock and tag power source
before installing or servicing. Failure to disconnect
power source can result in re, shock or serious
injury.
AVERTISSEMENT
L’appareil doit être rendu non opérationnel lors du
nettoyage de la turbine ou du caisson (fusibles,
retirés, sectionneur verrouilur).
!
WARNING
This unit should be made non-functional when
cleaning the wheel or housing )fuses removed,
disconnect locked off).
DANGER
Pour écarter les risques d’incendie, de choc
électrique ou de blessure grave, veiller à toujours
débrancher, verrouiller et étiqueter la source de
courant avant l’installation ou l’entretien
This manual suits for next models
8
Table of contents
Other ENERVEX Fan manuals
