manuals.online logo
Brands
  1. Home
  2. •
  3. Brands
  4. •
  5. Swegon
  6. •
  7. Fan
  8. •
  9. Swegon Adapt Sphere d User manual

Swegon Adapt Sphere d User manual

1
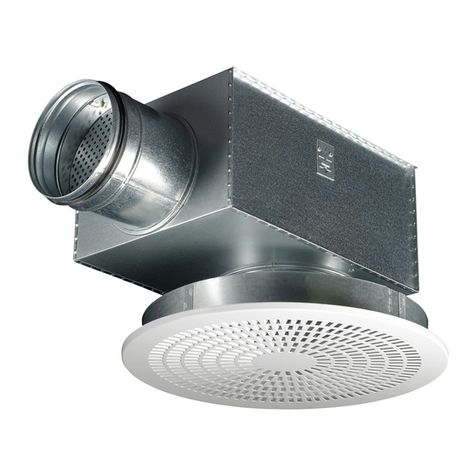
ADAPTTM Sphere d
Installation – Commissioning – Maintenance 20151013 / Art. No. 1545216
Installation
All connections to the duct system should be done with a
straight duct of the same dimension as the box inlet and
with a length > 2 x ØD. If a flexible duct is used, it should be
stretched so it remains as straight as possible, see figure 1.
1. The commissioning box can be suspended from a
ceiling and connected to a duct system. Use hanger
system (A) or (B), see figure 3.
2. The front plate of ADAPT Sphere can be dismantled by
pressing the fixing pins of the bottom plate outward,
which will loosen it from the upper cone. The bottom
plate is secured to the upper cone by a safety cord.
3. Press the diffuser face into the outlet of the commis-
sioning box. Make sure that the orientation of the
sensor module aligns with the extension of the room,
see figure 2. Then fixate and secure the diffuser with
screws or pop rivets. Readjust the hanger rods of the
commissioning box if necessary, so that the air diffuser
is firmly positioned against the false ceiling.
4. Connect the plug of the air diffuser into the top of the
diffuser (C, figure 3) and attach the safety cord. Press the
S-shaped hook together to prevent it from coming
loose.
5. Attach the diffuser section to the cone using the 3 pins.
6. The distance between the commissioning box and the
diffuser section can be extended to up to 200 mm. If a
greater distance is required, this is only possible if an order
is placed for a special version with extra long cables.
Figure 3. ADAPT Sphere, installation.
Figure 2. The orientation of the sensor module in a room or in an
office module. The LED’s of the sensor should be aligned with
the extension of the room in a straight line, facing the short sides
of the room as shown by the arrow in the figure.
A
B
C
Figure 1. Using a flexible duct.
4Swegon reserves the right to alter specifications. 20151013 www.swegon.com
WISE
Figure 7. Wiring of Master/Slave air diffusers and accessories.
1. ADAPT Master air diffuser
2. ADAPT Slave air diffusers
3. CONNECT Adapt, connection box
4. POWER Adapt, 24 V AC transformer
5. LINK Adapt (5 m long RJ45 cable)
6. LINK Modbus (5 m long RJ12 cable)
7a. TUNE Temperature (1 VA)
7b. DETECT Quality (Room version without display - Q0: 1 VA.
Room version with display Q1 and duct version - Q2: 3 VA)
7c. DETECT RH, humidity sensor (1 VA)
8. ACTUATOR, radiator control (max 3 valves at 6 VA)
9. ADAPT Relay, relay for lighting
10. Connection to main control system (Modbus RTU)
11. SPLIT Link RJ45
12. SPLIT Modbus RJ12, max. stab length, 10 m.
*) Only one of the accessories in paragraph 7 can be connected at
any one time in a room installation.
20
Master
21
Slave
22
Slave
23
Modbus
1 2 3 4 5 6 7 8 9 10 11 12 13 14 15 16
65
4
3
9
55
10
- + C
A1 A2 1 3
12 22
11
5
12
6
8
5
1
6
7a
G
G0
OUT1
1
2
3
7b
7c
66
12 12
3
Swegon reserves the right to alter specifications. 20151013 www.swegon.com
WISE
2
3
1
Electrical connections.
All the connections are wired to the CONNECT Adapt con-
nection box. From there, the Master air diffuser is connected
by means of the LINK Adapt (RJ45) cable included in the
delivery. The slave air diffusers, if required, are connected
by means of the same type of cable to their respective slave
contacts. If there are more than 2 slave air diffusers, a SPLIT
Link Adapt should be used for further connection to the last
slave air diffuser. See Figure 7. If SPLIT Link Adapt is used, the
maximum length of LINK Adapt from the connection box to
the last air diffuser is 15 meters. If ADAPT is to be connected
through Modbus communication, this should be done with
the LINK Modbus (RJ12) cable. The maximum length of
SPLIT Link Modbus is 10 meters from the connection box to
the last air diffuser. Use double CONNECT Adapts if longer
distances are required. All cables and contacts are different
so that they will not be confused or incorrectly connected.
Electrical data
ADAPT is supplied with power via the connection box. See
the wiring diagram in figure 7 or relevant diagram from the
Swegon Templates application, containing details for the
specific installation. It is important that cables with appro-
priate cross-sectional area, transformers of correct size and
power supply cables of correct length are selected. This
can for example be carried out with the dimensioning tool
“Cable and Transformer Design”, available for download
from www.swegon.com (the application is available in
english and swedish language versions).
Supply voltage 24 V AC ±10 %
Max. power consumption (controller only) 3 VA
Cable rating (controller only) 0.6 A
Ambient temperature 0-50 °C
Figure 6. Air diffuser connections.
1. Connection for LINK Adapt cable (RJ45)
2. Connection for the LINK Modbus cable (RJ12).
3. Direct 24 V connection if a connection box is not used and the
air diffuser will be completely “stand alone”.
Figure 5. Commissioning with TUNE Adapt.
24 V
Modbus
2Swegon reserves the right to alter specifications. 20151013 www.swegon.com
WISE
Maintenance
The exterior surface of the ADAPT air diffusers can be
cleaned whenever necessary using lukewarm water with
dishwashing detergent added.
The duct system is accessible through the air diffuser and
the commissioning box.
Commissioning
All the ADAPT Air diffusers are delivered preset into com-
missioning mode, which means that the air diffuser is set to
max. airflow by override control.
When the ADAPT air diffuser is in commissioning mode, the
LED is orange. Below follows the various LED indications:
• Steady green LED: Normal operation, the air diffuser is
operating normally.
• Flashing green LED: The air diffuser has just been
powered on and calibration is in progress.
• Steady red LED: Function failure, see separate docu-
mentation in the TUNE Adapt manual.
• Steady orange LED: The commissioning mode, max.
airflow
• Flashing orange LED: Other commissioning modes
and all the override control situations of the feedback
control system.
More information about the commissioning process itself
can be found in the Project Manual for the Wise system and
in the TUNE Adapt manual.
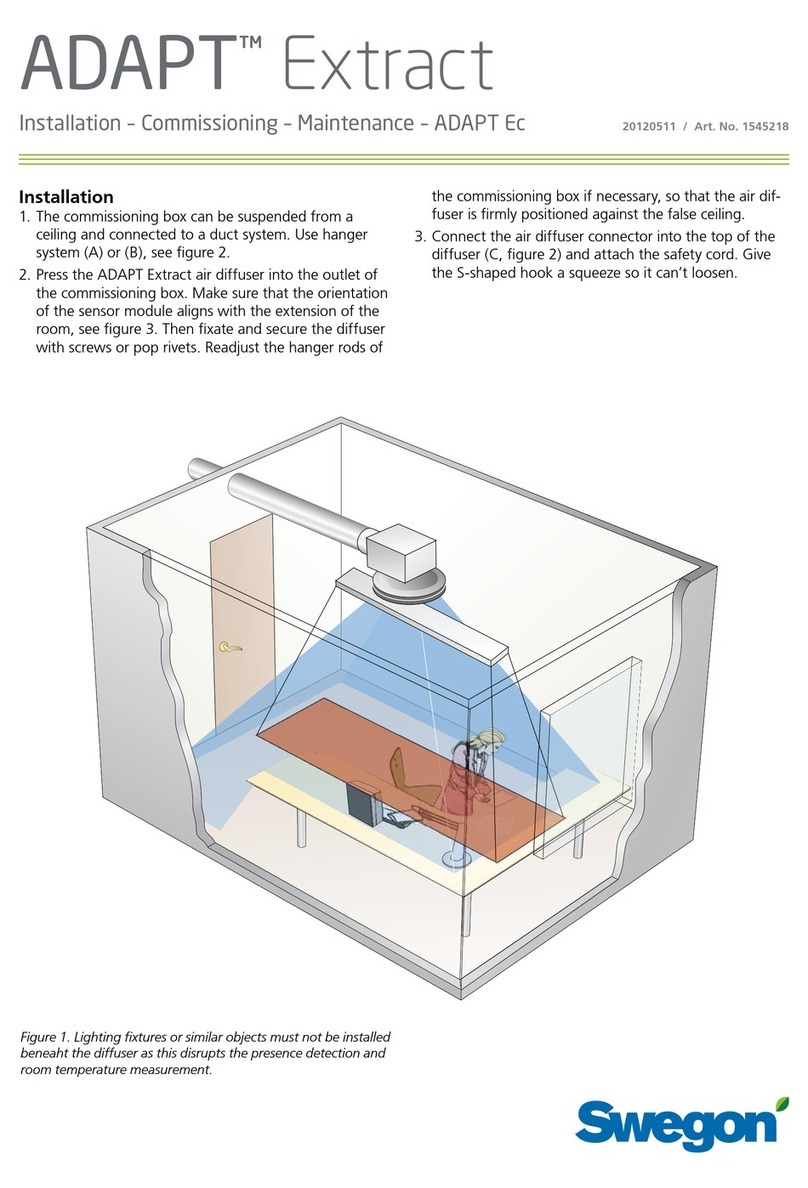
Figure 4. Lighting fixtures or similar objects must not be installed
beneath the diffuser as this disrupts the presence detection and
room temperature measurement.

This manual suits for next models

1

Other Swegon Fan manuals

Swegon REACT V SKNXa User manual

Swegon

Swegon REACT V SKNXa User manual

Swegon Parasol Zenith VAV 600 Guide

Swegon

Swegon Parasol Zenith VAV 600 Guide

Swegon EAGLE CCa Guide

Swegon

Swegon EAGLE CCa Guide

Swegon ADAPT Colibri Guide

Swegon

Swegon ADAPT Colibri Guide

Swegon PARAGON d Guide

Swegon

Swegon PARAGON d Guide

Swegon LOCKZONE Wall a User manual

Swegon

Swegon LOCKZONE Wall a User manual

Swegon ADAPT Extract d Guide

Swegon

Swegon ADAPT Extract d Guide

Swegon CASA W3 XS Smart Guide

Swegon

Swegon CASA W3 XS Smart Guide

Swegon PELICAN Ceiling HF Guide

Swegon

Swegon PELICAN Ceiling HF Guide

Swegon COLIBRI Ceiling b Guide

Swegon

Swegon COLIBRI Ceiling b Guide

Swegon EAGLE Ceiling User manual

Swegon

Swegon EAGLE Ceiling User manual

Swegon PARASOL EXc Guide

Swegon

Swegon PARASOL EXc Guide

Swegon PARAGON Wall c NC User manual

Swegon

Swegon PARAGON Wall c NC User manual

Swegon ADAPT Free b Guide

Swegon

Swegon ADAPT Free b Guide

Swegon ADAPT Parasol EXb User manual

Swegon

Swegon ADAPT Parasol EXb User manual

Swegon DHCe User manual

Swegon

Swegon DHCe User manual

Swegon CASA W100B Programming manual

Swegon

Swegon CASA W100B Programming manual

Swegon GOLD PX Instruction Manual

Swegon

Swegon GOLD PX Instruction Manual

Swegon PARASOL EXc 690 MF Guide

Swegon

Swegon PARASOL EXc 690 MF Guide

Swegon ADAPT Free Guide

Swegon

Swegon ADAPT Free Guide

Swegon PELICAN Ceiling User manual

Swegon

Swegon PELICAN Ceiling User manual

Swegon CASA R9H Smart Guide

Swegon

Swegon CASA R9H Smart Guide

Swegon ILTO X100 Premium Parts list manual

Swegon

Swegon ILTO X100 Premium Parts list manual

Swegon CASA R120 Operator's manual

Swegon

Swegon CASA R120 Operator's manual

Popular Fan manuals by other brands

Fakir ROTATING 360 instruction manual

Fakir

Fakir ROTATING 360 instruction manual

Hunter 21421 Parts guide

Hunter

Hunter 21421 Parts guide

Patton PX405PED owner's guide

Patton

Patton PX405PED owner's guide

Alf ISIV-01 user manual

Alf

Alf ISIV-01 user manual

Marley Geareducer 3600 user manual

Marley

Marley Geareducer 3600 user manual

LUCCI Air Airfusion Radar installation instructions

LUCCI Air

LUCCI Air Airfusion Radar installation instructions

U-Line H-9818 quick start guide

U-Line

U-Line H-9818 quick start guide

EUROM Vento 384642 instruction manual

EUROM

EUROM Vento 384642 instruction manual

Dynergy MINIFAN BASE Series Installation and operating manual

Dynergy

Dynergy MINIFAN BASE Series Installation and operating manual

TLV VS1C instruction manual

TLV

TLV VS1C instruction manual

Ruck Ventilatoren EM 150L E2M 01 manual

Ruck Ventilatoren

Ruck Ventilatoren EM 150L E2M 01 manual

Climate RENTAL SOLUTIONS AM103 instruction manual

Climate RENTAL SOLUTIONS

Climate RENTAL SOLUTIONS AM103 instruction manual

Black & Decker BFTR36B instruction manual

Black & Decker

Black & Decker BFTR36B instruction manual

Lasko TWIST TOP T12110 Important instructions & operating manual

Lasko

Lasko TWIST TOP T12110 Important instructions & operating manual

Miele DA1180 Operating and installation instructions

Miele

Miele DA1180 Operating and installation instructions

Multifan V-FloFan installation instructions

Multifan

Multifan V-FloFan installation instructions

BLAUBERG TwinBox EC 150 user manual

BLAUBERG

BLAUBERG TwinBox EC 150 user manual

Fanimation The Caruso FP7000 Series owner's manual

Fanimation

Fanimation The Caruso FP7000 Series owner's manual

manuals.online logo
manuals.online logoBrands
  • About & Mission
  • Contact us
  • Privacy Policy
  • Terms and Conditions

Copyright 2025 Manuals.Online. All Rights Reserved.