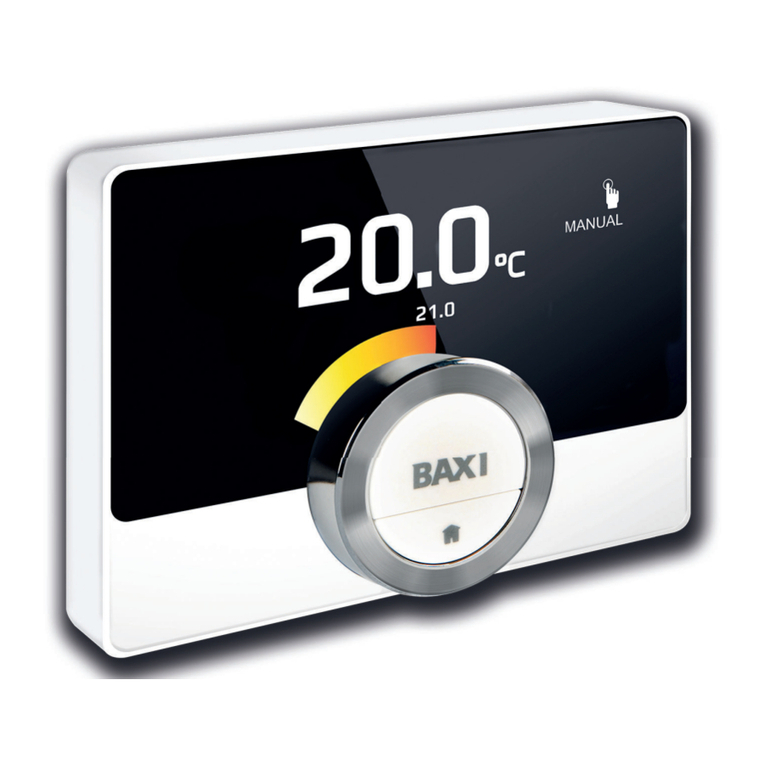
ENGO CONTROLS EONEBATW Installation instructions

FULL MANUAL
ZigBee Smart Thermostat, Li-Ion battery
EONEBATW EONEBATB
ONE

TABLE OF CONTENTS
1. Introduction........................................................................................................................................................4
1.1 Product Compliance ..............................................................................................................................................4
1.2 Safety Informations ..............................................................................................................................................4
2. Product Overview ................................................................................................................................................5
2.1 Package content ...................................................................................................................................................6
2.2 Proper thermostat location ...................................................................................................................................6
2.3 Wall mounting......................................................................................................................................................6
2.4 Description of thermostat terminals......................................................................................................................7
3. Communication diagram......................................................................................................................................7
4. About ZigBee network .........................................................................................................................................8
4.1 ZigBee network creation and operation.................................................................................................................8
5. About ENGO.........................................................................................................................................................9
5.1 Mobile device requirements ..................................................................................................................................9
5.2 About ENGO Smart app (general information)........................................................................................................9
6. First power on ................................................................................................................................................... 10
6.1 LCD icon descrption.............................................................................................................................................11
6.2 Buttons description located on right side of thermostat .......................................................................................11
7. ENGO Smart app installation .............................................................................................................................. 12
7.1 Account registration............................................................................................................................................13
7.2 Password reset....................................................................................................................................................14
7.3 Guidelines for installing devices in a WiFi network ...............................................................................................15
8. Installation of the ZigBee thermostat in the app - ONLINE.................................................................................... 16
9. ENGO Binding .................................................................................................................................................... 18
9.1 Linking thermostat to the wireless control box ECB62ZB ......................................................................................18
9.2 Linking thermostat to the control module EMODZB..............................................................................................19
9.3 Linking thermostat to the relay EREL1ZB12A........................................................................................................20
10. Thermostat opperation in the app - ONLINE ....................................................................................................... 21
10.1 General information..........................................................................................................................................21
10.2 App icons description ........................................................................................................................................21
10.3 Control .............................................................................................................................................................22
10.3.1 Setpoint temperature change...............................................................................................................22
10.3.2 „Power”function .................................................................................................................................23
10.3.3 Manual mode.......................................................................................................................................24
10.3.4 Schedule mode ....................................................................................................................................25
10.3.5 Holiday mode ......................................................................................................................................28
10.3.6 FROST mode.........................................................................................................................................29
10.3.7 Diagrams.............................................................................................................................................30

10.4 Settings (installer parameters)..........................................................................................................................31
10.4.1 Key lock function..................................................................................................................................31
10.4.2 Setting PIN ..........................................................................................................................................32
10.4.3 Backlight brightness ............................................................................................................................33
10.4.4 Max temp. limit ...................................................................................................................................34
10.4.5 Min temp. limit....................................................................................................................................34
10.4.6 Sensor Selection ..................................................................................................................................35
10.4.7 Temperature correction........................................................................................................................37
10.4.8 Control type (algorithm).......................................................................................................................38
10.4.9 Comfort warm oor function................................................................................................................39
10.4.10 Valve protection.................................................................................................................................40
10.4.11 Heating/Cooling mode selection.........................................................................................................41
10.5 General orders ..................................................................................................................................................42
10.5.1 Change the name, icon and location of the thermostat..........................................................................42
10.5.2 Device information...............................................................................................................................44
10.5.3 Tap-To-Run and Automation.................................................................................................................45
10.5.4 Sharing devices/home..........................................................................................................................48
10.5.5 Create group........................................................................................................................................50
10.5.6 FAQ & Feedback....................................................................................................................................52
10.5.7 Add to home screen..............................................................................................................................53
10.5.8 Device update......................................................................................................................................54
11. Alarms / Push notications / Emergency states .................................................................................................. 55
12. Remove device................................................................................................................................................. 57
13. Installation of the ZigBee thermostat in the app - OFFLINE................................................................................. 58
13.1 Adding thermostat to the ZigBee network.........................................................................................................58
13.2 Linking thermostat to the wireless control box ECB62ZB.....................................................................................59
13.3 Linking thermostat to the control module EMODZB............................................................................................60
13.4 Linking thermostat to the relay EREL1ZB12A......................................................................................................61
14. Oine installer parameters.............................................................................................................................. 62
15. Factory reset ................................................................................................................................................... 63
16. Cleaning and Maintenance ............................................................................................................................... 63
17. Technical Informations..................................................................................................................................... 64
18. Warranty......................................................................................................................................................... 65

4EONEBAT FULL MANUAL
This product complies with the essential requirements and other relevant provisions of Directives 2014/30EU, 2014/35/EU, 2014/53/EU and 2011/65/EU
1. Introduction
1.1 Product Compliance
1.2 Safety Informations
Care for the natural environment is of paramount importance to us. The awareness that we manufacture electronic devices
obliges us to dispose of used electronic components and devices safely. Therefore the company has received a registration
number issued by the Chief Inspector for Environmental Protection. The crossed out symbol the trash can on the product
means that the product must not be disposed of with ordinary waste containers. Sorting waste for recycling helps to protect
the environment. It is the user’s responsibility to surrender used equipment to a designated collection point for recycling
waste from electrical and electronic equipment.
• Before starting installation work and before using the product, read the entire manual.
• The information contained in the instructions is essential for proper functioning.
• To avoid accidents resulting in personal injury and material damage, please follow all safety precautions, specied in this manual.
• The device should not be used by people with limited mental, sensory or mental abilities, without experience, of insucient knowledge as well as
children.
• Do not use an unassembled device (eg without a cover).
• The device may only be opened by a qualied person.
• Keep electrical devices out of the reach of children and ensure that they do not play with it. Children should not be left unattended. If necessary,
disconnect the control system for the entire room.
• Do not leave the packaging, cabinet, or any loose parts of the device unattended, as they pose a risk to children.
INSTALLATION:
• Installation must be carried out by a qualied person with appropriate electrical qualications in accordance with standards and regulations in force
in the given country and in the EU.
• Never try to connect the device other than as described in the manual.
• Before assembly, repair or maintenance as well as during any connection works it is absolutely necessary disconnect the mains supply and make
sure that the terminals and electric wires are not live.
• The device may not be exposed to extreme temperatures, strong vibrations or subjected to mechanical shock.
• The device should not be used in unfavorable environmental conditions or in rooms where there is a concentration of ammable gases, fumes or
dust.
WARNING!
• There may be additional protection requirements for the entire installation that the installer is responsible for maintaining

5EONEBAT FULL MANUAL
EONEBATW / EONEBATB
EONEBATis a surface-mounted,roomthermostatbased on ZigBee technology. Itcomes with a built-in humiditysensor and theoption to set minimum
and maximum desired temperatures. The thermostat can operate in either heating or cooling mode. One of its distinctive features is wireless control
through the „ENGO binding” function. To enable wireless control via the ENGO Smart / TUYA Smart mobile application, the thermostat must be
connected to the EGATEZB internet gateway (sold separately).The„ENGO binding”function allows for wireless and direct linking of the thermostat to
receivers (e.g., control box - ECB62ZB, control module - EMODZB, or relay - EREL1ZB12A) only when used with the EGATEZB gateway. Once added to
the mobile application, the thermostat gains additional features such as the ability to program time schedules or receive push notications.
Using ENGO Smart, we can manage smart home devices that operate on various communication standards, including Zigbee, Bluetooth, or Wi-Fi.
These devices can be controlled from anywhere, and we also have the option to manage multiple devices simultaneously.
A signicant advantage is the ability to create rules based on factors such as time, location, or current air temperature.There’s also an option to assign
access rights to specic individuals, like family members, for example. ENGO Smart is a free application available for both Android and iOS users.
Product features:
• Communication using ZigBee 3.0 standard
• Very easy to operate
• A multitude of functions accessible through the ENGO Controls /Tuya Smart application
• Option to connect an additional NTC sensor
• Adjustable display backlight intensity
• Possibility to set minimum and maximum target temperature
• Temperature history charts available in the application
• Ability to share devices with multiple users
• Push notications from the application
• ENGO binding function (device linking in Online and Oine mode)
• Comfortable oor function
2. Product Overview

6EONEBAT FULL MANUAL
2.1 Package content
1) EONEBAT thermostat
2) Wall mounting plate
3) Self-adhesive mounting tape
4) Quick Guide
5) Mounting screws
2.2 Proper thermostat location
Uwaga:
The recommended height for mounting the thermostat is approx. 1.5 m above the ground, away from any sources of heat or cool. It
is not recommended to install the thermostat on an outside wall, in a draft or in a place where it will be exposed to direct sunlight.
Quick GuideSelf-adhesive
mounting tape
Mounting screws
EONE230W (white) or
EONE230B (black) thermostat
Wall mounting plate
(white or black)
1 53 4
2.3 Wall mounting
Mounting: to mount thermostat you can use accesories included with the set (mounting screws or self-adhesive tape). Remove back cover to mount
the plate to the wall. After this just attach thermostat to the plate (it has built-in magnet).
2
Protective lm with QR code for product page https://products.engocontrols.com/ is attached to thermostat

7EONEBAT FULL MANUAL
3. Communication diagram
S1, S2 Thermostat input for ext. temperature sensor
Products sold separately
Connection with ZigBee 3.0 network
EONEBATW/B EGATEZB*
ZigBee 3.0
or or
Temperature sensor
Battery powered
Legend:
ECB62ZB
Control box
EMODZB
Control module
EREL1ZB12A
Relay
Gateway
ZigBee 3.0
ZigBee 3.0
EONEBATW/B
S1
S2
Li-lon
3.7V
S
Devices operating on the third generation of ZigBee protocol. Communication works through an Internet gateway, providing remote control using the
ENGO Smart application if the gateway is connected to the Internet.
Wi-Fi 2.4GHz
Router
Application
Cloud
2.4 Description of thermostat terminals
The thermostat can communicate via ZigBee network with the
receiver or be connected wired to the control box

8EONEBAT FULL MANUAL
4. About ZigBee network
4.1 ZigBee network creation and operation
ZigBee - is a wireless network based on IEEE 802.15.4 standard and it’s communication takes place in the 2.4 GHz band. The network is based on a
mesh topology, which allows for a very large range and high reliability. The maximum range of direct communication between two network nodes
(devices) is about 100m in open space.
The devices included in the ZigBee network are divided into three types:
- coordinator - there can only be one such device in each network. It acts as a connection node for all devices;
- router (repeater) - this device is powered by 230VAC, with functionality similar to classic network routers, and it’s task is to forward data packets
and increase the range of the network;
- terminal device - battery powered, sends data to the coordinator (also through the router) to which it is connected. It is usually put to sleep
temporarily, which helps reduce energy consumption.
Built-in security in the ZigBee protocol (ISO-27001 and SSAE16 / ISAE 3402Type II - SOC 2 certication) ensure high transmission reliability, detection
and removal of transmission errors, as well as connectivity between established priority devices.
Four simple steps on how to properly create a ZigBee network:
1. Installation of the EGATEZB coordinator. Coordinating device
230V Devices
closest to the coordinator
Further 230V devices
in the network
Battery devices
2. Next - add any powered 230V AC device.
Note to locate it as near coordinator as possible.
3. Now you can increase range of the ZigBee
network by adding more 230V AC powered devices.
4. At the end add more battery powered devices
and accesories

9EONEBAT FULL MANUAL
5. About ENGO
5.2 About ENGO Smart app (general information)
5.1 Mobile device requirements
FOR A MOBILE DEVICE WITH ANDROID:
Android version 5.0 or higher
FOR A MOBILE DEVICE WITH IOS SYSTEM:
IOS version 9.0 or higher
COMPATIBILITY WITH TUYA DEVICES (examples):
The heart of the ENGO system is its ENGO Smart app. It allows you to combine the functionality of many devices in an accessible way. It allows you to
connect to devices marked with the logs„Powered by Tuya” or„Powered by Tuya: Intelligence Inside”. Remote control is carried out via the Tuya cloud,
which connects to the user’s phone, so that the user of the device does not have to rent a server room or write software for it.Why can’t the phone connect
directly to the device? Such a necessity is due to the fact that it would require an appropriate router with a xed IP address, so the cellular network will
not work, and even with such a router, its conguration would be quite complicated and would require some sacrices as regards the security of the link,
because you would have to allow the devices from outside the house connected to it.
The rst connection and conguration can be performed manually according to the instructions displayed in the app, but there is also an option to auto-
matically scan for congurable devices. After that, the device automatically connects with the app and is visible on the list.
Each of the owned devices can be optionally assigned to the room in which it is located, which makes it easier to nd out when our home is truly intelli-
gent. All devices, regardless of whether they belong to specic rooms, are assigned to one of the houses that can have more than one.This assignment is
not pointless, as the app knows where the device is located and can provide information about the current weather.
Thanks to this data, you can create so-called scenes, i.e. automate repetitive activities and thus save time. For example, you can set in the app that if the
temperature drops below fteen degrees, the heating will turn on or that the light will come on when the sun goes down.
But what if you need to automate something independent of the weather? The ENGO app also satisfy such a need, and it does so by using scenes that
can be run with a single tap, or scenes that trigger when the state of one of the added devices changes. Example: we are leaving the house and we want
the power to be cut o from the smart socket to which the iron is connected, and ve minutes after that, all lights in the house turn o. It can be easily
congured and started with one tap. It is similarly simple to solve the problem of turning o the light in the bedroom - if the bedside lamp is turned on, it
can be set to turn o the light in the bedroom.
Smart plugs Smart bulbs Cameras Doorbells
Compatibility of devices in the ENGO Smart application:
ENGO Wi-Fi ENGO ZigBee
E901WIFI EONEBATW/EONEBATB
EONE230W/EONE230B
EIRTXWIFI
E10W230WIFI/E10B230WIFI EDOORZBEGATEZB
ECB62ZB EMODZB EREL1ZB12A

10EONEBAT FULL MANUAL
6. First power on
The thermostat is battery-powered.To turn it on, follow the instructions below.
To power on the thermostat hold button
for 3 seconds...
...the display will show all the icons...
...the main screen is appeared.
SET
1 2
3
3 sec.
3

11EONEBAT FULL MANUAL
6.1 LCD icon descrption
6.2 Buttons description located on right side of thermostat
SET
2
1
4
5
16
15
14
6
7
8
2 3
9
1012
1113
1
3
1. Humidity Display
2. Current Temperature / Setpoint Temperature
3. Clock
4. Temperature unit
5. Heating indicator (icon is animating when
there is heating demand)
6. Cooling indicator (icon is animating when
there is cooling demand)
7. Schedule mode icon
8. Temporary override mode
9. Additional temperature sensor
10. Key lock function
11. Holiday mode
12. Settings icon
13. Battery indicator
14. Receiver binding indicator
15. ZigBee network connection indicator
16. SET information /Temperature settings
1.“UP”button
2.“OK”button
3.“DOWN”button
Change the parameter value up
Change the parameter value down
Change of mode manual/schedule - single click (Online mode only)
Entering installer parameters - press and hold for 3 seconds
Switching the thermostat o/on - press and hold for 5 seconds
+
Pairing mode with gateway - press and hold until the PA shows on the display, then release the keys
Binding - linking the thermostat to the receiver - press and hold until the„bind”shows
on the display, then release the keys
Thermostat factory reset - press and hold until the FA shows on the display, then release the keys
+ Lock/Unlock the keys - press and hold for 3 seconds
+ Switching between Heating/Cooling modes - press and hold for 3 seconds

12EONEBAT FULL MANUAL
7. ENGO Smart app installation
DOWNLOAD THE ENGO SMART APP:
FOR A MOBILE DEVICE WITH ANDROID: FOR MOBILE DEVICE WITH IOS SYSTEM:
Method 1: Scan the QR code with the device’s scanner,
download and install the app.
Method 1: Scan the QR code and follow the directions to get to
the AppStore, download and install the app.
Method 2: Open the Google Play Store on your smartphone,
search for and install the„ENGO Smart”app.
Android version 5.0 or higher IOS version 9.0 or higher
Method 2: Open Apple’s„AppStore”on iPhone, search for
„ENGO Smart”app, download and install.
Please note! Please enable storage / location / camera permissions during installation. Otherwise, problems may arise during use / operation.
Please note! Make sure your router is within range of your mobile phone. Make sure you are connected to the Internet. This will reduce the pairing
time of the device.
FOR A MOBILE DEVICE WITH ANDROID: FOR A MOBILE DEVICE WITH IOS SYSTEM:

13EONEBAT FULL MANUAL
7.1 Account registration
REGISTER THE NEW ACCOUNT:
Click„Register”to create
new account.
Enter the verication code received
in the email. Remember that you
only have 60 seconds to enter
the code!
Then set the password for
login. The password must contain
6-20 characters including letters
and numbers.
Enter your e-mail address to which
the verication code will be sent.
To register a new account, please follow the steps below:
1
3
2
4

14EONEBAT FULL MANUAL
7.2 Password reset
FORGOTTEN PASSWORD:
Click on„I forgot my password.”
Click to receive the verication code
to the email address you entered.
Set a NEW password for login.The password must
contain 6-20 characters including letters and numbers.
Enter the e-mail address used
during account registration.
Enter the verication code received in the email.
Remember that you only have 60 seconds to enter
the code!
Once approved, you will be immediately
logged into the application.
1
3
5
2
4
6
If you have forgotten your password, you can log in as below:

15EONEBAT FULL MANUAL
7.3 Guidelines for installing devices in a WiFi network
• Make sure that the Wi-Fi network where you want to install the app broadcasts in the 2.4 GHz frequency.
• We recommend turning o mobile internet (cellular data) on your phone during conguration.
• It is recommended to use the encryption of the Wi-Fi network at the WPA-Personal level.
Parameters Specication
Frequency band (GHz) 2.4GHz
WLAN standard IEEE 802.11 b/g/n
Protocols IPv4/IPv6/TCP/UDP/HTTPS/TLS/MulticastDNS
Protection WEP/WPA/WPA2/AES128
Supported type STA/AP/STA+AP

16EONEBAT FULL MANUAL
8. Installation of the ZigBee thermostat in the app - ONLINE
Make sure that gateway has been
added to the application.
5 sec.
5 sec.
On the EONE thermostat, hold and buttons simultaneously
for 5 seconds until„PA”appears on the display. The thermostat will
enter pairing mode.
In the application, click on the in
upper right corner.
Select:
„Add Device”.
Thermostat count backwards (180s).
4 5
3

17EONEBAT FULL MANUAL
8
3
910
Wait for„End”.
6
When the ZigBee network gateway has
correctly searches for the thermostat,
click the button„Add.”
Name the device and click„Done”.
The thermostat has been installed
and displays the main interface.
On the thermostat screen appeared an
icon globe indicating that it has been
added to the ZigBee network.
7

18EONEBAT FULL MANUAL
9. ENGO Binding
9.1 Linking thermostat to the wireless control box ECB62ZB
The ENGO ZigBee series of devices - as the only one working on the basis of the TUYA platform - oers the so-called ENGO binding function, which
allows direct binding of EONE thermostat with receivers (ECB62ZB control box, EMODZB module, EREL1ZB12A relay) using EGATEZB gateway. This
makes it possible to bind devices without creating automation in the mobile application. The binding function ensures stable communication of
devices online and oine (even without Internet or router connection).
2
12
1
Make sure that the ECB62ZB control box and thermostat are in the same ZigBee network (they are added to the same gateway EGATEZB) and the
POWER LED lights up blue.
In order to correctly link thermostat with the control box, rst select the zone in the control box with the SELECT button (1) (zone which you want to
link with thermostat). The LED (2) will ash 3 times for the selected zone. Conrm your selection by clicking PAIR button (2). The LED (2) will ash
green with the previously selected zone - binding process has started, it is active for 10 minutes and during this time you can link thermostat with
the selected zone.
5sec.
5sec.
24
3
56
3
On the EONE thermostat, hold
and buttons until the
”bind”message appears.
Release keys, binding
function is active.
The ”binding”process takes
up to 300 seconds.
Both devices have been successfully
linked. Thermostat displays the main
screen, icon ” ”appeared on the
screen indicating connection with
the receiver
After successfull binding
operation ”End”message will
be displayed.
If the binding process fails, it must be repeated taking
into account the distances between devices, obstacles
and local radio signal interferences.
When the controller is bound to a wireless zone in the
control box, in case of loss of communication between
devices, the zone will turn o after 50 minutes.
Radio range can be increased by
Engo ZigBee repeaters.
ATTENTION:
ATTENTION:
Remember:

19EONEBAT FULL MANUAL
9.2 Linking thermostat to the control module EMODZB
Make sure that the module and thermostat are in the same ZigBee network (they are added to the same gateway EGATEZB).
5x
5sec.
5sec.
2
4
13
56
3
To properly bind thermostat with the module
rst click quickly the button on the device
5 times.The LED diode will start ashing
slowly on red, which means the device will
enable binding mode.
Release the keys, binding
function (process of linking
thermostat) is active.
On the EONE thermostat,
hold and buttons at the same
time for 10 seconds until the„bind”
function appears.
After successfull binding operation
„End”message will be displayed. The
LED on the module will stop ashing.
Both devices have been successfully
linked. Thermostat displays the main
screen, icon appeared on the screen
indicating connection with the receiver.
The„binding”process takes up
to 300 seconds.
If the binding process fails, it must be repeated taking into account the distances between devices, obstacles and local radio signal interferences.
When the controller is bound to the module, in case of loss of communication between devices, the modulewill turn o after 50 minutes.
When the regulator is bound to the module, do not set time schedules in the module because they will interfere with the operation of the heating
system.
Radio range can be increased by Engo ZigBee repeaters
ATTENTION:
ATTENTION:
ATTENTION:
Remember:

20EONEBAT FULL MANUAL
9.3 Linking thermostat to the relay EREL1ZB12A
Make sure that the relay and thermostat are in the same ZigBee network (they are added to the same gateway EGATEZB).
5x
5sec.
5sec.
2
4
13
5 6
3
To properly bind thermostat with the relay
rst click quickly the button on the device
5 times.The LED diode will start ashing
slowly on red, which means the device will
enable binding mode.
Release the keys, binding function
(process of linking thermostat) is active.
On the EONE thermostat, hold and buttons
and for 10 at the same time
seconds until the„bind”function appears.
After successfull binding operation„End”
message will be displayed. LED on the
module will stop ashing.
Both devices have been successfully
linked. Thermostat displays the main
screen, icon appeared on the
screen indicating connection
with the receiver.
The„binding”process takes
up to 300 seconds.
If the binding process fails, it must be repeated taking into account the distances between devices, obstacles and local radio signal interferences.
Radio range can be increased by Engo ZigBee repeaters.
ATTENTION:
Remember:
ATTENTION:
ATTENTION:
When the controller is bound to the relay, in case of loss of communication between devices, the modulewill turn o after 50 minutes.
When the regulator is bound to the relay, do not set time schedules in the relay because they will interfere with the operation of the heating system.
This manual suits for next models
3
Table of contents
Other ENGO CONTROLS Thermostat manuals
ENGO CONTROLS
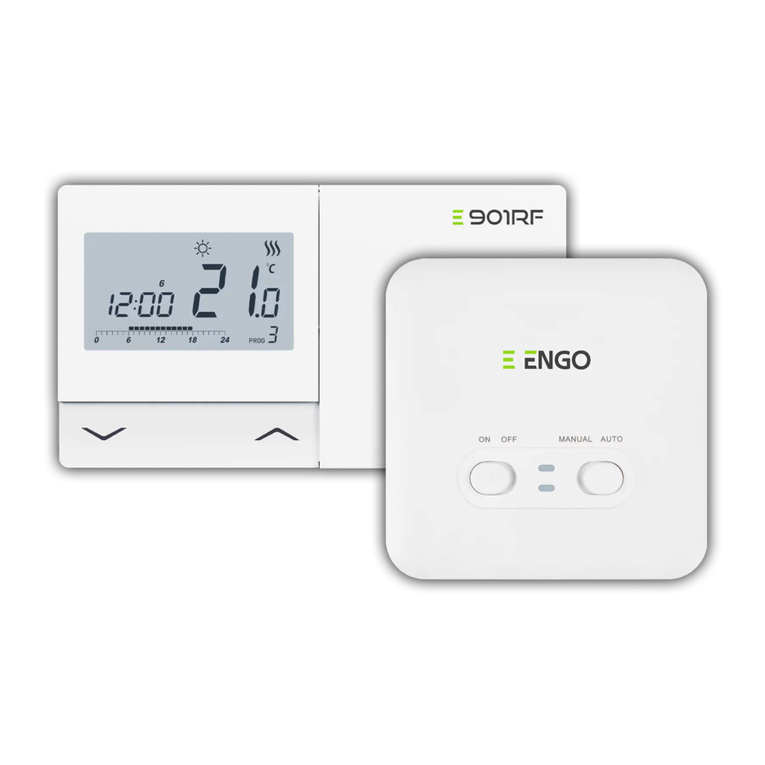
ENGO CONTROLS E901RF User manual
ENGO CONTROLS
ENGO CONTROLS E901 Installation instructions
ENGO CONTROLS
ENGO CONTROLS EASY230W User manual
ENGO CONTROLS
ENGO CONTROLS E901WIFI User manual

ENGO CONTROLS
ENGO CONTROLS E901RF Installation instructions
ENGO CONTROLS
ENGO CONTROLS E901WIFI Installation instructions
ENGO CONTROLS
ENGO CONTROLS SIMPLE User manual
ENGO CONTROLS
ENGO CONTROLS ESIMPLE230W User manual
ENGO CONTROLS
ENGO CONTROLS E10W230WIFI Installation instructions

ENGO CONTROLS
ENGO CONTROLS E10W230WIFI User manual
