Table of Contents
Important Safety Precautions
. . . . . . . . . . . . . . . . . . . . . . . . . . . . . . . . . . . . . .
5-8
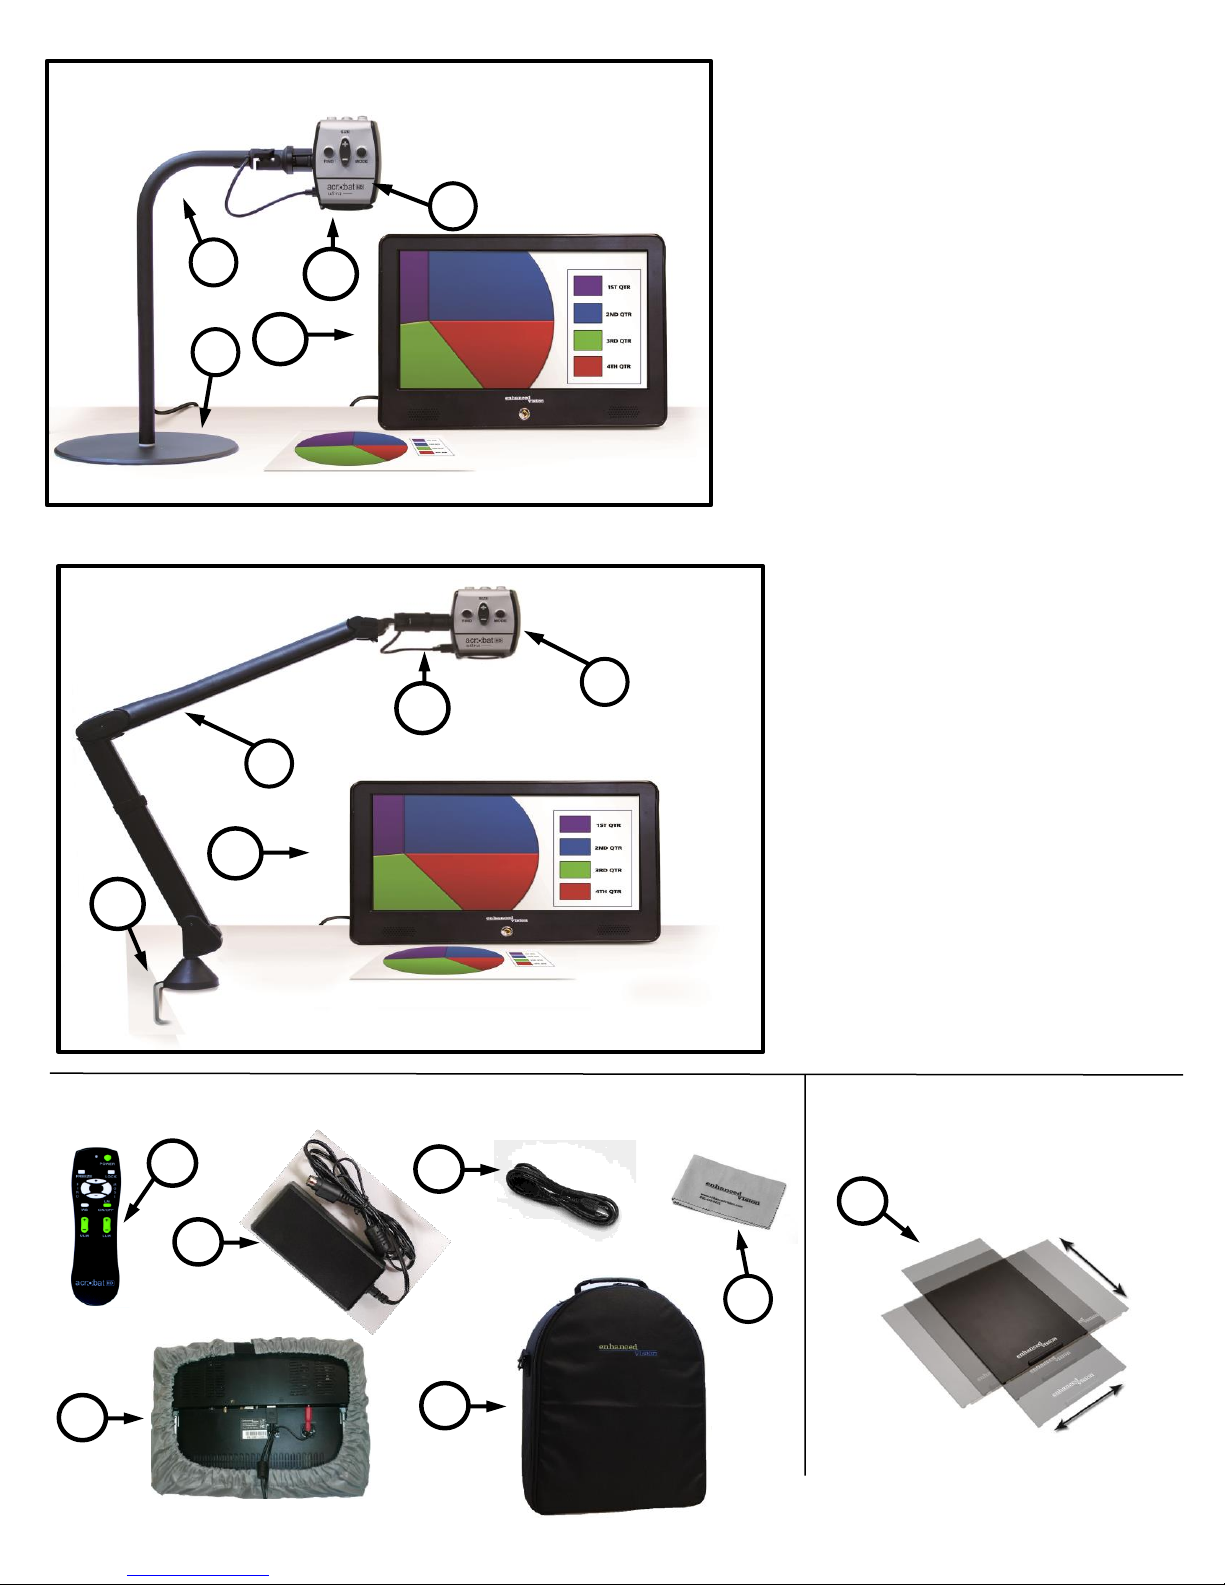
Acrobat HD Ultra w/Portable Monitor Package Contents
. . . . . . . . .
9-10
Acrobat HD Ultra Arm Setup
. . . . . . . . . . . . . . . . . . . . . . . . . . . . . . . . . . . . .
11-12
Using Acrobat HD Ultra w/Portable Monitor
Connecting the Power Supply & Charging the Battery . . . . . . . . . . . . . . 13
Turning the Monitor On/Off . . . . . . . . . . . . . . . . . . . . . . . . . . . . . . . . . . . 14
Charging Condition Icon
. . . . . . . . . . . . . . . . . . . . . . . . . . . . . . . . . . . . . . . . . . . .
14
Portable Monitor Controls
. . . . . . . . . . . . . . . . . . . . . . . . . . . . . . . . . . . . . . . . . . .
15
Checking the Battery Level
. . . . . . . . . . . . . . . . . . . . . . . . . . . . . . . . . . . . . . . . .
15
Using Acrobat HD Ultra
Distance, Self-Viewing & Reading and Writing Mode
. . . . . . . . . . . . . .
16-18
Adjusting Magnification
. . . . . . . . . . . . . . . . . . . . . . . . . . . . . . . . . . . . . . . . . . . . .
19
Changing & Adjusting the Viewing Mode
. . . . . . . . . . . . . . . . . . . . . . . . . . . .
20
Viewing Modes & Changing Favorite Color Modes
. . . . . . . . . . . . . . . .
21-23
Adjusting Brightness
. . . . . . . . . . . . . . . . . . . . . . . . . . . . . . . . . . . . . . . . . . . . . . .
24
Adjusting the White Balance
. . . . . . . . . . . . . . . . . . . . . . . . . . . . . . . . . . . . .
25-26
Using Line Markers
. . . . . . . . . . . . . . . . . . . . . . . . . . . . . . . . . . . . . . . . . . . . .
27-28
Setting the Left or Right Hand Mode
. . . . . . . . . . . . . . . . . . . . . . . . . . . . . . . . .
29
Using the Object Locator
. . . . . . . . . . . . . . . . . . . . . . . . . . . . . . . . . . . . . . . . . . .
30
Using Intelligent Focus Lock
. . . . . . . . . . . . . . . . . . . . . . . . . . . . . . . . . . . . .
31-32
Using the Freeze Function
. . . . . . . . . . . . . . . . . . . . . . . . . . . . . . . . . . . . . . . . . .
33
Advance Programming
. . . . . . . . . . . . . . . . . . . . . . . . . . . . . . . . . . . . . . . . . .
34-35
Troubleshooting
. . . . . . . . . . . . . . . . . . . . . . . . . . . . . . . . . . . . . . . . . . . . . . . . . . . .
36
Specifications
. . . . . . . . . . . . . . . . . . . . . . . . . . . . . . . . . . . . . . . . . . . . . . . . . . .
37-38
Warranty Statement
. . . . . . . . . . . . . . . . . . . . . . . . . . . . . . . . . . . . . . . . . . . . . . . . .
39
Other Enhanced Vision Products
. . . . . . . . . . . . . . . . . . . . . . . . . . . . . . . .
40-42
Contact Information
. . . . . . . . . . . . . . . . . . . . . . . . . . . . . . . . . . . . . . . . . . . . . . . .
42