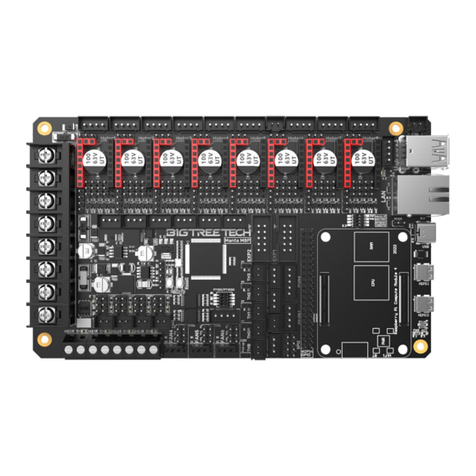
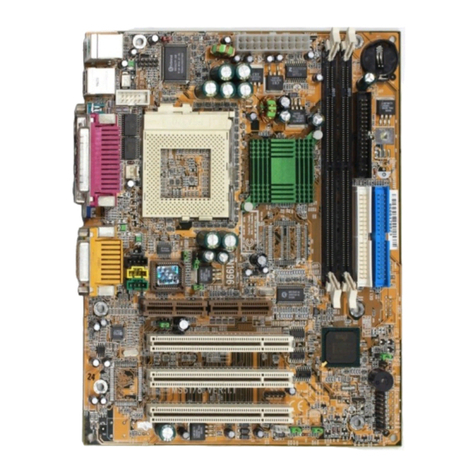
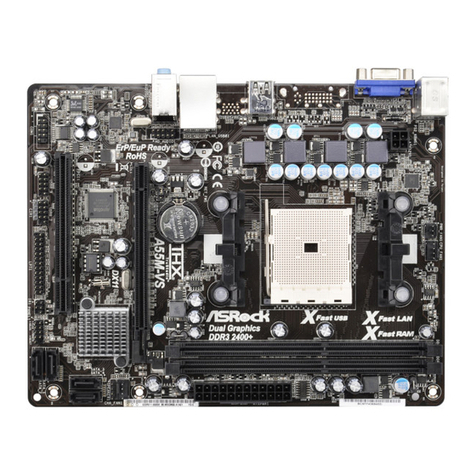
Enoch Systems SHB120 Operational manual

Product User Manual
and enterprise branch and head offices
SHB120
$;,207(.
www.enochsystems.com 1-877-722-1116 [email protected]
Copyright © 2013 Enoch Systems, LLC, Enoch Systems and the Enoch Systems logo are trademarks or registered trademarks of Enoch Systems, LLC and/or its affiliates in the U.S. and other countries.
Third-party trademarks mentioned are the property of their respective owners. All rights reserved.

SHB120 Series
Intel®Socket 1155 Core™i7 / Core™i5 / Core™i3 /
Processor
PICMG®1.3 Full-Size CPU Card
User’s Manual

ii
Disclaimers
This manual has been carefully checked and believed to contain accurate information. Axiomtek
Co., Ltd. assumes no responsibility for any infringements of patents or any third party’s rights, and
any liability arising from such use.
Axiomtek does not warrant or assume any legal liability or responsibility for the accuracy,
completeness or usefulness of any information in this document. Axiomtek does not make any
commitment to update the information in this manual.
Axiomtek reserves the right to change or revise this document and/or product at any time without
notice.
No part of this document may be reproduced, stored in a retrieval system, or transmitted, in any
form or by any means, electronic, mechanical, photocopying, recording, or otherwise, without the
prior written permission of Axiomtek Co., Ltd.
Caution
If you replace wrong batteries, it causes the danger of explosion. It is recommended by the
manufacturer that you follow the manufacturer’s instructions to only replace the same or
equivalent type of battery, and dispose of used ones.
Copyright 2012 Axiomtek Co., Ltd.
All Rights Reserved
July 2012, Version A1
Printed in Taiwan

iii
ESD Precautions
Computer boards have integrated circuits sensitive to static electricity. To prevent chipsets from
electrostatic discharge damage, please take care of the following jobs with precautions:
Do not remove boards or integrated circuits from their anti-static
Packaging until you are ready to install them.
Before holding the board or integrated circuit, touch an unpainted portion of the system unit
chassis for a few seconds. It discharges static electricity from your body.
Wear a wrist-grounding strap, available from most electronic
Component stores, when handling boards and components.
Trademarks Acknowledgments
Axiomtek is a trademark of Axiomtek Co., Ltd.
Windows®is a trademark of Microsoft Corporation.
AMI are trademarks of American Megatrend Inc.
IBM, PC/AT, PS/2, VGA are trademarks of International Business
Machines Corporation.
Intel® Core™ i3 LGA1155 Desktop Processor,
Intel® Core™ i5 LGA1155 Desktop Processor,
Intel® Core™ i7 LGA1155 Desktop Processor,
are trademarks of Intel Corporation
Winbond is a trademark of Winbond Electronics Corp.
Other brand names and trademarks are the properties and registered brands of their respective
owners.

iv
Table of Contents
CHAPTER 1 INTRODUCTION.........................................................................................................1
1.1 Specifications.............................................................................................................2
1.2 Utilities Supported......................................................................................................4
CHAPTER 2 JUMPERS AND CONNECTORS................................................................................5
2.1 Board Dimension .......................................................................................................5
2.2 Board Layout..............................................................................................................6
2.3 Jumper Settings.........................................................................................................7
2.3.1 COM1 Mode Select Jumpers for RS232/422/485 (JP3, JP4, JP5) ...........................7
2.3.2 Audio Amplifier Jumper (JP1)....................................................................................8
2.3.3 Clear RTC Jumper (JP8)...........................................................................................8
2.4 Connectors.................................................................................................................9
2.4.1 SMBUS Connector (CN1)........................................................................................10
2.4.2 Floppy Disk Port Connector (CN4) ..........................................................................11
2.4.3 Internal USB Connectors (CN5)...............................................................................12
2.4.4 Internal USB Connectors (CN8, CN10, CN13)........................................................12
2.4.5 LAN2 LED Connectors (CN6)..................................................................................13
2.4.6 LAN1 LED Connectors (CN7)..................................................................................13
2.4.7 DB15 CRT Connector (CN11) Co-layout with CN12 ...............................................13
2.4.8 DVI-D Pin Header (CN14)........................................................................................14
2.4.9 Front Panel Connector (CN15)................................................................................15
2.4.10 PS/2 Keyboard, Mouse Connectors (CN17, CN18).................................................16
2.4.11 External USB 3.0 Port Connectors (CN16, CN19)..................................................16
2.4.12 RS232/422/485 Pin Assignment (COM1)................................................................17
2.4.13 COM Port RS-232 Pin Assignment (COM2)............................................................18
2.4.14 Intel®HD Audio Digital Header (AUDIO1)...............................................................18
2.4.15 ATX 8 Pin 12V IN Connector (ATX2) ......................................................................19
2.4.16 A CPU fan is always needed for cooling CPU heat (FAN3) ....................................19
2.4.17 System & Auxiliary Fan Connectors (FAN1, FAN2) ................................................19
2.4.18 Ethernet RJ-45 Connectors (LAN1, LAN2)..............................................................20
2.4.19 Parallel Port Connector (PRINT1) Print Port Connector..........................................21
2.4.20 SATA Connectors (SATA1(3.0) ,SATA2(3.0),SATA3,SATA4,SATA5,SATA6).......22
CHAPTER 3 HARDWARE INSTALLATION..................................................................................23
3.1 Installing the Processor............................................................................................23
3.2 Installing the Memory...............................................................................................31
CHAPTER 4 HARDWARE DESCRIPTION....................................................................................33
4.1 Microprocessors.......................................................................................................33
4.2 BIOS ........................................................................................................................33
4.3 System Memory.......................................................................................................33
4.4 I/O Port Address Map ..............................................................................................34
4.5 Interrupt Controller (IRQ) Map.................................................................................36
CHAPTER 5 AMI BIOS UTILITY ...................................................................................................37
5.1 Starting.....................................................................................................................37

v
5.2 Navigation Keys.......................................................................................................37
5.3 Main Menu ...............................................................................................................39
5.4 Advanced Menu.......................................................................................................40
5.5 Chipset Menu...........................................................................................................51
5.6 Boot Menu................................................................................................................54
5.7 Security Menu..........................................................................................................55
5.8 Save & Exit Menu.....................................................................................................56
APPENDIX A WATCHDOG TIMER...............................................................................................59
Watchdog Timer Setting............................................................................................................59
APPENDIX B PCI IRQ ROUTING..................................................................................................61
PICMG®PCI IRQ Routing .........................................................................................................61
APPENDIX C CONFIGURING SATA FOR RAID FUNCTION.......................................................63
APPENDIX D iAMT SETTINGS.....................................................................................................77
D.1 Entering MEBx.........................................................................................................77
D.2 Set & Change Password..........................................................................................78
D.3 Intel® iAMT Settings................................................................................................81
D.4 iAMT Web Console..................................................................................................88
APPENDIX E PICMG®v1.3 INTERFACE DEFINITION ................................................................91

vi
MEMO:

SHB120 LAG1155 Full-Size SBC User’s Manual
Introduction
1
CHAPTER 1
INTRODUCTION
The SHB120 PICMG® 1.3 full-size Single Board Computer supports LAG1155 socket H2 for
Intel® Core™ i3 Desktop Processor, Intel® Core™ i5 Desktop Processor, Core™ i7 Desktop
Processor with 32nm technology and Transfer Rate 1333/1600 MHz. The board integrates Intel®
Q77 chipset that delivers outstanding system performance through high-bandwidth interfaces,
multiple I/O functions for interactive applications and various embedded computing solutions.
There are two 240-pin DDR3 DIMM sockets for dual channel DDR3 1333/1600, maximum
memory capacity up to 16GB. The board also features dual Gigabit Ethernet, two SATA-6.0Gb/s
and four SATA-3.0Gb/s and SATA RAID 0/1/5/10 by PCH. Ten USB 2.0 & four USB 3.0 high
speed compliant ports and built-in Intel® HD Audio Digital Header can achieve the best stability
and reliability for industrial applications.

SHB120 LAG1155 Full-Size SBC User’s Manual
Introduction
2
1.1 Specifications
CPU
Intel® Core™ i3 Desktop Processor
Intel® Core™ i5 Desktop Processor
Intel® Core™ i7 Desktop Processor
System Chipset
Intel® Q77
CPU Socket
LAG1155 Socket
DRAM Transfer Rate
1333/1600 MHz
BIOS
AMI BIOS via SPI interface with socket
System Memory
Two 240-pin DDR3 1333/1600 DIMM sockets
Maximum up to 16GB DDR3 memory
L1, L2, L3 Cache: integrated in CPU
Onboard Multi-I/O
Parallel Port: one 26-pin 2.54-pitch box-header, SPP/EPP/ECP supported
Serial Port: one for RS-232/422/485 with 10-pin, 2.54-pitch box-header (COM1) and one
port for RS-232 with 10-pin, 2.54-pitch box-header (COM2)
Floppy controller: one 34-pin, 2.54-pitch box-header supports two drives (1.44MB for each)
USB Interface
Ten USB ports compliant with USB Spec. Rev. 2.0 (6 ports on board, 4 ports to SHB
connector-C golden fingers)
Four USB ports compliant with USB Spec. Rev. 3.0 (2 ports on rear I/O, 2 ports on board)

SHB120 LAG1155 Full-Size SBC User’s Manual
Introduction
3
Onboard Graphic
Intel® Arrandale integrated a Graphic processing unit processor which goes with Q77
chipset with VGA, DisplayPort (co-lay with VGA) and DVI.
Memory Size --Intel® DVMT 5.0 supported; preallocated memory for frame buffer option as
OS option:
Windows XP:
* For Total System Memory < 1GB,
Graphics sharing memory = 128 MB Maximum;
* For 1 GB to 1.5 GB Total System Memory,
Graphics sharing memory = 512 MB Maximum;
* For 1.5 GB to 2 GB Total System Memory,
Graphics sharing memory = 768 MB Maximum;
* For 2 GB and Above Total System Memory,
Graphics sharing memory = 1GB Maximum.
Windows Vista:
* Graphics sharing memory max to 0.5* (OS Ram Size –512)
Resolution -- Analog output -- the analog port utilizes an
integrated 400MHz 24-bit RAMDAC that can directly drive a standard progressive scan
analog monitor up to a resolution of 2048x1536 pixels with 32-bit color at 75 Hz
Analog Output Interface -- CRT from DAC output via 15-pin D-Sub connector on the edge;
CRT always ON supported
Ethernet
The LAN1/LAN2 are Intel 82579LM with iAMT 7.0 / Intel 82574L Ethernet controller support
10/100/1000 Mb/s
Serial ATA
Two Serial ATA-6Gb/s and Four Serial ATA-3Gb/s performance and SATA RAID 0/1/5/10
by Q77

SHB120 LAG1155 Full-Size SBC User’s Manual
Introduction
4
Audio
10-pin 2.0 pin-header (Intel® HD Audio Digital Header)
Hardware Monitoring
Monitoring temperatures, voltages, and cooling fan status
Watchdog Timer
Reset Supported (1-255 level)
Dimensions
338mm x 126mm
Expansion interface:
1 PCI-E x16(Gen.3)
1 PCI-E x4(or 4 PCI-E x1) (Gen.2)
4 PCI
NOTE: All specifications and images are subject to change without notice.
1.2 Utilities Supported
Intel®Q77 Utility and Drivers
VGA Drivers
Ethernet Utility and Drivers
RAID Utility
iAMT Utility and Drivers
TPM Utility

SHB120 LAG1155 Full-Size SBC User’s Manual
Jumpers And Connectors
5
CHAPTER 2
JUMPERS AND CONNECTORS
2.1 Board Dimension

SHB120 LAG1155 Full-Size SBC User’s Manual
Jumpers And Connectors
6
2.2 Board Layout

SHB120 LAG1155 Full-Size SBC User’s Manual
Jumpers And Connectors
7
2.3 Jumper Settings
Proper jumper settings configure the SHB120 to meet your application purpose. We are herewith
listing a summary table of all jumpers and default settings for onboard devices, respectively.
Jumper
Description
Jumper Setting
JP3
COM1 Mode Selection : RS-232
Short 3-5 , 4-6
JP4
COM1 Mode Selection : RS-232
Short 3-5 , 4-6
JP5
COM1 Mode Selection : RS-232
Short 1-2
JP1
Audio Amplifier Selection : Disable
Short 1-3 , 2-4
JP8
Clear RTC : Normal
Short 1-2
2.3.1 COM1 Mode Select Jumpers for RS232/422/485 (JP3, JP4, JP5)
These jumpers select the COM1 port’s communication mode to operate RS-232 or RS-422/485
Function
Jumper Setting
JP3
JP4
JP5
RS-232 (Default)
RS-422
RS-485

SHB120 LAG1155 Full-Size SBC User’s Manual
Jumpers And Connectors
8
2.3.2 Audio Amplifier Jumper (JP1)
Function
Jumper Setting
Disable
(Default)
Enable
2.3.3 Clear RTC Jumper (JP8)
You may need to use this jumper to clear the RTC if incorrect RTC settings.
Function
Jumper Setting
Normal
(Default)
Clear ME

SHB120 LAG1155 Full-Size SBC User’s Manual
Jumpers And Connectors
9
2.4 Connectors
Connectors connect this board with other parts of the system. Loose or improper connection
might cause problems. Make sure all connectors are properly and firmly connected.
Here is a summary table shows you all connectors on the board.
Connector
Label
SMBUS
CN1
Floppy Connecter
CN4
Internal USB3.0 Connector port 2/3
CN5
LAN2 External LED
CN6
LAN1 External LED
CN7
USB Port 4/5
CN8
USB Port 6/7
CN10
VGA Port
CN11
Display Port (BOM Option)
CN12
USB Port 8/9
CN13
DVI Connector
CN14
Axiomtek Front Panel
CN15
USB2.0/3.0 Port 1
CN16
Keyboard
CN17
Mouse
CN18
USB2.0/3.0 Port 0
CN19
SYS FAN
FAN1
AUX FAN
FAN2
CPU FAN
FAN3
RJ45 (WG82579LM)
LAN1
RJ45 (WG82574L)
LAN2
Print Connecter
PRINT1
SATA 0 6Gb(SATA3)
SATA1
SATA 1 6Gb(SATA3)
SATA2
SATA Port 2
SATA3

SHB120 LAG1155 Full-Size SBC User’s Manual
Jumpers And Connectors
10
Connector
Label
SATA Port 3
SATA4
SATA Port 4
SATA5
SATA Port 5
SATA6
COM1 Connecter
COM1
COM2 Connecter
COM2
Audio Connector
AUDIO1
ATX Connecter
ATX2
2.4.1 SMBUS Connector (CN1)
Connector SMBUS CN1 is for SMBUS interface support.
Pin
Signal
1
CLOCK
2
N.C
3
GND
4
DATA
5
+5V

SHB120 LAG1155 Full-Size SBC User’s Manual
Jumpers And Connectors
11
2.4.2 Floppy Disk Port Connector (CN4)
The board provides a 34-pin header type connector, CN4, supporting up to two floppy drives. The
floppy drives may be any one of the following types: 5.25" 360KB/1.2MB and 3.5"
720KB/1.44MB/2.88MB.
Pin
Signal
Pin
Signal
Pin
Signal
1
GND
2
Drive Density Select
3
GND
4
No connector
5
GND
6
No connector
7
GND
8
Index#
9
GND
10
Motor enable A#
11
GND
12
No connector
13
GND
14
Drive select A#
15
GND
16
No connector
17
GND
18
Direction#
19
GND
20
STEP#
21
GND
22
Write data#
23
GND
24
Write gate#
25
GND
26
Track 0 #
27
GND
28
Write protect#
29
No connector
30
Read data#
31
GND
32
Head selection#
33
No connector
34
Disk change#

SHB120 LAG1155 Full-Size SBC User’s Manual
Jumpers And Connectors
12
2.4.3 Internal USB Connectors (CN5)
The 19-pin standard Universal Serial Bus (USB 3.0) connectors, CN5 on this board is for installing
versatile USB 3.0 interface peripherals.
Pin
Signal
Pin
Signal
CN5
1
VBUS0
2
SSRX2-
19
VBUS1
3
SSRX2+
18
SSRX3-
4
GND
17
SSRX3+
5
SSTX2-
16
GND
6
SSTX2+
15
SSTX3-
7
GND
14
SSTX3+
8
USB2-
13
GND
9
USB2+
12
USB3-
10
ID
11
USB3+
2.4.4 Internal USB Connectors (CN8, CN10, CN13)
The 10-pin standard Universal Serial Bus (USB 2.0) connectors, CN8/10/13 on this board are for
installing versatile USB interface peripherals.
Pin
Signal
Pin
Signal
CN8
1
9
1
USB_PWR
2
USB_PWR
3
USB4-
4
USB5-
5
USB4+
6
USB5+
7
GND
8
GND
9
GND
10
GND

SHB120 LAG1155 Full-Size SBC User’s Manual
Jumpers And Connectors
13
2.4.5 LAN2 LED Connectors (CN6)
Pin
Signal
1
+ 3.3V
2
LINK_ACT LED(-)
3
100, Low Active
4
+3.3V
5
1000, Low Active
2.4.6 LAN1 LED Connectors (CN7)
Pin
Signal
1
+ 3.3V
2
LINK_ACT LED(-)
3
100, Low Active
4
+3.3V
5
1000, Low Active
2.4.7 DB15 CRT Connector (CN11) Co-layout with CN12
CN11 is a DB15 connector commonly used for the CRT Monitor.
Pin
Signal
Pin
Signal
Pin
Signal
1
Red
2
Green
3
Blue
4
N.C
5
GND
6
DETECT
7
GND
8
GND
9
VCC
10
GND
11
N.C
12
DDC DATA
13
Horizontal Sync
14
Vertical Sync
15
DDC CLK
15
6
11
10
15
Table of contents
Other Enoch Systems Motherboard manuals


