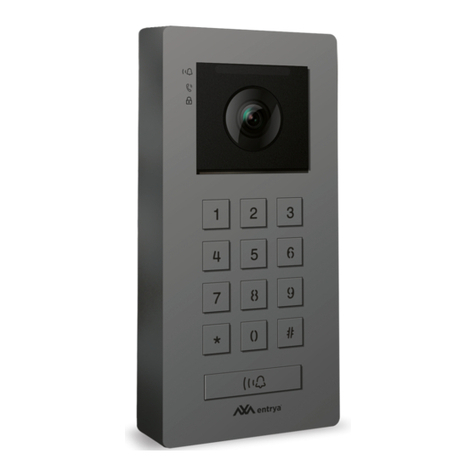
Entrya FACILA FP135 User manual

FACILA
FP135 Binnenpost
FP135 Poste intérieure
FP135 Monitor
Installatie- en gebruikershandleiding
Mode d’emploi et installation
Installation and user manual

2
Alle teksten en afbeeldingen in deze handleiding zijn auteursrechtelijk beschermd en intellectueel eigendom van ENTRYA BVBA.
Tous les textes et images dans ce manuel sont protégés par le droit d’auteur et la propriété intellectuelle d’ENTRYA BVBA.
All texts and images in this manual are protected by copyright laws and intellectual property of ENTRYA BVBA.
Index P.
Voorzorgsmaatregelen Mesures de précaution Precautions 3
Gebruik volgens de
voorschriften
Utilisation selon les
prescriptions
Utilization according
the prescriptions 4
Installatie-
waarschuwingen
Avertissements
d’installation Installation Warnings 4-5
Installatie Installation Installation 5
Omschrijving Description Description 6-7
Hoofdmenu Menu principal Main menu 8
Gebruik Utilisation Usage 9
Intercom Interphone Intercom 10
Adres instellen Congurer l’adresse Address setting 11
Eindweerstand
instellen
Congurer résistance
de terminaison Set terminal switch 12
MASTER/SLAVE
instellen
Congurer MAÎTRE/
ESCLAVE Set MASTER/SLAVE 12-13
Beltonen en volume
instellen
Congurer les sonne-
ries et le volume
Congure tones and
volume 13
Scherm en
gespreksvolume
aanpassen
Adapter l’écran et le
volume d’appel
Change screen and
volume 14
Datum en tijd instellen Congurer Date et
temps Set Date and time 14
Eigenschappen Spécications Specications 15
Extra functies Fonctions
supplémentaires Extra functions 16

3
Alle teksten en afbeeldingen in deze handleiding zijn auteursrechtelijk beschermd en intellectueel eigendom van ENTRYA BVBA.
Tous les textes et images dans ce manuel sont protégés par le droit d’auteur et la propriété intellectuelle d’ENTRYA BVBA.
All texts and images in this manual are protected by copyright laws and intellectual property of ENTRYA BVBA.
Voorzorgsmaatregelen
Mesures de précaution
Precautions
Lees deze handleiding aandachtig voor installatie of gebruik van het toestel.
Entrya Technologies BVBA is niet verantwoordelijk voor een onjuiste installatie en het niet voldoen
aan de lokale elektrische- en bouwvoorschriften.
Entrya Technologies BVBA kan niet aansprakelijk gesteld worden voor beschadigingen en
bedrijfsstoringen, die voortvloeien uit het feit dat de montage- en de gebruiksaanwijzing niet in acht
genomen worden.
Bewaar alle onderdelen en deze handleiding voor later gebruik.
• Voor werkzaamheden altijd het toestel spanningsvrij maken en beveiligen tegen opnieuw
inschakelen.
• Nooit een beschadigd toestel in gebruik nemen.
• Het is niet toegestaan onderdelen te wijzigen anders dan in deze handleiding omschreven.
• Neem contact op met een gekwaliceerde installateur als een storing niet kan worden verholpen.
Open het toestel niet!
Lisez attentivement ce mode d’emploi avant d’installer ou d’utiliser les appareils.
Entrya Technologies SPRL n’est pas responsable des installations incorrectes ni du non-respect des
prescriptions locales en matière d’électricité et de construction.
Entrya Technologies SPRL décline toute responsabilité pour les dommages et problèmes
d’exploitation découlant du non-respect des instructions de montage et d’utilisation.
Conservez tous les composants et le présent manuel pour un usage ultérieur.
• Avant d’entamer des travaux, l’appareil doit toujours être mis hors tension et protégé contre un
branchement accidentel.
• Ne mettez jamais un appareil endommagé en service.
• Il est interdit de modier des composants autrement que dans le respect des dispositions de ce
mode d’emploi.
• Contactez un installateur qualié si vous ne pouvez pas réparer un dérangement. N’ouvrez
surtout pas l’appareil !
Read this manual carefully before installation or before using the device.
Entrya Technologies BVBA is not responsible for an incorrect installation or not following local
electrical and building regulations.
Entrya Technologies BVBA is not liable for damages and defects that are caused by not following
the installation and userguide.
Save all parts and this manual for later use.
• Make sure the device is not connected to the power supply before working on the device.
• Never use a damaged device.
• It is not allowed to change parts other then described in this manual.
• Contact a qualied installer when an error can not be xed. Never open the device!
NL
FR
EN

4
Alle teksten en afbeeldingen in deze handleiding zijn auteursrechtelijk beschermd en intellectueel eigendom van ENTRYA BVBA.
Tous les textes et images dans ce manuel sont protégés par le droit d’auteur et la propriété intellectuelle d’ENTRYA BVBA.
All texts and images in this manual are protected by copyright laws and intellectual property of ENTRYA BVBA.
Gebruik volgens de voorschriften
Installatiewaarschuwingen
Avertissements d’installation
Utilisation selon les prescriptions
Utilization according the prescriptions
• Voor schade, die ontstaat door ander gebruik, stelt de producent zich niet aansprakelijk. Het
risico wordt uitsluitend gedragen door exploitant.
• Het toestel mag uitsluitend in technisch perfecte staat en volgens de voorschriften worden
• gebruikt, bovendien met inachtneming van de veiligheids- en gevarenrichtlijnen en de montage-
en gebruiksaanwijzing.
• Storingen, die een veilig gebruik onmogelijk maken, moeten onmiddellijk worden verholpen.
• Le producteur décline toute responsabilité pour les dommages causés par une utilisation non
conforme. Le risque est supporté exclusivement par l’exploitant.
• L’appareil peut être utilisé uniquement en parfait état technique et selon les prescriptions, et en
respectant par ailleurs les directives de sécurité et de danger, et les instructions de montage et
d’utilisation.
• Il faut immédiatement remédier aux problèmes qui rendent impossible une utilisation sûre.
• The producer cannot be held responsible for damages that are caused by usage out of the scope
of this manual. The dealer is fully responsible.
• The device is only to be used in technical perfect condition and according to the prescriptions,
with respect to the safety and danger directives and installation and user manual.
• Malfunctions, that make safe use impossible, should be solved immediately.
• Het toestel uitsluitend in droge, gesloten ruimtes toepassen en niet in plaatsen met
explosiegevaar.
• Plaats het toestel nooit vlak naast of boven een radiator of andere warmtebron.
• Het toestel mag niet worden ingebouwd zonder voldoende ventilatie, de openingen achteraan het
toestel mogen niet worden afgedekt.
• Plaats het toestel niet in direct zonlicht.
• Bescherm het toestel tegen trillingen en vallen.
• Er kunnen storingen optreden in het beeld of geluid als het toestel of de bedrading te dicht bij
een elektromagnetisch veld wordt gemonteerd. Bijvoorbeeld: microgolfoven, TV, computer,..
• Het toestel moet beschermd worden tegen vocht, hoge temperaturen, stof en bijtende
producten.
• L’appareil peut être utilisé exclusivement dans les locaux secs et dans des zones ne présentant
aucun danger d’explosion.
• Ne placez jamais l’appareil à côté ou au-dessus d’un radiateur ou d’une autre source de chaleur.
• L’appareil ne peut pas être encastré sans une source de ventilation susante.
• N’exposez jamais l’appareil à la lumière directe du soleil.
• Protégez l’appareil contre les vibrations et les chutes.
• L’image ou le son peuvent être perturbés si l’appareil ou le câblage sont installés trop près d’un
champ électromagnétique. Par exemple : un four à micro-ondes, un téléviseur, un ordinateur…
• Protégez l’appareil contre : l’eau, la condensation, les températures extrêmement élevées, la
poussière et les gaz agressifs.
NL
NL
FR
FR
EN

5
Alle teksten en afbeeldingen in deze handleiding zijn auteursrechtelijk beschermd en intellectueel eigendom van ENTRYA BVBA.
Tous les textes et images dans ce manuel sont protégés par le droit d’auteur et la propriété intellectuelle d’ENTRYA BVBA.
All texts and images in this manual are protected by copyright laws and intellectual property of ENTRYA BVBA.
Installation Warnings
Installatie
Installation
Installation
• Only use the device in dry, closed spaces and not in locations that have explosion hazards.
• Never install the device next to or above a heater.
• The device may never be ush mounted without sucient ventilation, do not cover the openings
on the back of the device.
• Do not install the device in direct sunlight.
• Protect the device against vibrations and dropping.
• Video and audio may be inuenced if the wiring is to close to an electromagnetic eld.
For example: microwave, TV, computer, ...
• Device must be protected against moist, high temperatures, dust and acids.
1. Bevestig de bodemplaat met geschikte schroeven tegen de muur. Breng de kabel door de
kabeldoorvoer en sluit aan op de connector.
2. Haak het frontpaneel in de linkerzijde van de bodemplaat.
3. Draai het ingehaakt frontpaneel tot het klikt in de bodemplaat.
Ga verder met het instellen van het adres (p.11), instellen van de eindweerstand (p.12) en de
MASTER/SLAVE conguratie (p.12-13).
1. Fixez la plaque de fond avec les vis. Connectez le câble pour le BUS à le connecteur.
2. Accrochez le panneau avant dans le coté gauche de la plaque de fond.
3. Cliquez le panneau avant avec un mouvement de rotation dans la plaque de fond.
Continuez avec l’adressage (p.11), la résistance de terminaison (p.12) et la conguration MAÎTRE/
ESCLAVE (p.12-13).
1. Fix the bottom cover on the wall with screws. Connect the cable to the connector in the bottom
cover.
2. Hook the front cover in the left side of the bottom cover.
3. Turn the hooked front panel until it clicks into the bottom cover.
Continue with setting the address (p.11), the terminal switch (p.12) and the MASTER/SLAVE
conguration (p.12-13).
EN
NL
FR
EN
1 2 3

6
Alle teksten en afbeeldingen in deze handleiding zijn auteursrechtelijk beschermd en intellectueel eigendom van ENTRYA BVBA.
Tous les textes et images dans ce manuel sont protégés par le droit d’auteur et la propriété intellectuelle d’ENTRYA BVBA.
All texts and images in this manual are protected by copyright laws and intellectual property of ENTRYA BVBA.
1
10
2
3 4 5 6 7 8 9
Omschrijving
Description
Description
NL
FR
EN
1. Microfoon 6. Omhoog-toets
2. LCD-scherm 7. Omlaag-toets
3. Spreek- / Monitor-toets 8. Instellingen-toets
4. Ontgrendeltoets 9. Indicatie-LED
5. Oproeptoets / Ontgrendeltoets Slot 2 10. Luidspreker
1. Microphone 6. En Haut
2. Ecran LCD 7. En Bas
3. Bouton Parler / Ecran 8. Bouton de conguration
4. Bouton de déverrouillage 9. LED d’indication
5. Bouton d’appel / déverrouillage 2 10. Haut-Parleur
1. Microphone 6. Up Button
2. LCD Display 7. Down Button
3. Talk/Monitor Button 8. Settings Button
4. Unlock Button 9. StatusLED
5. Call Button / Unlock 2nd Button 10. Speaker

7
Alle teksten en afbeeldingen in deze handleiding zijn auteursrechtelijk beschermd en intellectueel eigendom van ENTRYA BVBA.
Tous les textes et images dans ce manuel sont protégés par le droit d’auteur et la propriété intellectuelle d’ENTRYA BVBA.
All texts and images in this manual are protected by copyright laws and intellectual property of ENTRYA BVBA.
BUS
DIP
Omschrijving
Description
Description
NL
FR
EN
DIP BUS
DIP-schakelaar voor het instellen van het adres Aansluitconnector voor de BUS-signaallijn
SW+ / SW- EXT-RING / GND
Drukknop-ingang Bel-uitgang (max 12Vdc, 50mA)
DIP BUS
Commutateur DIP pour réglage de l’addresse Connecteur pour connecter sur la ligne BUS
SW+ / SW- EXT-RING / GND
Bouton Poussoir Sortie sonnerie (12Vcc max, 50mA)
DIP BUS
DIP-switch for setting the address Connector for connecting to the BUS-line
SW+ / SW- EXT-RING / GND
Pushbutton External Ring (max 12Vdc, 50mA)
ON
123 4 56
Output Connector
SW+
(white)
● Gereserveerd
(yellow)
●SW-
(green)
●GND
(black)
●EXT-RING
(red)

8
Alle teksten en afbeeldingen in deze handleiding zijn auteursrechtelijk beschermd en intellectueel eigendom van ENTRYA BVBA.
Tous les textes et images dans ce manuel sont protégés par le droit d’auteur et la propriété intellectuelle d’ENTRYA BVBA.
All texts and images in this manual are protected by copyright laws and intellectual property of ENTRYA BVBA.
MonitorL ight Intercom Setting
14
2
3
Hoofdmenu
Menu principal
Main menu
NL
FR
EN
Druk op Instelling, Pijl Omhoog of Omlaag om het hoofdmenu op te roepen.
1. Monitor Beeld van de buitenpost oproepen
2. Licht Trapverlichting bedienen (in combinatie met DT210/A-module)
3. Intercom Intercom-functie
4. Instelling Instellingenmenu
Appuyez sur Réglage, le êche en haut ou en bas pour ouvrir le menu principal.
1. Moniteur Voir vidéo de la poste extérieure
2. Lumière Commutateur étagé
3. Interphone Fonction interphone
4. Réglage menu de la conguration
Press Setting, Arrow Up or Down to open the main menu.
1. Monitor View outdoor post camera
2. Light Staircase Light
3. Intercom Intercom function
4. Setting Open Settings menu

9
Alle teksten en afbeeldingen in deze handleiding zijn auteursrechtelijk beschermd en intellectueel eigendom van ENTRYA BVBA.
Tous les textes et images dans ce manuel sont protégés par le droit d’auteur et la propriété intellectuelle d’ENTRYA BVBA.
All texts and images in this manual are protected by copyright laws and intellectual property of ENTRYA BVBA.
1. Appuyez sur le bouton d’appel du poste extérieur. L’image de la caméra est aché sur le poste
intérieur et la sonnerie met en marche.
2. Appuyez sur le bouton Parler pour démarrer la conversation. Appuyez encore une fois sur le
bouton Parler pour terminer la conversation. L’écran s’éteint automatiquement si on ne répond
pas à l’appel après 40 secondes.
3. Pendant la conversation, appuyez sur le bouton de déverrouillage pour activer la serrure.
Si’l y a deux serrures, appuyez sur le bouton de déverrouillage 2 pour activer la deuxième
serrure.
4. En mode standby, appuyez sur le bouton Parler pour avoir l’image de la caméra du poste
extérieur. S’il y a plusieurs postes extérieurs sont installés, appuyez sur pour changer entre
les postes.
1. Druk op de oproeptoets van de buitenpost. De binnenpost geeft een geluidsignaal en geeft
tegelijk het beeld van de buitenpost weer.
2. Druk op de Spreek-/Monitor-toets om een gesprek te starten. Druk nogmaals op de Spreek-/
Monitor-toets om het gesprek te beëindigen. Indien de oproep onbeantwoord blijft, wordt het
scherm na 40 seconden uitgeschakeld.
3. Tijdens een gesprek, druk op de Ontgrendeltoets om het slot te bedienen voor een bezoeker.
Indien twee sloten aangesloten zijn, druk dan Ontgrendeltoets 2 om het tweede slot te
bedienen.
4. Wanneer de binnenpost standby is, druk op de Spreek-/Monitor-toets om beeld van de
buitenpost op te roepen. Indien er meerdere buitenposten geïnstalleerd zijn, druk op om te
wisselen tussen de verschillende posten.
1. Press the Call-button on the outdoor station, the monitor rings and at the same time the screen
will display an image of the visitor(s).
2. Press Talk/Mon-button on the monitor to communicate with the visitor. After nishing your
conversation press Talk/Mon-button again to end the communication. If nobody answers the
call, the screen will be turned o automatically after 40 seconds.
3. During conversation, press Unlock-button to open the door for the visitor. If two locks are
connected, press Unlock 2-button to release the second lock.
4. When the monitor is in standby mode, press Talk/Mon-button. The display will show the video
of the outdoor station. When multiple stations are installed, use the to switch the door
station.
Gebruik
Utilisation
Usage
NL
FR
EN

10
Alle teksten en afbeeldingen in deze handleiding zijn auteursrechtelijk beschermd en intellectueel eigendom van ENTRYA BVBA.
Tous les textes et images dans ce manuel sont protégés par le droit d’auteur et la propriété intellectuelle d’ENTRYA BVBA.
All texts and images in this manual are protected by copyright laws and intellectual property of ENTRYA BVBA.
Het is mogelijk om een oproep te doen tussen twee binnenposten in hetzelfde appartement of in
dezelfde installatie.
Een gesprek voeren tussen twee binnenposten in dezelfde installatie
1. In Standby-modus, druk op de Insteltoets om het hoofdmenu te openen.
2. Druk op de Oproeptoets om het Intercom-menu te openen.
3. Druk nogmaals op de Oproeptoets om Intercom tussen appartementen te starten.
4. Kies het Gebouw en Appartementsnummer en druk op de Spreektoets om een oproep te
starten.
Een gesprek voeren tussen twee binnenposten in hetzelfde appartement
1. In Standby-modus, druk op de Insteltoets om het hoofdmenu te openen.
2. Druk op de Oproeptoets om het Intercom-menu te openen.
3. Druk op de Pijl Omhoog om Interne Oproep te selecteren.
4. Alle binnenposten in hetzelfde appartement worden tegelijk opgeroepen. Het gesprek wordt
gevoerd met de binnenpost die het eerst de oproep beantwoordt.
C’est possible pour faire un appel entre deux postes intérieurs dans le même appartement ou le
même installation.
Faire un appel entre deux postes intérieurs dans le même installation
1. En mode Standby, appuyez sur le bouton Réglage pour ouvrir le menu principal.
2. Appuyez sur le bouton d’Appel pour ouvrir le menu Interphone.
3. Appuyez encore une fois sur le bouton d’Appel pour démarrer l’interphone.
4. Choississez le Bâtiment et le numéro d’appartement et appuyez sur le bouton Parler pour
démarrer la conversation.
Faire un appel entre deux postes intérieurs dans le même appartement
1. En mode Standby, appuyez sur le bouton Réglage pour ouvrir le menu principal.
2. Appuyez sur le bouton d’Appel pour ouvrir le menu Interphone.
3. Appuyez sur le êche en haut pour sélectionner l’appel intern.
4. Tous les postes intérieurs dans le même appartement sont appelé. La conversation est démarré
avec le poste intérieur qui répond l’appel.
It is possible to call between monitors in the same appartment or in the same installation.
Calling between two monitors in the same installation
1. In Standby-modus, press the Setting button to open the main menu.
2. Press the Call button to open the Intercom menu.
3. Press the Call button again to start an intercom between to appartments.
4. Choose the Building and Appartment and press the Talk/Mon button to start a conversation.
Calling monitors in the same appartment
1. In Standby-modus, press the Setting button to open the main menu.
2. Press the Call button to open the Intercom menu.
3. Press the Arrow Up to select Inner Call.
4. All monitors in the same appartment are called. The conversation is started with the monitors
that answers the call.
Intercom
Interphone
Intercom
NL
FR
EN

11
Alle teksten en afbeeldingen in deze handleiding zijn auteursrechtelijk beschermd en intellectueel eigendom van ENTRYA BVBA.
Tous les textes et images dans ce manuel sont protégés par le droit d’auteur et la propriété intellectuelle d’ENTRYA BVBA.
All texts and images in this manual are protected by copyright laws and intellectual property of ENTRYA BVBA.
Alle binnenposten vereisen een adres. Alle binnenposten in hetzelfde appartement krijgen hetzelfde
adres en worden vervolgens als MASTER of SLAVE ingesteld. Stel het adres van de binnenpost in aan
de hand van onderstaande tabel:
Tous les postes internes demandent une adress. Tous les postes internes dans le même appartement
reçoivent le même adresse et sont congurés comme Maître ou Esclave. Congurez correctement les
commutateurs DIP à l’aide du tableau suivant:
All monitors require an address. All monitors in the same appartement receive the same address and
need to be congured as MASTER or SLAVE. Refer to the following table to set the address:
Adres instellen
Congurer l’adresse
Address Setting
NL
FR
EN
ADR DIP ADR DIP ADR DIP
0
ON
123 4 5614
ON
123 4 5628
ON
123 4 56
1
ON
123 4 5615
ON
123 4 5629
ON
123 4 56
2
ON
123 4 5616
ON
123 4 5630
ON
123 4 56
3
ON
123 4 5617
ON
123 4 5631
ON
123 4 56
4
ON
123 4 5618
ON
123 4 56
5
ON
123 4 5619
ON
123 4 56
6
ON
123 4 5620
ON
123 4 56
7
ON
123 4 5621
ON
123 4 56
8
ON
123 4 5622
ON
123 4 56
9
ON
123 4 5623
ON
123 4 56
10
ON
123 4 5624
ON
123 4 56
11
ON
123 4 5625
ON
123 4 56
12
ON
123 4 5626
ON
123 4 56
13
ON
123 4 5627
ON
123 4 56

12
Alle teksten en afbeeldingen in deze handleiding zijn auteursrechtelijk beschermd en intellectueel eigendom van ENTRYA BVBA.
Tous les textes et images dans ce manuel sont protégés par le droit d’auteur et la propriété intellectuelle d’ENTRYA BVBA.
All texts and images in this manual are protected by copyright laws and intellectual property of ENTRYA BVBA.
Zet DIP6 AAN indien de binnenpost de laatste is op de BUS.
Indien er meerdere binnenposten in hetzelfde appartement worden geïnstalleerd, hebben deze
hetzelfde adres. De eerste binnenpost is de MASTER (standaard) en de andere worden respectievelijk
ingesteld als SLAVE 1, 2 en 3.
1. In Standby-modus, druk 3 sec op de Insteltoets.
2. Geef code 8000: MASTER
8001: SLAVE 1
8002: SLAVE 2
8003: SLAVE 3
in met behulp van de pijltjes en druk op de Oproeptoets om te bevestigen.
Stel met code 8006 in dat het beeld van de buitenpost wordt weergegeven op de SLAVE-monitor
(standaard is dit niet actief).
S’il y a plusieurs postes internes installés dans le même appartement, ils ont le même adresse. Le
premier poste interne est le maître (par défaut), les autres postes internes sont respectivement
Esclave 1, 2 et 3.
1. En mode Standby, appuyez 3 sec sur le bouton Réglage.
2. Entrez code 8000: MAÎTRE
8001: ESCLAVE 1
8002: ESCLAVE 2
8003: ESCLAVE 3
avec les êches et appuyez sur le bouton d’Appel pour conrmer.
Pour activer le vidéo sur poste esclave s’il y a un appel, congurez le code 8006 (OFF par défaut).
Activez DIP6 si le poste interne est installé à la n de la ligne BUS.
Set DIP6 ON if the monitor is installed on the end of the BUS.
Eindweerstand instellen
MASTER / SLAVE instellen
Congurer MAÎTRE / ESCLAVE
Congurer résistance de terminaison
Set Terminal switch
NL
NL
FR
FR
EN
ON
123 4 56

13
Alle teksten en afbeeldingen in deze handleiding zijn auteursrechtelijk beschermd en intellectueel eigendom van ENTRYA BVBA.
Tous les textes et images dans ce manuel sont protégés par le droit d’auteur et la propriété intellectuelle d’ENTRYA BVBA.
All texts and images in this manual are protected by copyright laws and intellectual property of ENTRYA BVBA.
When multiple monitors are installed in the same appartment, these will have the same address. The
rst monitor is the MASTER (default) and the others have to be congured as ESCLAVE 1, 2 and 3.
1. In Standby-mode, press 3s on the Setting button.
2. Enter code 8000: MASTER
8001: SLAVE 1
8002: SLAVE 2
8003: SLAVE 3
with the arrows and press the Call-button to conrm.
Use code 8006 to activate image on the slave monitor when a call is made (this is OFF by default).
1. In Standby-modus, druk op de Insteltoets.
2. Druk 1x (Oproep Buitenpost) of 2x (Intercom Oproep) op de Insteltoets om te selecteren.
3. Gebruik de pijltjestoetsen om een beltoon te kiezen
1. In Standby-modus, druk op de Insteltoets.
2. Druk 3x op de Insteltoets om het Toonvolume te selecteren.
3. Gebruik de pijltjestoetsen om het volume in te stellen.
1. En mode Standby, appuyez sur le bouton Réglage.
2. Appuyez 1x (Appel poste externe) ou 2x (Appel Interphone) sur le bouton Réglage.
3. Utilise les êches pour sélectionner un sonnerie.
4. En mode Standby, appuyez sur le bouton Réglage.
5. Appuyez 3x sur le bouton Réglage pour sélectionner le volume.
6. Utilise les êches pour congurer le volume.
1. In Standby-mode, press on the Setting button.
2. Press 1x (Call Outdoorstation) or 2x (Intercom Call) on the Setting button to select.
3. Use the arrows to select a tone.
4. In Standby-mode, press on the Setting button.
5. Press 3x on the Setting button to select the volume.
6. Use the arrows to determine the volume.
Set MASTER / SLAVE
Beltonen en Toonvolume instellen
Congurer les sonneries et le volume
Congure Tones and volume
EN
NL
FR
EN

14
Alle teksten en afbeeldingen in deze handleiding zijn auteursrechtelijk beschermd en intellectueel eigendom van ENTRYA BVBA.
Tous les textes et images dans ce manuel sont protégés par le droit d’auteur et la propriété intellectuelle d’ENTRYA BVBA.
All texts and images in this manual are protected by copyright laws and intellectual property of ENTRYA BVBA.
Tijdens beeldweergave of een gesprek is het mogelijk om het contrast, de helderheid,
kleurverzadiging en gespreksvolume aan te passen.
1. Tijdens een gesprek / beeldweergave, druk op de Insteltoets.
2. Druk verschillende malen op de Oproeptoets om te kiezen tussen de verschillende functies.
3. Pas de waarden aan met de pijltjestoetsen.
Pendant l’achage d’image ou un appel, c’est possible pour adapter, le contraste, luminosité, palette
des couleurs et volume de haut-parleur.
1. Pendant un appel / l’achage, appuyez sur le bouton Réglage.
2. Appuyez plusieurs fois sur le bouton d’appel pour sélectionner les fonctions.
3. Adaptez les valeurs avec les êches.
During a call or monitoring it is possible to change the contrast, brightness, saturation and talking
volume.
1. During a call / monitoring, press on the Setting button.
2. Press several times on the Call button to select the functions.
3. Change the values with the arrows.
Scherm en gespreksvolume aanpassen
Datum & tijd instellen
Congurer date et temps
Adapter l’écran et le volume d’appel
Change screen and volume
NL
NL
FR
FR
EN
1. In Standby-modus, druk op de Insteltoets.
2. Druk 4x op de Insteltoets om Reset naar fabrieksinstellingen te selecteren.
3. Druk 3s op de ontgrendeltoets.
4. Gebruik de verschillende toetsen om de datum en tijd in te stellen.
1. En mode Standby, appuyez sur le bouton Réglage.
2. Appuyez 4x le bouton Réglage pour sélectionner le menu Réinitialisation.
3. Appuyez 3s sur le bouton de déverrouillage.
4. Utilisez tous les boutons pour congure la date et le temps.
1. In Standby-mode, press on the Setting button.
2. Press 4x on the Setting button to select the Reset function.
3. Press 3s on the unlock button.
4. Use all buttons to set the date and the time.
Set date and time
EN

15
Alle teksten en afbeeldingen in deze handleiding zijn auteursrechtelijk beschermd en intellectueel eigendom van ENTRYA BVBA.
Tous les textes et images dans ce manuel sont protégés par le droit d’auteur et la propriété intellectuelle d’ENTRYA BVBA.
All texts and images in this manual are protected by copyright laws and intellectual property of ENTRYA BVBA.
Eigenschappen
Spécications
Specications
NL
FR
EN
Spanning - Power Supply - Tension DC 20-28V
Stroomverbruik in rust
Consommation en répos
Power consumption stanby
<7mA
Max stroomverbruik
Consommation max
Max Power consumption
<145mA
Scherm - Ecran - Screen 4.3” LCD (800x480px)
Video - Vidéo - Video 1p-p, 75Ohm, CCIR standard
Afmetingen - Dimensions - Dimensions 105(H)x167(W)x17(D)mm

16
Alle teksten en afbeeldingen in deze handleiding zijn auteursrechtelijk beschermd en intellectueel eigendom van ENTRYA BVBA.
Tous les textes et images dans ce manuel sont protégés par le droit d’auteur et la propriété intellectuelle d’ENTRYA BVBA.
All texts and images in this manual are protected by copyright laws and intellectual property of ENTRYA BVBA.
1. In Standby-modus, druk 3 seconden op de Insteltoets om het installatiemenu te openen.
2. Kies in de onderstaande tabel de gewenste functie.
3. Druk op de Oproeptoets om je ingave te bevestigen.
1. En mode Standby, appuyez 3 sec sur le bouton Réglage pour ouvrir le menu d’installation.
2. Choississez dans le tableau suivant le fonction souhaité.
3. Appuyez sur le bouton d’appel pour conrmer.
1. In Standby mode, press 3 seconds on the Setting button to open the installation menu.
2. Choose in the table below the desired function.
3. Press the Call button to conrm.
Extra functies
Fonctions supplémentaires
Extra functions
NL
FR
EN
Code
2419 Reset naar Fabrieksinstellingen
Restaurer conguration d’usine
Factory Reset
2414 RM Parameter Set
3006-3600 Weergavetijd / Temps de l’achage / Monitor Time
8008-8009 Datumweergave / Mode Date / Date Mode
8008: MM:DD:YYYY
8009: DD:MM:YYYY
8010-8011 Ontgrendelmode / Mode de déverrouillage / Unlock Mode
8010: NO
8011: NC
8012-8013 Tijdweergave / Achage du temps / Time Mode
8012: 12H
8013: 24H
8016-8017 Bypass Setting
8016: Binnenpost is beschikbaar tijdens BUS-communicatie
8017: Binnenpost is uitgeschakeld tijdens BUS-communicatie
8018-8020 Beeldformaat / Format de vidéo / Video Format
8401-8499 Ontgrendeltijd / Temps de déverrouillage / Unlock Time (1-99s)
9015-9016 Intercom / Interphone ON/OFF
9017-9018 Geheugen / Mémoire / Memory OFF/ON
9101-9104 Aantal Buitenposten / Nombres des postes ext. / Door Stations Quantity
9200-9216 Aantal Cameras / Nombres des caméras / CAM Quantity
Table of contents
Other Entrya Intercom System manuals
