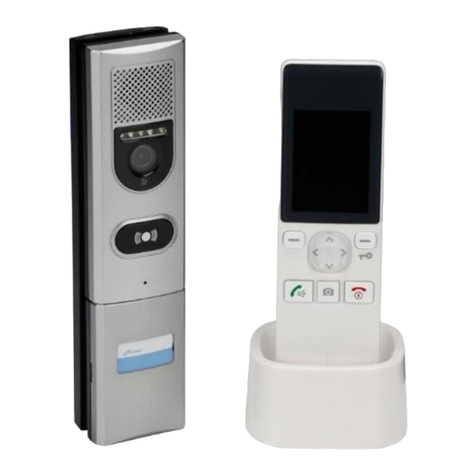
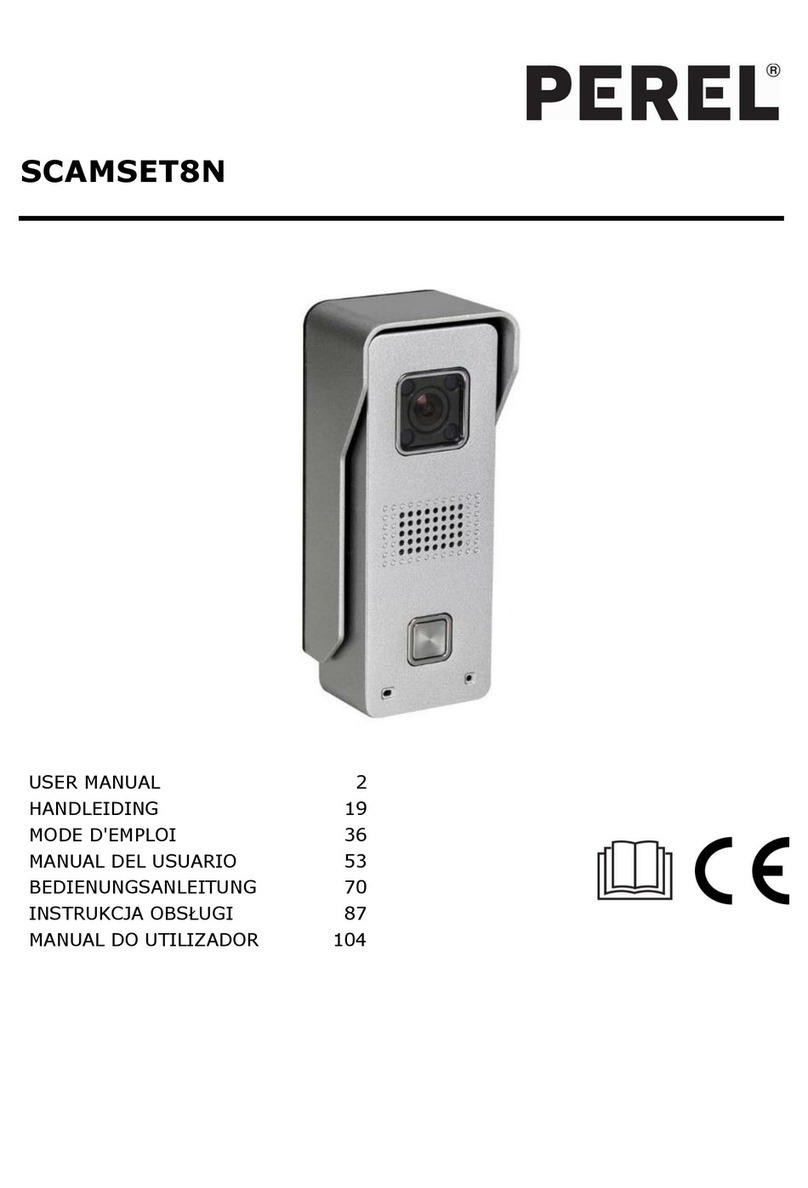
Perel SCAMSET8 User manual

SCAMSET8
WIFI VIDEO INTERCOM DOOR PHONE SYSTEM
WIFI-INTERCOM MET VIDEO-OPNAME
INTERPHONE WIFI AVEC ENREGISTREMENT VIDÉO
VIDEOPORTERO CON WIFI Y GRABACIÓN DE VÍDEO
WIFI-VIDEO-TÜRSPRECHANLAGE MIT VIDEO-AUFNAHME
SISTEMA DE VÍDEO PORTEIRO COM WIFI E GRAVAÇÃO DE VÍDEO
VIDEOCITOFONO WIFI
USER MANUAL 3
GEBRUIKERSHANDLEIDING 18
MODE D'EMPLOI 33
MANUAL DEL USUARIO 48
BEDIENUNGSANLEITUNG 63
MANUAL DO UTILIZADOR 78
MANUALE UTENTE 93

SCAMSET8
V. 03 –25/02/2016 2 ©Velleman nv

SCAMSET8
V. 03 –25/02/2016 3 ©Velleman nv
USER MANUAL
1. Introduction
To all residents of the European Union
Important environmental information about this product
This symbol on the device or the package indicates that disposal of the device after its lifecycle could
harm the environment. Do not dispose of the unit (or batteries) as unsorted municipal waste; it
should be taken to a specialized company for recycling. This device should be returned to your
distributor or to a local recycling service. Respect the local environmental rules.
If in doubt, contact your local waste disposal authorities.
Thank you for choosing Perel! Please read the manual thoroughly before bringing this device into service. If the
device was damaged in transit, do not install or use it and contact your dealer.
2. Safety Instructions
Keep this device away from children and unauthorized users.
This appliance is not intended for use by persons (including children) with reduced physical, sensory
or mental capabilities, or lack of experience and knowledge, unless they have been given supervision
or instruction concerning use of the appliance by a person responsible for their safety.
Children shall be supervised to ensure that they do not play with the appliance.
Risk of electroshock when opening the cover. Touching live wires can cause life-threatening
electroshocks. Do not disassemble or open the housing yourself. Have the device repaired by qualified
personnel.
Be very careful during the installation: touching live wires can cause life-threatening electroshocks.
Do not crimp the power cord and protect it against damage.
Warning! If the power cord is damaged, it must be replaced by the manufacturer, its service agent,
or similarly qualified persons in order to avoid any hazard.
Always disconnect mains power when the device is not in use or when servicing or maintenance
activities are performed. Handle the power cord by the plug only.
There are no user-serviceable parts inside the device. Refer to an authorized dealer for service and/or
spare parts.
Have the device installed/repaired by a qualified person.
Do not use the device when damage to housing or cables is noticed. Do not attempt to service the
device yourself but contact an authorised dealer.
3. General Guidelines
Refer to the Velleman®Service and Quality Warranty on the last pages of this manual.
Keep this device away from dust and extreme temperatures.
Protect this device from shocks and abuse. Avoid brute force when operating the device.
Familiarise yourself with the functions of the device before actually using it.
All modifications of the device are forbidden for safety reasons. Damage caused by user modifications to
the device is not covered by the warranty.
Only use the device for its intended purpose. Using the device in an unauthorised way will void the
warranty.
Damage caused by disregard of certain guidelines in this manual is not covered by the warranty and the
dealer will not accept responsibility for any ensuing defects or problems.
Do not use outside the technical specifications.

SCAMSET8
V. 03 –25/02/2016 4 ©Velleman nv
Nor Velleman nv nor its dealers can be held responsible for any damage (extraordinary, incidental or
indirect) –of any nature (financial, physical…) arising from the possession, use or failure of this product.
Due to constant product improvements, the actual product appearance might differ from the shown images.
Product images are for illustrative purposes only.
Keep this manual for future reference.
4. Features
Plug and Play video door phone system with wifi and LAN connection. Use your smartphone to see, talk and
open the door for a visitor, even if you are not at home. The setup is easy, Plug and Play via free apps for
Android or iOS. The smartphone will give a notification alert when somebody presses the button.
The video door phone can record video by motion detection or trigger from the push button.
A classic doorbell can be connected to the relay output to warn you when your smartphone is not operative.
camera with infrared LEDs for night vision
automatic IR filter: the filter blocks infrared light during daytime, so it cannot distort the colour image.
720p video quality
full duplex two-way audio
video recording on microSD card
remote door unlock function via your smartphone
audio priority technology: if the network is not good, the audio has priority
Plug and Play setup via QR code or network scan function
solid and vandal-proof metal housing
5. Overview
1
IR LED
6
microphone
2
lens
7
tamper switch
3
speaker
8
reset button
4
CdS photoresistor
9
thread hole
5
doorbell button

SCAMSET8
V. 03 –25/02/2016 5 ©Velleman nv
6. Wall-Mounting
Please ensure a good wifi signal before installing!
Make sure the microSD card is inserted.
1. Choose your mounting spot. Drill a hole for the wires.
2. Fix the harness using two screws.
3. Lead the wires through the hole in the harness and the wall. Install the camera unit into the harness and
fix with the screw.
4. Proceed with the connection of the system.

SCAMSET8
V. 03 –25/02/2016 6 ©Velleman nv
7. Wiring the System
1. Connect the antenna and fix it on the wall inside the house.
2. Connect the wires.
connection scheme description
a
antenna
g
doorbell relay NO (grey)
b
power in DC +12 V (red)
h
Net RJ45 (orange + white)
c
power in DC -12 V (black)
i
Net RJ45 (orange)
d
lock relay COM (yellow)
j
Net RJ45 (green + white)
e
lock relay NO (purple)
k
Net RJ45 (green)
f
doorbell relay COM (grey)

SCAMSET8
V. 03 –25/02/2016 7 ©Velleman nv
8. Installing the App
Download the SafeSmart app from the Google Play or iTunes store, and install it on your mobile phone.
Remember to allow the software to send notifications.
Android®
iOS®
9. Wifi Connection to Your Mobile Phone
Do not yet connect the network cable.
1. Power up the door phone. The system takes 30 seconds to start up.
2. Connect your mobile phone to your router. Registering is done by e-mail.
a. Enter your e-mail address.
b. Enter your ID password.
c. Remember your ID number and tap [Ok].

SCAMSET8
V. 03 –25/02/2016 8 ©Velleman nv
If two or more mobile phones are used to connect to the system, please register
a different ID for each in order to receive a notification on the different mobile
phones.
3. Activate the wifi by QR code.
a. Enter the wifi name.
b. Enter your wifi password and tap [Next].
4. The door phone will beep to notice it is ready to scan the QR code.
If the door phone does not beep, press the reset button for 5 seconds and start
the scanning procedure.
5. Aim your smartphone towards the door phone’s camera to scan the QR code.
6. Tap [Heard] after the beep. The door phone should be connected to your wifi network.
a. Tap [Heard] after the beep.

SCAMSET8
V. 03 –25/02/2016 9 ©Velleman nv
The system will only scan the QR code once. Press the reset button for 5 seconds
and restart the scanning procedure.
7. Add the door phone in the list.
a. Slide down to refresh and find the door phone.
b. Tap to add the door phone.
c. Enter the door phone’s name.
d. Enter your password, confirm and tap [Save].
10. Wifi Connection through a Network Cable
If connecting through scanning the QR code does not succeed, please connect
the wifi through a network cable.
1. Connect the door phone to the router using an LAN cable.
2. After registration, search the door phone in the device list.
a. Slide down to refresh and find the door phone.
b. Tap to add the door phone.

SCAMSET8
V. 03 –25/02/2016 10 ©Velleman nv
c. Enter the door phone’s name.
d. Enter your password, confirm and tap [Save].
e. Enter the device list, tap the door phone in the device list and tap [Settings] to enter the settings page.
f. Tap [Network Settings] to enter the network settings page.
g. Select your network type, in this case [WIFI].
h. Tap [Ok] to confirm.
i. Choose your wifi type from the list.
j. Enter the wifi password.
k. Tap [Ok] to confirm.

SCAMSET8
V. 03 –25/02/2016 11 ©Velleman nv
11. Connecting the Door Phone to a Second Mobile Phone
Connecting the door phone to a second smartphone is easy, as you do not need to scan the QR code again.
Simply follow the procedure below:
a. Tap [+] in the device list.
b. Tap [Manual] to manually add a second mobile phone.
c. Enter the device’s ID number and tap [Next].
d. Enter your password and tap [Save].
The device’s ID can be retrieved from the device list as below:

SCAMSET8
V. 03 –25/02/2016 12 ©Velleman nv
12. Setting Date and Time
a. Tap the door phone in the device list.
b. Tap [Setting] to open the setting menu.
c. Tap [Date and Time] to enter the settings page.
a. Select your time zone (UTC+0: UK/Ireland/Portugal; UTC+1: Germany/France/Belgium/Netherlands/
Spain/Poland/Italy).
b. Check the correct date and time.
c. Tap [Apply] to confirm.

SCAMSET8
V. 03 –25/02/2016 13 ©Velleman nv
13. Push Notification
Activate the function in order to be notified of a visit or an alarm.
a. Tap [Alarm Settings] to enter the alarm settings page.
b. Swipe the [Alarm Push] option to activate the function.
c. Tap this icon to delete the ID to which the door phone does not need to send a notification.
Android®
iOS®
You will receive a notification message when the door phone button is pressed or an alarm is triggered.
For Android®
d. Tap [Check] to view the message.
For iOS®
e. You received a message. Slide to unlock the screen.
f. Tap [View] or the device icon to view the message.
Remember to keep the app activated in order to receive the notifications.

SCAMSET8
V. 03 –25/02/2016 14 ©Velleman nv
14. Viewing Interface
a. Tap and hold for 3 seconds to unlock the door. Wait for 6 more seconds to unlock again.
int 1
date and time
int 5
talk
int 2
audio
int 6
smooth image (320 x 180)
int 3
snapshot
int 7
clear image (640 x 360)
int 4
hang up
int 8
HD image (1280 x 720)
15. Video Recording and Playback
Prior to starting recording, make sure the microSD card is inserted.
a. Enter the device list, tap the door phone in the device list and tap [Settings] to enter the settings page.
b. Tap [Storage Info] to enter the storage information page. This page contains information on the microSD
card.
c. If necessary, tap [Erase SD Card] to delete the files on the card.

SCAMSET8
V. 03 –25/02/2016 15 ©Velleman nv
d. Go back to the settings page and tap [Record Settings].
e. Choose [Alarm Recording] to start the recording when the door phone button is pressed or an alarm is
triggered.
f. Choose the recording time.
g. Go back to the device list, tap the door phone in the device list and tap [Playback] to enter the playback
page.
h. Select the desired video file in the list.
i. Use the interface as a regular video interface.

SCAMSET8
V. 03 –25/02/2016 16 ©Velleman nv
16. Resetting the Door Phone
Press and hold the reset button for 5 seconds. The
system will restart 30 seconds after the beep.
17. Tamper Alarm
When the door phone is removed from its harness
with evil intent, the tamper switch will be activated.
The system will then send an alarm message to your
connected phone.
18. Troubleshooting
I do not receive any notification on my smartphone.
Make sure the notification function is enabled on the door phone.
Make sure the app is enabled on your smart phone.
Unclear sound or picture, no sound.
The network is not stable. Try to change to a broader bandwidth.
Possibly, too many devices are connected to the same router.
Audio and video delay with long-distance connection.
The door phone is installed too far from the antenna. Shorten the connection distance or use a 16 dB
antenna instead.
Poor-quality audio on my smartphone.
Increase the volume level on your smartphone.

SCAMSET8
V. 03 –25/02/2016 17 ©Velleman nv
The audio is subject to noise and echo.
Your smartphone is possible too close to the door phone’s speaker.
I cannot open the door lock.
Tap the key icon for 3 seconds to unlock the door. Wait for 6 more seconds and retry.
Can I update my app?
Yes, you can. Go to the system settings page and tap [Update].
Can I update my door phone?
Yes, go to the device updating page to update to the newest version.
19. Cleaning and Maintenance
The device does not need any particular maintenance. However, it is advisable to clean it occasionally to keep it
looking like new.
20. Technical Specifications
camera
sensor ................................................................................................................ 1 megapixel
video quality...................................................................................................... 720p / 30 fps
IR filter ............................................................................................................................yes
night vision distance ......................................................................................................... 2 m
viewing angle .................................................................................................110° wide angle
audio
2-way audio ............................................................................... full duplex (at the same time)
door unlock function ................................................................................................ relay output
IP rating............................................................................................................................ IP65
working temperature ...........................................................................................-10 °C to 50 °C
dimensions .................................................................................................... 128 x 42 x 53 mm
weight ............................................................................................................................ 290 g
power supply .............................................................................................. 12 VDC, 0.5 A (incl.)
Use this device with original accessories only. Velleman nv cannot be held responsible in the event
of damage or injury resulting from (incorrect) use of this device. For more info concerning this
product and the latest version of this manual, please visit our website www.perel.eu. The
information in this manual is subject to change without prior notice.
R&TTE Declaration of Conformity
Hereby, Velleman NV declares that the radio equipment type [SCAMSET8] is in compliance with Directive
1999/5/EC.
The full text of the EU declaration of conformity is available at the following internet address:
www.velleman.eu.
© COPYRIGHT NOTICE
The copyright to this manual is owned by Velleman nv. All worldwide rights reserved. No part of this
manual may be copied, reproduced, translated or reduced to any electronic medium or otherwise without the
prior written consent of the copyright holder.

SCAMSET8
V. 03 –25/02/2016 18 ©Velleman nv
GEBRUIKERSHANDLEIDING
1. Inleiding
Aan alle burgers van de Europese Unie
Belangrijke milieu-informatie betreffende dit product
Dit symbool op het toestel of de verpakking geeft aan dat, als het na zijn levenscyclus wordt
weggeworpen, dit toestel schade kan toebrengen aan het milieu. Gooi dit toestel (en eventuele
batterijen) niet bij het gewone huishoudelijke afval; het moet bij een gespecialiseerd bedrijf
terechtkomen voor recyclage. U moet dit toestel naar uw dealer of naar een lokaal recyclagepunt
brengen. Respecteer de plaatselijke milieuwetgeving.
Hebt u vragen, contacteer dan de plaatselijke autoriteiten betreffende de verwijdering.
Bedankt voor uw aankoop! Lees deze handleiding grondig voor u het toestel in gebruik neemt. Werd het toestel
beschadigd tijdens het transport, installeer het dan niet en raadpleeg uw dealer.
2. Veiligheidsinstructies
Houd dit toestel buiten het bereik van kinderen en onbevoegden.
Dit toestel is niet geschikt voor gebruik door personen (kinderen inbegrepen) met verminderde
fysieke, zintuiglijke of geestelijke capaciteiten of gebrek aan ervaring en kennis, tenzij zij onder
toezicht staan of instructie hebben gekregen over het gebruik van het toestel van een persoon die
verantwoordelijk is voor hun veiligheid.
Houd toezicht op kinderen om te voorkomen dat ze met het toestel spelen.
Elektrocutiegevaar bij het openen van de behuizing. Raak geen kabels aan die onder stroom staan
om dodelijke elektrische schokken te vermijden. Open de behuizing niet zelf. Laat het onderhoud van
het toestel over aan een vakman.
Wees voorzichtig bij de installatie: raak geen kabels aan die onder stroom staan, om dodelijke
elektroshocks te vermijden.
De voedingskabel mag niet beschadigd zijn of ingekort worden.
Waarschuwing! Indien de voedingskabel beschadigd is, dan moet deze door de fabrikant, diens
servicedienst, of een gelijkwaardig bekwaam persoon vervangen worden om gevaar te voorkomen.
Trek de stekker uit het stopcontact wanneer het toestel niet in gebruik is of voordat u het toestel
reinigt. Houd de voedingskabel altijd vast bij de stekker en niet bij de kabel.
Er zijn geen door de gebruiker vervangbare onderdelen in dit toestel. Voor onderhoud of
reserveonderdelen, contacteer uw dealer.
Laat het toestel installeren/repareren door een technicus.
Gebruik het toestel niet indien de behuizing of de bekabeling beschadigd is. Probeer in geen geval het
toestel zelf te repareren maar contacteer uw verdeler.
3. Algemene richtlijnen
Raadpleeg de Velleman® service- en kwaliteitsgarantie achteraan deze handleiding.
Bescherm het toestel tegen stof en extreme temperaturen.
Bescherm tegen schokken. Vermijd brute kracht tijdens de bediening van het toestel.
Leer eerst de functies van het toestel kennen voor u het gaat gebruiken.
Om veiligheidsredenen mag u geen wijzigingen aanbrengen. Schade door wijzigingen die de gebruiker heeft
aangebracht aan het toestel valt niet onder de garantie.
Gebruik het toestel enkel waarvoor het gemaakt is. De garantie vervalt automatisch bij ongeoorloofd
gebruik.

SCAMSET8
V. 03 –25/02/2016 19 ©Velleman nv
De garantie geldt niet voor schade door het negeren van bepaalde richtlijnen in deze handleiding en uw
dealer zal de verantwoordelijkheid afwijzen voor defecten of problemen die hier rechtstreeks verband mee
houden.
Respecteer de technische specificaties.
Noch Velleman nv noch zijn verdelers kunnen aansprakelijk gesteld worden voor schade (buitengewoon,
incidenteel of onrechtstreeks) –van welke aard dan ook (financieel, fysisch…) voortvloeiend uit het bezit,
gebruik of falen van dit product.
We streven voortdurend naar verbetering van onze producten. Daarom kan dit product uiterlijk verschillen
van de afbeeldingen.
De afbeeldingen van het product zijn enkel ter illustratie.
Bewaar deze handleiding voor verdere raadpleging.
4. Eigenschappen
Plug-&-play video-intercom met wifi- en LAN-aansluiting. Gebruik uw smartphone om te zien wie er voor de
deur staat, om met de bezoeker te praten en om de deur te openen, zelfs wanneer u niet thuis bent.
Eenvoudige plug-&-play-installatie via gratis apps voor Android of iOS. U ontvangt een bericht wanneer iemand
aanbelt.
Het systeem maakt een video-opname wanneer er beweging wordt gedetecteerd of wanneer iemand aanbelt
U kunt een klassieke deurbel aansluiten op de relaisuitgang, om u te informeren wanneer de smartphone niet
functioneert.
camera met IR-leds voor nachtzicht
de automatische IR-sperfilter: filtert het IR-licht overdag zodat er niets aan de beeldkwaliteit verandert.
videokwaliteit 720p
full duplex tweewegaudio-overdracht
video-opname op microSD-kaart
deurontgrendeling op afstand via smartphone
audio-prioriteit: functioneert het netwerk niet goed, dan heeft het geluid prioriteit
plug-&-play-installatie via QR-code of netwerkscanfunctie
robuuste en vandaalbestendige behuizing
5. Omschrijving
1
IR-led
6
microfoon
2
lens
7
antisabotageschakelaar
3
luidspreker
8
resetknop
4
CdS-fotoweerstand
9
kabelopening
5
deurbelknop

SCAMSET8
V. 03 –25/02/2016 20 ©Velleman nv
6. Wandmontage
Controleer of het wifi-signaal voldoende sterk is, voordat u het toestel installeert!
Plaats de microSD-kaart.
1. Kies een montageplaats. Boor een gat voor de kabels.
2. Bevestig de behuizing met 2 schroeven.
3. Voer de kabels door de opening in de behuizing en de muur. Plaats de camera in de behuizing en
bevestig met de schroef.
4. Ga verder met de aansluiting van het systeem.
Table of contents
Languages:
Other Perel Intercom System manuals

Perel
Perel SCAMSETW5 User manual

Perel
Perel SCAMSET6 Reference manual

Perel
Perel SCAMSET16 User manual

Perel
Perel SCAMSET8N User manual

Perel
Perel EDB5 User manual

Perel
Perel EDB5 User manual

Perel
Perel SCAMSET User manual

Perel
Perel EDB7 User manual

Perel
Perel EDB4 User manual

Perel
Perel SCAMSETW5 User manual