Quick Start Manual
Datagate MK2 70044
For latest version visit:
www.enttec.com
2 ID: 2691
Safety
• Do not expose the Datagate Mk2 to rain or
moisture, doing this will void the warranty
• Do not remove the cover, there are no serviceable
parts inside
• This unit is intended for indoor use only
Basic Setup
Right out of the box the unit is setup as Art-Net to DMX (8
universe) node. Because of this, you can use the device
with applications, consoles, desks, or controllers that
are compatible with Art-Net to distribute Art-Net data
via Ethernet network.
With the default profile, each DMX Port is mapped to it's
respective Art-Net Universe, allowing you to directly plug-
in Art-Net without any changes or configuration
necessary.
Getting Started
To begin your installation please follow these steps.
1. Unpack the unit from the box. Inspect the
Datagate Mk2 for any damage that might have
occurred in shipping, and verify that it looks to
be in good condition before plugging it in to
power.
2. The Datagate Mk2 occupies a single unit (1U) in
a 19 inch rack. You may attach it to the rack
either at this time or later after configuring it,
if desired.
3. Attach a power cord with mains voltage
(supplied) to the IEC input on the back.
4. Using an Ethernet Cat5, Cat5E or Cat6 cable,
connect the unit to an Ethernet Network.
5. Datagate Mk2 is set to DHCP by default, so it can
be connected to your existing network (router or
switch), and the IP address, if needed, can be
changed from LCD or web browser.
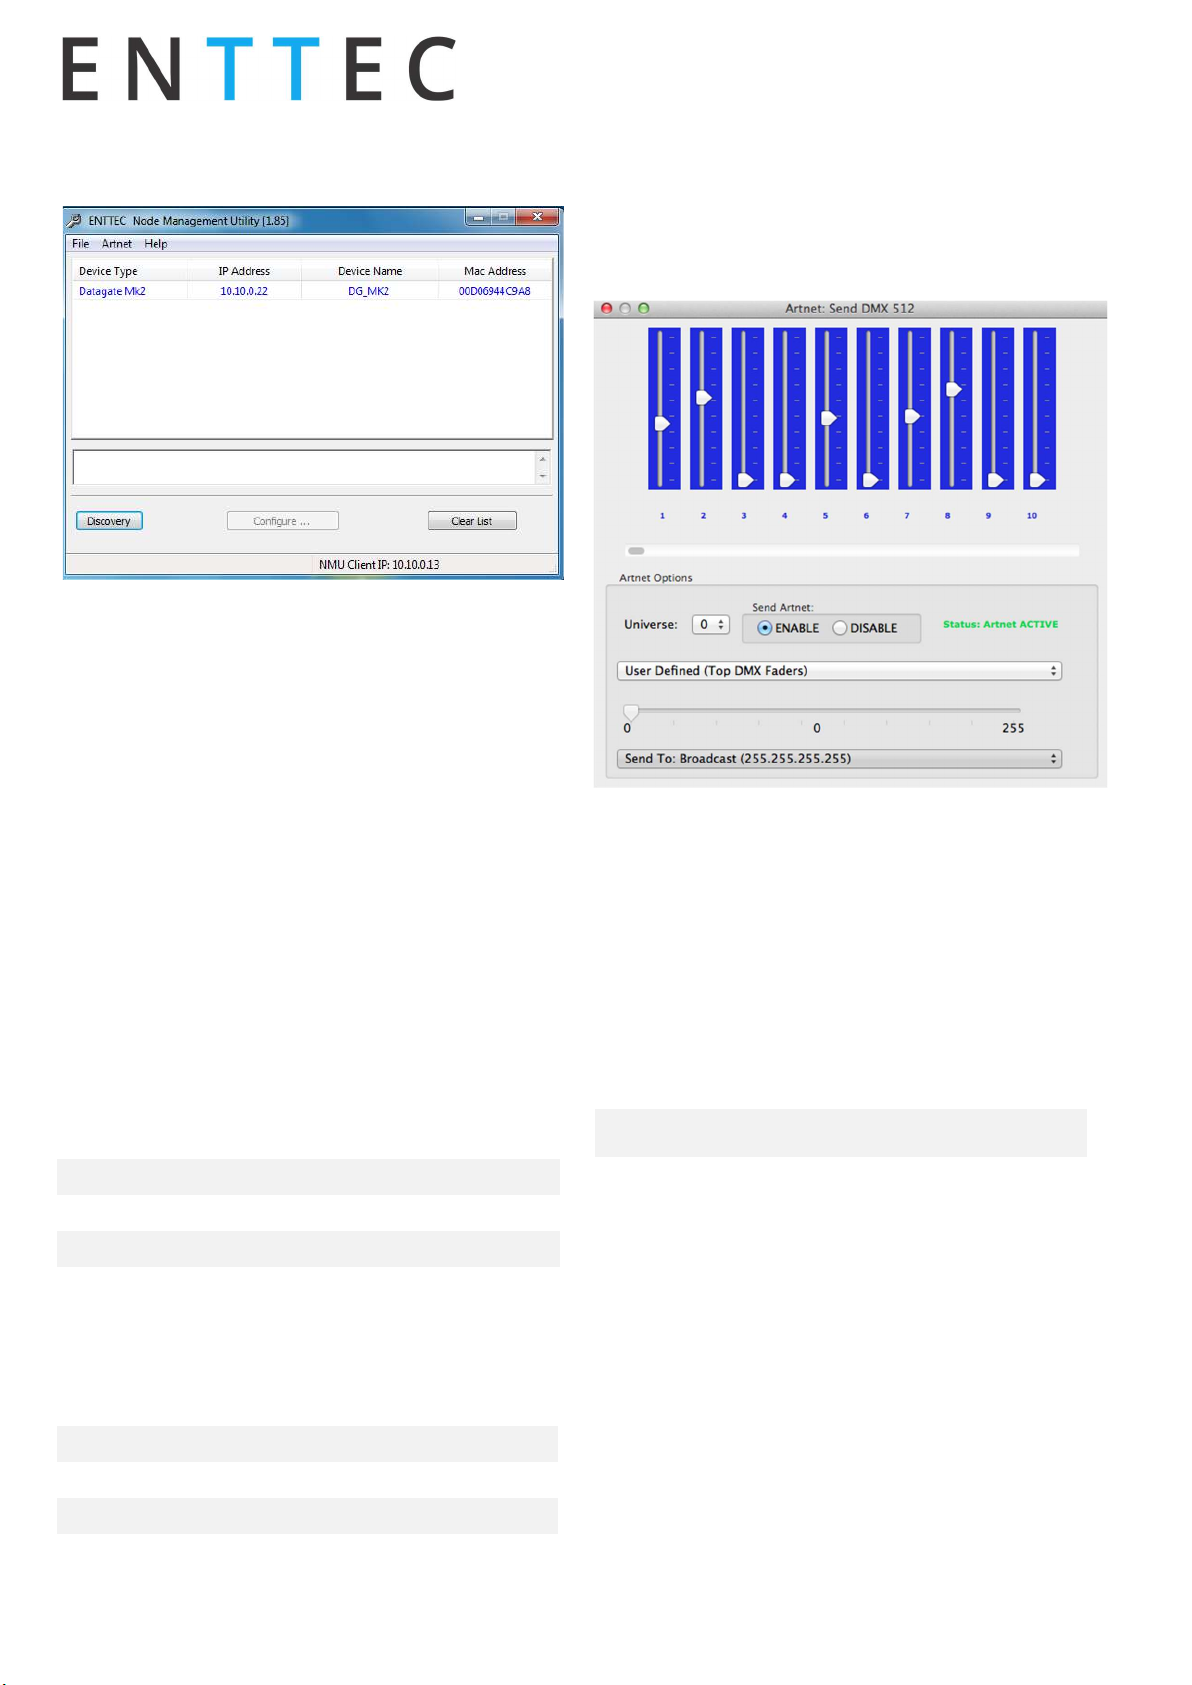
6. The LCD displays the IP address of the unit at all
times (except when it's booting), but if not
possible to check the LCD, NMU App (available for
Windows & Mac) can be used to detect the
Datagate Mk2 on your network. NMU can be
downloaded from the ENTTEC website.
Profiles
Profiles are essential to the operational philosophy of the
Datagate. With a profile selected, the device knows how to
utilize the many resources it can make use of to perform
lighting control tasks.
Each Profile contains configuration information for some or
all of the following:
DMX Ports
These are the physical DMX ports 1 to 8.
Ethernet Streams
These are the DMX over Ethernet universes. (Art-Net,
ESP, KiNET, ACN)
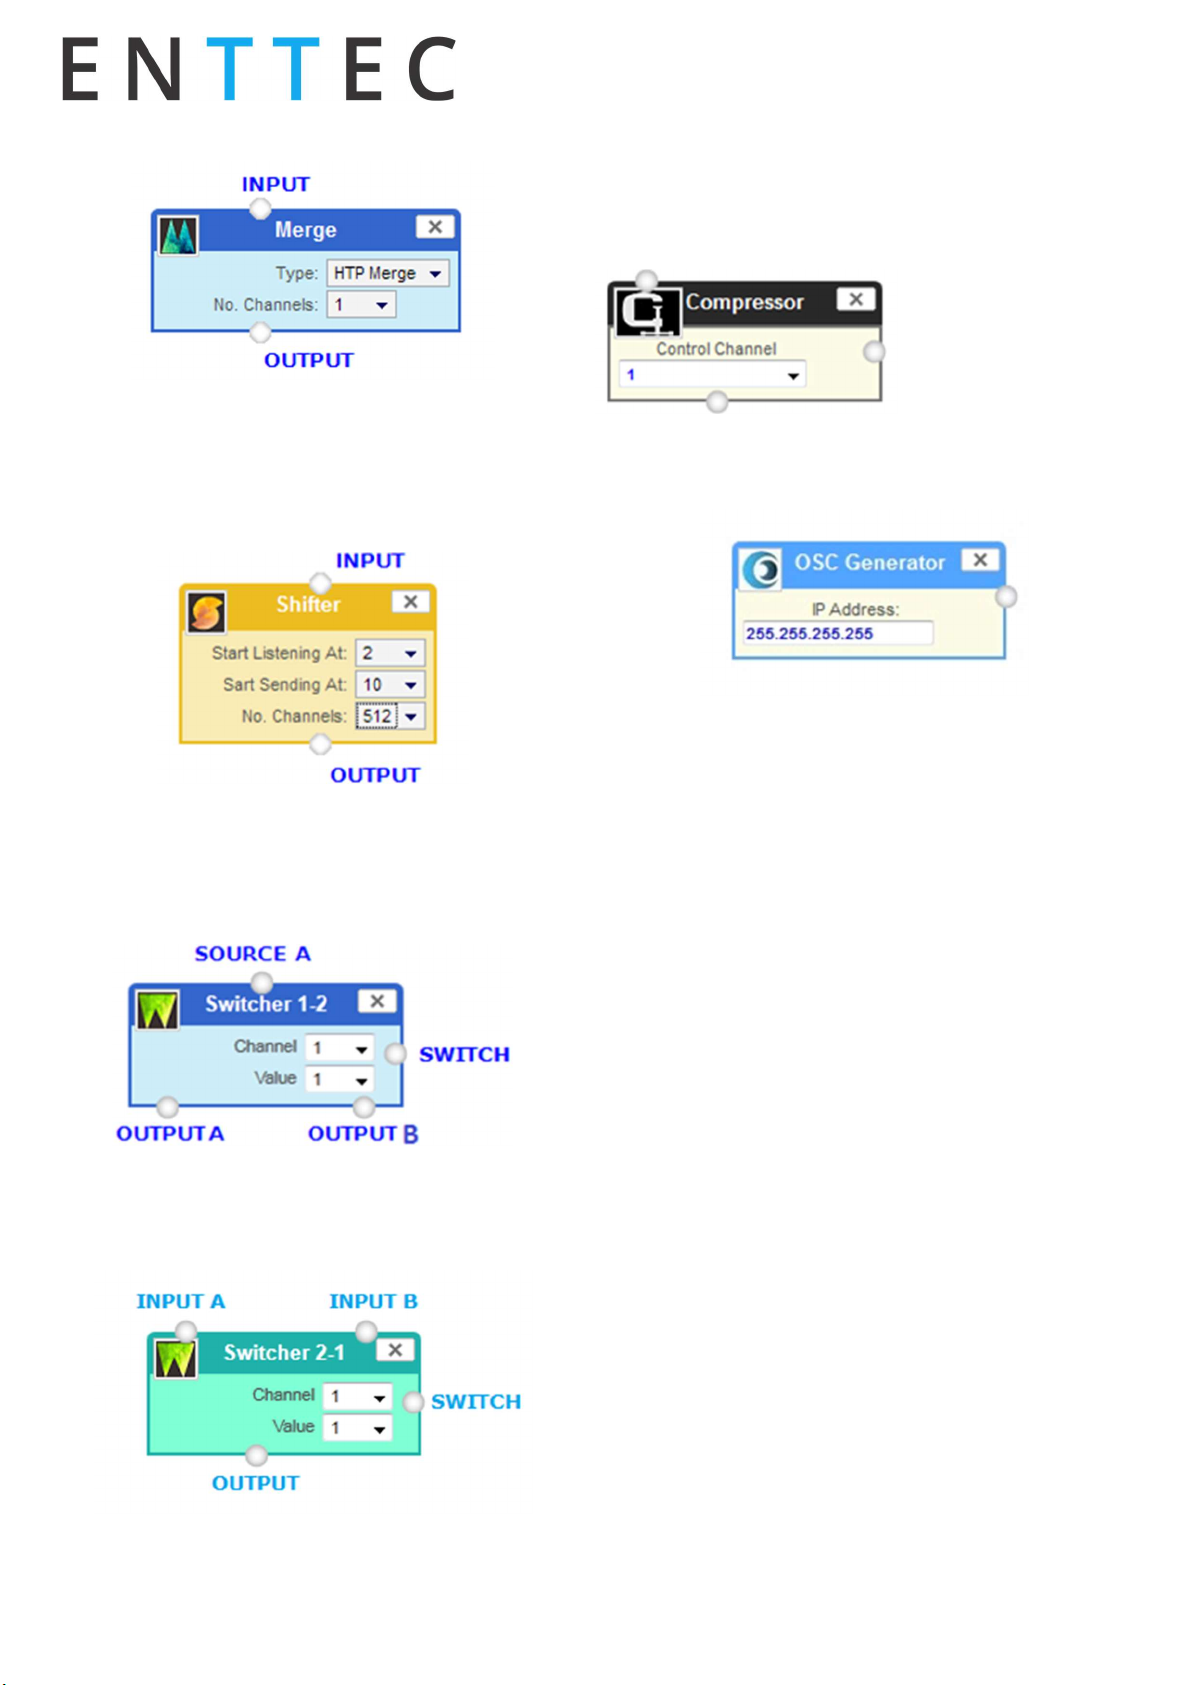
Routing Diagram
The routing diagram is the visual representation of the
Profile itself and it tells the Datagate how frames are moved
or routed inside the routing engine, as well as what to do
with multiple sources of data that need to be merged, when
that option is engages. Other special operations can be part
of a diagram as well, such as Merging, Channel Shifter,
Output Switch, etc.
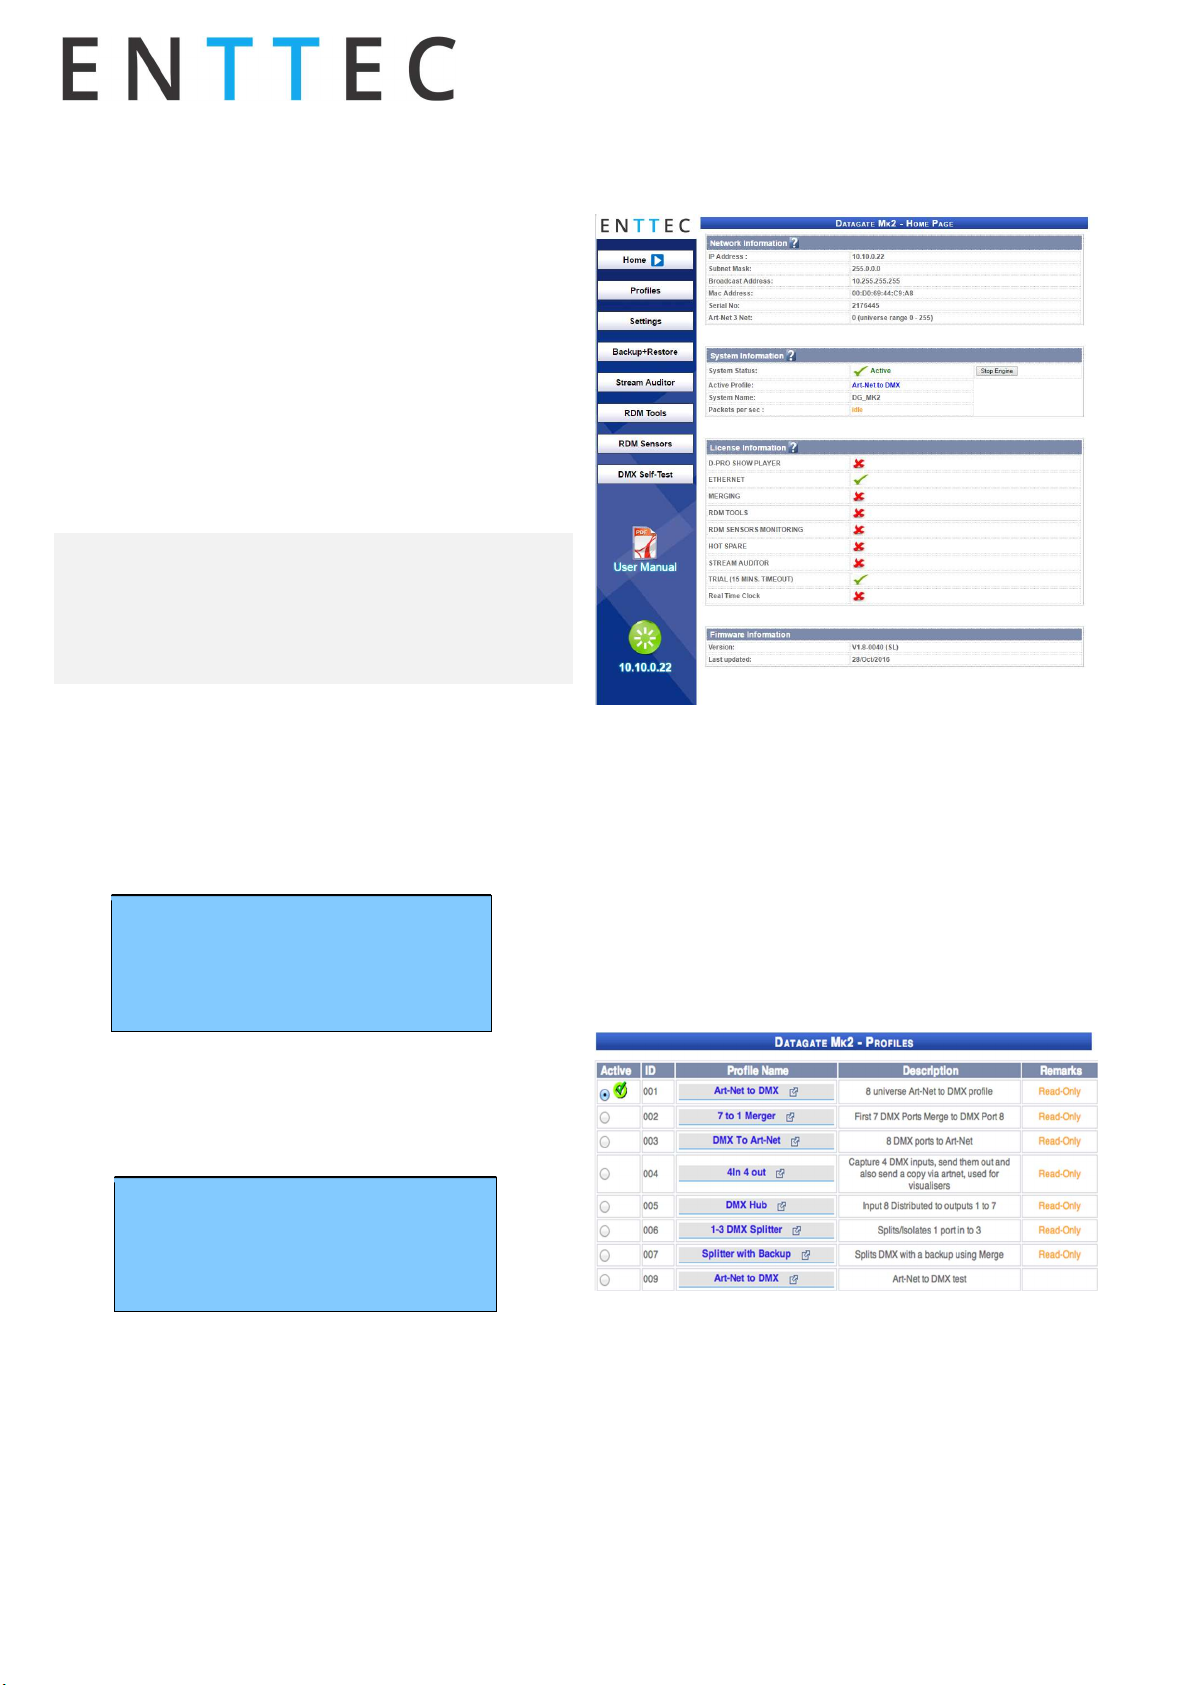
Factory Profiles
The Datagate Mk2 has a set of factory profiles, to start you
off. You're likely to see the following:
• Art-Net to DMX: This profile will take 8 DMX over
Ethernet signals using the Art-Net protocol and convert
them to 8 DMX signal on ports 1 to 8.
• DMX to Art-Net: This profile takes 8 DMX signals on
ports 1 to 8 and send them over Ethernet using Art-Net
protocol.
• DMX Splitter: This profile inputs DMX on port 8 and the
signal is replicated onto ports 1 to 7
• 4 In 4 Out Isolator: This profiles is used to isolate 4 DMX
streams, signal on input 1 is replicated to port 2, signal
on port 3 is replicated on port 4
• 7 to 1 Merger: This profile does an HTP merge of DMX
inputs 1 to 7 and send the result onto DMX port 8
These profiles are just an example of what can be done with
the Datagate Mk2, you can modify the factory profiles to
accommodate your particular need (copy and then edit), or
create your own profile from scratch.
Changing from one profile to another can be done in a web
browser window, or with the touch of a few buttons on the
front panel menu
LCD Menu
The LCD Menu is navigated through the four panel
buttons on the front of the unit.
The Menu button acts as the “Back” button, which takes
you to the previous Menu/screen.
The Enter button goes into the selected option on the
screen, and activating the option.