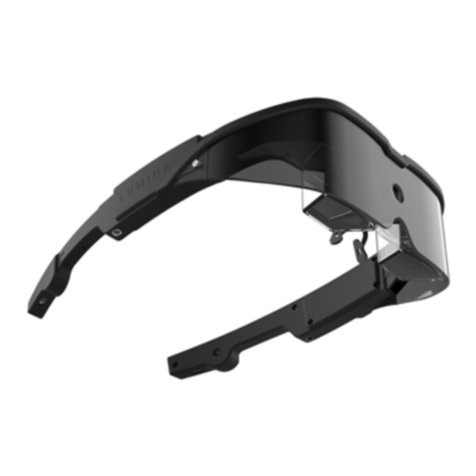
Envision Read Glasses User manual

Envision Glasses User Guide
An extensive guide for Envision Glasses users. Find out how to get started, use
gestures, access features, and explore all the possibilities of the Envision Glasses.
Updated on January 13, 2023 for Envision Glasses Version 1.10.1.
For a more up-to-date version of this guide, visit: support.letsenvision.com
1

Envision Technologies B.V.
Wilhelmina van Pruisenweg 35
2595AN,The Hague
The Netherlands
2

Table of Contents
1. Welcome to the Envision Family 8
2. Getting Started 9
2.1 What is Envision Glasses? 9
2.2 What’s in the box? 10
2.2.1 Envision Glasses Body 10
2.2.2 Envision Glasses Frame 11
2.2.3 Protective Carrying Case 11
2.2.4 Envision Glasses Power Cable 11
2.2.5 Quick Start Guide Card 12
2.3 Attaching the Envision Glasses Frame 12
2.3.1 Types of Frames 12
2.3.2 Attaching the Frame 14
2.3.3 Detaching the Frame 15
2.3.4 Designer Frames 16
2.4 Pairing your Envision Glasses 16
2.4.1 Install Envision App 16
2.4.2 Login to Envision App 17
2.4.3 Turning on your Envision Glasses 17
2.4.4 Pair Envision Glasses with Envision App 18
For Android Users 19
2.4.5 Unpairing the Envision Glasses 19
3. Interacting with Envision Glasses 21
3.1 Touchpad Gestures 21
3.1.1 Screens 21
First Level: Main Menu 22
Second Level: Activate 22
Third Level: Context Menu 22
3.1.2 Personalize your Menu 22
3.1.3 Types of Gestures 23
Swipes 24
One-finger swipe forward 24
One-finger swipe back 24
One-finger swipe down 25
Two-finger swipe down 25
Two-finger swipe up 25
3

Taps 25
One-finger single tap 25
One-finger double tap 25
One-finger tap and hold 26
Two-finger single tap 26
3.1.3 On-Device Tutorials 26
Trainings 26
Smart Guidance Training 26
Gestures Introduction Training 27
Gestures Practise Training 27
Manuals 28
About Your Envision Glasses 28
3.2 Voice Commands 28
3.3 Power Button 28
3.3.1 Power On 29
3.3.2 Power Off 30
3.3.3 Sleep Mode 30
4. Read Features 30
4.1 Instant Text 31
4.1.1 How to activate Instant Text? 31
4.1.2 Do you want to pause Instant Text? 31
4.1.3 Do you want to reset Instant Text? 31
4.1.4 Do you want to switch between online and offline Instant Text? 31
4.15 Setting a Recognition Language on Instant Text 32
4.2 Scan Text 33
4.2.1 Scan Text 33
4.2.2 Smart Guidance 33
4.2.3 Word Detection 34
Do you want to Scan Text without Smart Guidance or Word Detection? 34
4.2.4 Language Detection 34
4.2.5 Layout Detection 35
Do you want to switch Smart Guidance, Word Detection, Language
Detection, or Layout Detection on or off? 35
Do you want to read handwritten text? 35
4.2.6 R eader 36
How to export scanned text to your phone? 36
4.3 Batch Scan 36
4.4 Handwritten Text 37
5. Call Features 37
4

5.1 Call An Ally 37
How to use Call An Ally? 38
Do you want to add an Ally? 38
How to add an Ally as an Envisioner? 38
How to be added by an Ally? 39
5.2 Call an Aira Agent 39
5.2.1 Introductory Offers 40
5.2.2 How to use the Call An Aira Agent feature? 40
5.2.3 How can I activate Privacy Mode? 41
5.2.4 How can I unlink my Aira Account on Envision Glasses? 41
5.2.5 How can I check how many minutes I have left of the 200 free minutes?
42
5.2.6 Which languages are supported by Aira Agents? 42
6. Identify Features 42
6.1 Describe Scene 42
6.1.1 How to use the Describe Scene feature? 42
6.1.2 Do you want to recognize all the faces taught in the Envision App? 43
6.2 Detect Light 43
6.2.1 How to use the Detect Light feature? 43
6.2.2 Changing the preference of hearing a frequency of beeps or tone of pitch
43
6.3 Recognise Cash 44
6.3.1 How to use the Recognise Cash feature? 44
6.3.2 How to change the currency? 44
6.4 Scan QR Code 44
6.5 Detect Colors 45
Are the colours spoken not correct? 46
7. Find Features 46
7.1 Find Objects 46
7.2 Find People 46
7.2.1 How to actively find people? 46
7.2.2 Do you want to Teach Envision faces? 47
7.3 Explore 47
8. Connectivity 48
8.1 Connect To Wi-Fi 48
8.1.1 Connect to the Internet using the Envision Glasses Wi-Fi QR Code 48
8.1.2 How do I create a Wi-Fi QR Code? 49
8.1.3 Connect to the internet by using both the Envision Glasses and the
Envision App 49
5

8.1.4 Connect to the internet by using the Envision App 49
8.1.6 Features that do not require an internet connection 50
8.2 Connect to Hotspot 51
8.2.1 Hotspot on iOS 51
Connecting to iPhone's Personal Hotspot for the first time after pairing 51
Connecting to iPhone's Personal Hotspot after the first time 53
8.2.2 Hotspot on Android 53
8.2.3 Why is my Personal Hotspot not detected by Envision Glasses? 54
8.3 Connect To Bluetooth Devices 55
8.3.1 Connecting to headphones or speakers 55
8.3.2 Connecting to AirPods 55
8.4 Connect to a wired device 56
Using other devices that don't support USB-C 56
8.5 Charging 56
8.5.1 What is the battery life of my Envision Glasses? 56
9. Language & Localisation 57
9.1 Change Device Language 57
9.2 Supported Reading Languages 57
9.3 Localisations in your native language 59
9.3.1 Translating and proofreading with Crowdin 59
9.3.2 Why is my language not on the list? 59
10. Settings 59
10.1 Change Time Format 60
10.2 Change Volume, Speed and Voice in Audio Settings 60
Change Volume 60
Change Speed 60
Change Voice 61
10.3 Turn Off Display 61
10.4 Update Software 61
How to update Envision Glasses to the latest version? 61
Are you having trouble finding the latest update? 62
11. Purchasing Envision Glasses 62
11.1 Request A Demo 62
11.2 Order Envision Glasses 63
11.3 Payment Plans & Methods 63
11.4 Accessories 63
11.5 Authorized Distributors 64
11.6 Funding Support 64
11.7 Warranty 64
6

11.8 Return & Refund 65
12. Hardware & Specifications 65
12.1 Taking Care Of Envision Glasses 65
Charging 65
Protecting 66
Cleaning 66
12.2 Audio Outputs 67
12.3 Technical Specifications 67
13. Glasses Frequently Asked Questions 69
13.1 Can my Envision Glasses automatically switch between previously taught
internet networks? 69
13.2 Which features of Envision Glasses need an internet connection? 69
13.3 Can I use the Envision Glasses without my smartphone? 70
13.4 Which features work without an Internet connection? 70
13.5 How will I know when there is a new Envision Glasses software update? 70
13.6 How can I connect my Envision Glasses to an open network? 71
13.7 Which objects can Envision Glasses currently recognise? 71
13.8 How can I pair Envision Glasses to a new smartphone? 72
13.9 Where can I find the serial number of my Envision Glasses? 72
13.10 How do I create a Wi-Fi QR code? 72
14. Glossary 73
15. Contact Us 74
7

1. Welcome to the Envision Family
Welcome to your Envision Glasses. We hope you will enjoy the Envision experience
and that our products can be of assistance to you in your everyday life.
This document is a detailed guide to help you get started on taking full advantage of
all the features available on the Envision Glasses. If for any reason your Envision
Glasses are not working as expected, we have also included a list of troubleshooting
steps. Additionally, our Customer Success Team is always happy to assist you with
any concerns by sending an email to [email protected]
The future of wearable cameras that we have all been dreaming of is finally here.
8

2. Getting Started
This chapter contains general information about what Envision Glasses are, what comes in
the box, and detailed steps on installing the Envision App, attaching the frame, pairing
Envision Glasses with the Envision App, starting the Envision Glasses Onboarding process
and updating the software.
2.1 What is Envision Glasses?
The Envision Glasses are a wearable assistive device that allows users to independently
access the world around them in a way that is convenient, hands-free, and discreet.
Envision Glasses make everyday life more accessible for those with visual impairments by
using Envision's award-winning AI technology to turn visual information into speech.
Turn text into speech
The Envision Glasses enable you to read and export all kinds of text from any surface in
over 60 languages. It uses fast and accurate Optical Character Recognition (OCR) to read
official documents, letters, street signs, handwritten cards, magazines, books and more. To
read it later, you can export the text to have it saved offline in your Envision App.
Conquer any situation with video calling
In a situation where you would prefer a person to assist you, you can also initiate a
hand-free video call to someone you know straight from the Envision Glasses with Call An
Ally feature. Request friends, family, and colleagues to see what is in front of you through
the camera on the Envision Glasses with the free Envision Ally App.
Find objects and recognise people
Looking for your keys, coffee cup, or the nearest trash bin? Need to identify your friend in a
café or your colleagues at work? With the Find Object and Find People features you can
scan your surroundings with the Envision Glasses to have the device find what you are
looking for.
Know what is around you
The Envision Glasses can describe scenes, identify colors, detect the amount of
light, and even recognize cash. Find the right items in your closet, go grocery
shopping and explore new places on your own.
For more information, please visit our website.
9

2.2 What’s in the box?
The Envision Glasses box, once you receive it, should include the following items:
●Envision Glasses Body
●Envision Glasses Frame
●Protective Carrying Case
●Envision Glasses Power Cable
●Quick Start Guide Card
2.2.1 Envision Glasses Body
The body is the main part of the Envision Glasses and it features the processor, the
battery, the speakers, and the camera. It is shaped like one half of a spectacle frame and
sits on your right ear when you put it on. It weighs roughly 45 grams.
At the back of the body, you can find the battery, the USB-C inlet, the power button, and
the speakers. A bit more towards the front you will find the touchpad, located on the
outside part next to your temple, when you are wearing the device. The touchpad leads to
the foldable front of the body, which consists of the camera and the display. The body is
located at the top of the box once you open the lid.
Envision Glasses Body
10

2.2.2 Envision Glasses Frame
By default, Envision Glasses come already attached to the titanium frame. These frames do
not have lenses or the possibility to attach them. It has a sleek, minimalist design, and the
frame itself is made of titanium, which makes it very lightweight and durable.
Should you prefer to have frames with lenses, you can order additional Smith Optics or Lux
frames, which will be shipped in a separate box. You can interchange them easily by
detaching the default titanium frame and attaching the Smith Optics or Lux frame. To learn
more about how to attach the frame to the Envision Glasses body, please visit the article
Attaching the Envision Glasses Frame.
Envision Glasses Titanium Frame
2.2.3 Protective Carrying Case
When first shipped, you will find the Envision Glasses inside the black protective carrying
case. This zipper-closure case also has a zippered inside pocket to carry the glasses,
charging cable and any additional accessories. It protects the glasses when they aren’t in
use and is ideal for travel and storage.
2.2.4 Envision Glasses Power Cable
To charge your Envision Glasses, inside the zippered pocket of the protective case we
have added a power cable. This is a USB to USB-C cable. You can plug the cable into any
USB power adapter and start charging your device right away. Keep in mind that this
11

device supports fast charging so, if you have a fast charger adapter, use it to your
advantage!
Disclaimer: Plugging in the Envision Glasses with the fast charging cable to a computer,
will not charge the device in most cases.
2.2.5 Quick Start Guide Card
At the very top of the box, you should find a card. This contains instructions on how to pair
your Envision Glasses with a mobile phone and the Envision App. This will lead you to the
onboarding process which starts with the Gestures Introduction Training a tutorial on
how to interact with the glasses. Steps on how to pair your glasses can also be found in
the article Pairing your Envision Glasses.
2.3 Attaching the Envision Glasses Frame
This sub-section contains the following:
●Types of Frames
●Attaching the Frame
●Detaching the Frame
●Designer Frames
2.3.1 Types of Frames
There are three kinds of frames that can be used with Envision Glasses:
1. Titanium Frame: These are the standard lightweight frames that are shipped with
every pair of Envision Glasses. This frame does not have lenses or the possibility to
attach lenses. It has a sleek, minimalist design, and the frame itself is made of
12

titanium, which makes it very durable.
2. Lux Frames: These stylish designer frames come with elegant prints and clear
lenses that can be purchased as an accessory with Envision Glasses. The clear
lenses can be replaced by taking them to your preferred optician with custom tinted
lenses or polarised sunglasses, in addition to your applicable prescription.
3. Smith Optics Frames: These are slightly larger frames and hence can
accommodate larger lenses that provide greater coverage of the eye. This frame
comes with zero power lenses and can be purchased as an accessory with the
Envision Glasses. The zero-power lenses can be replaced by taking them to your
preferred optician with custom tinted lenses or polarised sunglasses in addition to
13

your applicable prescription.
When you purchase your Envision Glasses, by default they are already attached to the
titanium frame, therefore should you decide to order an additional Lux or Smith Optics
frame, you will have both the titanium frame and the Lux or Smith Optics frame.
If they get detached, here is the instruction on how you can attach them again. These
instructions can also be used for the Lux frame or Smith Optics frame, but, in that case,
the right earpiece will have to first be detached in order for the Envision Glasses body to
take its place.
2.3.2 Attaching the Frame
1. Take the frame and make sure it is in an unfolded position.
2. Make sure that the body of the Envision Glasses is also in an unfolded position. That
means that the front of the body, where the camera and display are located, is
folded out.
3. With your left hand, take the frame and, with your right hand, take the body of the
Envision Glasses. While holding the body with your right hand, make sure your
thumb is on the front part and your index finger below, to prevent the body from
folding in.
4. Locate the metallic hinge button with your thumb on the top of the body.
5. With your left hand, make sure to grab the end of the frame where you can feel a
circular part. This is the circular piece that will fit on the hinge button of the body.
6. Bring the circular piece of the frame on top of the button on the body. You can do
this by keeping your left thumb on the circular part.
7. Once the circular part is on top of the button, you will have to lock the frame by
turning it clockwise while pressing on the circular part with your right thumb. This
will allow you to rotate the frame to its position.
8. You will hear a soft metallic click when the frame is attached to the body.
14

9. That’s it! You can start wearing your Envision Glasses, or practice how to detach the
frame with the help of the next guide.
Envision Glasses Hing Button
2.3.3 Detaching the Frame
You might have the need to detach the frame to replace it with a different one. Here are the
steps you need to follow for that. When you get a Lux Frame or Smith Optics frame, you
need to follow similar steps to detach the right arm from them as well, because that right
arm is what gets replaced by Envision Glasses body.
Here is how:
1. Take your Envision Glasses off your face and make sure they stay in a folded-out
position. This means that the front of the body, where the camera and display are
located, is folded out.
2. Hold the frame with your left hand and the body with your right hand.
3. While holding the body in your right hand, make sure your thumb is on the top part
of the body, in the area before it curves to the front. Make sure your index finger is
behind the part where the camera and glass plate are located.
4. There is a button on the body around the area where your thumb and index are
located. Press this button with your thumb.
5. Now, with your left hand, rotate the frame towards you (or counter-clockwise). This
will allow you to detach the frame from the body.
6. To detach the frame, push down with your thumb on the connected piece of the
frame and body, then push away with your index finger.
15

At first, the process of attaching and detaching the frames may seem a little complicated.
Once you practice it a few times and get the hang of it, it gets pretty easy!
How to assemble the Envision Glasses
2.3.4 Designer Frames
One of the arms of the Lux or Smith Optics frame can be detached, similar to how you
detach the titanium frame from the glasses through the hinge. The instructions above can
therefore also be used for the Smith Optics frame, but, in that case, the right earpiece will
have to first be detached in order for the Envision Glasses body to take its place, the right
earpiece of the designer frame serves as the Envision Glasses body.
2.4 Pairing your Envision Glasses
You can pair your Envision Glasses with the Envision App by following these simple steps:
●Install Envision App
●Login to Envision App
●Turn on your Envision Glasses
●Pair Envision Glasses with the Envision App
●Unpairing the Envision Glasses
2.4.1 Install Envision App
Envision is a free app that can be installed from the App Store on iOS or Play Store on
Android. Here are the links for both of them:
●Download for iOS
●Download for Android
16

2.4.2 Login to Envision App
To get started with the Envision Glasses, log in to the Envision App. If you don’t have an
account yet, an account will be created for you. You can sign up by using your email or
other methods. The first account that you pair your Envision Glasses with, will have the
lifetime subscription added to it.
2.4.3 Turning on your Envision Glasses
Now that your frame is attached to the body, let’s turn on the Envision Glasses! You can do
so by holding the power button for 6 seconds. The power button is located on the rear end
of the glasses on the right side, next to the charging port, on the inside surface. After you
have pressed the power button for 6 seconds, please take into consideration that it takes
about a minute for the device to boot up, and there is no audio cue during this process.
You will know the Envision Glasses are on when they start speaking out on the start
screen. The first time you turn the device on, the glasses will speak out a request to 'Go to
EnvisionGlasses.com’.
Envision Glasses Power Button
If the Envision Glasses are not turning on, try charging them with the fast-charging USB-C
cable that is provided in the box. This will not only charge your Envision Glasses, but it will
also make sure they get powered on.
17

Note: Keep in mind that your Envision Glasses will automatically turn on when you unfold
them and when you connect them to the power cable.
2.4.4 Pair Envision Glasses with Envision App
When your Envision Glasses are powered on and it will continuously speak out to 'Go to
EnvisionGlasses.com' this means the device is on, but not paired with the smartphone,
yet.
To start pairing your Envision Glasses with your Envision App, complete the following
steps:
1. Open the Envision App.
2. Navigate to the Glasses tab.
3. Tap on Pair Envision Glasses, and a pop-up will appear.
4. Tap on Start Pairing Process.
5. Complete the steps shown on the app, this includes pairing the app and connecting
to a Wi-Fi network.
6. In the last step the device is paired with the app and connected to Wi-Fi.
7. Tap on Continue.
8. Switch to your Envision Glasses, the Gestures Introduction Training will start for
you when it is the first time you are using the glasses.
How to pair your Envision Glasses to the Envision App
18

For Android Users
If you have an Android smartphone, Location and Privacy settings on your phone need to
be enabled in the Envision App in order to pair the glasses. To enable location, follow the
steps here.
In some cases, it is also necessary to reset your phone's Bluetooth cache. Here's how:
1. Open Settings, and then tap on the option called Apps.
2. Tap on the Sort icon, located at the top right with three vertical dots, then tap on
Show System Apps or Show System Processes. When this option is selected, all
the system apps will appear in a list.
3. Tap on the Search Bar and type and select Bluetooth, then select the option
Storage and select the Clear Data option.
4. Tap on Delete and make sure Location is enabled for the Envision App. To enable
location, follow the steps here. Now your smartphone is ready to be paired to your
Envision Glasses
At this point, you will go through the introductory tutorial on Envision Glasses. You will first
be taught where the touchpad is located, afterwards, you will learn about the swipe and
tap gestures.
Touchpad location on the Envision Glasses' body.
2.4.5 Unpairing the Envision Glasses
If you want to pair your glasses with a different device, you can follow the steps below.
1. Make sure that the Envision App has been unpaired from the glasses by going to
the Glasses tab, selecting Settings, and tapping on Unpair Envision Glasses.
19

2. Set the glasses into Pairing Mode. You can do this on the glasses by going to the
main menu, navigating through the menu by swiping forward with one finger until
you reach Settings, and double-tap with one finger on the Pairing Mode option.
3. To confirm that your glasses are in pairing mode, you will hear go to 'Go to
EnvisionGlasses.com', in multiple languages.
4. Your device will now be ready to be paired with another Envision account on
Envision App.
How to unpair your Envision Glasses from Envision App
20
This manual suits for next models
2
Table of contents
Other Envision Smart Glasses manuals

