manuals.online logo
Brands
  1. Home
  2. •
  3. Brands
  4. •
  5. ERKCO
  6. •
  7. Water Pump
  8. •
  9. ERKCO 101 User manual

ERKCO 101 User manual

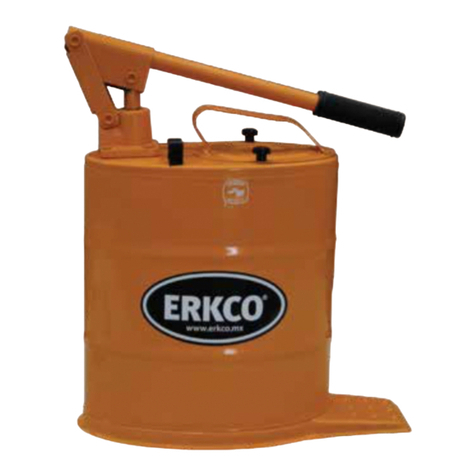
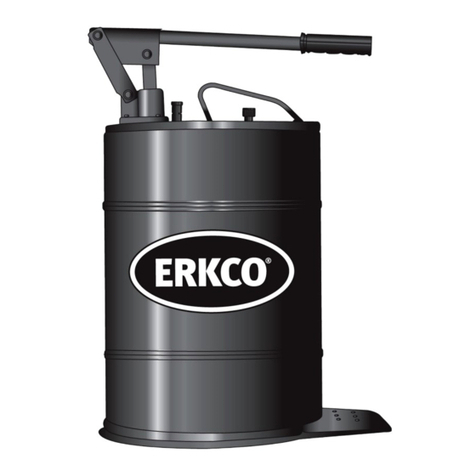
BOMBA PARA GRASA (19 Kg)
101
MANUAL DE USO
USER MANUAL
PRECAUCIÓN: Antes de usar el producto, asegúrese de leer
y entender este manual, siga las instrucciones sugeridas
para su operación
CAUTION: Before using the product, read this manual and
follow care and use guidelines
www.erkco.mx
Español
FALLA POSIBLE CAUSA
Si al operar la bomba:
Falta de grasa en el depósito
ANÁLISIS DE FALLAS
SOLUCIONES
Llene el depósito de grasa
Boquilla obstruida o dañada Acuda al centro de servicio
El tubo del alimentador está lleno de aire Accione la palanca varias veces para
extraer el aire
No inyecta grasa
La grasa puede tener poca viscosidad Revisar que la grasa se aplique a
temperatura ambiente
La manguera puede tener fuga Acuda al centro de servicio
Puede haber fugas de grasa en conexiones
y puntos de unión
Acuda al centro de servicio
La bomba no levanta la
presión
La grasa se encuentra en un estado muy
viscoso (a bajas temperaturas)
Revisar que la grasa se aplique a
temperatura ambiente
La válvula check puede estar tapada Desensamble esta pieza y revise que el
paso de la grasa sea el correcto
La grasera puede estar tapada Sustituya la grasera
Se siente dura o forzada
English
1.- Consute su instuctivo de operación (análisis de fallas).
2.- Si vericado su instructivo aún requiere sevicio. Acuda al Centro de Servicio Autorizado
más cercano o a travez de su distribuidor.
3.- Para conservar la calidad de su producto exija que en su reparación se utilicen partes
originales y mano de obra especializada.
Lea cuidadosamente este manual y guárdelo junto con sus documentos de compra, ya que
sin la presentación de esta póliza no se hará efectiva la garantía.
Verique que los datos que a continuación aparecen correspondan al modelo y números
de serie de su producto, y que esté debidamente autorizado por su distribuidor, donde lo
adquirió.
NOMBRE DEL CLIENTE
DIRECCIÓN DEL CLIENTE
MODELOY No. DE SERIE DEL PRODUCTO
NUMERO Y FECHA DE FACTURA
ANTES DE SOLICITAR SERVICIO SIGA LOS SIGUIENTES PASOS:
PÓLIZA DE GARANTÍA
EL USUARIO DE ESTE PRODUCTO MARCA ERKCO ESTÁ PROTEGIDO POR ESTÁ PÓLIZA
QUE GARANTIZA, QUE CUALQUIER COMPONENTE ENCONTRADO CON FALLA
DENTRO DE LOS SIGUIENTES 12 MESES A PARTIR DE LA FECHA DE COMPRA, SERÁ
REPARADO O REMPLAZADO SIN CARGO, SIEMPRE Y CUANDO SEA ATRIBUIBLE A LA
CALIDAD DE SUS MATERIALES O DE SU MANO DE OBRA EN SU FABRICACIÓN, PREVIO
DICTAMEN DEL CENTRO DE SERVICIO AUTORIZADO.
PARA HACER EFECTIVA ESTA GARANTIA DEBERA ACUDIR AL CENTRO DE SERVICIO
AUTORIZADO, ES REQUISITO INDISPENSABLE PRESENTAR ESTA PÓLIZAY SU FACTURA
AL DISTRIBUIDOR.
RECURRA A SU CENTRO DE SERVICIO AUTORIZADO MÁS CERCANO A TRAVÉS DEL
DISTRIBUIDOR DE QUIEN ADQUIRIÓ SU PRODUCTO.
ESTA GARANTÍA NO CUBRE:
*DESCOMPOSTURAS POR SOBRECARGA
*DESCOMPOSTURAS POR EL ABUSO DE USO
*DAÑOS CUANDO EL PRODUCTO NO HA SIDO
OPERADO DE ACUERDO CON EL INSTRUCTIVO
DE USO, MANEJO Y MANTENIMIENTO
*ROTURA DE PIEZAS POR MAL MANEJO
*INTERVENCIONES POR CENTROS DE SERVICIO
NO AUTORIZADOSY PERSONAL NO CALIFICADO
ASÍ COMO DAÑOS POR USO DE PARTES QUE NO
SEAN ORIGINALES
*DESCOMPOSTURAS POR INSTALACIONES
DEFECTUOSAS Y/O INADECUADAS
*DAÑOS CAUSADOS POR SU TRANSPORTACIÓN
*DAÑOS OCASIONADOS POR CAUSAS FORTUITAS
*ESTA GARANTIA ES NULA SI SE PRESENTARA
ENMENDADURAS O ALTERACIONES
Servicios Corporativos Unidos S.A. de C.V.
Av. Del Cerrillo Lote 10-B, Fracc. Ind. El Cerrillo 1 Lerma, Edomex. 52000 Tel: (728)285 6934
FOLIO:
FAILURE POSSIBLE CAUSE
If operating the pump:
Lack of grease in the tank
SOLUTIONS
Fill the grease tank
Blocked or damaged hydraulic coupler Replace hydraulic coupler
The feeder tube is lled with air Operate the lever several times to
remove air
Does not deliver grease
The grease may be of low viscosity Check that the grease is applied at room
temperature
The hose may have a leak Go to the service center
There may be grease leakage in connections
or attachment points Go to the service center
The pump does not have
adequate pressure
The grase is in very viscous state
(at low temperatures) Operate pump above freezing
temperatures
The Check Valve may be clogged Disassemble and inspect to check that
grease passes correctly
The tting can be plugged Replace tting
The lever feels hard and
won´t pump
GREASE PUMP (42 Lbs)
INSTRUCCIONES DE OPERACIÓN / OPERATING INSTRUCTIONS
Español English
1. Llene el depósito con grasa (litio Nº 2)
2. Accione la palanca varias veces para extraer el aire
atrapado hasta llevar la grasa a la boquilla de la manguera.
Coloque la manguera dentro del depósito para que la
grasa inyectada no se tire sobre el piso.
3. Verique que la grasa salga de la forma uida y sin
burbujas de aire.
4. Inserte la boquilla en la grasera donde se inyectara
grasa. Para un buen sello entre la boquilla y grasera, estas
deben de estar alineadas.
5. Accione la palanca para inyectar grasa.
Si la grasa se encuentra en un estado muy viscoso use una
herramienta para empujarla de vez en cuando hacia el
fondo de la cubeta, y evitar así burbujas de aire alrededor
del pistón alimentador.
6. Una vez aplicada la grasa requerida, se recomienda
retirar la boquilla haciendo movimientos rotatorios suaves
con respecto a la grasera para facilitar el desensamble, y
así evitar el desgaste prematuro de las mordazas
1. Fill with grease (lithium No. 2)
2. Operate the lever several times to remove trapped air,
and ll the hose and coupler with grease. Place the hose in
the tank so that the pumped grease will not pour on the
oor.
3. Verify that the grease ows eavenly and without air
bubbles.
4. Insert the coupler into the tting where the grease will
injected. They must be aligned for a good seal between the
coupler and tting.
5. Operate the lever to inject grease.
If grease is in a highly viscous state, use a tool to push it to
the bottom of the bowl, and avoid air bubbles around the
feeder piston.
6. After you apply grease, we recommend removing the
coupler, by making soft circular movements with respect
to the tting, and avoid premature wear of the claws.|
LISTA DE PARTES / PARTS
ITEM No. DE PARTE DESCRIPCIÓN CANTIDAD
1 100-31 Sub palanca de 16” 1
2 H4-1 Remache semitub. AC 3/8”x 1-1/4” 1
3 K1-1 Orig 2-210 1/8”x 3/4” 1
4 F1-2-G Tornillo Hexagonal 1/4”-20 x 1” 4
5 100-32-CF Base para palanca 1
6 100-33 Tirante 1
7 H4-2 Remache semitub. 3/8”x 1-1/2” 2
8 100-38 Vástago de 3/4” 1
9 100-36-2 Vástago de 3/8” 1
10 D-2 Chaveta AC. 3/32”x 3/4” 1
11 100-36-1 Casquillo de lámina 1
12 100-36-3 Triángulo guía 1
13 100-36-A Empaque válvula 1
14 100-35-E Sub tubo cubeta 100 1
15 100-36-5 Pistón alimentador 1
16 C-75 Calcomanía ERKCO mediana 1
17 100-50 Depósito 1
18 H3-025 Remache Rickle Plus 1/4” - 20 7
19 C-29 Calcomanía“HECHO EN MÉXICO” 1
20 100-55 Grapa para manguera cubeta 101 1
21 100-60 Sub Tornillo para tapa 2
22 100-51 Sub Tapa cubeta 1
23 B-4 Bala diámetro 5/16” 1
24 100-21-2 Resorte 1
25 ST-18 Anillo de retención int. 7/16” 1
26 100-13 Sub de la manguera 1
27 1005-33 Sub válvula de mordazas 1
*NOTA: El Kit de reparaciones es el K 100-100
INSTRUCCIONES DE SEGURIDAD / SAFETY INSTRUCTIONS
PRECAUCIONES / WARNING
!
Español
1. Cuide que la grasa sea la indicada para aplicarse con
este tipo de equipo (litio grado 2) y que este limpia y
libre de impurezas.
2. Evite golpear el depósito contra el piso; en caso de
presentarse burbujas de aire alrededor del pistón
alimentador, empuje la grasa con una herramienta
hacia el fondo de la cubeta.
3. Al operar la bomba no use un tubo o eje para aumen-
tar la fuerza en la palanca (ver “Análisis de fallas”).
English
ESPECIFICACIÓNES / SPECIFICATIONS
CUADRO COMPARATIVO DE GRASAS / GREASE SPECS
Español English
Modo de operación Manual
Capacidad 19 Kg (42 Lbs)
Presión máxima 210 Kg/cm² (3000 PSI )
Carrera del émbolo 11.1 cm (4.37”)
Peso neto 8 Kg (17.6 Lbs)
Manual
19Kg (42 Lbs)
210 Kg/cm² (3000 PSI )
11.1 cm (4.37”)
8 Kg (17.6 Lbs)
DIMENSIONES / DIMENSIONS
Español English
Altura 59 cm (23-1/4”)
Largo de la base 40.9 cm (16-3/32”)
Ancho del cuerpo 22.4 cm (8-13/16”)
Longitud de la palanca 40.6 cm (16”)
Longitud de la manguera 130 cm (51-3/16”)
Puerto de salida 1/4”-18 NPT
Dimensiones de empaque 16.5”x 10.75” x 27.75”
59 cm (23-1/4”)
40.9 cm (16-3/32”)
22.4 cm (8-13/16”)
35 cm (13-3/4”)
130 cm (51-3/16”)
1/4”-18 NPT
16.5”x 10.75” x 27.75”
CARACTERÍSTICAS DE FUNCIONAMIENTO / OPERATING SPECS
1. Be sure that the grease used in this equipment is the one
specie (lithium 2 grade) and it´s clean and free of
waste.
2. Avoid hitting the tank on the oor. In case of air bubbles
forming around the piston feeder, push the grease down
with a tool.
3. Do not use a tube or shaft to increase the force on the
lever (see "Failure Analysis").
CHEVRON MOBIL SHELL MEXLUB
Multifak EP-2 Mobilux EP-2 Alvania Grease EP-2 Litio EP-2
Type
Capacity
Maximum pressure
Piston stroke
Net weight
Height of tank
Length of base
Width of the body
Handle lenght
Hose lenght
Outlet diameter
Seal dimensions
1
2
3
4
6
7
8
9
11
12
13
14
15
16
17
22
21
20
19
18
10
5
23 24 25
26
27

Other ERKCO Water Pump manuals

ERKCO 23 User manual

ERKCO

ERKCO 23 User manual

ERKCO 101-E19 User manual

ERKCO

ERKCO 101-E19 User manual

ERKCO 101-E19-P User manual

ERKCO

ERKCO 101-E19-P User manual

ERKCO 25 User manual

ERKCO

ERKCO 25 User manual

ERKCO 100-D13 User manual

ERKCO

ERKCO 100-D13 User manual

Popular Water Pump manuals by other brands

Armstrong HEP OPTIMO operating manual

Armstrong

Armstrong HEP OPTIMO operating manual

Wilo Rexa UNI Installation and operating instructions

Wilo

Wilo Rexa UNI Installation and operating instructions

Sulzer ABS Piranha S10/4-60 Installation, operating and maintenance instructions

Sulzer

Sulzer ABS Piranha S10/4-60 Installation, operating and maintenance instructions

DAB DAB E.SYBOX Instruction for installation and maintenance

DAB

DAB DAB E.SYBOX Instruction for installation and maintenance

Hamron 006780 operating instructions

Hamron

Hamron 006780 operating instructions

Wilo Stratos GIGA2.0-I Installation and operating instructions

Wilo

Wilo Stratos GIGA2.0-I Installation and operating instructions

Lincoln 105 owner's manual

Lincoln

Lincoln 105 owner's manual

Becker KVX 3.80 operating instructions

Becker

Becker KVX 3.80 operating instructions

GORMAN-RUPP PUMPS T10A60S-BF6L Installation, operation, and maintenance manual with parts list

GORMAN-RUPP PUMPS

GORMAN-RUPP PUMPS T10A60S-BF6L Installation, operation, and maintenance manual with parts list

Trebor Mega 255 Operation & maintenance manual

Trebor

Trebor Mega 255 Operation & maintenance manual

Danfoss PAHT G 10 Disassembling and assembling

Danfoss

Danfoss PAHT G 10 Disassembling and assembling

Franklin Electric VersaJet Series Installation and operation manual

Franklin Electric

Franklin Electric VersaJet Series Installation and operation manual

Ecom ECP2010 user guide

Ecom

Ecom ECP2010 user guide

Neptun NCHW-E 110 Inox Original operating instructions

Neptun

Neptun NCHW-E 110 Inox Original operating instructions

Wolf ZP-3 installation instructions

Wolf

Wolf ZP-3 installation instructions

WAGNER TOPFINISH DD10 Alu NiP Translation of the original operating manual

WAGNER

WAGNER TOPFINISH DD10 Alu NiP Translation of the original operating manual

Silverline 633872 user manual

Silverline

Silverline 633872 user manual

Salamander Pumps CT Force installation guide

Salamander Pumps

Salamander Pumps CT Force installation guide

manuals.online logo
manuals.online logoBrands
  • About & Mission
  • Contact us
  • Privacy Policy
  • Terms and Conditions

Copyright 2025 Manuals.Online. All Rights Reserved.