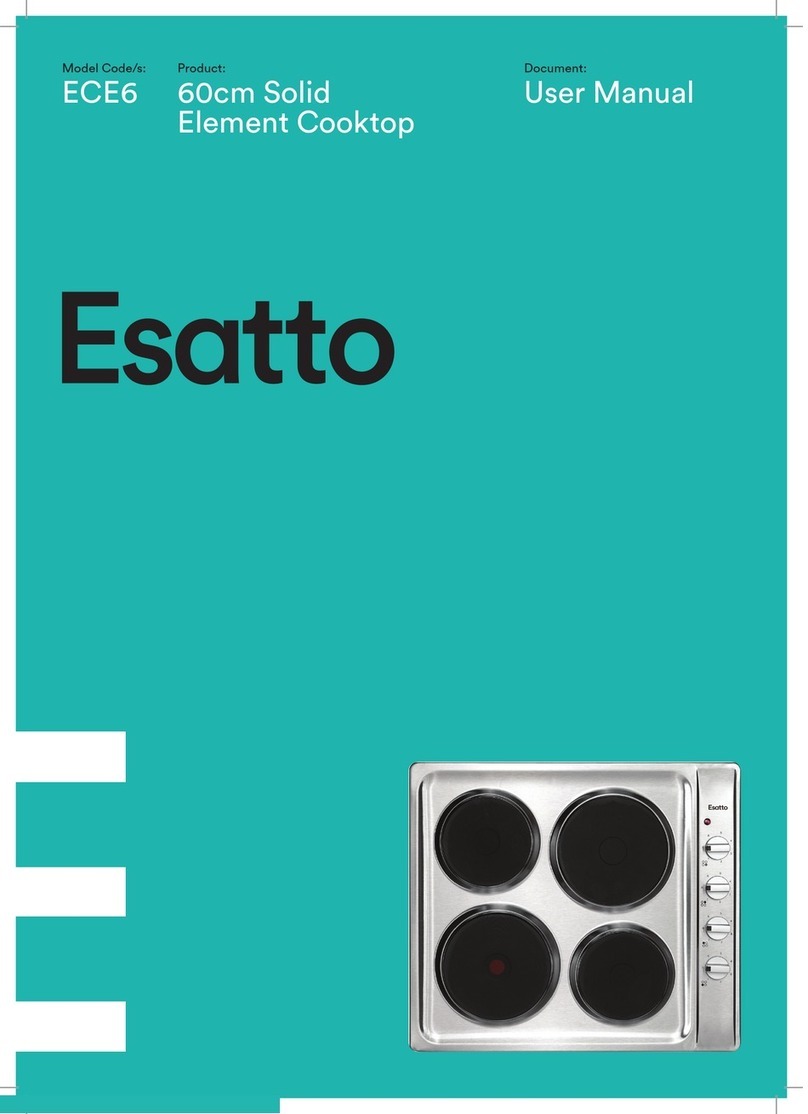
Esatto EF54W User manual

Page:
1
User Manual:
Model Code/s:
EF54W
Product:
54cm Freestanding
Electric Oven
Document:
User Manual

Dear Customer, Congratulations on purchasing your new
freestanding oven. The Esatto brand is proudly
distributed within Australia by Residentia Group Pty
Ltd.
Please refer to the warranty card at the rear of this
manual for information regarding your product’s
parts and labour warranty, or visit us online at
www.residentiagroup.com.au.
At Residentia Group, we are customer obsessed
and our Support Team are there to ensure you get
the most out of your appliance. Should you want
to learn more about your oven such as the various
cooking functions or importantly taking care of the
appliance, our Support Team are here to help.
You can use our online Support Centre at anytime
by visiting http://support.residentiagroup.com.au,
or you can contact us via phone by dialling:
1300 11 HELP (4357).
It is important that you read through the following
use and care manual thoroughly to familiarise
yourself with the installation and operation
requirements of your appliance to ensure optimum
performance.
Again, thank you for choosing an Esatto appliance
and we look forward to being of service to you.
Kind Regards,
The Residentia Team
T1300 11 4357
E info@residentiagroup.com.au
W residentiagroup.com.au
ACN 600 546 656
Residentia Group
PO Box 581
Stanhope Gardens
NSW Australia 2768

Page:
3
User Manual:
Contents: Page:
Safety instructions 4
Your Esatto Freestanding Oven 5
Installation Instructions 6
Technical Data 8
Appliance Features 8
Using your Freestanding Oven 9
Cleaning and maintenance 12
Troubleshooting 13
Warranty information 14

Page:
4
User Manual:
Safety Instructions
→ This appliance is only intended for use within the interior of a domestic
environment.
→ This appliance is not intended for use by persons (including children) with reduced
physical, sensory or mental capabilities, or lack of experience and knowledge, unless
they have been given supervision or instruction concerning use of the appliance by a
person responsible for their safety.
→Children should be supervised to ensure that they do not play with the appliance.
→This freestanding oven may be installed with cabinets on both sides, or it can be installed
as a freestanding oven. Sucient space should be allowed at either side of the oven to
enable it to be removed for cleaning and servicing.
→Please read all instructions within this user manual before instaling or using this
appliance.
→All installation and servicing work must be carried out by a suitably qualied and
competent person.
UNPACKING
→During transportation, protective packaging was used to protect the appliance against
any damage. After unpacking, please dispose of all elements of packaging in a way
that will not cause damage to the environment. All materials used for packaging the
appliance are environmentally friendly; they are 100% recyclable and are marked with
the appropriate symbol.
→We recommend washing all oven shelves and runners with warm soapy water to remove
the protective coating of oil. During your rst use, you may still notice an odour as any
remaining oils/residues are burnt o.
Caution! During unpacking, the packaging materials (polythene bags, polystyrene
pieces, etc.) should be kept out of reach of children.
MOVING YOUR FREESTANDING OVEN
→Please note that this appliance may be heavier than it appears. Take care if the appliance
needs to be lifted during installation and alway use an appropriate method of lifting.
→Do not attempt to move the oven by pulling or lifting on the doors or handles. Open the
door and grasp the frame of the oven, taking care to ensure that the door doesn’t close
on your ngers.
→Take care to avoid damage to your oor coverings when moving the oven. In particular,
some cushioned vinyl oor coverings may not be designed to withstand sliding
appliances without marking or damage.
GLASS DOOR PANELS
→To meet the relevant Standards of Domestic cooking appliances, all of the glass panels
on this appliance are toughened to meet the fragmentation requirements of BS3193.
This ensures that, in the likely event that a panel breaks, it does so into small fragments
to minimise the risk of injury.
→Please take care when handling,using or cleaning all glass panels, as any damage to the
surfaces or edges may result in the glass breaking without warning or apparent cause
at a later date. Any damaged or broken glass should be replaced immediately.
DISPOSAL OF THE APPLIANCE
→Old appliances should not simply be disposed of with normal household waste, but
should be delivered to a collection and recycling centre for electric and electronic
equipment. A symbol shown on the product, the instruction manual or the packaging
shows that it is suitable for recycling.
→Materials used inside the appliance are recyclable and are labeled with information
concerning this. By recycling materials or other parts from used devices you are making
a signicant contribution to the protection of our environment.
→Information on appropriate disposal centres for used devices can be provided by your
local authority.

Page:
5
User Manual:
Safety Instructions (continued)
→ When you are cooking, keep children away from the vicinity of the appliance.
→ This product is designed as a domestic cooking appliance for the preparation and
cooking of domestic food products, and should not be used for any other purpose.
→ Make sure you read and understand the instructions before using the appliance.
→ Remove all packaging, protective lms and oils from the appliance before using for
the rst time.
→ Keep electrical leads short so they do not drape over the appliance or the edge of the
bench top.
→ Keep all ammable materials (such as curtains, furnishings & clothing) away from the
appliance.
→ The appliance is not intended to be operated by means of an external timer or separate
remote-control system.
→ Parts of the appliance may be hot during or immediately after use. Care should be
taken to avoid touching heating elements inside the oven. Allow sucient time for the
appliance to cool after switching o.
→ Do not use the oven with the door inner glass panel removed.
→ Do not drape tea towels over the ue vents or doors, as this creates a re hazard.
→ Do not use aluminium foil to cover the grill pan, or put items wrapped in foil under the
grill, as this creates a re hazard. The high reectivity can also damage the element.
→ Do not use foil on oven shelves, or allow it to block the oven ue, as this creates a re
hazard, and pre-vents heat circulation.
→ When cooking heavy items—eg; turkeys—do not pull the oven shelf out with the item
still on the shelf.
→ When opening the appliance door, take care to avoid skin contact with any steam which
may escape from the cooking.
→ Use oven gloves when removing hot food/dishes from the oven or grill. The oven/grill and
utensils will be very hot when in use.
→ During use the appliances becomes hot. Care should be taken to avoid touching heating
elements inside the oven, for cooking ranges and ovens.
Your Esatto Freestanding Oven
Parts Identication:
1. Control Panel
2. Grill
3. Oven Door
4–7. Hot Plates
8. Temperature Indicator Light
9. Grill pan with handle
10. 2 x Wire Shelves
11. Grill Door
12. Oven

Page:
6
User Manual:
Installation Instructions
POWER SOURCE AND GROUNDING
→This appliance must be earthed and should be on it’s own dedicated power outlet in an
accessible location.
Important! If the power cord is damaged, it must be replaced by Residentia Group or
one of it’s authorised service representatives. Please contact 1300 11 HELP
(4357) and ensure the appliance is completely disconnected from the
power supply.
POSITIONING:
→Remove all packing materials including the protective lm covering the chrome plated
and stainless steel parts (if applicable).
→The kitchen should be dry and well ventilated. Position the oven ensuring free access to
all of the controls and so that the doors can open unobstructed.
→The distance between the cooktop and the extractor hood should be at least 650mm.
→If necessary, level the oven using the adjustable feet.
SAFETY CHAIN ANCHORS:
Important! This freestanding oven MUST be secured to the wall, please follow the
instructions below.
→ In order to eliminate the risk of the oven falling forward, two chains have been supplied
with the appliance. Before use, these will need to be fastened securely to the wall behind
the appliance with the anchor brackets supplied.
→ Decide on a suitable wall location for tting the anchor brackets directly behind teach
oven safety chain.
→ Hold the chain anchor up to the wall where it will be required and mark the xing holes
using a pencil.
→ Drill the xing holes and x the chain anchors to the wall using the screws provided and
suitable wall plugs for the type of wall being xed to.

Page:
7
User Manual:
→ Leave the chains unattached until the installation process has been completed.
WARNING! Whilst every care is taken to eliminate burrs and raw edges from this product, please
take care when handling. We recommend using protective gloves.
Important! Ensure that you route all mains cables well clear of any adjacent heat source.
INSTALLATION CLEARANCES:
→This oven may be tted ush to base units. However, for models with side opening doors,
we recommend a side clearance of 60mm between the oven and any side wall to allow
the door to be opened fully.
→The oven should not be placed on a base.
→No shelf or overhang or rangehood should be closer than a minimum of 650mm, but
check with the rangehood manufacturer’s recommendations.
→The oven must have a side clearance above cooktop level of 90mm up to a height of
400mm.
DIMENSIONS:
→All sizes are nominal, and some variation is to be expected. The ‘depth’ of the oven, as
given below, is to the front of the door and excluding the knobs and handles.
WIDTH: 540mm,
DEPTH: 600mm,
HEIGHT: 900-930mm.
LEVELLING THE OVEN:
→There are four adjustable feet on the base of the oven. Slacken the locknut with an M8
spanner and turn the feet by hand to adjust the height of the oven.
CONNECTION TO ELECTRICITY SUPPLY:
Important! This appliance must be installed by a qualied person.
→ 40 amp hardwire required and needs a dedicated circuit from the main switchboard.
→ Ensure that you route all mains electrical cables well clear of an adjacent heat source,
such as an oven or grill.
→ This appliance must be earthed.
→ Where a xed connection is used, a device allowing the appliance to be isolated on
all poles from the mains supply with a contact opening width of at least 3mm must be
provided.
→ After connection to electricity, please ensure that all electrical parts are working.

Page:
8
User Manual:
Installation Instructions (continued)
→ The maximum power rating is specied in the Technical Data section of this user manual
and also on the Rating Plate on the appliance itself.
→ If it is necessary to disconnect the appliance after installation, the disconnection may be
achieved by having a plug accessible or by incorporating a switch in the xed wiring in
accordance with the local wiring rules.
Technical Data
Element: Element Ratings (@ 220-240V): Other:
Front LHS element 2000W Oven Volume Capacity 55L (Net)
Rear LHS element 1000W Grill Volume Capacity 25L (Net)
Rear RHS element 1500W
Front RHS element 1000W Weight ~56kg
Grill 1500W
Main Oven 2050W
Maximum Load 10550W
Appliance Features
COOKTOP FEATURES: OVEN FEATURES:
→ 4 x Electric Solid Elements →White enamelled nish
→ Easy to clean single piece cooktop →150–250º Celsius
temperature range
→ Fan-forced electric
bottom oven
→ Separate grill

Page:
9
User Manual:
Using your Freestanding Oven: Cooktop
USING YOUR COOKTOP:
→ Commercial simmering aids should not be used as they create excessive temperatures
that can damage the cooktop surface and may cause a hazard.
→ Do not place aluminium foil or plastic utensils on the cooktop, as they may melt and
damage the surface.
→ Do not use the cooktop surface for storage.
→ When cooking with fat or oil, never leave unattended.
→ Turn pan handles to a safe position, so they are out of reach of children, not overhanging
the appliance and annot be caught accidentally.
→ Position pans over the centre of the cooktop elements.
→ Aluminium foil must not be placed on the cooktop as it will reect any heat back into the
element which can damage it.
→ Leaving a cooktop on for a length of time, without it being covered by a pan, causes
overheating of surrounding areas which could cause damage to the element.
→ Be careful when cooking foods in salted water, or foods containing large amounts of
sugar, syrup or jam- if they are spilt on to hot areas of the cooktop they may cause
damage.
CHOICE OF PANS:
→ The choice of cookware is important if you are to achieve maximum benet from
cooking.
→ When buying new pans, always refer to the manufacturer’s guidelines to ensure its
appropriate for your freestanding oven.
→ For best results and energy eciency, it is important to use at bottomed pans of the
correct type.
→ Always use pans which are large enough to prevent spillage, especially for deep frying or
when cooking with a sugar based substance.
→ Trviets, round based woks, heat diuser pads and over-sized pans are not recommended.
TYPE AND SIZE OF PANS:
→ Cast iron, stainless steel or enamelled steel pans are all suitable for use on ceramic glass
hobs.
→ Aluminimum pans will give good cooking results but care must be taken in their use.
→ Avoid using double pans or old mis-shapen pans which are unstable and dangerous.
→ Pans with highly polished based can reect heat back into the cooktop causing the
element to cycle on and o more rapidly than normal which can slow down cooking.
IN THE EVENT OF A PAN FIRE:
→ Turn o the freestanding oven at the wall power outlet.
→ Cover the pan with a re blanket or damp cloth. This will smother the ames and
extinguish the re.
→ Leave the pan to cool for at least an hour before attempting to move it. Injuries are often
caused by picking up a hot pan and rushing outside with it.
→ NEVER USE A FIRE EXTINGUISHER TO PUT OUT A PAN FIRE.
→ NEVER USE WATER TO EXTINGUISH OIL OR FAT PAN FIRES.
USING THE COOKTOP ELEMENTS:
→ Each cooktop is regulated using a selector knob on the front control panel of your
freestanding oven.
→ The control allows for the ecient transfer of heat to the cooking pan.
→ On the knob, which can be turned in both directions, there are numbers 0 to 6, where 6
is the highest heat setting and zero is o.

Page:
10
User Manual:
Using your Freestanding Oven: Grill
USING YOUR GRILL:
→ Accessible parts may be hot when the grill is used, young children should be kept away
from the oven.
→ Use the detachable grill pan handle to remove the grill pan. During grilling ensure that
the detachable grill pan is removed, to prevent it from overheating.
→ Food for grilling should be positioned centrally on the grill pan.
→ Using Aluminium foil to cover the grill pan, or placing items wrapped in foil under the
grill, can create a re hazard and the high reectivity can damage the grill element.
PRE-HEATING:
→ For best results, preheat the grill for 3–5 minutes.
SWITCHING ON THE GRILL:
→ Turn the selector control knob (shown below) to the required temperature position.
→ Place the food in the middle of the grill pan and position the pan so that the food i near
but not touching the top element.
→ Do not line the grill pan with aluminium foil.
→ When the food is cooked, turn the selector control and temperature control to the o
positions.
→ Important: The door must be kept closed when the grill is in use.
→ When grilling, you cna control the speed of grilling by using the temperature control
selector or by adjusting your grill pan shelf position.

Page:
11
User Manual:
Using your Freestanding Oven: Oven
WARNING! Accessible parts may be hot when the oven is used, young children should be kept
away from the oven.
SWITCHING THE OVEN ON:
→ Turn the selector control knob to the required temperature position.
→ The indicator light on the control panel will go out when the selected temperature has
been reached inside the oven.
→ Always turn the control knob to o when cooking has nished.
→ Note: If the oven temperature becomes excessive, your freestanding oven incorporates
a safety cut-o switch to kill the electricity supply to the oven.
ADJUSTING SHELF POSITIONS:
→ You can adjust the position of shelves by inserting and removing on a slight angle,
as shown in the gure below. Remember to use oven gloves if your oven has been in
operation.
→ Food for grilling should be positioned centrally on the grill pan.
→ Using Aluminium foil to cover the grill pan, or placing items wrapped in foil under the
grill, can create a re hazard and the high reectivity can damage the grill element.
PRE-HEATING:
→ Always allow the oven to pre-heat until the indicator light switches o, before beginning
your cooking.
BAKING AND ROASTING TRAYS:
→ For best results, tha maximum sized baking trays and roasting tins that should be used
are as follows:
BAKING TRAYS: 350 × 280mm
ROASTING TINS: 370 × 320mm

Page:
12
User Manual:
Cleaning Your Freestanding Oven
WARNING! Any cleaning agent used incorrectly may damage your appliance and void your warranty.
→ Always allow the appliance to completely cool down before cleaning.
→ Never use a steam cleaner on this appliance.
→ Disconnect the freestanding oven from it’s power supply before proceeding with washing
and cleaning and ensure it completely cools.
→ You should ensure that your oven is regularly cleaned .
GENERAL CARE AND CLEANING:
→ Some cooking operations generate considerable amount of grease, this combined with
spillage can become a hazard if allowed to accumulate on the appliance through a lack
of cleaning. In extreme cases, this may amount to mis-use of the appliance and could
invalidate your warranty.
→ Never use caustic, corrosive, or abrasive cleaning products, products containing bleach,
coarse wire wool or any other hard implements, as they will damage the surfaces.
→ Warm soapy water used regularly should be adequate to keep your oven and cooktop in
clean working order.
→ Never use harsh abrasives or sharp metal scrapers to clean the oven door glass, as they
can scratch the surface and ultimately lead to shattering of the glass.
VITREOUS ENAMEL PARTS:
→ These include the grill pan and internal oven compartments.
→ Use a mild cream cleaner available from your supermarket. Ensure on the manufacturer’s
guidelines that it is suitable for use on enamelled surfaces and has been designed for use
within domestic ovens.
→ The grill pan may be cleaned within your dishwasher, or with a nylon brush in hot soapy
water.
GLASS PARTS:
→ Use a mild cream cleaner available from your supermarket. Ensure on the manufacturer’s
guidelines that it is suitable for use on glass surfaces.
→ Rinse and thoroughly dry with a soft cloth.
PAINTED, PLASTIC AND METAL PARTS:
→ These include the control knobs, door handle and fascia panel.
→ Only use a clean cloth with hot soapy water.
CHROME PLATED PARTS:
→ These include the oven shelves and oven shelf runners and the grill pan insert.
→ Only use a clean cloth with hot soapy water, or a moist soap pad (i.e. “Brillo”).
CLEANING THE COOKTOP:
→ Clean the cooktop elements with a damp sponge and then dry them by turning them on
for a few seconds.
→ The cooktop trim rings can be cleaned with agents intended for the maintenance of
stainless steel parts. The rings may become yellowed as a result of overheating. This is
normal.
CLEANING THE OVEN:
→ It is best to clean the bottom of the oven after every use and not allow the remains of
food and spots of oil to remain burned on.

Page:
13
User Manual:
Troubleshooting
OPERATION IN CASE OF EMERGENCY
In the event of an emergency you should:
→Switch o all controls.
→Switch the washing machine o at the power outlet or at the fuse box.
→Call the Residentia Support Team on 1300 11 HELP (4357).

Page:
14
User Manual:
Continued over page →
Warranty
WARRANTY TERMS AND CONDITIONS
COOKING APPLIANCES
→This document sets out the terms and conditions of the product warranties for Residentia
Group Appliances. It is an important document. Please keep it with your proof of
purchase documents in a safe place for future reference should you require service for
your Appliance.
1. In this warranty
(a) ‘acceptable quality’ as referred to in clause 10 of this warranty has the same meaning
referred to in the ACL;
(b) ‘ACL’ means Trade Practices Amendment (Australian Consumer Law) Act (No.2)
2010;
(c) ‘Appliance’ means any Residentia Group product purchased by you accompanied by
this document;
(d) ‘ASR’ means Residentia Group authorised service representative;
(e) ‘Residentia Group’ means Residentia Group Pty Ltd of 20 Yaltara Avenue, Bundoora
Victoria 3083, ACN 600 546 656 in respect of Appliances purchased in Australia;
(f) ‘major failure’ as referred to in clause 10 of this warranty has the same meaning
referred to in the ACL and includes a situation when an Appliance cannot be
repaired or it is uneconomic for Residentia Group, at its discretion, to repair an
Appliance during the Warranty Period;
(g) ‘Warranty Period’ means:
(i) where the Appliance is used for personal, domestic or household use
(i.e. normal single family use) as set out in the instruction manual, the
Appliance is warranted against manufacturing defects in Australia for 12
months following the date of original purchase of the Appliance;
(h) ‘you’ means the purchaser of the Appliance not having purchased the Appliance for
re-sale, and ‘your’ has a corresponding meaning.
2. This warranty only applies to Appliances purchased and used in Australia and is in addition to (and does
not exclude, restrict, or modify in any way) any non-excludable statutory warranties in Australia.
3. During the Warranty Period Residentia Group or its ASR will, at no extra charge if your Appliance is
readily accessible for service, without special equipment and subject to these terms and conditions,
repair or replace any parts which it considers to be defective. Residentia Group or its ASR may use
remanufactured parts to repair your Appliance. You agree that any replaced Appliances or parts become
the property of Residentia Group. This warranty does not apply to light globes, batteries, lters or
similar perishable parts.
4. Parts and Appliances not supplied by Residentia Group are not covered by this warranty.
5. You will bear the cost of transportation, travel and delivery of the Appliance to and from Residentia
Group or its ASR. If you reside outside of the service area, you will bear the cost of:
(a) travel of an authorised representative;
(b) transportation and delivery of the Appliance to and from Residentia Group or its
ASR, in all instances, unless the Appliance is transported by Residentia Group or its
ASR, the Appliance is transported at the owner’s cost and risk while in transit to and
from Residentia Group or its ASR.
6. Proof of purchase is required before you can make a claim under this warranty.

Page:
15
User Manual:
Our goods come with guarantees that cannot be excluded under the Australian Consumer Law. You are entitled
to a replacement or refund for a major failure and for compensation for any other reasonably foreseeable loss or
damage. You are also entitled to have the goods repaired or replaced if the goods fail to be of acceptable quality
and the failure does not amount to a major failure.
The Australian Consumer
Law requires the inclusion
of the following statement
with this warranty:
Warranty continued
7. You may not make a claim under this warranty unless the defect claimed is due to faulty or defective
parts or workmanship. Residentia Group is not liable in the following situations (which are not
exhaustive):
(a) the Appliance is damaged by:
(i) accident
(ii) misuse or abuse, including failure to properly maintain or service
(iii) normal wear and tear
(iv) power surges, electrical storm damage or incorrect power supply
(v) incomplete or improper installation
(vi) incorrect, improper or inappropriate operation
(vii) insect or vermin infestation
(viii) failure to comply with any additional instructions supplied with the
Appliance;
(b) the Appliance is modied without authority from Residentia Group in writing;
(c) the Appliance’s serial number or warranty seal has been removed or defaced;
(d) the Appliance was serviced or repaired by anyone other than Residentia Group, an
authorised repairer or ASR.
8. This warranty, the contract to which it relates and the relationship between you and Residentia Group
are governed by the law applicable where the Appliance was purchased.
9. To the extent permitted by law, Residentia Group excludes all warranties and liabilities (other than as
contained in this document) including liability for any loss or damage whether direct or indirect arising
from your purchase, use or non use of the Appliance.
10. For Appliances and services provided by Residentia Group in Australia, the Appliances come with a
guarantee by Residentia Group that cannot be excluded under the Australian Consumer Law. You are
entitled to a replacement or refund for a major failure and for compensation for any other reasonably
foreseeable loss or damage. You are also entitled to have the Appliance repaired or replaced if the
Appliance fails to be of acceptable quality and the failure does not amount to a major failure. The
benets to you given by this warranty are in addition to your other rights and remedies under a law in
relation to the Appliances or services to which the warranty relates.
11. At all times during the Warranty Period, Residentia Group shall, at its discretion, determine whether
repair, replacement or refund will apply if an Appliance has a valid warranty claim applicable to it.
12. To enquire about claiming under this warranty, please follow these steps:
(a) carefully check the operating instructions, user manual and the terms of this
warranty;
(b) have the model and serial number of the Appliance available;
(c) have the proof of purchase (e.g. an invoice) available;
(d) telephone the numbers shown below.
13. You accept that if you make a warranty claim, Residentia Group and its ASR may
exchange information in relation to you to enable Residentia Group to meet its
obligations under this warranty.
IMPORTANT Before calling for service, please ensure that the steps in point 12 have been followed.
Service: Please call 1300 11 HELP (4357)
Spare Parts: Please call 1300 11 PART (7278)

Page:
16
User Manual:
Model Code/s:
EF54W
Table of contents
Other Esatto Oven manuals
Popular Oven manuals by other brands

Atag
Atag ZX4511DN Instructions for use

Bosch
Bosch HBG6767 1A Series User manual and installation instructions

Bakers Pride
Bakers Pride SUPER DECK Y-600 Operation manual

Siemens
Siemens HM678G4 1B Series instruction manual

Miele
Miele TX3587 Operating and installation instructions

Bosch
Bosch MBA5350 0B Series User manual and installation instructions