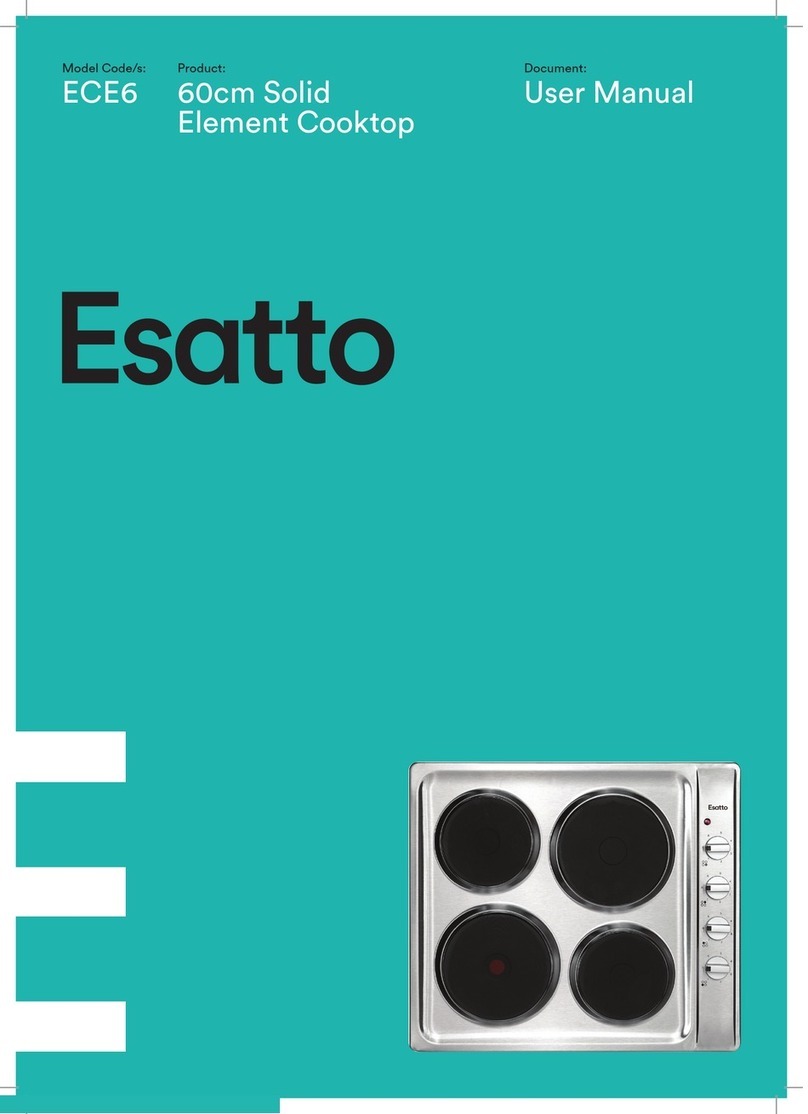
Esatto EOP6010TB User manual

Version
V1.1 1022
Everything you need for
your 60cm 10 Function
Built-in Pyrolytic Oven
is in this User Mnul
Model/s
EOP6010TB

User Manual
2
Welcome
Congrtultions on purchsing your new Built-in Oven. The Estto brnd is
proudly distributed within Austrli by Residenti Group Pty Ltd.
Plese refer to the wrrnty crd t the rer of this mnul for informtion
regrding your product’s prts nd lbour wrrnty, or visit us online t:
www.residenti.group
At Residenti Group, we re customer obsessed nd our Support Tem re there
to ensure you get the most out of your pplince. Should you wnt to lern more
bout your new oven, it's fetures or importntly tking cre of the pplince,
our Support Tem re here to help.
You cn use our online Support Centre t nytime by visiting:
http://support.residentigroup.com.u
Or you cn contct us vi phone by diling: 1300 11 HELP (4357).
It is importnt tht you red through the following use nd cre mnul
thoroughly to fmilirise yourself with the instlltion nd opertion
requirements of your pplince to ensure optimum performnce.
Agin, thnk you for choosing n Estto pplince nd we look forwrd
to being of service to you.
Kind Regrds,
The Residenti Tem
Residenti roup
—
Head Office
165 Brkly Avenue
Burnley, Victori
Austrli 3121
—
ACN
600 546 656
—
Online
residenti.group
www.estto.house
@estto.house
—
Postage
PO Box 5177
Burnley, Victori
Austrli 3121
—
Telephone
1300 11 4357
www.estto.house

esatto.house
3
Pge 2
Welcome
Pge 4
Sfety Instructions
Pge 7
Instlltion
Instructions
Pge 8
Your Built-in Oven
Pge 9
Technicl
Specictions
Pge 10
Opertion
Instructions
Pge 16
Mintennce
Clening
Pge 17
Troubleshooting
Contents
Pge 19
Purchse Detils
Pge 20
Wrrnty

User Manual
4
IMPORTANT SAFETY INSTRUCTIONS
READ CAREFULLY AND KEEP
FOR FUTURE REFERENCE
Red this mnul thoroughly before rst use,
even if you re fmilir with this type of product.
The sfety precutions enclosed herein reduce
the risk of re, electric shock nd injury when
correctly dhered to. Mke sure you understnd
ll instructions nd wrnings.
Keep the mnul in sfe plce for future
reference, long with the completed wrrnty
crd nd purchse receipt. If you sell or trnsfer
ownership of this product, pss on these
instructions to the new owner.
Alwys follow bsic sfety precutions nd
ccident prevention mesures when using n
electricl pplince. The following sttements you
will see in this booklet hve these menings:
WARNING: Indicting informtion concerning
your personl sfety.
CAUTION: Indicting informtion on how to
void dmging the pplince or cbinetry.
IMPORTANT: Indicting tips nd informtion
bout use of the pplince.
USAGE CONDITIONS AND RESTRICTIONS
• Domestic use only: This pplince is intended
for indoor household use only. It is not intended
for commercil, industril or outdoor use. It is not
intended for use in recretionl vehicle.
• Purpose: Do not use this pplince for nything
other thn its intended purpose. Other uses re
not recommended nd my cuse re, electric
shock or personl injury.
• Attchments: The use of ttchments is not
recommended by the pplince mnufcturer
nd distributor s they my be hzrdous.
• Improper use: Dmge due to improper use,
or repirs mde by unqulied personnel will
void your wrrnty. We ssume no libility
for ny eventul dmges cused by misuse
of the product or noncomplince with these
instructions.
BEFORE USING YOUR APPLIANCE
This mnul explins the proper use of your new
Estto oven. Plese red this mnul crefully
before using the product. This mnul should be
kept in sfe plce for hndy reference.
This oven is domestic pplince which hs been
mnufctured nd tested to comply with Austrlin
nd New Zelnd Stndrds.
This oven must only be instlled in ccordnce with
the instructions provided. Incorrect instlltion my
cuse hrm to persons, dmge property nd void
the product’s wrrnty.
Red the following crefully to void dmge
or injury.
IMPORTANT: Check for ny dmge or mrks.
If you nd the pplince is dmged or mrked,
you must report it within 7 dys if you wish to clim
for dmge/ mrks under the mnufcturer’s
wrrnty. This does not ect your sttutory rights.
SAFETY INSTRUCTIONS
• Before the instlltion nd use of the pplince,
crefully red the supplied instructions.
• The mnufcturer is not responsible if n
incorrect instlltion nd use cuses injuries
nd dmges.
• Alwys keep the instructions with your pplince
for future reference.
• Do not use the oven unless you re wering
something on your feet. Do not touch the oven
with wet or dmp hnds or feet.
• Some prts of pplince my keep its het for
long time; it is required to wit for it to cool down
before touching onto the points tht re exposed
to the het directly.
• If you will not use the pplince for long time,
it is dvised to turn it o by the power source.
WARNING: To prevent ny dmges to your nd
others’ life or property, you hve to follow the
sfety notes.
WARNING: Cution, risk of re!
Sfety Instructions

esatto.house
5
CHILDREN VULNERABLE PEOPLE SAFETY
WARNING: Risk of suocation, injury or permanent
disability.
• This pplince cn be used by children ged
from 8 yers nd bove nd persons with
reduced physicl, sensory or mentl cpbilities
or lck of experience nd knowledge if they hve
been given supervision or instruction for the
opertion of the pplince by person who is
responsible for their sfety.
• Do not let children ply with the pplince.
• Keep ll pckging wy from children.
• Keep ll detergents wy from children.
• Keep children nd pets wy from the pplince
door when it is open.
• Do not llow children to go ner the oven when it
is operting, especilly when the grill is on.
• Clening nd user mintennce shll not be
mde by children without supervision.
BEFORE INSTALLATION
• Remove ll the pckging.
• Do not instll or use dmged pplince.
• Alwys move the pplince cutiously. Do not
use the mchine door or the hndle of oven, to
lift the pplince.
• When the oven is rst switched on, it my give o
n unplesnt smell. This is due to the bonding
gent used for the insulting pnels within the
oven. Plese run the new empty oven with the
conventionl cooking function, 250 °C for 90
minutes to clen oil impurities inside the cvity.
• During the rst time use, it is completely norml
tht the oven will show slight signs of smoke nd
unplesnt odours. Plese wit for the smell to
cler before putting food into the oven.
• Plese use this product under the open
environment.
• The pplince nd its ccessible prts become
hot during use. Cre should be tken to void
touching heting elements.
• If the surfce is crcked, switch o the pplince
to void the possibility of electric shock.
• During use, the pplince becomes very hot.
Cre should be tken to void touching heting
elements inside the oven.
• Ensure tht the pplince is switched o before
replcing the oven lmp to void the possibility of
electric shock.
• The mens for disconnection must be
incorported in the xed wiring in ccordnce
with the wiring specictions.
• Accessible prts my become hot during use.
• An ll-pole disconnection mens must be
incorported in the xed wiring in ccordnce
with the wiring rules.
• The pplince must be instlled by n uthorised
technicin nd put into use. The mnufcturer
is not responsible for ny dmge tht might
be cused by defective plcement, nd
instlltion by unuthorised personnel.
Plese contct 1300 11 HELP (4357) to rrnge
n uthorised technicin.
ELECTRICAL CONNECTION
CAUTION: Risk of re and electrical shock!
• The pplince must be erthed.
• Mke sure tht the electricl informtion on the
rting plte grees with the power supply. If not,
contct n electricin.
• Alwys use correctly instlled shockproof
socket.
• Do not use ny multi-plug dpters or extension
cbles.
• Connect the mins plug to the mins socket
only t the end of the instlltion. Mke sure
tht there is ccess to the mins plug fter the
instlltion. Do not connect the pplince plug
with power connection bord.
• Do not pull the mins cble to disconnect the
pplince. Alwys pull the mins plug.
• Do not touch the mins cble or the mins plug
with wet hnds.
WARNING: If the supply cord is dmged, it must
be replced by the mnufcturer or its service
gent or similrly qulied person in order to void
hzrd.
WARNING: All electricl work must be done in
ccordnce with locl nd ntionl electricl
codes s pplicble nd should be undertken by
licenced nd qulied persons only. Filure to follow
these instructions cn result in deth, re
or electricl shock.

User Manual
6
Sfety Instructions (Continued)
APPLIANCE USE
WARNING: Risk of re, explosion, electric shock or
dmge to the pplince.
• Use this pplince in household only.
• Do not chnge the speciction of this oven.
• Do not sit or stnd on the open door.
• Plese do not close the mchine door with
excessive force.
• When the door or drwer of oven is open do not
leve nything on it, you my unblnce your
pplince or brek the door.
• The pplinces re not intended to be operted
by mens of n externl timer or seprte
remote control system.
• The instructions for ovens tht hve shelves shll
include detils indicting the correct instlltions
of the shelves.
• Only use the temperture probe recommended
for this oven.
CARE CLEANING
CAUTION: Risk of injury or damage to the oven.
• Before mintennce, dectivte the pplince
nd disconnect the mins plug.
• Excess spillge must be removed before clening.
• During pyrolytic clening, ccessible prts my
become hotter thn norml. Young children
should be kept wy.
• During pyrolytic clening, the probe is to
be removed.
• Do not use stem clener on the pplince.
• Clen the pplince with moist soft cloth.
Only use neutrl detergents. Do not use brsive
products, brsive clening pds, solvents or
metl objects.
• Do not use hrsh brsive cleners or shrp
metl scrpers to clen the oven door glss since
they cn scrtch the surfce, which my result in
shttering of the glss.
UNPACKING
During trnsporttion, protective pckging ws
used to protect the pplince ginst ny dmge.
After unpcking, plese dispose of ll elements of
pckging in wy tht will not cuse dmge to
the environment.
All mterils used for pckging the pplince re
environmentlly friendly; they re 100% recyclble
nd re mrked with the pproprite symbol.
CAUTION: During unpcking, the pckging
mterils (polythene bgs, polystyrene pieces, etc.)
should be kept out of rech of children.
DISPOSAL OF THE APPLIANCE
• Disconnect the pplince from the mins supply.
• Cut o the mins cble nd discrd it.
• Remove the door ctch to prevent children nd
pets to get closed in the pplince.
Old pplinces should not simply be disposed
of with norml household wste nd should be
delivered to collection nd recycling centre for
electric nd electronic equipment. A symbol shown
on the product, the instruction mnul or the
pckging shows tht it is suitble for recycling.
Mterils used inside the pplince re recyclble
nd re lbelled with informtion concerning this.
By recycling mterils or other prts from used
devices you re mking signicnt contribution to
the protection of our environment.
Informtion on pproprite disposl centres for
used devices cn be provided by your locl uthority.
DECLARATION OF COMPLIANCE
When you have unpacked the oven, make sure that
it has not been damaged in any way. If you have any
doubts at all, do not use it: contact a professionally
qualied person. Keep packing materials such as
plastic bags, polystyrene, or nails out of the reach
of children because these are dangerous to children.

esatto.house
7
FITTING THE OVEN INTO THE KITCHEN UNIT
Fit the oven into the space provided in the kitchen unit; it may be tted underneath a work
top or into an upright cupboard. Fix the oven in position by screwing into place, using the two
xing holes in the frame. To locate the xing holes, open the oven door and look inside. To allow
adequate ventilation, the measurements and distances adhered to when xing the oven.
IMPORTANT: If the oven is to work properly, the kitchen housing must be suitable. The panels of the
kitchen unit that are next to the oven must be made of a heat resistant material. Ensure that the glues
of units that are made of veneered wood can withstand temperatures of at least 120º C. Plastics or
glues that cannot withstand such temperatures will melt and deform the unit, once the oven has
been lodged inside the units, electrical parts must be completely insulated. This is a legal safety
requirement. All guards must be rmly xed into place so that it is impossible to remove them
without using special tools. Remove the back of the kitchen unit to ensure an adequate current
of air circulates around the oven. The hob must have a rear gap of at least 45mm.
Note:
• The cvity is not to include the power switch or socket.
• Only plus devitions re dmissible for ll dimensions.
• No not include the power switch or socket within the cbinet.
• The cbinet dimensions re in mm.
SECURING THE OVEN TO THE CABINET
1. Fit oven into the cabinet recess.
2. Open the oven door and determine the location of the mounting screw holes.
3. Secure the oven to the kitchen cabinet with the two screws.
CONNECTION OF THE OVEN
Instlltion Instructions
12
NOTE: The number of accessories included depends on the particular appliance purchased.
INSTALLATION
Remark:
1.Only plus deviations are admissible for all dimension.
2.The cabinet is not include the power switch or socket.
CONNECTION OF THE OVEN
L
N
VENTILATING OPENINGS
When cooking is finished or in pause state or in waiting state, if the oven's center temperature is
over 75 degree, the cooling fan will continue working for 15 minutes. Or when the oven's center
temperature becomes lower than 75 degree, the cooling fan will stop in advance.
Ventilating openings
555
20
595
595
560
570
min.560
606
600
80
250
100
11
BULB REPLACEMENT
For replacement, process as follows:
1> Disconnect power from the mains outlet or switch off the circuit breaker of the unit's mains outlet.
2> Unscrew the glass lamp cover by turning it counter-clockwise (note, it may be stiff) and replace
the bulb with a new one of the same type.
3> Screw the glass lamp cover back in place.
NOTE: Only use 25-40W/220V-240V , T300°C halogen lamps.
SHELF PLACEMENT WARNING:
OR
To ensure the oven shelves operate safely, correct placement of the shelves between the side
rail is imperative. Shelves and the pan only can be used between the first and fifth layers.
The shelves should use with the right direction, it will ensure that during careful removal of the
shelf or tray, hot food items should not slide out.
SECURING THE OVEN TO THE CABINET
1. Fit oven into the cabinet recess.
2. Open the oven door and determine the location of the mounting
screw holes.
3. Fix the oven to the cabinet with two screws.
NOTE: The number of accessories included depends on the particular appliance purchased.
INSTALLATION
570
min. 560
606
600
80
250
100
Remark:
1.Only plus deviations are admissible for all dimension.
2.The cabinet is not include the power switch or socket.
VENTILATING OPENINGS
CONNECTION OF THE OVEN
Ventilating openings
L
N
When cooking is finished, if the temperature of ventilating openings is over 70 degree, the cooling
fan will continue working. The cooling fan will not stop working until the temperature becomes
lower than 60 degree.
555
20
595
595
560
9

User Manual
8
Your Built-in Oven
CONTROL PANEL
1. Function Time selector knob
2. Minute minder
3. Disply screen
4. Strt button
5. Temperture Time selector knob
6. Time button
7. Puse/Cncel button
ACCESSORIES
Your Estto Built-in Oven is supplied with:
• 2 × Wire Shelf
For grill, dishes, cke pn with items for rosting nd grilling
• 2 × Slider Brckets
These shelf support rils on the right nd left sides of the oven cn be removed.
Dishes nd try cn be plced on the oven bse, using the Grill, Mx Grill
Mx Grill nd Fn functions.
• 1 × Bking Try
For cooking lrge quntities of food such s ckes, pstries, frozen food etc,
or for collecting ft/spillge nd met juices.
• 2 × Telescopic Runners
Allows for esy nd sfe removl of hot bking trys.
WARNING: Ensure tht ll ccessories re removed from the cvity of the oven before
performing the Pyrolytic function.
Note: The Telescopic Runners nd slider brckets could be disssembled by unscrewing
the screws used to x it. After disssembled, dishes nd try cn be put on the oven oor,
using functions s Grill, Mx Grill Mx Grill nd Fn functions.
SHELF PLACEMENT
To ensure the oven shelves operte sfely, correct plcement of the shelves between the
side ril is impertive. Shelves nd the pn only cn be used between the rst nd fth
lyers. The shelves should use with the right direction, it will ensure tht during creful
removl of the shelf or try, hot food items should not slide out.
Note: The images in this user manual are for reference only. Your appliance may appear dierently.
1 2 4 5
6 7
3
BULB REPLACEMENT
For replacement, process as follows:
1> Disconnect power from the mains outlet or switch off the circuit breaker of the unit's mains outlet.
2> Unscrew the glass lamp cover by turning it counter-clockwise (note, it may be stiff) and replace
the bulb with a new one of the same type.
3> Screw the glass lamp cover back in place.
NOTE: Only use 25-40W/220V-240V, T300°C halogen lamps.
SHELF PLACEMENT WARNING:
SECURING THE OVEN TO THE CABINET
1. Fit oven into the cabinet recess.
2. Open the oven door.
3. Secure the oven to the kitchen cabinet with two
distance holders " A " which fit the holes in the
oven frame and fit the two screws " B ".
To ensure the oven shelves operate safely, correct placement of the shelves between the side rail
is imperative. Shelves and the pan only can be used between the first and fifth layers.
The shelves should be used with the right direction, it will ensure that during careful removal of the
shelf or tray, hot food items should not slide out.
OR
8

esatto.house
9
Model EOP6010TB
Volume (Net/Gross): 71/80L
Product Dimensions (W × D × H): 595 × 575 × 595mm
Weight (Net/Gross): 39kg / 43kg
Supply Voltge 220-240V AC 50Hz–60Hz
Rted Power 3.2kW
Number of Functions 10
Glss Door Qud-glzed
• Technicl specictions cn be chnged without prior notice to improve product qulity.
• The vlues provided with the pplince or its ccompnying documents re lbortory redings in
ccordnce with the respective stndrds.
• These vlues my dier depending on the use nd mbient conditions.
• Figures in this guide re schemtic nd my not be exctly mtch your product.
Technicl Specictions

User Manual
10
Operting Instructions
OVEN FUNCTIONS
FUNCTION DESCRIPTION
Oven Light: This function enbles the user to observe the progress of their cooking without
letting het escpe by opening the door. The oven lmp will operte for ll functions except
Pyrolytic Clening function.
Defrost: The circultion of ir t room temperture enbles quicker thwing of frozen
food (without the use of ny heting elements). It is gentle but quick wy to speed up the
defrosting time nd thwing of redy-mde dishes, scones or ckes with icing, etc.
Bottom Het: This function is commonly used for ckes, where you wnt to crisp the
bottom or keeping food wrm. The temperture cn be set within the rnge of 60–120°C.
The defult temperture is 60°C.
Bke (Conventionl): Idel for ckes, pizz cookies. The top bottom heting elements
operte together to provide convectionl cooking. The temperture cn be set within the
rnge of 50–250°C. The defult temperture is 220°C.
Fn Bke: Evenly distributes het within the cvity for bking rosting on single try
vi combintion of the fn, nd both top nd bottom heting elements. The evenly
distributed het cn sve up to 30-40% of energy compred to the Bke (Conventionl)
function. Dishes will be lightly browned on the outside nd still moist on the inside.
This function is suitble for grilling or rosting t higher temperture. The temperture
cn be set within the rnge of 50–250°C. The defult temperture is 220°C.
Grill: This cooking method is for everydy grilling, utilising only the inner grill element
directing het downwrds onto the food. The inner grill element switches on nd o to
mintin temperture. The temperture cn be set within the rnge of 180–240°C.
The defult temperture is 210°C.
Mx Grill: Suitble for grilling lrge mount of cooking on lower rck within the oven
using the inner nd upper heting element. The temperture cn be set within the rnge of
180–240°C. The defult temperture is 210°C
Mx Grill Fn: Suitble for grilling lrge mount of cooking on lower rck within the
oven using the inner nd upper heting elements, long with the fn to circulte the hot ir
round the oven cvity. The temperture cn be set within the rnge of 180–240°C.
The defult temperture is 210°C
Fn Forced (Convection): An element round the convection fn provides n dditionl
source of het for convection style cooking. In Fn Forced mode, the fn evenly distributes
het within the cvity to circulte hot ir to llow cooking on multiple shelves.
Plese bke rost t tempertures lower thn the Bke (Conventionl) function to void
burning your food. The temperture cn be set within the rnge of 50–240°C.
The defult temperture is 180°C.
Pyrolytic Clening: This function will turn ny cooking mess into sh for esy clening by
rising the oven temperture to 450°C for 1.5 or 2 hours. Plese red the instructions on
pge 15 before using this function.
WARNING: Ensure tht ll ccessories, including slider brckets, re removed from the
cvity of the oven before performing the Pyrolytic clening function.

esatto.house
11
BEFORE FIRST USE
• Before using the oven for the rst time, red this mnul thoroughly, even if you re fmilir with this
type of pplince. Py prticulr ttention to the sfety instructions, instlltion instructions nd
operting instructions.
• Remove lbels or ccessories ttched inside the oven. If ny, tke out the protective lm or stickers on
front side of the pplince.
• Remove dust nd pckging residues by wiping inside of the oven with dmp cloth. Inside of oven must
be empty.
• After the pplince hs been properly instlled, nd before rst use, you should burn o ny dust,
oil or other remnnts tht my hve been left inside the cvity from the mnufcturing process or
trnsporttion. Plese run the new empty oven with the conventionl cooking function t 250º C
for t lest 90 minutes. If possible, open few nerby windows s smoke nd smell my occur
(which is norml). If the smell persists fter the cycle, repet the process once more.
• Wipe inside of the oven with slightly wrm wter with detergent fter it cooled followed by dry clen
cloth. Now you cn use your oven is redy for use.
• Prior to plcing food in your oven, we recommend preheting your oven for best results.
VENTILATION
When cooking is nished, or in a paused or standby state, if the oven cavity temperature is over 75 degrees,
the cavity cooling fan will to operate for 15 minutes or until the oven cavity temperature become lower than
75 degrees.
USING YOUR BUILTIN OVEN
• Your oven is re risk if the cooking time is not set or if the time is set too long.
It is importnt to keep close supervision when the oven is in opertion.
• Set functions by turning the Function Time selector knob “ F ” to desired option.
• To set the clock, press the “ ” time button nd use the Temperture Time selector knob “ C ”
to set your desired setting.
• Set the temperture by turning the Temperture Time selector knob “ C ”.
• If the unit is not in use, lwys set the knobs to the “ ● ” o position.
• During operation, if you want to stop cooking, press the Puse/Cncel button quickly.
There is no need to long press the Puse/Cncel button (invalid).
NOTE: The number of accessories included depends on the particular appliance purchased.
INSTALLATION
570
min. 560
606
600
80
250
100
Remark:
1.Only plus deviations are admissible for all dimension.
2.The cabinet is not include the power switch or socket.
VENTILATING OPENINGS
CONNECTION OF THE OVEN
Ventilating openings
L
N
When cooking is finished, if the temperature of ventilating openings is over 70 degree, the cooling
fan will continue working. The cooling fan will not stop working until the temperature becomes
lower than 60 degree.
555
20
595
595
560
9
VENTILATION OPENINGS

User Manual
12
Operting Instructions (Continued)
SETTING THE CLOCK
After connecting the unit to the power, the disply with show “0:00”.
1. Press the “ ” time button to chnge the hour vlue.
2. Rotte the Temperture Time selector knob “ C ” to djust the hour vlue between 0–23.
3. Press the “ ” time button to chnge the minute vlue.
4. Rotte the Temperture Time selector knob “ C ” to djust the minute vlue between 0–59.
5. Press the “ ” time button to conrm the time settings nd ":" will sh
with the time illuminted
Note: This clock is in 24 hour time format.
SELECTING THE OVEN OPERATION MODE
1. When the oven is in standby mode (not in use), rotate the Function Time selector knob “ F ”
to cycle through the oven cooking modes.
2. Then turn the Temperture Time selector knob “ C ” to desired temperture setting. The
defult temperture for the cooking function will be used if you skip this step. The defult
cooking time is 9 hours.
3. Press the strt button “ ” to begin cooking.
4. Rotte the Function Time selector knob “ F ” to djust the cooking time once cooking
hs strted.
5. Press the strt button “ ” to conrm the cooking time.
Note:
• The time djustment will be in increments of 1 minute between 0:00–0:30 minutes.
The time djustment will be in increments of 5 minutes between 0:30–9:00 hours.
• The temperture djustment will be in increments of 5°C. For the Grill function, it is 30°C.
CHANGING THE OVEN SETTINGS WHILST IN OPERATION
Adjusting the Cooking Time
• Rotte the Function Time selector knob “ F ” to djust the cooking time if cooking
is in progress. Press the strt button “ ” to conrm the new cooking function setting.
• If the strt button “ ” is not pressed to conrm the djusted temperture setting, the
temperture will revert bck to the previously set temperture.
Adjusting the Temperature Setting
• To djust the temperture once cooking hs strted, rotte the Temperture Time selector
knob “ C ” to desired temperture setting nd press the strt button “ ” to conrm the
new temperture setting.
• If the strt button “ ” is not pressed to conrm the djusted temperture setting, the
temperture will revert bck to the previously set temperture.
START/PAUSE/CANCEL FUNCTIONS
• If the cooking time hs been set, press the strt button “ ” to strt cooking.
• If the cooking is pused, press the strt button “ ” to resume cooking.
• If the oven is in opertion, press the “ ” Puse/Cncel button once to puse cooking.
• Press the “ ” Puse/Cncel button twice to cncel cooking.

esatto.house
13
USING THE OVEN LIGHT FUNCTION
• Rotte the Function Time selector knob “ F ” until Oven Light function icon is displyed.
• Press the strt button “ ” to conrm the setting.
• “0:00” nd the Oven Light function icon will disply on the screen with “:” shing while
the oven cvity light will operte.
Note: The oven light will operate for all functions except Pyrolytic Cleaning.
TIME INQUIRY FUNCTION
In the following sttes, you cn use Time Inquiry function. After 3 seconds, the disply will
return to the set operting stte.
• During opertion, if the clock time hs been set, press the “ ” time button to see the
current time. If the Minute Minder function hs been set, press the “ ” Minute Minder
button to see the remining time of the Minute Minder.
• In the Minute Minder stte, if the clock time hs been set, press the “ ” time button to
see the current time.
• In clock disply stte, if the Delyed Strt cooking mode hs been set, press the “ ”
time button to see the remining time of the delyed cooking time.
MINUTE MINDER MODE
You cn set period of time using the Minute Minder function, nd n lrm will sound
10 times when tht time hs elpsed. The mximum time is 10 hours.
1. To begin, press the “ ” Minute Minder button.
2. Rotte the Temperture Time selector knob “ C ” to djust the hour vlue between 0–9.
3. Press the “ ” Minute Minder button gin to set the hour.
4. Rotte the Temperture Time selector knob “ C ” to djust the minute vlue
between 0–59.
5. Press the strt button “ ” to conrm the Minute Minder time settings.
The time will begin the countdown period.
6. Once the countdown period hs elpsed, the oven will sound n lrm nd the time will
return bck to zero hours. The Minute Minder lrm is for reminding purposes only.
7. If you no longer require the Minute Minder, press the “ ” Puse/Cncel button twice
to cncel.
CHILD LOCK FUNCTION
• To ctivte the Child Lock function, simultneously press the strt button “ ” nd the
Puse/Cncel button “ ” for 3 seconds. When ctivted, the oven will sound long beep
nd lock symbol will be displyed on the screen.
• To dectivte the Child Lock function, simultneously press the strt button “ ” nd
the Puse/Cncel button “ ” for 3 seconds. When dectivted, the oven will sound
long beep.

User Manual
14
DELAYED START COOKING MODE
(Semi-Automtic Progrmming)
This function cn be used to strt cooking t set time durtion. This setting cn only be performed
from the oven stndby mode nd if the oven clock time hs been set.
1. Press the “ ” time button.
2. Rotte the Temperture Time selector knob “ C ” to djust the hour vlue between 0–23.
3. Press the “ ” time button to chnge the minute vlue.
4. Rotte the Temperture Time selector knob “ C ” to djust the minute vlue between 0–59.
5. Next, insted of pressing the “ ” time button, rotte the Function Time selector knob “ F ”
to choose cooking function.
6. Press the strt button “ ”.
7. Now you cn turn the Function Time selector knob “ F ” to djust the cooking time, nd the
Temperture Time selector knob “ C ” to djust temperture.
8. Press the strt button “ ” to conrm the Delyed Strt settings nd the clock will disply on the
screen with the delyed time long with “ ” hour glss symbol.
No other function signls re presented. Delyed strt time cn be checked by pressing the “ ”
time button, 3 seconds lter the screen will show clock gin.
9. After the delyed strt time hs elpsed, the oven wiill begin cooking utomticlly fter sounding
n lert. The hour glss symbol “ ” will no longer be on the screen nd ll other indictors will
operte s norml.
Note:
• The strting time for the Oven Light nd Defrost functions cnnot be delyed.
• During the opertion of Delyed Strt, press cncel button once nd the time nd temperture
of Dely Strt settings will be displyed with the icon shown constntly. Press the cncel button
gin nd the screen will return to the clock time. Alterntively, press the strt button to return
to Delyed Strt sttus.
• The Minute Minder function is invlid during the opertion of Delyed Strt.
WARNING:
• Food sfety: Do not leave the food for too long in the oven as food may spoil. We recommend only
using the delayed cooking function for non-perishable items only.
• Do not leve the oven unttended when cooking. Oils nd fts my ctch re due to overheting.
• When bking, we do not recommend progrmming the oven for delyed cooking s the cke
mixture my dry out nd the rising gents my lose their eectiveness.
ENERGY SAVING MODE
• From the oven stndby or Minute Minder stte, press the strt button “ ” for three seconds. The
LED disply will then turn o nd enter Energy Sving mode.
• If there is no opertion within 10 minutes under the stndby mode, the LED disply will lso turn o
nd enter Energy Sving mode.
• To exit Energy Sving mode, press ny key or rotte ny mode.
Operting Instructions (Continued)

esatto.house
15
PYROLYTIC CLEANING FUNCTION
WARNING:
Before activating the Pyrolytic Cleaning function:
• Remove ny excessive spillge nd mke sure tht oven is empty
• Ensure tht ll ccessories, including slider brckets, re removed from the cvity
of the oven before performing the Pyrolytic clening function s they cn be hevily dmged.
Setting the Pyrolytic Cleaning function
• Rotte the Function Time selector knob “ F ” until the Pyrolytic Clening function is selected.
The screen will disply “ PyR ”.
• Press the strt button “ ” to conrm the setting.
The defult Pyrolytic Clening durtion time is 2 hours.
• Rotte the Function Time selector knob “ F ” to djust the Pyrolytic Clening.
The Pyrolytic Clening durtion cn be set to either 1:30 or 2:00 hours.
Note:
• If the oven door is not fully closed, pressing strt button will be invlid.
The LED will disply “ door ” nd “ PyR ”.
• When the oven's cvity temperture is higher thn 320°C, pressing strt button will be invlid.
The LED will disply “ CooL ” nd “ PyR ”. When the oven cvity temperture is lower thn 200°C,
press cncel button once nd it will puse. Press it once more to return to the oven stndby stte
• If the oven cvity temperture is higher thn 200°C, press cncel button once nd it will return
to the oven stndby stte.
• When you open the door when the oven is in opertion, the screen will disply “ door ” nd sound
n lert continuously until the door is closed or the cncel button is pressed.

User Manual
16
PRIOR TO CLEANING YOUR OVEN
WARNING:
• Refer to pge 15 for instructions on how to use
the Pyrolytic Clening function nd wrnings.
• Before ny mintennce nd clening, turn o
the pplince nd disconnect the power.
• Set ll controls in the OFF position.
• Wit until the inside of the unit is not hot but only
slightly wrm—clening is esier thn
when wrm.
• Clen the surfce of the unit with dmp cloth,
soft brush or ne sponge nd then
wipe dry.
• In cse of hevy soiling, use hot wter with non-
brsive clening product.
• For clening the oven door glss, do not use
brsive cleners or shrp metl scrpers,
s these cn scrtch the surfce or led to the
glss being dmged.
• Never leve cidic substnces (lemon juice,
vinegr) on stinless steel prts.
• Do not use high pressure clener for clening
the unit.
• The bking try nd wire shelving my be
wshed in mild detergent.
BULB REPLACEMENT
For replacement, follow the below process:
1. Disconnect power from the mins outlet
or switch o the circuit breker of the unit’s
mins outlet.
2. Unscrew the glss lmp cover by turning it
counter-clockwise (note, it my be sti) nd
replce the bulb with new one of the sme
bulb type.
3. Screw the glss lmp cover bck in plce.
NOTE:
Only use 25W/230V, T300°C hlogen lmps.
REMOVING THE OVEN DOOR INNER GLASS
The removble door llows for full ccess to the
entire interior of the oven for esier nd quicker
mintennce. Follow these instructions crefully
if you wish to remove the over door.
1. To remove the door, open the door to the
mximum ngle. Then pull the buckle t
the door hinges bckwrd.
2. Close the door to n ngle pproximtely 30°.
Hold the door with one hnd on ech side. Lift up
nd slowly pull the door out from the oven.
3. Open the door rottion brcket ssembly,
refer to imge on the right.
4. Lift up the door outer glss nd pull it out.
5. Then tke the door middle glss out using the
sme method s step 4.
6. When clening is completed, reverse the
bove procedures to return the door to its
originl position.
WARNING:
• Do not forcefully pull out the door or glss to
prevent breking the glss during dismntling.
• The hinge springs could become loose
nd cuse personl injury.
• Do not lift or crry the oven door
by the door hndle.
Mintennce Clening
BULB REPLACEMENT
For replacement, process as follows:
1> Disconnect power from the mains outlet or switch off the circuit breaker of the unit's mains outlet.
2> Unscrew the glass lamp cover by turning it counter-clockwise (note, it may be stiff) and replace
the bulb with a new one of the same type.
3> Screw the glass lamp cover back in place.
NOTE: Only use 25-40W/220V-240V, T300°C halogen lamps.
SHELF PLACEMENT WARNING:
SECURING THE OVEN TO THE CABINET
1. Fit oven into the cabinet recess.
2. Open the oven door.
3. Secure the oven to the kitchen cabinet with two
distance holders " A " which fit the holes in the
oven frame and fit the two screws " B ".
To ensure the oven shelves operate safely, correct placement of the shelves between the side rail
is imperative. Shelves and the pan only can be used between the first and fifth layers.
The shelves should be used with the right direction, it will ensure that during careful removal of the
shelf or tray, hot food items should not slide out.
OR
8
esatto.house13
PRIOR TO CLEANING YOUR OVEN
WARNING:
• Before ny mintennce nd clening, turn o
the pplince nd disconnect the power.
• Set ll controls in the OFF position.
• Wit until the inside of the unit is not hot but only
slightly wrm—clening is esier thn
when wrm.
• Clen the surfce of the unit with dmp cloth,
soft brush or ne sponge nd then
wipe dry.
• In cse of hevy soiling, use hot wter with non-
brsive clening product.
• For clening the oven door glss, do not use
brsive cleners or shrp metl scrpers,
s these cn scrtch the surfce or led to the
glss being dmged.
• Never leve cidic substnces (lemon juice,
vinegr) on stinless steel prts.
• Do not use high pressure clener for clening
the unit.
• The bking try nd wire shelving my be
wshed in mild detergent.
BULB REPLACEMENT
For replacement, follow the below process:
1. Disconnect power from the mins outlet or
switch o the circuit breker of the unit’s mins
outlet.
2. Unscrew the glss lmp cover by turning it
counter-clockwise (note, it my be sti) nd
replce the bulb with new one of the sme
type.
3. Screw the glss lmp cover bck in plce.
NOTE: Only use 25W/230V , T300°C
halogen lamps.
REMOVING THE OVEN DOOR & INNER GLASS
The removable door allows for full access to the
entire interior of the oven for easier and quicker
maintenance. Follow these instructions carefully if
you wish to remove the over door.
WARNING:
•
•
•
Maintenance & Cleaning
OVEN (OPTIONAL)
1.
2.
3.
4.
5.
6.
7.
(Figure 3)
(Figure 4)
in
OVEN (OPTIONAL)
1.
2.
3.
4.
5.
6.
7.
(Figure 2)
(Figure 3)
(Figure 4)
in
OVEN (OPTIONAL)
Removable door allows full access to entire interior
1.
2.
3.
4.
5.
6.
7.
(Figure 2)
(Figure 3)
(Figure 4)
in
OVEN (OPTIONAL)
1.
2.
3.
4.
5.
6.
7.
(Figure 2)
(Figure 3)
(Figure 4)
in
10
OVEN (OPTIONAL)
1.
2.
3.
4.
5.
6.
7.
(Figure 2)
(Figure 3)
(Figure 4)
in
10
OVEN (OPTIONAL)
1.
2.
3.
4.
5.
6.
7.
(Figure 1)
(Figure 3)
(Figure 4)
in
BULB REPLACEMENT
For replacement, process as follows:
1> Disconnect power from the mains outlet or switch off the circuit breaker of the unit's mains outlet.
2> Unscrew the glass lamp cover by turning it counter-clockwise (note, it may be stiff) and replace
the bulb with a new one of the same type.
3> Screw the glass lamp cover back in place.
NOTE: Only use 25-40W/220V-240V, T300°C halogen lamps.
SHELF PLACEMENT WARNING:
SECURING THE OVEN TO THE CABINET
1. Fit oven into the cabinet recess.
2. Open the oven door.
3. Secure the oven to the kitchen cabinet with two
distance holders " A " which fit the holes in the
oven frame and fit the two screws " B ".
is imperative. Shelves and the pan only can be used between the first and fifth layers.
The shelves should be used with the right direction,
shelf or tray, hot food items should not slide out.
OR
8
30˚
1. To remove the door, open the
door to the maximum angle.
Then pull the buckle at the
2. Close the door to an angle
approximately 30°. Hold the
3. Open the door rotation
bracket assembly, refer the
action in the following picture.
4. Lift up the door outer glass
and pull it out, then take the
door middle glass out in the
same way.
Don't forcibly pulled out the door and
prevent the glass breakage during the
dismantling process.
The hinge springs could loose, causing
personal injury.
Do not lift or carry the oven door by
the door handle.
door hinge backward.
door with one hand on each side.
Lift up and slowly pull the door
out from the oven.

esatto.house
17
OPERATION IN CASE OF EMERGENCY
In the event of n emergency you should:
• Set ll controls in the OFF position nd disconnect the power.
• Cll After Sles Support on 1300 11 4357 or emil support@residentigroup.com.u
Some minor fults cn be fixed by referring to the instructions given in the tble below.
IMPORTANT: If your pplince ppers to be operting incorrectly, then you should disconnect it
from your electricl supply nd then contct After Sles Support.
WARNING: Do not ttempt to repir the oven yourself.
Plese note tht if n service gent is sked to ttend whilst the product is under wrrnty nd finds tht
the problem is not the result of n pplince fult, then you my be lible for the cost of the cll out chrge.
The pplince must be ccessible for the service gent to perform ny necessry repir.
If your pplince is instlled in such wy tht service gent is concerned tht dmge will be cused to
the pplince or your kitchen, then they will not complete repir.
Plese refer to the conditions of tht pper on the wrrnty section t the rer of this user mnul.
ISSUE POSSIBLE CAUSE COMMON RESOLUTIONS
The oven is not
turning on.
Brek in power
supply.
Check the household fuse box for ny blown fuses
nd replce s necessry. Also ensure tht sfety
switch hsn’t tripped.
The oven light is
not working.
The light globe is
loose or hs blown.
When the oven hs cooled nd is switched o,
remove the globe cover nd ensure tht the globe
is tightly secured.
If blown, refer to the Clening nd Mintennce
section under Bulb Replcement.
The oven is burning the
top of my dish whilst the
underside is under-done.
Not enough het
from the bottom
of the oven.
Try using the Conventionl cooking functions.
Try lowering the temperture.
Try using lower shelf position.
The oven is burning the
underside of my dish
whilst the top is under
cooked.
Excessive het
from the bottom
of the oven.
Try using the Conventionl cooking functions.
Try lowering the temperture.
Try using higher shelf position.
The oven is burning the
outside of my dish whilst
the inside is under-done.
Temperture is set
too high.
Lower the oven temperture nd increse the
cooking durtion.
The outside of my dish
is too dry even though it
looks cooked.
Temperture is set
too low.
Increse the oven temperture nd decrese the
cooking durtion.
If you need assistance, please contact our After Sales support centre on 1300 11 43 57 or emil
support@residentigroup.com.u
Troubleshooting

User Manual
18
Attch your receipt to this pge

esatto.house
19
Purchse Detils
For your records, plese record detils of your purchse below nd stple your receipt on the opposite pge.
Your seril number cn be found on the rting plte of your Built-in Oven.
STORE DETAILS
STORE NAME
|
ADDRESS
|
TELEPHONE
|
PURCHASE DATE
|
PRODUCT DETAILS
MODEL NO.
|
SERIAL NO.*
|

User Manual
20
WARRANTY TERMS AND CONDITIONS
BUILTIN OVENS
This document sets out the terms nd conditions of the
product wrrnties for Residenti Group Applinces. It is
n importnt document. Plese keep it with your proof of
purchse documents in sfe plce for future reference
should you require service for your Applince.
Plese be wre tht the service of your pplince is
subject to the following wrrnty terms nd conditions,
our goods come with gurntees tht cnnot be excluded
under Austrlin Consumer Lw. Should the concern with
your pplince be non-mnufcturing issue (user error,
instlltion issue, misuse, improper cre nd mintennce
or no fult found) you will be lible for the cost of the
technicin visit.
1. IN THIS WARRANTY
() ‘cceptble qulity’ s referred to in cluse 10 of
this wrrnty hs the sme mening referred to in
the ACL;
(b) ‘ACL’ mens Trde Prctices Amendment (Austrlin
Consumer Lw) Act (No.2) 2010;
(c) ‘Applince’ mens ny Residenti Group product
purchsed by you ccompnied by this document;
(d) ‘ASR’ mens Residenti Group uthorised service
representtive;
(e) ‘Residenti Group’ mens Residenti Group Pty Ltd
of 165 Brkly Ave, Burnley VIC 3121, ACN 600 546
656 in respect of Applinces purchsed in Austrli;
(f ) ‘mjor filure’ s referred to in cluse 10 of this
wrrnty hs the sme mening referred to in the
ACL nd includes sitution when n Applince
cnnot be repired or it is uneconomic for Residenti
Group, t its discretion, to repir n Applince during
the Wrrnty Period;
(g) ‘Wrrnty Period’ mens:
(i) where the Applince is used for personl,
domestic or household use (i.e. norml
single fmily use) s set out in the instruction
mnul, the Applince is wrrnted ginst
mnufcturing defects for 24 months, following
the dte of originl purchse of the Applince;
(h) ‘you’ mens the purchser of the Applince not
hving purchsed the Applince for re-sle, nd
‘your’ hs corresponding mening.
2. This wrrnty only pplies to Applinces purchsed
nd used in Austrli nd is in ddition to (nd does
not exclude, restrict, or modify in ny wy) ny
non-excludble sttutory wrrnties in Austrli.
3. During the Wrrnty Period Residenti Group or
its ASR will, t no extr chrge if your Applince
is redily ccessible for service, without specil
equipment nd subject to these terms nd conditions,
repir or replce ny prts which it considers to
be defective. Residenti Group or its ASR my use
remnufctured prts to repir your Applince. You
gree tht ny replced Applinces or prts become
the property of Residenti Group. This wrrnty does
not pply to light globes, btteries, lters, sels or
similr perishble prts.
4. Prts nd Applinces not supplied by Residenti
Group re not covered by this wrrnty.
Wrrnty
— THIS WARRANTY IS VALID IN AUSTRALIA ONLY —
Table of contents
Other Esatto Oven manuals
Popular Oven manuals by other brands

Teka
Teka HS-625 Instructions for use

Ariston
Ariston FH G S operating instructions

Henny Penny
Henny Penny FlexFusion ELECTRIC GOLD COMBI FGE-615 installation instructions

Zanussi Electrolux
Zanussi Electrolux ZCE 8021 Instruction booklet

AEG
AEG COMPETENCE CB1100-2B operating instructions

Brandt
Brandt FE1222X instruction manual