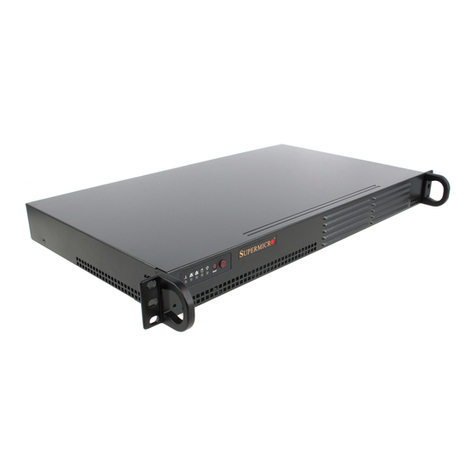
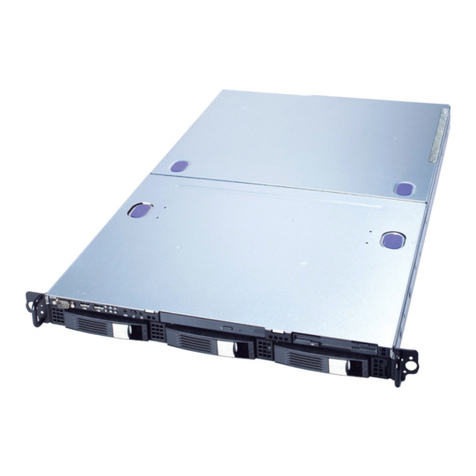
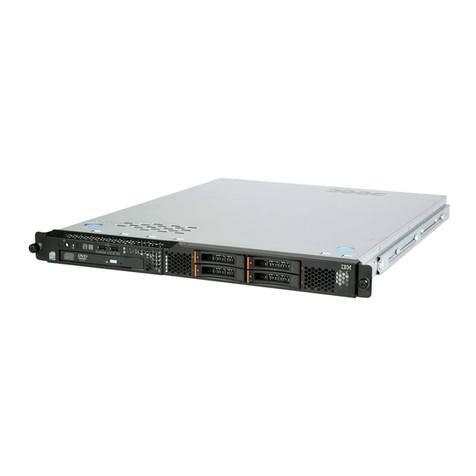
ESlim Computer SU7-2212G Quick start guide

SU7(Haswell) Series
SU7-2212G
Full-Featured
Energy
Efficient
2-Way
Server
Technical
Guide
Version: 2.0

COPYRIGHT
Copyright
Copyright ©2014 ESlim Computer Inc. This publication, including all photographs, illus-
trations and software, is protected under international copyright laws, with all rights
reserved. Neither this technical guide, nor any of the material contained herein, may be
reproduced without the express written consent of the manufacturer. Alltrademarks and
logos are copyrights of their respective owners.
Version 2.0 /
November 25, 2014
Disclaimer
The information in this document is subject to change without notice. The manufacturer
makes no representations or warranties with respect to the contents hereof and specifi-
cally disclaims any implied warranties of merchantability or fitness for any particular pur-
pose. Furthermore, the manufacturer reserves the right to revise this publication and to
make changes from time to time in the content hereof without obligation of the manufac-
turer to notify any person of such revision or changes.
For the latest information and updates please see www.eslim.co.kr
Allthe illustrations in this technical guide are for reference onlyand are subject to change
without prior notice.
I

T
ABLE
OF CONTENT
T
ABLE
OF CONTENT
About the System
Introduction ..........................................................
1-1
Package Contents .....................................................
1-4
ATour of the System ..................................................
1-5
System Overview.................................................
1-5
System Front View .............................................
1-7
System Rear View ..............................................
1-9
LEDDefinitions. .................................................1-10
Front Control Panel LED.......................................1-10
LANPort LEDs
................................................1-11
HDDLED
.....................................................1-11
Installing Hardware
Safety Measures. ......................................................
2-1
Hard DiskDrive Assembly
.............................................
2-2
Removing the HDDAssembly. ....................................
2-2
Installing the HDDAssembly. .....................................
2-3
Solid-State Disk .......................................................
2-4
Removing the SSD Module
.......................................
2-4
Installing the SSD Module
........................................
2-5
Power Supply Unit
....................................................
2-7
Removing aPower Supply Unit ...................................
2-7
Installing aPower Supply Unit ....................................
2-8
II

T
ABLE
OF CONTENT
Top Cover. ............................................................
2-9
Removing the Top Cover .........................................
2-9
Installing the Top Cover
.........................................2-10
Removing the Middle Top Cover.................................2-11
Installing the Middle Top Cover..................................2-12
Fan Module ..........................................................2-13
Removing the Fan Module. ......................................2-13
Installing theFan Module. .......................................2-14
SuperCap ............................................................2-16
Replacing the SuperCap Power Module (RAIDBackup Unit).......2-16
Installing aSuperCap ............................................2-17
Expansion Cards
.....................................................2-18
Removing aPCIeCard ...........................................2-18
Installing aPCIeCard ............................................2-19
Expansion Assembly
.................................................2-20
Removing the Expansion Assembly ..............................2-20
Installing the Expansion Assembly ...............................2-21
PCIeRiser Board
......................................................2-23
Removing the PCIeRiser Board
..................................2-23
Installing the PCIe Riser Board
...................................2-24
Mezzanine ...........................................................2-26
Removing aMezzanine Assembly................................2-26
Installing aMezzanine Assembly.................................2-27
OCPMezzanine Board................................................2-29
Installing an OCPMezzanine Board
..............................2-29
Removing an OCPMezzanine Board
.............................2-30
III

T
ABLE
OF CONTENT
AirDuct
..............................................................2-32
Removing the AirDuct
..........................................2-32
Installing the AirDuct
...........................................2-33
Processor Heat Sink ..................................................2-34
Removing the Processor Heat Sink ...............................2-34
Installing the Processor Heat Sink ................................2-35
Processor ............................................................2-36
Removing the Processor.........................................2-36
Installing the Processor ..........................................2-37
Memory Modules
....................................................2-39
General Guidelines ..............................................2-39
Memory Population Support. ....................................2-39
Removing aMemory Module ....................................2-40
Installing aMemory Module .....................................2-41
Mainboard ...........................................................2-42
Removing the Mainboard. .......................................2-42
Installing the Mainboard. ........................................2-43
Hard DiskDrive Backplane
............................................2-44
Locating the HDD Backplane. ....................................2-44
Removing the Backplane (2.5”). ..................................2-45
Installing the Backplane (2.5”). ...................................2-46
Removing the HDD Backplane (3.5”)
.............................2-47
Installing the HDDBackplane (3.5”)
..............................2-48
SSDAirDuct .........................................................2-49
Removing the SSD Air Duct ......................................2-49
Installing the SSD AirDuct .......................................2-50
IV

T
ABLE
OF CONTENT
SSDFan Module. .....................................................2-51
Removing aSSDFan Module
....................................2-51
Installing aSSD Fan Module
.....................................2-52
SSDBackplane .......................................................2-53
Removing aSSDBackplane ......................................2-53
Installing aSSD Backplane .......................................2-55
Expander Board ......................................................2-58
Removing an Expander Board. ...................................2-58
Installing an Expander Board. ....................................2-59
Front Panel Board ....................................................2-60
Removing the Front Panel Board
.................................2-60
Installing the Front Panel Board
..................................2-61
USBBoard
...........................................................2-63
Removing the USBBoard ........................................2-63
Installing the USBBoard .........................................2-65
BIOS
BIOSSetup Utility
.....................................................
3-1
Operation........................................................
3-1
Setup Page Layout
...............................................
3-1
Entering BIOSSetup ..............................................
3-1
Keyboard Commands
............................................
3-2
Menu Selection Bar...............................................
3-3
Server Platform Setup UtilityScreens. .............................
3-4
Main Screen......................................................
3-4
Advanced Screen. ................................................
3-5
Super IO Configuration. ........................................
3-7
SATAConfiguration ............................................
3-9
Serial Port Console Redirection ................................3-10
V

T
ABLE
OF CONTENT
Onboard Device Configuration ................................3-14
PCI Subsystem Settings
.......................................3-15
CSM Configuration. ...........................................3-17
Trusted Computing ...........................................3-18
USBConfiguration ............................................3-19
IntelRCSetup Screen.............................................3-19
Processor Configuration. ......................................3-21
Advanced Power Management Configuration
.................3-24
Common RefCode Configuration ..............................3-29
QPIConfiguration. ............................................3-30
Memory Configuration ........................................3-32
IIO Configuration
.............................................3-35
PCH Configuration ............................................3-40
Server ME Configuration
......................................3-47
Runtime Error Logging ........................................3-48
Server Management Screen. .....................................3-49
System Event Log.............................................3-51
ViewFRU information ...........................................3-52
BMC network configuration ...................................3-53
Boot Options Screen. ............................................3-54
UEFINetwork Drive BBSPriorities..............................3-57
Security Screen. .................................................3-58
Secure Boot menu ............................................3-59
ExitScreen ......................................................3-62
Loading BIOSDefaults...........................................3-64
BIOSUpdate Utility...................................................3-65
BIOSUpdate Utility..............................................3-65
AFULNX:v2.39 ................................................3-65
ME Region Update ............................................3-65
BIOSSetting Utility............................................3-66
BIOSRevision .................................................3-66
Clear CMOS .....................................................3-69
Clear Password ..................................................3-69
VI

T
ABLE
OF CONTENT
Server Management. .................................................3-70
Console Redirection .............................................3-70
Serial Configuration Settings ..................................3-70
Keystroke Mapping ...........................................3-70
Reset .........................................................3-71
Limitations
...................................................3-71
Interface to Server Management (Optional)....................3-72
Network BIOSSupport. ..........................................3-72
PXEBoot. .....................................................3-72
Checkpoints. ....................................................3-72
Debug Header ................................................3-72
Standard Checkpoint. .........................................3-73
ACPI/ASLCheckpoints
........................................3-78
OEM-Reserved Checkpoint Ranges ............................3-79
BMC
Server Management Software .........................................
4-1
Server System Overview ..........................................
4-1
BMC KeyFeatures and Functions. .................................
4-1
Power System....................................................
4-1
Front Panel User Interface ........................................
4-2
Power Button ..................................................
4-2
ID Button ......................................................
4-2
LEDs...........................................................
4-2
LANInterface. ....................................................
4-5
Session and User...............................................
4-5
Serial Over LAN. ..................................................
4-5
Time Sync........................................................
4-6
SEL
..............................................................
4-6
Platform Event ...................................................
4-6
Platform Event Filter ...........................................
4-6
BMC Firmware Update. ...........................................
4-6
VII

T
ABLE
OF CONTENT
DOS Recovery Utility ...........................................
4-6
WebUI Update .................................................
4-7
BMC Recovery. ........................................................
4-8
Recovery Process in DOS System..................................
4-8
Recovery Process in Linux System.................................
4-8
Recovery Process in Windows System .............................
4-8
SMASH................................................................
4-9
System Level Commands. .....................................4-10
BMC Information. .............................................4-14
Web Graphical User Interface (GUI)for ESMS ..........................4-16
Using the Web GUI ..............................................4-16
Login ...........................................................4-16
Dashboard ......................................................4-17
Device Information
...........................................4-18
Network Information. .........................................4-19
Sensor Monitoring ............................................4-19
Event Logs. ...................................................4-19
Server Information
..............................................4-19
FRU Information. ................................................4-20
Server Component............................................4-22
Server identify ................................................4-23
BIOSPOSTCode
..............................................4-24
Server Health Group
..........................................4-24
Sensor Readings ..............................................4-25
Event Log. ....................................................4-27
Configuration Group ............................................4-29
Active Directory. ..............................................4-29
DNS ..........................................................4-32
LDAP/E-Directory .............................................4-34
Mouse Mode. .................................................4-37
Network ......................................................4-38
VIII

T
ABLE
OF CONTENT
PEF...........................................................4-41
RADIUS.......................................................4-49
Remote Session...............................................4-50
SMTP.........................................................4-51
SOL...........................................................4-54
SSL ...........................................................4-54
User Management ............................................4-58
Virtual Media
.................................................4-62
SNMP...........................................................4-63
UTC Timezone. ..................................................4-63
LANPort Settings. ...............................................4-64
Remote Control .................................................4-65
Console Redirection. ..........................................4-65
Server Power Control
.........................................4-73
Maintenance Group .............................................4-73
BMC Firmware Update ........................................4-74
BIOSUpdate ..................................................4-75
Preserve Configuration. .......................................4-75
Restore Factory Defaults
......................................4-77
Log Out .........................................................4-78
User Privilege
...................................................4-78
Connectors and Jumpers
Connectors and Jumpers ..............................................
5-1
Mainboard .......................................................
5-1
Connectors ....................................................
5-1
Jumpers .......................................................
5-3
HDDBackplane. ..................................................
5-3
USBBoard. .......................................................
5-5
PCIeSSDBackplane
..............................................
5-6
SAS/SATASSD Backplane.........................................
5-6
IX

T
ABLE
OF CONTENT
Troubleshooting
Troubleshooting ......................................................
6-1
BIOScheckpoints. ................................................
6-1
Intel Memory Reference Code Checkpoints .....................
6-1
Hardware Failure .................................................
6-2
HDDSMARTfailure. ............................................
6-2
HDDnot ready, or server does not see hard disk drive ...........
6-2
HDDSATAfailure ..............................................
6-2
Motherboard No Boot. .........................................
6-2
Motherboard fails single bit ECCErrors. .........................
6-2
Motherboard fails multiple bit error or rebooting
...............
6-3
Motherboard fails 1G Ethernet port.............................
6-3
Motherboard fails for PXE,10G Mellanox. .......................
6-3
Motherboard rebooting........................................
6-4
Fan failure .....................................................
6-4
Hardware Failure Troubleshooting Matrix .........................
6-5
SOL..............................................................
6-7
Regulatory and Compliance Information
X

CONVENTIONS
Conventions
Several different typographic conventions are used throughout this manual. Refer to the
following examples for common usage.
Bold
type face denotes menu items, buttons and application names.
Italic type face denotes references to other sections, and the names of the folders, menus,
programs, and files.
<Enter> type face denotes keyboard keys.
.Warning information appears before the text it references and should not be ignored as
the content may prevent damage to the device.
!
!
WARNING!
Warning information appears before the text it references and should not be ignored as the
content may prevent damage to the device.
CAUTION!
CAUTIONS APPEAR BEFORETHE
TEXT
IT REFERENCES,SIMILARTO NOTES AND WARNINGS.CAUTIONS,HOWEVER,
APPEAR IN CAPITALLETTERSAND CONTAIN
VITAL
HEALTHAND SAFETYINFORMATION.
Note:
Highlights general or useful information and tips.
XI

Table 1: Warning and Cautions
PRECAUTIONARYMEASURES
Precautionary Measures
Read all caution and safety statements in this document before performing any of the
instructions. To reduce the risk of bodily injury, electrical shock, fire, and equipment dam-
age, read and observe all warnings and precautions in this chapter before installing or
maintaining your system. To avoid personal injury or property damage, before you begin
installing the product, read, observe, and adhere to all of the following instructions and
information. The following symbols may be used throughout this guide and may be
marked on the product and /or the product packaging.
Safety Instructions about your system
In the event of aconflict between the information in this guide and information provided
with the product or on the website for aparticular product, the product documentation
takes precedence.
Yoursystem should be integrated and serviced only by technically qualified persons.
Youmust adhere to the guidelines in this guide and the assembly instructions in related
chapters to ensure and maintain compliance with existing product certifications and
approvals. Use only the described, regulated components specified in this guide. Use of
other products /components will void the UL Listing and other regulatory approvals of
the product, and may result in noncompliance with product regulations in the region(s) in
which the product is sold.
XII
CAUTION
Indicates the presence of ahazard that may cause minor personal injury or prop-
erty damage if the CAUTIONis ignored.
WARNING
Indicates the presence of ahazard that may result in serious personal injury if the
WARNINGis ignored.
Indicates potential hazard if indicated information is ignored.
Indicates shock hazards that result in serious injury or death if safety instructions
are not followed.
Indicates hot components or surfaces.
Indicates do not touch fan blades, may result in injury.
Remove the system from the rack to disconnect power system.

Table 1: Warning and Cautions (Continued)
PRECAUTIONARYMEASURES
Intended Application Uses
This product was evaluated as Information Technology Equipment (ITE),which may be
installed in offices, schools, computer rooms, and similar commercial type locations. The
suitabilityofthis product for other product categories and environments (such as medical,
industrial, residential, alarm systems, and test equipment), other than an ITEapplication,
may require further evaluation.
Site Selection
The system is designed to operate in atypical office environment. Choose asite that is:
Clean, dry, and free of airborne particles (other than normal room dust).
Well-ventilated and away from sources of heat including direct sunlight and radia-
tors.
Awayfrom sources of vibration or physical shock.
Isolated from strong electromagnetic fields produced byelectrical devices.
In regions that are susceptible to electrical storms, we recommend you plug your
system into asurge suppressor and disconnect telecommunication lines to your
modem during an electrical storm.
Provided with aproperly grounded wall outlet.
Provided with sufficient space to access the power system, because they serve as the
product's main power disconnect.
Provided with either two independent DCpower system ortwo independent phases
from asingle power system.
XIII
The enclosure is designed to carry only the weight of the system sled. Do not use
this equipment as aworkspace. Do not place additional load onto any equipment
in this system.
Indicates two people are required to safely handle the system.
Restricted
Access
Location:
The system is intended for installation only in a
Server Room or Computer Room where both these conditions apply:
access can only be gained by SERVICEPERSONSor by USERSwho have been
instructed about the reasons for the restrictions applied to the location and
about any precautions that shall be taken; and
access is through the use of aTOOLor lockand key, or other means of security,
and is controlled by the authority responsible for the location.

PRECAUTIONARYMEASURES
Equipment Handling Practices
Reduce the risk of personal injury or equipment damage:
Conform to local occupational health and safety requirements when moving and
lifting equipment.
Use mechanical assistance or other suitable assistance when moving and lifting
equipment.
To reduce the weight for easier handling, remove any easily detachable compo-
nents.
Never lift or move your system soley bythe handle on the component.
Power and Electrical Warnings
!
!
CAUTION!
M
AKE
SURETHESYSTEMIS REMOVEDFROM THE
RACK
BEFORESERVICING
ANY
NON-HOTPLUG COMPONENTS.
THE BUS
BAR
CLIPS MUST
BE
DISCONNECTEDFROM THEPOWER SYSTEMINORDER TO
FULLY
SEPARATETHESYS-
TEMFROMTHEPOWERSOURCE.
CAUTION!
TOAVOIDRISKOF ELECTRICSHOCK,DISCONNECT
ALL
CABLINGFROM THESYSTEMANDREMOVETHESYSTEM
FROM THE
RACK
.
System Access Warnings
!
CAUTION!
TOAVOIDPERSONAL INJURY OR PROPERTYDAMAGE,THEFOLLOWINGSAFETY INSTRUCTIONS APPLY WHENEVER
ACCESSINGTHE INSIDE OF THEPRODUCT:
Disconnect from the power source by removing the system from the rack.
Disconnect all cabling running into the system.
Retain all screws or other fasteners when servicing. Upon completion servicing, sercure
with original screws or fasteners.
!
CAUTION!
IFTHE SERVERHAS BEENRUNNING,
ANY
INSTALLEDHDD MODULES
MAY
BE
HOT.
!
!
CAUTION!
UNLESSYOU
ARE
ADDINGOR REMOVINGAHOT-PLUGCOMPONENT,ALLOWTHESYSTEMTO COOLBEFORESER-
VICING.
CAUTION!
TOAVOIDINJURYDO NOT CONTACTMOVINGFANBLADES.IFYOURSYSTEMIS SUPPLIEDWITHAGUARDOVERTHE
FAN,DO NOT OPERATE THESYSTEMWITHOUTTHEFAN GUARDIN PLACE.
XIV

PRECAUTIONARYMEASURES
Rack Mount Warnings
The followinginstallation guidelines are required byUL for maintaining safety compliance
when installing your system into arack.
The equipment rack must be anchored to an unmovable support to prevent it from tip-
ping when your system or piece of equipment is extended from it. The equipment rack
must be installed according to the rack manufacturer's instructions.
Install equipment in the rack from the bottom up, with the heaviest equipment at the bot-
tom of the rack.
Extend onlyone piece of equipment from the rack at atime.
Youare responsible for installing amain power disconnect for the entire rack unit. This
main disconnect must be readilyaccessible, and it must belabeled as controlling power to
the entire unit, not just to the system(s).
To avoid risk of potential electric shock, aproper safety ground must be implemented for
the rack and each piece of equipment installed in it.
Elevated Operating Ambient -If installed in aclosed or multi-unit rack assembly, the oper-
ating ambient temperature of the rack environment may be greater than room ambient.
Therefore, consideration should be given to installing the equipment in an environment
compatible with the maximum ambient temperature (Tma) specified by the manufac-
turer.
Reduced AirFlow -Installation of the equipment in arack should be such that the amount
of air flow required for safe operation of the equipment is not compromised.
Mechanical Loading -Mounting of the equipment in the rack should be such that ahaz-
ardous condition is not achieved due to uneven mechanical loading.
Circuit Overloading -Consideration should be given to the connection of the equipment
to the supply circuit and the effect that overloading of the circuits might have on over-cur-
rent protection and supply wiring. Appropriate consideration of equipment nameplate
ratings should be used when addressing this concern.
Reliable Earthing -Reliable earthing of rack-mounted equipment should be maintained.
Particular attention should be given to supply connections other than direct connections
to the branch circuit (e.g. use of power strips).
XV

PRECAUTIONARYMEASURES
Electrostatic Discharge (ESD)
!
CAUTION!
ESDCANDAMAGEDRIVES,BOARDS,ANDOTHERPARTS.W
E
RECOMMENDTHATYOU PERFORM
ALL
PROCEDURES
AT AN ESDWORKSTATION.IFONE IS NOT
AVAILABLE
,PROVIDE SOME ESDPROTECTION
BY
WEARINGAN ANTI-
STATIC WRISTSTRAP ATTACHEDTO CHASSISGROUND --
ANY
UNPAINTEDMETALSURFACE-- ON YOURSERVER
WHENHANDLING PARTS.
Always handle boards carefully. Theycan be extremely sensitive to ESD.Hold boards only
bytheir edges without any component and pin touching. After removing aboard from its
protective wrapper or from the system, place the board component side up on a
grounded, static free surface. Use aconductive foam pad if available but not the board
wrapper. Do not slide board over any surface.
Cooling and Airflow
!
CAUTION!
C
AREFULLY
ROUTECABLESAS DIRECTEDTO MINIMIZE AIRFLOWBLOCKAGEAND COOLING PROBLEMS.FOR
PROPERCOOLINGANDAIRFLOW,OPERATETHESYSTEMONLYWITHTHECHASSISCOVERS*/AIRDUCTINSTALLED.
OPERATINGTHESYSTEMWITHOUTTHECOVERS/AIRDUCTIN PLACECAN DAMAGE SYSTEMPARTS .TOINSTALL
THECOVERS*/AIRDUCT:
Check first to make sure you have not left loose tools or parts inside the system.
Check that cables, add-in cards, and other components are properly installed.
Attach the covers* /air duct to the chassis according to the product instructions.
*May not apply to all systems.
Please be aware that slots and openings on the front and rear side of the chassis are
designed for ventilation; to make sure reliable operation of your system and to protect it
from overheating, these openings must not be covered or blocked. The openings should
never be covered or blocked byplacing the product on abed, sofa, rug, or other similar
surface. Thisproduct should never be placed near orover aradiator orheat register, or in a
built-in installation unless proper ventilation is provided.
Laser Peripherals or Devices
!
CAUTION!
TOAVOIDRISKOF RADIATIONEXPOSURE AND /OR PERSONAL INJURY:
Do not open the enclosure of any laser peripheral or device.
Laser peripherals or devices are not serviceable.
Return to manufacturer for servicing.
Use certified and rated Laser Class Ifor Optical Transceiver product.
Heed
safety
instructions:
Before working with the system, whether using this manual or
any other resource as areference, pay close attention to the safety instructions. Adhere to
the assembly instructions in this manual to ensure and maintain compliance with existing
product certifications and approvals. Use only the described, regulated components spec-
XVI

PRECAUTIONARYMEASURES
ified in this manual. Use of other products /components will void the UL listing and other
regulatory approvals of the product and will most likelyresult in non-compliance with
product regulations in the region(s) in which the product is sold.
System
power
on/off:
To remove power from system, you must remove the system from
rack. Make sure the system is removed from the rack before opening the chassis, adding,
or removing any non hot-plug components.
Hazardous
conditions,
devices
and
cables:
Hazardous electrical conditions may be
present on power, telephone, and communication cables. Turn off the system and discon-
nect the cables attached to the system before opening it. Otherwise, personal injury or
equipment damage can result.
Electrostatic
discharge
(ESD)
and
ESD
protection:
ESDcan damage drives, boards, and
other parts. We recommend that you perform all procedures in this chapter onlyat an ESD
workstation. If one is not available, provide some ESDprotection bywearing an antistatic
wrist strap attached to chassis ground any unpainted metal surface on the server when
handling parts.
ESD
and
handling
boards:
Always handle boards carefully. Theycan be extremely sensi-
tive to electrostatic discharge (ESD).Hold boards only by their edges. After removing a
board from its protective wrapper or from the server, place the board component side up
on agrounded, static free surface. Use aconductive foam pad if available but not the
board wrapper. Do not slide board over any surface.
Installing
or
removing
jumpers
:Ajumper is asmall plastic encased conductor that slips
over two jumper pins. Some jumpers have asmall tab on top that can be gripped with fin-
gertips or with apair of fine needle nosed pliers. If the jumpers do not have such atab,
take care when using needle nosed pliers to remove or install ajumper; grip the narrow
sides of the jumper with the pliers, never the wide sides. Gripping the wide sides can dam-
age the contacts inside the jumper, causing intermittent problems with the function con-
trolled bythat jumper. Takecare to grip with, but notsqueeze, the pliers or other tool used
to remove ajumper, or the pins on the board may bend or break.
General Information
The information about rack and the wording “rack” in this technical guide supports the
organization of Open Compute definition.
The term
Rack
as found in this technical guide referes to the term
Rack
or
Open
Rack
as
described and used in the Open Compute Project definition.
Before servicing this system, it is recommened to read this technical guide completely to
be aware of any safety issues or requirements involved in the servicing of this system.
XVII

PRECAUTIONARYMEASURES
Assembly Safety Guidelines
XVIII
The power system in this product contains no user-serviceable parts.
Refer servicing only to qualified personnel.
The system is designed to operate in atypical office environment.
Choose asite that is:
Clean and free of airborne particles (other than normal room dust).
Wellventilated and away from sources of heat including direct sunlight.
Away from sources of vibration or physical shock.
Isolated from strong electromagnetic fields produced by electrical devices.
In regions that are susceptible to electrical storms, we recommend you plug
your system into asurge suppressor and disconnect telecommunication lines
to your modem during an electrical storm.
Provided with aproperly grounded wall outlet.
Provided with sufficient space to access the power system, because they serve
as the product's main power disconnect.
WARNING!
The system is safety certified as rack-mounted equipment for use in aserver room
or computer room, using an approved customer rack.
The enclosure isdesigned to carryonlythe weight ofthe system sled. Do not place
additional load onto any equipment.
Heavy object. Indicates two people are required to safely handle the system.

PRECAUTIONARYMEASURES
Structure of this guide
Chapter 1: About the System
“This section introduces the system, its different configuration(s) and the main
features.”
Chapter 2: Installing Hardware
“This section provides guidance information to properly service components in
the system.”
Chapter 3: BIOS
“This section provides information regarding the BIOSarchitecture, BIOSupdate
utility, server management, checkpoints, and error handling found in the sys-
tem.”
Chapter 4: BMC
“This section provides information and key features of BMC(Baseboard Manage-
ment Controller).”
Chapter 5: Connectors and Jumpers
“This sectionprovides guidance informationforthe position and configuration of
connectors and jumpers.”
Chapter 6: Troubleshooting
“This section provides aguidance for the troubleshooting of system errors and
hardware failure notification.”
Chapter 7: Regulatory and Compliance Information
“This section provides regulatory and compliance information applicable to this
system.”
XIX
Table of contents
