Esselte Dymo LabelPOINT 100 User manual

© Esselte NV DYMO 2001
Esselte ••Industriepark-Noord 30 ••9100 Sint-Niklaas
DYMO, AN ESSELTE BRAND
Electronic
Labelmaker
Instructions for Use
Electronische
Labelmaker
Gebruikershandleiding
Etichettatrice
Elettronica
Guida per l’Utilizzo
Máquina de
Rotular Electr nica
Instrucciones
Etiquetadora
Electr nica
Instruções
Elektronik
Etiketleme Makinası
Kullanım Talimatı
LP100 S-EU.qxd 13-06-2001 12:01 Pagina 103
All manuals and user guides at all-guides.com
all-guides.com

How to use your
Dymo LabelPoint 100
What LabelPoint can do for you
With the Dymo LabelPoint you can create a
wide variety of high-quality self-adhesive
labels. ou can choose to print them in a
range of different sizes and styles. The Label
Point can print on 9mm (3/8") or 12mm
(1/2") width. Dymo tape cassettes are availa-
ble in a wide range of colours: tape is back-
slit for easy removal from the backing tape.
Warranty Registration
Please complete the warranty registration
card and return it to the relevant customer
service address, within seven days– see the
warranty booklet for details.
Getting started
STEP ONE - insert the batteries
•Apply pressure to thumb catch and open
hinged access door – see fig A, page 2.
•Insert six size AAA alkaline batteries,
observing the polarity markings A1, and
close cover.
•Remove batteries if the LabelPoint is to
remain unused for some time.
STEP TWO - insert the cassette
•Slide catch B1 as shown to open cassette
door B2 – see page 2.
•Hold cassette B4 as shown and lift it
straight up and out.
•Ensure tape and ribbon B3 are taut across
mouth of cassette and tape passes
between guideposts before installing as
shown. If necessary, turn spool B5 clockwise
to tighten ribbon.
•Insert cassette and push firmly C3until it
clicks into place.
•Ensure tape and ribbon are positioned as
shown between pinch roller C2 and print
head C1.
•Close door B2
STEP THREE - switch on
Switch on with the ON/OFF switch.
Note: the LabelPoint switches off automati-
cally after two minutes if no keys are pressed.
3
LP100 S-EU.qxd 13-06-2001 12:01 Pagina 105
All manuals and user guides at all-guides.com

STEP FOUR - type a label
•Type a simple first label to try the
machine. Learn more about formatting in
the following pages.
STEP FIVE - print your label
•Press to print the label.
STEP SIX - cut the label
•Use cutter button E to cut the label –
see page 2.
Congratulations! You’ve printed your first
label!
Let’s go on to learn more about typing
and formatting.
Getting to know your
LabelPoint 100
The Display
The display shows:
•Up to eleven text characters, at one time.
Use or to move along the text.
•8 indicators – as shown below.
•The display will flash if you press
an incorrect key in a function sequence.
Function keys
ON/OFF
Switches the power on and off.
•Switches off automatically after two minutes
if no keys are pressed. The last label created
will be retained and displayed when next
turned on. Any stored last label settings
will also be retained.
Note: If the batteries are removed for more
than a few seconds, all text and settings will
be lost.
When power is restored, the display will
show a flashing cursor (no text) and the set-
tings will be full height standard width text
with Hand all other settings off.
4
CAPITALS
•Press this button, and all subsequent cha-
racters will appear in UPPER CASE
(CAPITALS), as confirmed by the CAPS
indicator in the display.
•Press again to cancel and return to lower
case.
SHIFT KEY
This has a dual action: either press and hold
down or press and release to remain in
"shift" position.
Press Hagain to return to normal state.
•Use Hbefore pressing an alphabet key to
produce an UPPER CASE (CAPS) character.
•For dual-purpose keys, press Hfirst to
produce the legend above the key.
•Pressing Hwhile CAPS is set will give a
lower case character.
DELETE
•Press to delete the character to the left of
the cursor, or to exit certain function key
operations.
CLEAR ALL TEXT +
•Press to clear all the current text and
cancel any fixed length setting, but leave
the text size and other settings unchanged.
Also use to exit or clear certain function
key operations.
CURSOR KEYS
•Press to move the cursor along the text,
one character at a time.
•Press and hold to scan quickly through
the text.
•Press H+ or to move the cursor
to the beginning or end of the text.
•When used in conjunction with certain
function keys, use or to select
options.
•To insert characters into the text, use or
to position the cursor under the
character to the right of the insertion
point, then type in the characters required.
PRINTING
•Press PRINT to print the label.
(see extended memory)
•Use cutter button E to release the label –
see page 2.
PRINT PREVIEW +
Allows you to preview your selected label
before printing it.
•Press H+ CAPS and the entire text of the
selected label will scroll across the display.
Note: with a 2 line label, the message will
be previewed as a single line message.
BUFFER PREVIEW +
•Press ---ll--- and the entire content of the
label storage buffer will scroll across the
display. (see extended memory)
Note: any 2-line label in the buffer will be
previewed as a single line message.
SPACE KEY
•Press SPACE to insert a space into the text.
SYMBOLS +
•Press H+ SPACE to select a symbol character
– see Symbols and special characters
and the symbols table on page 2.
TEXT SIZE
•Press SIZE to display the six text print sizes:
l condensed full height
ıcondensed half-height
l
normal full height
5
UNDLINE ITALIC LTH SET OUTLINE
CAPS VERT
H
LP100 S-EU.qxd 13-06-2001 12:01 Pagina 4
All manuals and user guides at all-guides.com

ı
normal half-height
l
extended full height
ı
extended, half-height.
The cursor will be positioned over the
current selection.
•Either press DEL to exit, or use or
to move the cursor over the size symbol
you require, then press ENTER to confirm
the selection, or PRINT to confirm the
selection and print the label.
VERTICAL TEXT +
•Press H+ BOX/UL to rotate the text
through 90˚so that the text on the label is
printed vertically (i.e., it reads from top to
bottom).
This is confirmed by the VERT indicator,
top right of the display.
•Press again to cancel and return to hori-
zontal text (left to right).
Note: Vertical text is not available on two
lines.
2-LINE PRINTING
•Press ↵to start the second line of text on
a two-line label. The two lines will be
printed half-height and ranged left, e.g.
« This is a two ↵line label » in the
display will be printed as:
THIS IS A TWO
LINE LABEL
BOXED/UNDERLINED PRINTING
•Press BOX/ULonce to display the menu above.
•Use or to move the cursor under the
desired option and press ↵to enter. (Con-
firmed by the or
_
indicator displayed.)
•To return to previously selected Box /
Underline text press DEL.
STYLE
Italic and OOuuttlliinneeare accessible from ST LE.
When pressing ST LE a menu appears with
Italic and OOuuttlliinnee. or will guide you to the
preferred option. To select your choice, please enter.
Note: Italic and Outline can be used simultaneous-
ly but you’ll have to enter the ST LE menu twice.
•Press again to cancel.
•Use or to move the cursor under the
desired option and press ↵to enter.
LABEL LENGTH +
Displays the current label length. The length
is normally calculated automatically, accor-
ding to the length of the text on the label.
•Press DEL to exit the length function
without changing the length, or:
•Use or to increase (400mm / 15.6 inches
max.) or decrease the length in 2mm / 0.1
inch steps. The display will flash if you try
to make the label shorter than the text.
•If the length displayed is preceded by the
symbol, the length has already been fixed;
the label is too short for the text and it will
not print. Either press to increase the
length in 2mm / 0.2 inch steps until the
symbol disappears, or press H+ DEL CLEAR
to cancel fixed length; the label is now
long enough for the text and can be printed.
•Press ↵to fix the length for all subsequent
labels, confirmed by the LTH SET
indicator in the display, or
•Press PRINT to fix the new length and
print the label.
•Pressing H+ DEL will cancel the fixed
length and restore the automatic length.
EXTENDED MEMORY
•Press ---ll---
Allows you to start a new label after stored
6
labels. ou may store as many labels as you
like until the memory is full when an error
flash warning is given. To make space in the
memory you can edit any stored label.
Extended memory allows you to store your
favourite labels in the memory. ou can
store up to 70 characters in as many labels
as you like. Each label can have its own
characteristics such as bold, underline, ...
To store a new label, simply press ---ll---
after the last label entered. To make space in
the memory, simply edit any label. To select
a label to print or edit, move the cursor any-
where within the label and press print. Move
the cursor with the or buttons or to
jump between labels, use or .
MULTIPLE COPIES +
•our LabelPoint can provide multiple
copies within the range 1-20.
•To use this facility press Hthen ST LE to
show n = 1 on the display. To increase the
number of copies required press . By
pressing you can work backwards from 20.
To print the desired quantity press PRINT.
Note: A row of vertical dots will print
between each label as a cutting guide.
INCREMENTAL NUMBERING +
Labels can be printed in increments
of 1-20 automatically.
•Key in your starting number as the right
most digit on the label. Press Hthen PRINT
the display will automatically move up a
digit to the next number. Press Hthen
PRINT to continue the sequence.
•It is also possible to include automatic
incremental numbering when printing
multiple copies.
•Key in your starting number, egg. LABEL 1 .
•Next press Hthen ST LE followed by
until the desired number of copies are
displayed eg.10.
Now press Hthen PRINT this will print ten
labels - LABEL 1 to LABEL 10.
•It is possible to print up to 20 sequentially
numbered labels at any one time.
LAST LABEL MEMORY
•The unit will store the last label text and
settings when turned off. Upon power-up,
these will be restored and displayed.
Removal of the batteries for more than a
few seconds will cause this information to
be lost.
Symbols and special characters
INTERNATIONAL CHARACTERS
To add a diacritical (accent) to create an
international character, enter the character
first, followed immediately by the diacritical,
e.g. press E followed by Hthen £to get é.
To add a diacritical to an existing character,
use or to place the cursor under the
character to be changed, then press the
appropriate diacritical key.
SYMBOLS +
•Press H+ SPACE to show symbols and
special characters, some of which are not
available direct from the keyboard. The
display will show: A-Z Each letter selects
a line of symbol characters, as shown in
the table on page 2.
•Press DEL to cancel, or press a letter key
‘A’ to ‘Z’ until you find the line of symbols
required.
•Use or to select a symbol. Press ↵to
place the symbol in the label.
7
LP100 S-EU.qxd 13-06-2001 12:01 Pagina 6
All manuals and user guides at all-guides.com

This product is CE marked in accordance
with EMC directive and the low voltage
directive and is designed to conform with
the following international standards:
•Safety - EN60950, IEC 950, UL 1950
•EMC emissions - EN 55022 Class B, CIS
PR22 Class B, FCC pt 15 Sub pt B Class B
•EMC immunity - EN 50082-1, IEC 801-2
& IEC801-3
9
PRINT CONTRAST
May be adjusted by pressing H+ SPACE +
PRINT
•Use or to select lighter or darker print.
•Press ↵to confirm the setting.
The contrast level will revert to the mid-
setting when the LabelPoint is turned off
and on again.
Note: This function enables you to adjust
the print quality under extreme temperature
conditions.
Cleaning
•Clean the cutter blade regularly: Remove
the cassette, then insert the tip of a ball
pen or pencil between L-shaped piece D1
and the guide pin – see page 2.
•Press and hold down cutter lever E to
expose cutter blade D3, then use a cotton
bud and alcohol to clean both sides of the
blade. Release cutter lever E.
•Check and clean print head face D4 regular-
ly using a cotton bud and alcohol ONL .
Changing the cassette
•Open hinged access door as above.
•Hold as shown, then lift cassette B4
straight up and out.
•Ensure tape and ribbon B3 are taut across
mouth of cassette and tape passes between
guideposts before installing as shown. If
necessary, turn spool B5 clockwise to
tighten ribbon.
•Insert cassette and push firmly C3 until it
clicks into place.
•Ensure tape and ribbon are positioned as
shown between pinch roller C1 and print
head C2.
Troubleshooting
No display
•check that the machine is on
•replace discharged batteries
No printing or poor text
•Replace discharged batteries
•Check that the tape cassette is installed
correctly
•Clean the print head
•Replace the tape cassette.
Tape jammed
•Lift out tape cassette carefully
•Remove/release jammed tape
•DO NOT cut the ink ribbon – turn spool to
tighten
•Cut off excess label tape
•Refit/replace the tape cassette.
Poor cutter performance
•Clean the cutter blade regularly
No response to print key
•!!!!!!!! in the display indicates a printer
jam. Press any key to return to normal
display. Open the cassette compartment
and free the jam.
•
flashing in the display
indicates discharged batteries. Press any
key to return to normal display.
Replace the batteries.
No success?
Call the D MO customer service hotline
telephone number in your country – see the
warranty booklet.
8
LP100 S-EU.qxd 13-06-2001 12:01 Pagina 8
All manuals and user guides at all-guides.com

10
Hoe gebruik ik de
Dymo LabelPoint 100
Wat LabelPoint voor u kan doen
De Dymo LabelPoint 100 maakt het u moge-
lijk een grote verscheidenheid aan zelfkle-
vende labels met 1 tot 100 karakters te
maken. De LabelPoint gebruikt 9mm of
12mm tape-cassettes in verschillende kleu-
ren. Labels zijn voorzien van een voorgesne-
den achterzijde teneinde de tape eenvoudig
te verwijderen van de achterzijde.
Garantie en Registratie
Vul alstublieft de garantiekaart in en stuur
deze binnen zeven dagen na aankoop naar
de desbetreffende klantenservice – zie de
garantiekaart voor verdere details.
De DYMO LabelPoint 100 label-
klaar maken.
Stap 1 – het plaatsen van de batterijen
•Druk het vergrendelingsclipje (fig. A, pagi-
na 2) naar achteren en open de deksel van
het batterijencompartiment.
•Plaats zes AAA alkaline of oplaadbare nikkel-
cadmium batterijen in het compartiment;
let daarbij op de polariteitstekens A1 en
sluit daarna het deksel.
•Verwijder de batterijen indien de
LabelPoint voor langere tijd niet gebruikt
wordt.
Stap 2 – het verwisselen van de tape-
cassette
•Open het deksel B2 zoals aangegeven in
fig. B op pagina 2.
•Hou de cassette B4 zoals getoond en licht
deze er recht uit.
•Verzeker u ervan dat de tape en carbon B3
strak staat in de opening van de cassette,
voordat deze wordt geïnstalleerd. Indien
nodig draai het spoeltje B5 kloksgewijs
op tot de carbon strak staat.
•Druk stevig op de cassette C3 zodat deze
op zijn plaats klikt.
• Verzeker u ervan dat de tape en carbon
correct geplaatst zijn.
•Sluit het deksel B2.
11
LP100 S-EU.qxd 13-06-2001 12:01 Pagina 10
All manuals and user guides at all-guides.com
all-guides.com

Stap 3 – aanzetten van de LabelPoint
Druk op de ON/OFF knop.
Noot: de LabelPoint 100 gaat automatisch
uit na twee minuten als er geen toetsen
meer ingetoetst worden
Stap 4 – maak een label
Typ een eenvoudige tekst om de labelmaker
te proberen. Leer meer over de verschillende
mogelijkheden op de volgende pagina’s.
Stap 5 - print uw label
Druk op om de label te printen.
Stap 6 – snij de label
Gebruik knop E om uw label af te snijden –
zie pagina 2.
Gefeliciteerd! heeft uw eerste label
geprint!
Op de volgende pagina’s kunt u meer
lezen over de verschillende mogelijkheden
van de DYMO LabelPoint 100.
Kennis maken met uw
D MO LabelPoint 100
De Display
De dispay toont:
•Maximaal 11 karakters, plus de cursor,
tegelijkertijd.
•Gebruik toetsen en om door de
tekst te lopen.
•8 functie aanduidingen – zoals hieronder
aangegeven.
•De display zal knipperen indien u bij het
uitvoeren van een bepaalde functie een
verkeerde handeling verricht.
Functie toetsen
ON/OFF
Schakelt de stroom aan en uit.
•Indien geen toetsen worden ingetoetst
schakelt het apparaat na twee minuten auto-
matisch uit. De laatste label zal bewaard
worden en verschijnt op de display wanneer
de LabelPoint weer wordt aangezet.
Bovendien blijven de instellingen behouden.
Opmerking: Als de batterijen meer dan een
paar seconden zijn verwijderd, zullen alle
tekst en instellingen verloren gaan. Wanneer
het apparaat weer stroom krijgt, zal de dis-
play een knipperende cursor tonen (geen
tekst) en de standaard instellingen ( tekst
met volledige hoogte en normale breedte met
Hen alle andere instellingen uitgeschakeld).
12
HOOFDLETTERS
•Druk in om alle volgende karakters in
HOOFDLETTERS af te drukken, zoals
wordt aangegeven door de CAPS aandui-
ding in de display.
•Druk nogmaals in om de functie ongedaan
te maken en terug te keren naar kleine letters.
SHIFT TOETS
Dubbel gebruik door in te drukken en vast te
houden en door eenmalig in te drukken voor
de "shift stand". Druk Hopnieuw in om
terug te gaan naar standaard instelling.
•Druk Hin om het volgende alfabetische
karakter in HOOFDLETTERS te zetten.
•Voor toetsen met een dubbele functie:
druk eerst op Hom de functie of letter
boven de toets uit te voeren.
•Wanneer deze toets Hingedrukt wordt
terwijl CAPS is ingesteld, krijgt u een
kleine letter.
DELETE
•Door deze toets te gebruiken wordt het
teken links van de cursor verwijderd, of
wordt een bepaalde functie geannuleerd.
VERWIJDEREN VAN TEKST
+
•Toetsen om alle tekst en eventuele lengte
instelling ongedaan te maken. De letter
grootte en de stijlinstellingen blijven
onveranderd. Tevens te gebruiken om uit
bepaalde functies te gaan of om de functie
ongedaan te maken.
CURSOR TOETSEN
•Toetsen om de cursor door de tekst te
bewegen.
•Druk in en houd ingedrukt om snel door
de tekst te bewegen.
•Druk H+ of in om de cursor naar het
begin of het eind van de label te verplaatsen.
•In combinatie met bepaalde toetsen kunt
u door middel van of specifieke
functies of numerieke waarden selecteren.
•Karakters toevoegen: gebruik of
om de cursor onder het karakter te plaatsen
dat rechts staat van de plaats waar de
tekst moet worden toegevoegd. Toets dan
het gewenste karakter in.
PRINTEN
•Druk PRINT in om de label af te drukken.
•Druk de snijdknop E1 in om de label af te
snijden – zie pagina 2.
PRINT PREVIEW +
Geeft de mogelijkheid om de gehele tekst te
zien voordat het label afgedrukt wordt.
•Druk H+ CAPS in en de gehele tekst zal
over het scherm voorbijkomen.
BUFFER PREVIEW +
•Druk op H+ ---ll--- en alle labels in het
geheugen zullen over het scherm voorbij-
komen. (zie uitgebreid geheugen)
Let op! Bij een label met twee regels wordt
de tekst in de preview stand getoond als één
regel tekst.
SPATIETOETS
•Druk op SPACE om een spatie in de tekst
te voegen.
SYMBOLEN +
•Druk H+ SPACE in om een symboolka-
rakter te selecteren – zie "symbolen en
speciale karakters" en de symbolentabel
op pagina 2.
13
UNDLINE ITALIC LTH SET OUTLINE
CAPS VERT
H
LP100 S-EU.qxd 13-06-2001 12:01 Pagina 12
All manuals and user guides at all-guides.com

KARAKTERGROOTTE
•De display toont de op dat moment gese-
lecteerde karaktergrootte:
l volledige hoogte / minimale breedte
ıhalve hoogte / minimale breedte
l
volledige hoogte / normale breedte
ı
halve hoogte / normale breedte
l
volledige hoogte / dubbele breedte
ı
halve hoogte / dubbele breedte
De cursor is geplaatst bij de huidige selectie.
•Druk DEL om situatie te verlaten of, indien
u verder wenst te gaan, gebruikt u de of
om de cursor onder de door u gewenste
instelling te plaatsen. Om te selecteren
toetst u ↵of PRINT om direct te selecte-
ren en de label af te drukken.
VERTICALE TEKST +
•Druk H+ BOX/UL in om de tekst 90
graden te roteren, zodat de label verticaal
wordt geprint, zoals bevestigd wordt door
de VERT aanduiding in de display.
•Druk opnieuw om te annuleren en terug te
keren naar horizontale tekst.
Opmerking: Verticale tekst is niet mogelijk
bij meerdere regels.
MEERDERE REGELS PRINTEN
•Druk op ↵om de volgende regel te
beginnen. De twee regels zullen op halve
hoogte geprint worden. Dit is een ↵
tweeregelig label wordt als volgt geprint:
DIT IS EEN
TWEEREGELIG LABEL
OMKADERD/ONDERSTREEPT
AFDRUKKEN
•Druk BOX/UL om de menu te tonen.
•Gebruik of om de cursor op de gewen-
ste instelling te plaatsen en te selecteren
door op ↵te drukken. (Dit wordt bevestigt
door de of
-
indicatie in de display).
•Druk DEL om terug te keren naar de vorige
omkaderde/onderstreepte tekst.
STYLE
Cursief en OOuuttlliinneezijn in te stellen via
ST LE. Wanneer u op ST LE drukt, wordt
een menu getoond met Cursief en Outline.
of gebruikt u om de juiste optie te kiezen.
Om uw keuze vast te leggen, drukt u op ↵.
Let op: Cursief en OOuuttlliinneekunnen tegelijker-
tijd gebruikt worden, maar u moet het ST LE
menu voor elke optie opnieuw gebruiken.
•Druk opnieuw om te annuleren.
•Gebruik of om de cursor op de gewen-
ste instelling te plaatsen en te selecteren
door op ↵te drukken.
LABELLENGTE +
De display toont de huidige labellengte. De
lengte is normaal gesproken automatisch
gecalculeerd, overeenkomend met de lengte
en grootte van de tekst op de label.
•Druk DEL in om de lengtefunctie uit te
schakelen zonder de lengte te veranderen,
of:
•Gebruik of om de lengte te verkleinen
of te verhogen met stappen van 2mm
(maximaal 400mm). De display zal knip-
peren indien u probeert de lengte kleiner
te maken dan de tekst.
•Als de getoonde lengte wordt voorafge-
gaan door het symbool, is de lengte
reeds ingesteld. De labellengte is in dit
geval te kort voor de tekst en wordt dan
niet geprint. Druk in dit geval op om
de lengte te verhogen totdat het symbool
verdwijnt of druk op H+ DEL om de
vastgestelde lengte te annuleren. De label
14
is nu lang genoeg voor de tekst en kan
worden geprint.
•Druk op ↵om de lengte vast te stellen voor
alle navolgende labels, zoals bevestigd
door de LTH SET indicatie in de display of:
•Druk PRINT in om de nieuwe lengte te
bevestigen en de label te printen.
•Door H+ DEL in te drukken wordt de
vastgestelde lengte geannuleerd en wordt
de lengte automatisch bepaald.
UITGEBREID GEHEUGEN
Toets ---ll---
Dit geeft u de mogelijkheid een nieuwe label
te maken nadat u een label heeft opgeslagen
in het geheugen. U kunt zoveel labels
opslaan als u wilt, totdat de geheugencapa-
citeit verbruikt is. Een foutmelding zal zal
zichtbaar zijn in de display. Om ruimte te
maken in het geheugen kunt u elk willekeu-
rig label bewerken.
Het uitgebreide geheugen maakt het moge-
lijk uw favoriete en veelgebruikte labels te
bewaren. U kunt tot 70 karakters bewaren,
verdeeld over verschillende labels. Elk label
kan zijn eigen opmaak hebben, zoals vet,
onderstreept, ....
Om een nieuw label op te slaan drukt u op
---ll--- nadat de label is gemaakt. Om een
label te selecteren om te printen of te
bewerken plaatst u de cursor ergens in de
label en drukt u op print. Verplaats de cur-
sor met de of toetsen, of gebruik of
om snel van labels te wisselen.
MEERVOUDIGE KOPIEËN
+
•Uw D MO LabelPoint 100 kan tot 1-20
kopieën maken van hetzelfde label.
•Druk op H+ ST LE en in de display ziet
u n = 1. Om nu het aantal kopieën te
verhogen drukt u op . Door op te druk-
ken telt u terug vanaf 20. Om het gewenste
aantal te printen druk PRINT.
Let op! Een gestippelde lijn geeft aan waar
u handmatig de labels kunt knippen.
OPLOPEND NUMMEREN
+
Labels kunnen met oplopende nummering
van 1-20 geprint worden.
•Het startcijfer waarvan oplopend zal worden
genummerd is het uiterst rechtse cijfer
van het getal op de label. Druk op Hen
daarna PRINT en de display zal dan auto-
matisch het getal met 1 hebben opgehoogd.
Druk vervolgens weer Hen daarna PRINT
om door te gaan.
•Het is ook mogelijk om automatisch oplo-
pend te nummeren wanneer u meervoudige
kopieën maakt.
•Druk uw startnummer in, bv. LABEL 1.
Druk vervolgens Hen daarna ST LE
gevolgd door totdat het gewenste aan-
tal kopieën wordt weergegeven bv. 10.
•Druk op Hen daarna PRINT en de 10
labels zullen worden afgedrukt – LABEL 1
tot LABEL 10.
•Het is mogelijk om tot 20 labels achter
elkaar te printen op elk gewenst moment.
GEHEUGEN LAATSTE LABEL
•Indien het apparaat wordt uitgeschakeld
zullen de laatst gebruikte instellingen en
tekst in het geheugen blijven staan. Deze
zullen vervolgens getoond worden wan-
neer het apparaat weer wordt aangezet.
•Het verwijderen van de batterijen, voor
langer dan enkele seconden heeft tot
gevolg dat alle informatie verloren gaat.
15
LP100 S-EU.qxd 13-06-2001 12:01 Pagina 14
All manuals and user guides at all-guides.com

Problemen en oplossingen
Geen display
•controleer of de LabelPoint aanstaat
•vervang lege batterijen
Tekens worden niet of vaag
afgedrukt
•vervang lege batterijen
•controleer of de tape-cassette correct
geïnstalleerd is
•reinig de printkop
•vervang de tape-cassette
Tapestoring
•verwijder voorzichtig de cassette
•verwijder vastgelopen tape
•KNIP NIET het carbonlint door – draai het
spoeltje om het carbonlint op te draaien
•knip overtollige tape af
•plaats de cassette weer terug
Onvoldoende snijdfunctie
•reinig het mesje regelmatig
Geen reactie op de print toets
•!!!!!!!! in de display betekent een printer-
storing. Druk op een willekeurige toets
om terug te keren naar een normale
display. Open de cassette-ruimte en los
de printerstoring op.
•
knipperend in de display
betekent dat de batterijen te weinig span-
ning leveren. Druk op een willekeurige
toets om terug te keren naar de normale
display. Vervang de batterijen.
Geen succes?
•Bel de D MO customer service hotline in
uw land – zie de garantiekaart.
Dit product draagt het CE keurmerk en is
goedgekeurd volgens de richtlijnen van de
EMC en laag voltage richtlijnen. Het produkt
is ontworpen om te voldoen aan de volgen-
de internationale standaards:
•Veiligheid - EN60950, IEC 950, UL 1950
•EMC emissies - EN 55022 Class B, CIS
PR22 Class B, FCC pt 15 Sub pt B Class B
•EMC ontheffingen - EN 50082-1, IEC
801-2 & IEC801-3
17
Symbolen en speciale
karakters
INTERNATIONALE KARAKTERS
Om een accent toe te voegen aan een karak-
ter (bv. een internationaal karakter), typt u
eerst het karakter in, direct gevolgd door het
accent. Bijvoorbeeld: type A gevolgd door
Hen ß om een Ä te krijgen.
Om een accent aan een bestaand karakter
toe te voegen, gebruikt u of om de cur-
sor onder het karakter te plaatsen dat veran-
derd dient te worden; typ dan het gewenste
accent in.
SYMBOLEN +
•Druk H+ SPACE in en de display toont
symbolen en speciale karakters, waarvan
de meeste niet direct beschikbaar zijn op
het toetsenbord. De display toont: A-Z
Door middel van elke letter selecteert u
een regel van symbolen, zoals getoond in
de tabel op pagina 2.
•Druk DEL in om te annuleren of druk op
de lettertoets ‘A’ tot en met ‘Z’ totdat u de
regel met het gewenste symbool heeft
gevonden.
•Gebruik of om een symbool te selec-
teren. Druk ↵in om het symbool in de
label op te nemen.
PRINT CONTRAST – Kan aangepast wor-
den door H+ SPACE + PRINT te toetsen
• Gebruik de en toetsen om een
donkerder of lichtere print te selecteren.
•Druk ↵om de selectie te bevestigen. Het
contrast niveau zal terugkeren naar de
middelste stand indien de LabelPoint
wordt uitgeschakeld.
Opmerking: Deze functie stelt u in staat de
printkwaliteit aan te passen onder extreme
temperatuurcondities.
REINIGING
•Reinig het mesje regelmatig. Verwijder de
cassette en druk vervolgens met de punt
van een pen tussen het L-vormige stukje
D1 en de geleide pin - zie pag 2.
•Druk op de knop van het snijdmecha-
nisme E om het mesje D3 toegankelijk te
maken voor reiniging. Gebruik watten-
stokjes met alcohol om beide zijden
van het mesje schoon te maken. Laat de
knop van het snijdmechanisme E los.
•Controleer en reinig ook regelmatig het
oppervlak van de printkop D3. Gebruik
uitsluitend wattenstokjes en alcohol.
VERWISSELEN VAN DE TAPE
CASSETTE
•Open het deksel B2 zoals aangegeven in
fig. B op pagina 2.
•Hou de cassette B4 zoals getoond en licht
deze er recht uit.
•Verzeker u ervan dat de tape en carbon B3
strak staat in de opening van de cassette,
voordat deze wordt geïnstalleerd. Indien
nodig draai het spoeltje B5 kloksgewijs
op tot de carbon strak staat.
•Druk stevig op de cassette C3 zodat deze
op zijn plaats klikt.
• Verzeker u ervan dat de tape en carbon
correct geplaatst zijn.
•Sluit het deksel B2.
16
LP100 S-EU.qxd 13-06-2001 12:01 Pagina 16
All manuals and user guides at all-guides.com

Come utilizzare Dymo
LabelPoint 100
Che cosa puòfare
LabelPoint 100 per voi
Con Dymo LabelPoint 100 èpossibile creare
una vasta gamma di etichette autoadesive
d'alta qualità. Èpossibile scegliere numero-
se dimensioni e stili diversi per le etichette.
Label Point 100 èin grado di stampare su
nastri da 9mm o da 12mm di larghezza. I
nastri Dymo sono disponibili in una vasta
gamma di colori tutti con pretaglio sul retro.
Registrazione garanzia
Si prega di completare la scheda per la
registrazione della garanzia e di rispedirla
all’indirizzo assistenza clienti di riferimento
entro sette giorni – per informazioni detta-
gliate vedere il libretto di garanzia.
Operazioni preliminari
PASSAGGIO 1 – inserimento delle batterie
•Fare pressione sul fermo e aprire lo sport-
ellino d'accesso a cerniera – vedere fig.A,
pagina 2.
•Inserire sei batterie alcaline modello AAA,
facendo attenzione alle indicazioni relative
alla polaritàA1 quindi richudere lo sportello.
•Se l’etichettatrice LabelPoint 100 rimarrà
inutilizzata per un po' di tempo.
Occorre rimuovere le batterie.
PASSAGGIO 1 – inserimento della cartuccia
•Fare scorrere il fermo B1 come indicato per
aprire lo sportellino B2 – vedi pagina 2.
•Tenendo la cartuccia B4 come indicato sol
levarla verso l'alto e tirarla fuori.
•Accertarsi che il nastro B3 sia teso all'a per-
tura della cartuccia e che il nastro passi per
le guide prima di procedere all'installazione
come illustrato. Se necessario ruotare la
bobina B5 in senso orario per tendere il nastro.
•Inserire la cartuccia e premere con decisione
C3 fino a collocarla nella corretta posizione.
•Accertarsi che il nastro sia collocato
come illustrato tra il rullo C1 e la testina
di stampa C2.
•Chiudere lo sportellino.
PASSAGGIO 3 - Accensione
Accendere il dispositivo con l'interruttore
ON/OFF.
NOTA: LabelPoint si arresta automaticamen-
te dopo due minuti se non vengono premuti
altri pulsanti.
1918
LP100 S-EU.qxd 13-06-2001 12:01 Pagina 18
All manuals and user guides at all-guides.com

CAPS
•Premendo una volta questo pulsante tutti i
caratteri saranno MAIUSCOLI, come riportato
dall'indicatore CAPS presente sul display.
•Premendo un'altra volta si esclude la fun-
zione e si ritorna alla battitura con carat-
tere minuscolo.
TASTO SHIFT
Questo pulsante svolge una duplice funzio-
ne: Per rimanere nella "posizione di SHIFT"
premerlo e tenerlo premuto o premerlo e
rilasciarlo. Premere ancora una volta per
ritornare allo stato normale.
•Utilizzare Hprima di premere un pulsante
alfabetico per generare caratteri in formato
MAIUSCOLO.
•Per i tasti multifunzione, premere i Hper
generare la legenda riportata sul pulsante.
•Premendo Hmentre CAPS èselezionato
si otterràun carattere minuscolo.
TASTO DELETE
•Premere questo pulsante per cancellare i
caratteri a sinistra del cursore o per uscire
da alcune operazioni dei tasti funzione.
ELIMINA TUTTO IL TESTO
+
•Premere questo pulsante per cancellare
tutto il testo corrente ed eliminare qualsiasi
impostazione relativa alla lunghezza fissa,
lasciando tuttavia invariati le dimensioni
del testo e le altre impostazioni. Impiegare
questo pulsante per uscire o azzerare alcu-
ne operazioni relative ai tasti funzione.
TASTI CURSORE
•Premere questi tasti per far scorrere il
cursore lungo il testo, con un movimento
di un carattere per volta.
•Premere e tenere premuto il tasto per
scorrere il testo.
•Premere H+ oper spostare il
cursore all'inizio o alla fine del testo.
•Utilizzare oper selezionare le opzioni,
quando questo tasto viene impiegato
insieme a certi tasti funzione.
•Per inserire caratteri nel testo, utilizzare
oper posizionare il cursore al di sotto
del carattere a destra rispetto al punto di
inserimento e digitare i caratteri necessari.
TASTO DI STAMPA PRINT
•Premere PRINT per stampare l'etichetta.
(vedere memoria estesa)
•Utilizzare il tasto E per rilasciare
l'etichetta – vedere pagina 2.
ANTEPRIMA DI STAMPA
+
Consente di visualizzare l'anteprima dell'eti-
chetta selezionata prima di procedere alla
sua stampa.
•Premere H+CAPS e tutto il testo dell'
etichetta selezionata scorreràsul display.
Nota: con un'etichetta composta da due
righe, il messaggio verràvisualizzato in
anteprima come un messaggio formato da
un'unica riga.
ANTEPRIMA DI STAMPA BUFFER
+
•Premere H+ ---ll--- e tutto il contenuto
del buffer di salvataggio dell'etichetta scor-
reràsul display. (vedere memoria estesa)
Nota: tutte le etichette composte da due
righe presenti nel buffer verranno visualizza-
te in anteprima come messaggi formati da
un'unica riga.
21
PASSAGGIO 4 – digitazione di un'etichetta
Digitare una prima semplice etichetta per
effettuare un test del dispositivo. Nelle pagi-
ne seguenti èpossibile approfondire le pro-
prie conoscenze in merito alla formattazione.
PASSAGGIO 5 – stampa delle etichette
•Premere il pulsante per effettuare la
stampa dell'etichetta.
PASSAGGIO 6 – taglio dell'etichetta
Utilizzare il pulsante E per eseguire il taglio
dell'etichetta – vedere pagina 2.
Complimenti! Ecco stampata la prima eti-
chetta!
Adesso cerchiamo di approfondire
ulteriormente le nostre conoscenze sulla
digitazione e sulla formattazione.
Conoscere
LabelPoint 100
Il Display
Il display riporta:
•fino ad un massimo di undici caratteri di
testo alla volta.
Utilizzare oper scorrere il testo.
•8 indicatori – come illustrato di seguito.
•Se si preme un tasto sbagliato durante una se-
quenza di una funzione il display si illuminerà.
Tasti funzione
ON/OFF
Accende/Spegne il dispositivo.
•Disattiva il dispositivo automaticamente
dopo due minuti se non vengono premuti
altri pulsanti. L'ultima etichetta creata verrà
conservata e visualizzata all'accensione
successiva. Verranno conservate anche
tutte le impostazioni relative all'ultima
etichetta salvata.
NOTA: Se le batterie vengono rimosse per
un tempo piū lungo di alcuni secondi, tutto
il testo e le impostazioni andranno perse.
Una volta ristabilita l'alimentazione, il display
visualizzeràun cursore lampeggiante (senza
testo) e le impostazioni saranno: larghezza
standard e altezza massima per il testo, invece
He tutte le altre impostazioni disattivate.
20
UNDLINE ITALIC LTH SET OUTLINE
CAPS VERT
H
LP100 S-EU.qxd 13-06-2001 12:01 Pagina 20
All manuals and user guides at all-guides.com
all-guides.com

funzione lunghezza senza apportare modi-
fiche alla lunghezza o:
•impiegare oper aumentare (400mm /
15,6 pollici max) o diminuire la lunghezza
ad intervalli di 2mm / 0,1 pollici. Se si
tenta di generare un'etichetta piùcorta del
testo digitato il display si illumina.
•La lunghezza dell’etichetta ègiàstata fis-
sata quando la lunghezza visualizzata è
preceduta dal simbolo , qualora l'etichetta
risultasse troppo corta per il testo digitato
non verràstampata. Premere per aumen-
tare la lunghezza ad intervalli di 2mm / 0,1
pollici fino a far scomparire il simbolo ,
o premere il tasto H+DEL CLEAR per
eliminare la lunghezza fissata; l'etichetta a
questo punto èsufficientemente lunga per
accogliere il testo e puòessere stampata.
•Premere ↵per fissare la lunghezza di
tutte le etichette successive. L'indicatore
SET LTH (SET LUNGHEZZA) presente sul
display confermeràtale impostazione.
•Premere PRINT (STAMPA) per stabilire la
nuova lunghezza e stampare l'etichetta.
•Premendo H+DEL si elimineràla lung-
hezza fissa e si ripristineràla lunghezza
automatica.
MEMORIA ESTESA
•Premere ---ll---
Consente di iniziare una nuova etichetta
dopo il salvataggio delle etichette. Èpossi-
bile salvare tante etichette quante si deside-
ra fino a che la memoria non risulta piena e
viene dato un segnale lampeggiante d'erro-
re. Per liberare spazio nella memoria, èpos-
sibile modificare tutte le etichette salvate.
La memoria estesa consente di salvare le
etichette preferite. Ē possibile salvare fino a
70 caratteri. Ogni etichetta puòavere le pro-
prie caratteristiche, grassetto, sottolineato
Per salvare una nuova etichetta, premere
---ll--- dopo aver impostato l'ultima etichetta.
Per liberare spazio nella memoria, èpossi-
bile modificare tutte le etichette salvate. Per
selezionare un'etichetta da stampare o
modificare, spostare il cursore in qualsiasi
punto all'interno dell'etichetta e premere
stampa. Per spostare il cursore, premere i
tasti o, o per passare da un'etichetta
all'altra, impiegare o.
COPIE MULTIPLE +
•LabelPoint 100 èin grado di fornire copie
multiple in un intervallo da 1 a 20.
•Per impiegare questa funzione premere H
poi ST LE per visualizzare n = 1 sul display.
Per aumentare il numero di copie necessarie
premere . Premendo èpossibile agire in
senso inverso a scalare da 20 copie. Per
stampare la quantitàdesiderata premere PRINT.
NOTA: Una linea di punti verticali verrà
stampata tra ogni singola etichetta come
guida per il taglio.
NUMERAZIONE PROGRESSIVA
+
Èpossibile stampare automaticamente le
etichette con una numerazione crescente da
1 a 20.
Digitare il numero iniziale come il carattere
piùa destra sull'etichetta. Premere Hpoi
PRINT il display faràavanzare automatica-
mente la cifra al numero successivo.
Premere He poi PRINT per continuare la
sequenza.
•Èpossibile includere anche una numera-
zione progressiva automatica nel caso in cui
si stampino copie multiple.
23
BARRA SPAZIATRICE
•Premere SPACE per inserire uno spazio
nel testo.
SIMBOLI +
•Premere H+ SPACE per selezionare un
simbolo – vedi la tabella dei simboli e dei
caratteri speciali a pagina 2.
DIMENSIONI DEL TESTO
•Premere per visualizzare le sei dimensioni
di stampa del testo:
l altezza totale ridotta
ımezza altezza ridotta
l
altezza totale normale
ı
mezza altezza normale
l
altezza totale estesa
ı
mezza altezza estesa
Il cursore saràposizionato sulla selezione
corrente.
•Premere DEL (CANC) per uscire, o utilizzare
i tasti oper spostare il cursore sul
simbolo relativo alle dimensioni necessarie,
premere ENTER per confermare la selezione,
o PRINT per confermare la selezione e
lanciare la stampa dell'etichetta.
TESTO VERTICALE +
•Premere H+ BOX/UL per ruotare il testo
di 90°in modo tale che il testo sull'etichetta
venga stampato in senso verticale (cioè,
leggibile dall'alto verso il basso). L'indica-
tore VERT, posizionato in alto a destra del
display, conferma questa operazione.
•Premendo un'altra volta questo tasto si
elimina la selezione e si ritorna al testo
orizzontale (da sinistra verso destra).
NOTA: il testo verticale non èpossibile per
testi su due righe.
LANCIO DELLA STAMPA A 2 RIGHE
•Premere ↵per iniziare la seconda riga di
testo per un'etichetta a due righe. Le due
righe verranno stampate a metàaltezza e
allineate a sinistra, ad esempio.
« Si tratta di un'etichetta ↵a due righe »
visualizzata sul display che saràstampata
come:
SI TRATTA DI UN'ETICHETTA
A DUE RIGHE
STAMPA CON BORDO/
SOTTOLINEATURA
•Premere BOX/UL una volta per visualizzare
il menùriportato precedentemente.
•Impiegare oper spostare il cursore
sull'opzione desiderata e premere ↵per
confermare. (Confermato dall'indicatore
o _ presenti sullo schermo).
•Premere DEL per ritornare al testo Sotto-
linea / Bordo precedentemente selezionato.
STILE
Èpossibile avere accesso agli stili Corsivo e
GGrraasssseettttooda STILE. Premendo STILE viene
visualizzato un menùsul display con
Corsivo e GGrraasssseettttoo. aconsentiràdi
selezionare l'opzione desiderata. Per selezi-
onare le proprie scelte, premere invio.
NOTA: Lo stile Corsivo e Grassetto possono
essere impiegati allo stesso tempo ma ène-
cessario accedere al menùSTILE due volte.
LUNGHEZZA DELL'ETICHETTA
+
Visualizza la lunghezza corrente dell'etichet-
ta. La lunghezza viene normalmente calcola-
ta in maniera automatica a seconda della
lunghezza del testo immesso sull'etichetta.
•Premere DEL (CANC) per abbandonare la
22
LP100 S-EU.qxd 13-06-2001 12:01 Pagina 22
All manuals and user guides at all-guides.com

Cambiare la cartuccia
•Aprire lo sportellino a cerniera come
precedentemente descritto.
•Tenendo la cartuccia B4 come indicato,
sollevarla verso l'alto e tirarla fuori.
•All'apertura della cartuccia accertarsi che
il nastro B3 sia teso e che passi per le
guide prima di procedere all'installazione
come illustrato. Se necessario ruotare la
bobina B5 in senso orario per tendere il
nastro.
•Inserire la cartuccia e premere con deci-
sione C3 fino a collocarla nella corretta
posizione.
•Accertarsi che il nastro sia collocato,
come illustrato, tra il rullo C1 e la testina
di stampa C2.
Risoluzione problemi
Display non funzionante
•controllare che l’etichettatrice sia accesa
•sostituire le batterie scariche
L’etichettatrice non stampa o
stampa male
•sostituire le batterie scariche
•controllare che la cartuccia del nastro sia
correttamente installata
•pulire la testina di stampa
•sostituire la cartuccia
Nastro inceppato
•sollevare la cartuccia del nastro
•rimuovere/rilasciare il nastro inceppato
•NON tagliare il nastro d'inchiostro –
ruotare la bobina per tenderlo.
•eliminare il nastro superfluo dell'etichetta
•riposizionare/sostituire il nastro.
Problemi di taglio
•pulire regolarmente la lama della taglierina.
Nessuna reazione al tasto
di stampa
•!!!!!!!! visualizzato sul display indica un
blocco dell’etichettatrice. Premere un
tasto qualsiasi per tornare alla visualizza-
zione normale. Aprire il vano cartuccia e
rimuovere il blocco.
•
lampeggiante sul display
indica batterie scariche. Premere un tasto
qualsiasi per tornare alla visualizzazione
normale. Sostituire le batterie.
Nessun risultato?
Si consiglia di chiamare il numero d'as-
sistenza clienti D MO del proprio paese –
vedere il libretto di garanzia.
Il prodotto presenta marchio CE in
accordo con le direttive sul basso
voltaggio ed EMC. Il prodotto è stato
progettato seguendo i seguenti standard
internazionali di:
• Sicurezza, E EN60950, IEC 950,
UL 1950
• Emissioni EMC - - EN 55022 Class B,
CIS PR22 Class B, FCC pt 15 Sub pt B
Class B
• Esenzione EMC - EN 50082-1,
IEC 801-2 & IEC801-3
25
•Digitare il numero di partenza, come ad
esempio ETICHETTA 1 .
•Premere di seguito He poi ST LE
seguito da fino a visualizzare il numero
di copie desiderate, ad esempio 10.
A questo punto premere He poi PRINT.
In questo modo saranno stampate dieci eti-
chette – dall'ETICHETTA 1 all'ETICHETTA 10.
•Èpossibile stampare fino ad un massimo
di 20 etichette numerate in maniera pro-
gressiva in una sola volta.
MEMORIA ULTIMA ETICHETTA
•Quando viene spenta LabelPoint 100
mantiene in memoria il testo dell'ultima
etichetta e le relative impostazioni quando
viene spenta. All'accensione, queste ultime
verranno ripristinate e visualizzate. La
rimozione delle batterie per un tempo
superiore ad alcuni secondi provoca la
perdita di queste informazioni.
Simboli e caratteri speciali
CARATTERI INTERNAZIONALI
Per aggiungere un segno diacritico (accen-
to) per generare un carattere internazionale,
digitare il carattere, seguito immediatamente
dal diacritico, premendo ad esempio E seg-
uita da He poi £per ottenere é. Per aggi-
ungere un segno diacritico ad un carattere
esistente, impiegare oper collocare il
cursore sotto il carattere da modificare e
premere di seguito il tasto del diacritico
appropriato.
SIMBOLI +
Premere H+ SPACE per visualizzare i sim-
boli e caratteri speciali, alcuni dei quali non
sono disponibili direttamente dalla tastiera.
Il display visualizza quanto segue: A-Z Ogni
lettera seleziona una riga di simboli, come
indicato nella tabella a pagina 2.
Premere DEL (CANC) per eliminare, o pre-
mere una lettera tra la 'A' e la 'Z' fino a tro-
vare la riga di simboli desiderata.
Utilizzare oper selezionare un simbolo.
Premere ↵per collocare il simbolo nell'eti-
chetta.
CONTRASTO STAMPA – ē possibile
regolarlo premendo H+ SPACE + PRINT
•Utilizzare oper selezionare l’imposta-
zione di stampa piùchiara o piùscura.
•Premere ↵per confermare l'impostazione.
Quando LabelPoint 100 viene spenta il
livello del contrasto ritorna ad un'impos-
tazione media.
Nota: questa funzione consente di regolare
la qualitàdi stampa in condizioni di tempe-
rature estreme.
Pulizia
•Pulire la lama della taglierina in maniera
regolare: rimuovere la cartuccia, inserire
la punta di una penna a sfera o matita tra
la parte a forma di L D1 e la guida –
vedere pagina 2.
•Premere e tenere premuta la leva E per far
avanzare la lama D3, poi utilizzare un
batuffolo di cotone imbevuto d'alcol per
pulire entrambi i lati della lama.
Rilasciare la leva della taglierina E.
•Controllare e pulire il profilo della testina
di stampa D4 in maniera regolare utiliz-
zando SOLAMENTE un batuffolo di cotone
imbevuto d'alcol.
24
LP100 S-EU.qxd 13-06-2001 12:01 Pagina 24
All manuals and user guides at all-guides.com

26
Cómo utilizar la
Máquina de Rotular
Dymo LabelPoint 100
¿Para qué sirve la impresora
LabelPoint?
Dymo LabelPoint le permite crear una
amplia variedad de cintas adhesivas de gran
calidad. Las cintas pueden imprimirse en
distintos tamaños y estilos. La LabelPoint
imprime cintas de 9 mm ó 12 mm. Las cin-
tas Dymo se encuentran disponibles en un
amplio surtido de colores. La cinta está pre-
cortada para facilitar la extracción de la
banda protectora.
Registre su tarjeta de garantía
Por favor, rellene la tarjeta de garantía y
remítala a su Centro de Atención al Cliente
más próximo en el plazo de los siete días
posteriores a su adquisición. Para más
información, consulte el folleto de garantía.
Primeros pasos
PASO Nº1: coloque las pilas
•Presione sobre la marca de apertura y
abra la tapa del compartimento de las
pilas. Vea fig. A, pág. 2.
•Coloque seis pilas alcalinas tipo AAA,
teniendo en cuenta las marcas de polari-
dad A1. Cierre la tapa.
•Si la LabelPoint ha de permanecer inactiva
durante un periodo prolongado, retire las
pilas.
PASO Nº2: coloque la cinta
•Deslice la presilla B1 tal como se indica
con el fin de abrir el compartimento de la
cinta. Consulte la pág. 2.
•Sujete la cinta B4 tal como se indica y
colóquelo.
•Antes de proceder a su instalación, com-
pruebe que el carrete de tinta y la cinta
B3 están correctamente tensadas a lo
largo de la embocadura del cartucho y
que pasan entre los pivotes guía. Si es
necesario, tense la cinta haciendo girar la
bobina B5 en sentido horario.
•Introduzca la cinta y presione con firmeza
C3 hasta percibir un chasquido que indica
su correcta colocación.
•Compruebe que el carrete de tinta y la
cinta estén colocadas tal como se indica,
es decir, entre el rodillo C1 y el cabezal
de impresión C2.
•Cierre de nuevo la tapa.
27
LP100 S-EU.qxd 13-06-2001 12:01 Pagina 26
All manuals and user guides at all-guides.com

PASO Nº3 - encendidoTHREE - switch
on
Ponga la máquina marcha accionando el
conmutador ON/OFF.
Nota: Si no pulsa ninguna tecla por espacio
de dos minutos, la unidad se apagará auto-
máticamente.
PASO Nº4 - introduzca el texto de una etiqueta
•Escriba un texto de prueba simple. En las
páginas siguientes encontrará más infor-
mación acerca de la compaginación de
etiquetas.
PASO Nº5 - imprima la etiqueta
•Pulse para imprimir la etiqueta
PASO Nº6 - corte la etiqueta
•Para cortar la etiqueta, pulse el botón E.
Vea pág. 2.
¡Enhorabuena! ¡Acaba de imprimir su pri-
mera etiqueta!
Veamos ahora las distintas posibilidades
de introducción y formato de textos.
Familiarícese con su
LabelPoint 100
Pantalla
La pantalla puede mostrar:
•hasta once caracteres de texto simultánea-
mente. Use las teclas o para des-
plazar el cursor dentro del texto.
•8 indicadores, que se describen a
continuación.
•Si pulsa una tecla incorrecta en la
secuencia de cualquier función, la
pantalla parpadeará para indicárselo.
Teclas de funci n
ON/OFF
(encendido/apagado)
Enciende o apaga la unidad.
•Si no se pulsa ninguna tecla por espacio
de dos minutos, la unidad se apagará
automáticamente. La máquina memoriza
la última etiqueta creada y se la muestra
en el momento de encender la máquina
de nuevo. Los parámetros de la última
etiqueta se almacenan asimismo en la
memoria.
Nota: Si retira las pilas por un periodo
superior a unos pocos segundos, cualquier
28
texto o parámetro memorizado se perderá.
Cuando restablezca la alimentación, en la
pantalla aparecerá un cursor intermitente
(sin texto) y se cargarán los ajustes de texto
de anchura y altura estándar, con Hy todos
los demás parámetros desactivados.
CAPS
•A partir del momento en que pulse este
botón, todos los caracteres que introduzca
aparecerán en MA ÚSCULAS. En la pantalla
se encenderá el indicador CAPS.
•Pulsándola de nuevo, cancelará la función
MA ÚSCULAS y regresará al modo minús-
culas.
SHIFT KEY
Esta tecla desempeña una doble función:
pulse y mantenga la tecla pulsada, o púlsela
y suéltela para permanecer en modo "shift".
Pulse de nuevo Hpara regresar al modo
"normal".
•Pulsando la tecla Hantes de pulsar
cualquier letra del alfabeto obtendrá una
letra MA ÚSCULA.
•En el caso de las teclas con doble
función, pulsando en primer lugar H
accederá a la función que aparece en la
parte superior de la tecla.
•Si pulsa Hmientras la función CAPS
está activada, obtendrá letras minúsculas.
ELIMINAR
•Pulse esta tecla para eliminar el carácter
situado a la izquierda del cursor, o para
abandonar ciertas operaciones de las
teclas de función.
BORRAR TODO EL TEXTO +
•Pulse esta combinación para borrar todo
el texto y cancelar cualquier ajuste de
longitud memorizado, sin alterar ningún
otro parámetro. Utilícela también para
abandonar o borrar ciertas operaciones de
las teclas de función.
TECLAS DE CURSOR
•Utilice las teclas de cursor para
desplazarse a través del texto, pasando
los caracteres de uno en uno.
•Manteniendo pulsada cualquiera de las
dos teclas de cursor podrá desplazarse
rápidamente a través del texto.
•Pulse H+ o para desplazar el cursor
al principio o al final del texto,
respectivamente.
•Usadas conjuntamente con ciertas teclas
de función, las teclas y sirven asi
mismo para seleccionar opciones.
•Si desea insertar caracteres en el texto,
use las teclas y para colocar el cursor
bajo el carácter situado a la derecha del
punto de inserción y, acto seguido, teclee
los caracteres necesarios
IMPRESIÓN
•Pulse PRINT para imprimir la etiqueta
(vea memoria extendida)
•Para liberar la cinta, pulse el botón E.
Vea pág. 2.
VISTA PREVIA DE IMPRESIÓN
+
Permite obtener una vista previa de la eti-
queta seleccionada antes de imprimirla.
•Pulse H+ CAPS. La totalidad del texto
de la etiqueta seleccionada desfilará en la
pantalla.
29
UNDLINE ITALIC LTH SET OUTLINE
CAPS VERT
H
LP100 S-EU.qxd 13-06-2001 12:01 Pagina 28
All manuals and user guides at all-guides.com

Recuerde que si la etiqueta consta de dos
líneas, la vista previa del texto se realiza-
rá como si de una sola línea se tratara.
VISTA PREVIA DEL BÚFER +
•Pulse ---ll--- .
Todo el contenido del búfer de almacena-
miento de la etiqueta desfilará en la panta-
lla. (vea memoria extendida)
Nota: Recuerde que si la etiqueta almacena-
da en el búfer consta de dos líneas, la vista
previa se realizará como si de una sola línea
se tratara.
TECLA ESPACIADORA
•Pulse SPACE para insertar un espacio en
el texto.
SÍMBOLOS +
•Pulse H+ SPACE para seleccionar un
símbolo (consulte la sección 'Símbolos y
caracteres especiales' en la pág. 2).
TAMAÑO DEL TEXTO
•Utilice esta función para ver los seis
tamaños de impresión de texto disponibles:
l condensado de altura normal
ıcondensado de altura media
l
normal de altura normal
ı
normal de altura media
l
extendido de altura normal
ı
extendido de altura media
El cursor aparecerá sobre la opción actual-
mente seleccionada.
•Pulse DEL para salir, o utilice las teclas
y para desplazar el cursor hasta el
símbolo de tamaño que desea seleccio-
nar. A continuación, pulse ENTER para
confirmar su selección o PRINT para con-
firmar la selección e imprimir la etiqueta.
TEXTO VERTICAL +
•Pulse H+ BOX/UL para rotar el texto
90°. El texto se imprimirá en sentido
vertical, es decir, se leerá de arriba hacia
abajo. El indicador VERT que aparece en
la parte superior izquierda de la pantalla
confirma que esta función se encuentra
activada.
•Pulse de nuevo H+ BOX/UL para anular
esta opción y regresar al modo de impre-
sión horizontal (de izquierda a derecha).
Nota: Si la etiqueta se compone de dos
líneas, la opción de texto vertical no está
disponible.
IMPRESIÓN EN DOS LÍNEAS
•Si compone una etiqueta de dos líneas,
pulse ↵para marcar el inicio de la
segunda línea de texto. Ambas líneas se
imprimirán con caracteres de media altura
y alineadas a la izquierda, por ejemplo,
si la pantalla muestra Etiqueta de ↵dos
líneas, el resultado impreso será:
ETIQUETA DE
DOS LÍNEAS
TEXTO EN CAJA / SUBRAYADO
•Pulse BOX/UL una sola vez para invocar el
menú.
•Use las teclas o para colocar el cur-
sor bajo la opción deseada y, a continua-
ción, pulse ↵. (la presencia del indica dor
o _ en la pantalla confirmará la acción)
•Para salir sin realizar cambios, pulse DEL.
ESTILO
Los estilos de letra Italic (Cursiva) y OOuuttlliinnee
(Contorno) pueden seleccionarse a través de
la tecla ST LE. Al pulsarla aparecerá un
menú con las opciones Italic y OOuuttlliinnee.
30
a le facilitará la elección. Para confirmar
su selección, pulse ENTER.
Nota: Las letras Italic y Outline pueden utili-
zarse simultáneamente, aunque para ello
deberá ir al menú ST LE dos veces.
•Pulse de nuevo para anular.
•Use las teclas o para colocar el
cursor bajo la opción deseada y, a
continuación, pulse ↵.
LONGITUD DE LA ETIQUETA
+
Muestra la longitud de la etiqueta actual.
Normalmente, la longitud se calcula de
manera automática en función de la longitud
del texto de la etiqueta.
•Pulse DEL para salir de la función de lon-
gitud sin realizar cambios, o:
•Utilice las teclas y para aumentar
(hasta 400 mm / 15,6" máx.) o disminuir
la longitud en pasos de 2 mm / 0,1". Si el
valor de longitud introducido es inferior a
la longitud del texto, la pantalla parpadea-
rá para advertírselo.
•Si el valor de longitud aparece en la pan-
talla precedido por el símbolo ello sig-
nifica que la etiqueta es demasiado corta
para el texto que contiene y no podrá
imprimirse. Pulse para aumentar su
longitud en incrementos de 2 mm / 0,2"
hasta que el símbolo desaparezca, o
pulse H+ DEL CLEAR para anular la lon-
gitud memorizada; la etiqueta tiene ahora
la longitud suficiente para el texto y podrá
imprimirse.
•Pulse ↵para memorizar este valor de lon-
gitud para las etiquetas que cree a partir
de ahora (el indicador LENGHT SET se
iluminará en la pantalla para confirmarlo),
o
•Pulse PRINT para memorizar el nuevo
valor de longitud e imprimir la etiqueta.
•Pulse H+ DEL para cancelar el valor
de longitud memorizado y regresar a la
longitud automática.
MEMORIA EXTENDIDA
•pulse ---ll---
Esta función permite la creación de nuevas
etiquetas partiendo de otras previamente
almacenadas. Puede almacenar todas las
etiquetas que desee. Una señal de error
intermitente le avisará cuando la memoria
esté llena. Para aprovechar mejor la memoria
es recomendable modificar cualquiera de los
modelos de etiqueta previamente almacenados.
La memoria extendida le permite almacenar
sus etiquetas favoritas en la memoria.
Puede almacenar hasta 70 caracteres en
tantas etiquetas como usted lo desee. Cada
etiqueta puede tener sus propias caracte-
rísticas, como por ejemplo, caracteres en
negrita, subrayados, etc.
Para almacenar una etiqueta nueva basta
con pulsar ---ll--- una vez definida la
misma. Para aprovechar mejor la memoria
es recomendable modificar cualquiera de
los modelos de etiqueta. Para seleccionar la
etiqueta que desea imprimir o modificar, colo-
que el cursor en cualquier punto de dicha
etiqueta y pulse PRINT. Desplace el cursor
sirviéndose de las teclas y . Para pasar
de una etiqueta a otra utilice las teclas y .
COPIAS MÚLTIPLES +
•LabelPoint puede imprimir varias copias
de una etiqueta, entre 1 y 20.
•Para utilizar esta función, pulse Hy, a
continuación ST LE . Aparecerá en la pan-
31
LP100 S-EU.qxd 13-06-2001 12:01 Pagina 30
All manuals and user guides at all-guides.com
all-guides.com

talla el mensaje n = 1. Para seleccionar un
número mayor de copias, pulse . Pulsan-
do la tecla podrá retroceder a partir de 20.
Para imprimir la cantidad seleccionada,
pulse PRINT.
Nota: Una fila de puntos se imprimirá
entre las etiquetas com guía de corte.
NUMERACIÓN INCREMENTAL
+
Las etiquetas pueden imprimirse automáti-
camente en incrementos de 1 a 20.
•Introduzca el número inicial en la primera
posición de la etiqueta, empezando por la
derecha. Pulse Hy, a continuación
PRINT. La pantalla aumentará automática-
mente un dígito. Pulse Hy, a continuación
PRINT para continuar la secuencia.
•La función de numeración incremental
automática puede también utilizarse en la
impresión de copias múltiples.
•Introduzca el número inicial, por ejemplo,
ETIQUETA 1.
•A continuación, pulse Hy luego ST LE ,
seguido de hasta que aparezca en la
pantalla el número de copias deseado,
por ejemplo, 10. Pulse ahora Hy, a con-
tinuación PRINT. Se imprimirán diez eti-
quetas, ETIQUETA 1 a ETIQUETA 10.
•El sistema permite la impresión de hasta
20 etiquetas numeradas correlativamente.
MEMORIA DE ÚLTIMA ETIQUETA.
•La unidad conserva en memoria el texto y
los parámetros de la etiqueta selecciona-
da en el momento en que se apagó. Al
encenderla de nuevo, dichos datos son
recuperados y aparecen automáticamente
en la pantalla. Si retira las pilas por un
periodo superior a unos pocos segundos,
los datos memorizados se perderán.
Símbolos y caracteres
especiales
CARACTERES INTERNACIONALES
Para utilizar letras acentuadas, introduzca en
primer lugar el carácter inmediatamente
seguido del acento. Por ejemplo, para obte-
ner é, pulse E seguido de Hy £. Para aña-
dir un acento a un carácter existente, colo-
que el cursor debajo del carácter que desea
cambiar, utilizando las teclas y y, a con-
tinuación, pulse la tecla del acento corres-
pondiente.
SÍMBOLOS +
•Pulse H+ SPACE para ver los símbolos
y caracteres especiales. Algunos no está
disponibles directamente desde el teclado.
En la pantalla podrá ver: A-Z Cada letra
selecciona una línea de símbolos, tal
como se indica en la tabla de la pág. 2.
Pulse DEL para cancelar, o cualquier letra
de la A a la Z para seleccionar la línea de
símbolos que desee.
•Pulse DEL para cancelar, o cualquier letra
de la A a la Z para seleccionar la línea de
símbolos que desee.
•Use las teclas o para seleccionar el
símbolo. Pulse ↵para introducir el sím-
bolo en la etiqueta.
CONTRASTE DE IMPRESIÓN - Puede
ajustarse pulsando H+ SPACE + PRINT
•Use las teclas o para seleccionar un
tono de impresión más claro o más oscuro.
•Pulse ↵para confirmar su selección.
Cuando apague y encienda de nuevo
LabelPoint, el nivel de contraste de
impresión regresará al valor medio.
32
Nota: Esta función permite ajustar la calidad
de impresión en condiciones de temperatura
extremas.
Limpieza
•Limpie periódicamente la hoja del cutter.
Retire la cinta e introduzca la punta de un
bolígrafo o lápiz entre la pieza D1 en
forma de L y el pivote guía. Consulte la
pág. 2.
•Presione e inmovilice la palanca del cutter
E para dejar al descubierto la hoja D3.
Limpie ambas caras de la hoja con un
poco de algodón y alcohol. Suelte la
palanca E.
•Compruebe y limpie la parte visible del
cabezal de impresión D4 sirviéndose
SOLAMENTE de algodón y alcohol.
Sustituci n de la cinta
•Abra la tapa del compartimento.
•Sujete la cinta B4 tal como se indica y
retírela, levantándolo hacia afuera.
•Antes de proceder a su instalación, com-
pruebe que el carrete de tinta y la cinta B3
están correctamente tensadas a lo largo de
la embocadura del cartucho y que pasan
entre los pivotes guía. Si es necesario,
tense el carrete haciendo girar la bobina B5
en sentido horario.
•Introduzca el cartucho y presione con fir-
meza C3 hasta percibir un chasquido que
indica su correcta colocación.
•Compruebe que el carrete de tinta y la
cinta están colocadas tal como se indica,
es decir, entre el rodillo C1 y el cabezal
de impresión C2.
Resoluci n de problemas
La pantalla se ha quedado en blanco
•compruebe que la máquina está encendida
•sustituya las pilas si están gastadas
La máquina no imprime o imprime mal
•sustituya las pilas si están gastadas
•compruebe que la cinta está correctamente
instalada
•limpie el cabezal de impresión
•sustituya la cinta
La cinta se ha atascado
•extraiga cuidadosamente la cinta
•retire o libere la cinta atascada
•NO corte la cinta de tinta. Haga girar la
bobina para tensarla
•corte la cinta
•cambie la cinta
El cutter no funciona bien
•Limpie periódicamente la hoja del cutter
La máquina no imprime
•!!!!!!!! en la pantalla significa que la
máquina está atascada. Pulse cualquier
tecla para regresar a la vista normal. Abra
el compartimento de la cinta y resuelva el
problema.
•el mensaje
parpadeando
en la pantalla indica que las pilas tienen
poca carga. Pulse cualquier tecla para
regresar a la vista normal. Sustituya las
pilas.
¿No ha podido resolver el problema?
Llame al centro de asistencia telefónica
D MO de su país. Consulte el folleto de
garantía.
33
LP100 S-EU.qxd 13-06-2001 12:01 Pagina 32
All manuals and user guides at all-guides.com

Como utilizar a sua
LabelPoint 100 Dymo
O que a LabelPoint pode fazer
por si
Com a LabelPoint Dymo você pode criar
uma vasta gama de etiquetas autocolantes
de elevada qualidade. Pode optar pela sua
impressão numa série de diferentes taman-
hos e estilos. A Label Point pode imprimir
numa largura de 9 mm ou 12 mm. As casse-
tes de fita Dymo encontram-se disponíveis
nas mais diversas cores: a fita apresenta
uma ranhura na parte de trás para facilitar a
sua remoção da fita de suporte.
Registo de Garantia
Preencha o cartão de registo de garantia e
remeta-o para o devido endereço do serviço
de apoio ao cliente, no prazo de sete dias –
para mais informações, consulte o folheto
da garantia.
Instruções de utilização
PASSO UM – insira as baterias
•
Faça pressão para alcançar o trinco e abra
a porta de acesso articulada– ver fig A,
página 2.
•
Insira seis baterias alcalinas de tamanho
AAA, respeitando as marcas A1 de polari
dade, e feche a tampa.
•
Retire as baterias se não se prever a utili
zação da LabelPoint por um espaço de
tempo razoável.
PASSO DOIS – insira a cassete
•
Corra o trinco B1, como exemplificado,
para abrir o deck da cassete B1 – ver
página 2.
•
Segure na cassete B4, como ilustrado, e
faça força para cima e para fora.
•
Antes de proceder à instalação, como
ilustrado, assegure-se de que a fita e o
filamento B3 se encontram esticados de
um lado ao outro da entrada da cassete e
de que a fita passa entre os postes de
guia. Se necessário, rode o carretel B5
para a direita para apertar o filamento.
•
Insira a cassete e empurre C3 com força
até que faça um clique e fique encaixada
na devida posição.
•
Certifique-se de que a fita e o filamento
estão posicionados como ilustrado, entre
o rolo de extracção C2 e a cabeça de
impressão C1.
•
Feche o deck.
35
Este producto está marcado CE de
acuerdo con la directiva EMC y la
directiva de bajo voltage, y ha sido
diseñado conforme a los siguientes
estándares internacionales:
• Seguridad – EN60950, IEC 950, UL
1950
• Emisiones EMC – EN 55022 Clase B,
CIS PR 22 Clase B, FCC pt 15 Sub pt
B Clase B
• Inmunidad EMC – EN 50082-1,
IEC 801-2 & IEC801-3
34
LP100 S-EU.qxd 13-06-2001 12:01 Pagina 34
All manuals and user guides at all-guides.com

LETRAS MAIÚSCULAS
•
Prima este botão e todos os caracteres
subsequentes aparecerão em MAIÚSCU-
LAS, como é confirmado pelo indicador
CAPS no ecrã.
•
Prima novamente para cancelar e voltar às
letras minúsculas.
TECLA SHIFT
Esta tecla tem uma acção dupla: ou carrega
e mantém-na premida ou carrega e larga-a
para mantê-la na posição "shift".
Carregue novamente em
H
para voltar ao
estado normal.
•
Utilize
H
antes de premir uma tecla do
alfabeto para produzir um caracter em
MAIÚSCULAS (CAPS).
•
Para teclas de duas funções, carregue pri-
meiro em
H
para inserir o caracter da
parte de cima da tecla.
•
Premir
H
enquanto CAPS estiver activado
produzirá um caracter em minúsculas.
LIMPAR
•
Prima esta tecla para limpar o caracter à
esquerda do cursor, ou para encerrar ope
rações de determinadas teclas de função.
LIMPAR TODO O TEXT0 +
•
Carregue nestas teclas para eliminar inte-
gralmente o texto actual e para cancelar
qualquer definição de extensão definida,
mas não altere o tamanho do texto nem
outras definições. Utilize-as também para
encerrar ou eliminar operações de deter-
minadas teclas de função.
TECLAS DO CURSOR
•
Prima-as para deslocar o cursor ao longo
do texto, um caracter de cada vez.
•
Carregue e mantenha-as premidas para
percorrer rapidamente o texto.
•
Prima
H
+ ou para mover o cursor
para o início ou para o fim do texto.
•
Quando utilizadas juntamente com
determinadas teclas de função, utilize
ou
para seleccionar opções.
•
Para inserir caracteres no texto, utilize
ou
para posicionar o cursor sob o
caracter à direita do ponto de inserção e,
em seguida, insira os caracteres pretendi
dos.
IMPRIMIR
•
Carregue em PRINT para imprimir a
etiqueta. (ver memória ampliada)
•
Utilize o botão E da guilhotina para des
prender a etiqueta – ver página 2.
PRÉ-VISUALIZAR +
Permite-lhe pré-visualizar a etiqueta selecci-
onada antes de a imprimir.
•
Carregue em
H
+ CAPS e o texto integral
da etiqueta seleccionada passará no ecrã.
Nota:
com uma etiqueta de duas linhas, a
mensagem será pré-visualizada como
uma mensagem de uma só linha.
ANTEVISAO DE BUFFER +
•
Carregue em ---ll--- e todo o conteúdo do
registo auxiliar de memória da etiqueta
passará no ecrã. (ver memória ampliada)
Nota:
qualquer etiqueta de duas linhas
contida no registo auxiliar será pré-visu
alizada como uma mensagem de uma só
linha.
TECLA SPACE
•
Carregue em SPACE para inserir um
espaço no texto.
37
PASSO TRÊS – accione a máquina
Accione com o interruptor ON/OFF.
Nota:
se, no espaço de dois minutos, não
forem premidas quaisquer teclas, a
LabelPoint desliga automaticamente
PASSO QUATRO – digite uma etiqueta
•
Digite uma primeira etiqueta, simples,
para testar a máquina. Aprenda mais
acerca da formatação nas páginas que se
seguem.
PASSO CINCO – imprima a sua etiqueta
•
Carregue em para imprimir a
etiqueta.
PASSO SEIS – corte a etiqueta
•
Utilize o botão E da guilhotina para cor
tar a etiqueta – ver página 2.
Parabéns! Você imprimiu a sua pri-
meira etiqueta!
Continuemos para aprendermos mais
sobre digitação e formatação.
Consciencialização
das Potencialidades
da sua LabelPoint 100
Ecrã
ecrã mostra:
•
até onze caracteres de texto, de uma só vez.
Utilize ou para percorrer o texto.
•
indicadores – abaixo indicados.
•
ecrã começará a piscar se premir uma tec-
la incorrecta numa sequência de funções.
Teclas de função
ON/OFF
Liga ou desliga a corrente.
•
Se, no espaço de dois minutos, não forem
premidas quaisquer teclas, a LabelPoint
desliga automaticamente. A última etiqueta
criada será retida e exibida da próxima vez
que a máquina for ligada. Serão igualmente
retidas as definições da última etiqueta
que tenham sido guardadas.
Nota:
se as baterias forem retiradas por um
espaço de tempo superior a uns segundos,
perder-se-á todo o texto, assim como as
definições.
Quando a corrente for restabelecida, o ecrã
exibirá um cursor intermitente (sem texto) e
as definições serão de texto de largura stan-
dard e de altura máxima com
H
e quaisquer
outras definições desactivadas.
36
UNDLINE ITALIC LTH SET OUTLINE
CAPS VERT
H
LP100 S-EU.qxd 13-06-2001 12:01 Pagina 36
All manuals and user guides at all-guides.com

•
Prima DEL para encerrar a função de
extensão sem alterar a extensão, ou:
•
Utilize ou para aumentar (400 mm) ou
diminuir a extensão em espaços de 2 mm.
O ecrã começará a piscar se tentar fazer a
etiqueta mais pequena do que o texto.
•
Se a extensão visualizada no ecrã for pre
cedida do símbolo , é porque a extensão
já foi definida; a etiqueta é demasiado
pequena para o texto e a impressão não
se realizará. Carregue em para aumen
tar a extensão em espaços de 2 mm até o
símbolo desaparecer, ou carregue em
H
+ DEL CLEAR para cancelar a extensão
definida; a etiqueta tem agora o compri
mento suficiente para o texto e pode ser
imprimida.
•
Carregue em ↵para fixar a extensão para
todas as etiquetas subsequentes, confir
mada pelo indicador LTH SET no ecrã,
ou
•
Prima PRINT para fixar a nova extensão e
imprimir a etiqueta.
•
Premir
H
+ DEL cancelará a extensão def
inida e restabelecerá a extensão automática.
MEMÓRIA AMPLIADA
•
Carregue em ---ll---
Permite-lhe iniciar uma nova etiqueta a partir
das etiquetas guardadas. Pode guardar o
número de etiquetas que desejar até a
memória estar completa, altura em que é
dado um aviso de erro intermitente. Para
abrir espaço na memória, poderá editar
qualquer etiqueta guardada.
A memória ampliada permite-lhe guardar na
memória as suas etiquetas favoritas. Pode
guardar até 70 caracteres no número de eti-
quetas que desejar. Cada etiqueta pode ter
as suas próprias características, como o
negrito, o sublinhado, …
Para guardar uma nova etiqueta, carregue
simplesmente em ---ll--- depois de ter sido
inserida a última etiqueta. Para abrir espaço
na memória, edite simplesmente qualquer
etiqueta. Para seleccionar uma etiqueta para
impressão ou edição, mova o cursor para
qualquer ponto dentro da etiqueta e carregue
em print. Mova o cursor com os botões ou
ou para intercalar etiquetas utilize ou .
VÁRIAS CÓPIAS +
•
A sua LabelPoint pode produzir várias
cópias dentro dos números 1-20
•
Para fazer uso dessa capacidade, carregue
em
H
depois em STYLE para visualizar
n= 1no ecrã. Para aumentar o número de
cópias desejado, carregue em . Ao pre
mir pode trabalhar em sentido descen
dente a partir do 20. Para imprimir a
quantidade desejada, prima PRINT.
Nota:
entre cada etiqueta será imprimida
uma fila de pontos verticais como orientação
de corte.
NUMERAÇÃO INCREMENTADA
+
As etiquetas podem ser automaticamente
imprimidas em incrementos de 1-20
•
Digite o seu primeiro número, sendo o
dígito mais à direita na etiqueta. Prima
H
depois PRINT. O ecrã passará automatica-
mente um dígito para o número seguinte.
Prima
H
depois PRINT para continuar a
sequência.
•
É igualmente possível incluir numeração
incrementada automática na impressão de
várias cópias.
•
Digite o seu primeiro número, ex.
ETIQUETA 1.
39
SÍMBOLOS +
•
Carregue em
H
+ SPACE para seleccio
nar o caracter de um símbolo – ver
‘Símbolos e caracteres especiais’ e o qua
dro de símbolos na página 2.
TAMANHO DO TEXTO
•
Pressione a tecla SIZE para mostrar os seis
tamanhos de impressão:
l altura total comprimida
ı
altura média comprimida
l
altura total normal
ı
altura média normal
l
altura total ampliada
ı
altura média ampliada
O cursor será posicionado sobre a actual
escolha.
•
Carregue em DEL para encerrar ou utilize
ou para mover o cursor sobre o sím
bolo do tamanho que pretende. A seguir
prima ENTER para confirmar a escolha ou
PRINT para confirmar a escolha e impri
mir a etiqueta.
TEXTO VERTICAL +
•
Carregue em
H
para rodar o texto 90˚, de
modo a que o texto da etiqueta seja verti
calmente imprimido (isto é, lê-se de cima
para baixo). A confirmação é dada pelo
indicador VERT, situado no topo direito
do ecrã.
•
Prima novamente para cancelar e voltar
ao texto horizontal (da esquerda para a
direita).
Nota:
o texto vertical não se encontra dis
ponível em duas linhas.
IMPRESSĂO DE DUAS LINHAS
•
Carregue em ↵para iniciar a segunda
linha de texto numa etiqueta de duas lin
has. As duas linhas serão imprimidas a
uma altura média e alinhadas à esquerda,
ex.
Esta é uma etiqueta ↵ de duas linhas. No
ecrã será imprimida como:
ESTA É UMA ETIQUETA
DE DUAS Ó LINHAS
IMPRESSÃO DE CAIXA DE
TEXTO/SUBLINHADO
•
Carregue uma vez em BOX/UL para visu-
alizar o menu acima.
•
Utilize ou para mover o cursor sob a
opção desejada e prima Ó para aceder.
(Confirmado pelo indicador ou _ visu
alizado no ecrã).
•
Para voltar à Caixa de Texto/Sublinhado
previamente seleccionado, carregue em
DEL.
ESTILO
A partir de ESTILO tem-se acesso ao It
á
lico
e ao CCoonnttoorrnnoo. Ao premir ESTILO é exibido
um menu com It
á
lico e CCoonnttoorrnnoo. a
guiá-lo-á até à opção desejada. Para selecci-
onar a sua escolha, carregue em enter.
Nota:
O Itálico e o Contorno podem ser
simultaneamente utilizados mas, nesse caso,
terá de aceder ao menu ESTILO duas vezes.
EXTENSÃO DA ETIQUETA
+
Exibe no ecrã a extensão da actual etiqueta.
Normalmente a extensão é calculada de uma
forma automática, variando consoante a
extensão do texto contido na etiqueta.
38
LP100 S-EU.qxd 13-06-2001 12:01 Pagina 38
All manuals and user guides at all-guides.com
Other manuals for Dymo LabelPOINT 100
1
Table of contents
Languages:
Other Esselte Label Maker manuals
Esselte
Esselte DYMO LM100 PLUS User manual
Esselte
Esselte LECTRA TAG QX50 User manual
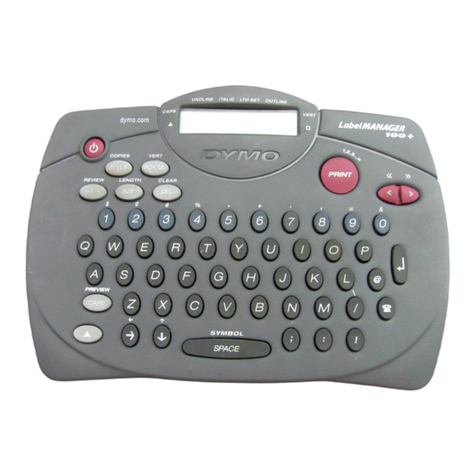
Esselte
Esselte DYMO LM100 PLUS User manual
Esselte
Esselte DYMO LP300 User manual

Esselte
Esselte Xyron Creative Station User manual
Esselte
Esselte DYMO 3500 User manual

Esselte
Esselte Xyron Creativity for Kids X-Treme Sticker Maker... User manual

Esselte
Esselte DYMO LM100 PLUS User manual
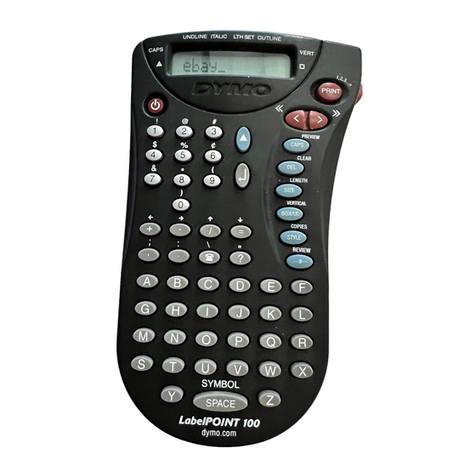
Esselte
Esselte Dymo LabelPOINT 100 User manual
Esselte
Esselte DYMO 4500 User manual
