ETEKCITY CL30 User manual

1
Questions or Concerns? (855) 686-3835 • support@etekcity.com
LED Camping
Lantern
Model No.: CL30

2
Thank You.
Thank you for purchasing the CL30 Camping Lantern by Etekcity. We are dedicated to
providing our customers with quality products for building a better living. Should you have
any questions or concerns about using your new product, feel free to reach out to our
helpful customer support team at (855) 686-3835 or by email at support@etekcity.com.
We hope you enjoy your new product!

3
Package Contents
1 x Camping Lantern
1 x User manual
3 x AA 1.5V batteries (pre-installed)
Table of Contents
Safety Information
Function Diagram
Set Up & Operation
Lantern Operation
Fire Starter Operation
Battery Replacement
Specifications
Warranty
Customer Support
4
5
6
6
8
8
10
11
13

4
Safety Information
WARNING: This product contains materials that, when used together, can ignite flammable
substances to use for campfires or emergencies. Always use caution when using these
materials, misuse of these materials may result in damage to the product or injury.
IMPORTANT: Please read and comply with all of the instructions and warnings provided in
this manual before using the product. Failure to comply with the instructions and warnings
provided herein may result in inaccurate results and/or damage to the product itself.
• DO NOT use the firestarter in indoor settings (i.e. living rooms, bedrooms, bathrooms, or
offices.)
• DO NOT use the firestarter near heat sources or flammable objects such as gas canisters,
fireworks, or gunpowder. Doing so may cause a fire and result in injury or even possible death.
• DO NOT allow children to use or play with the firestarter. The firestarter contains small parts
that may present a choking hazard.
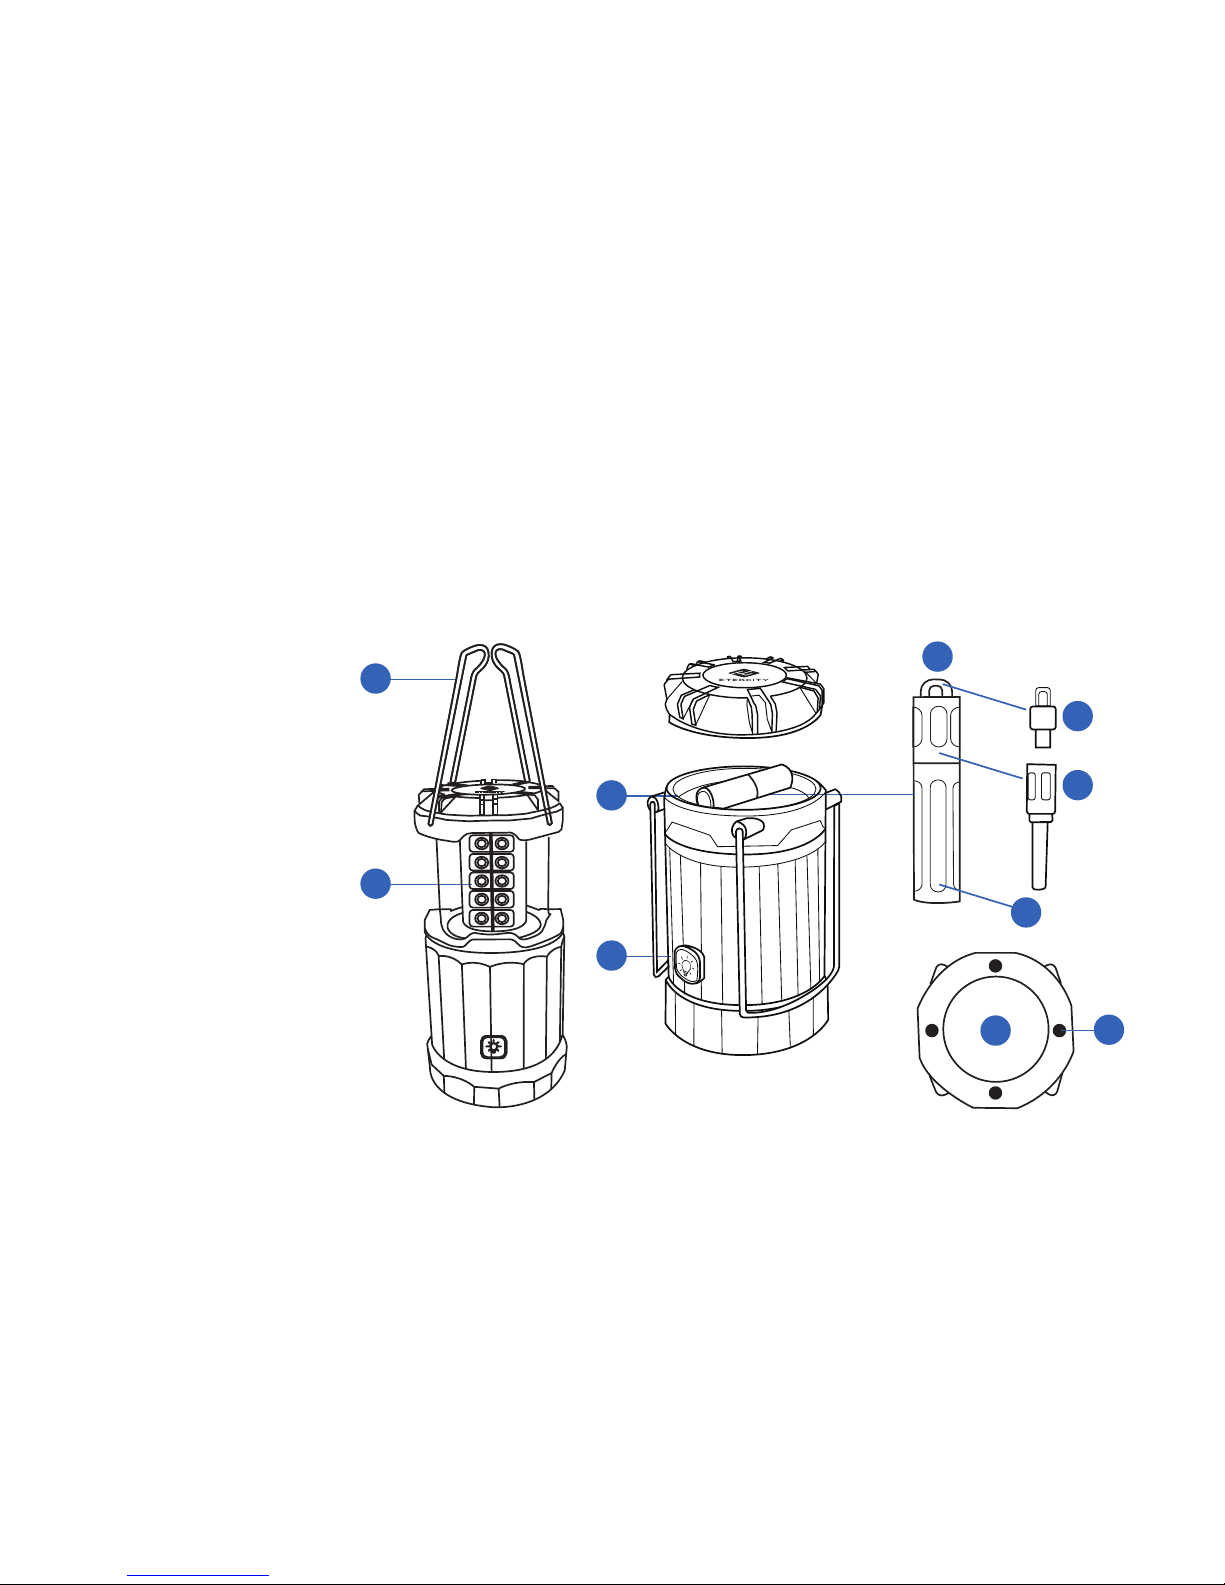
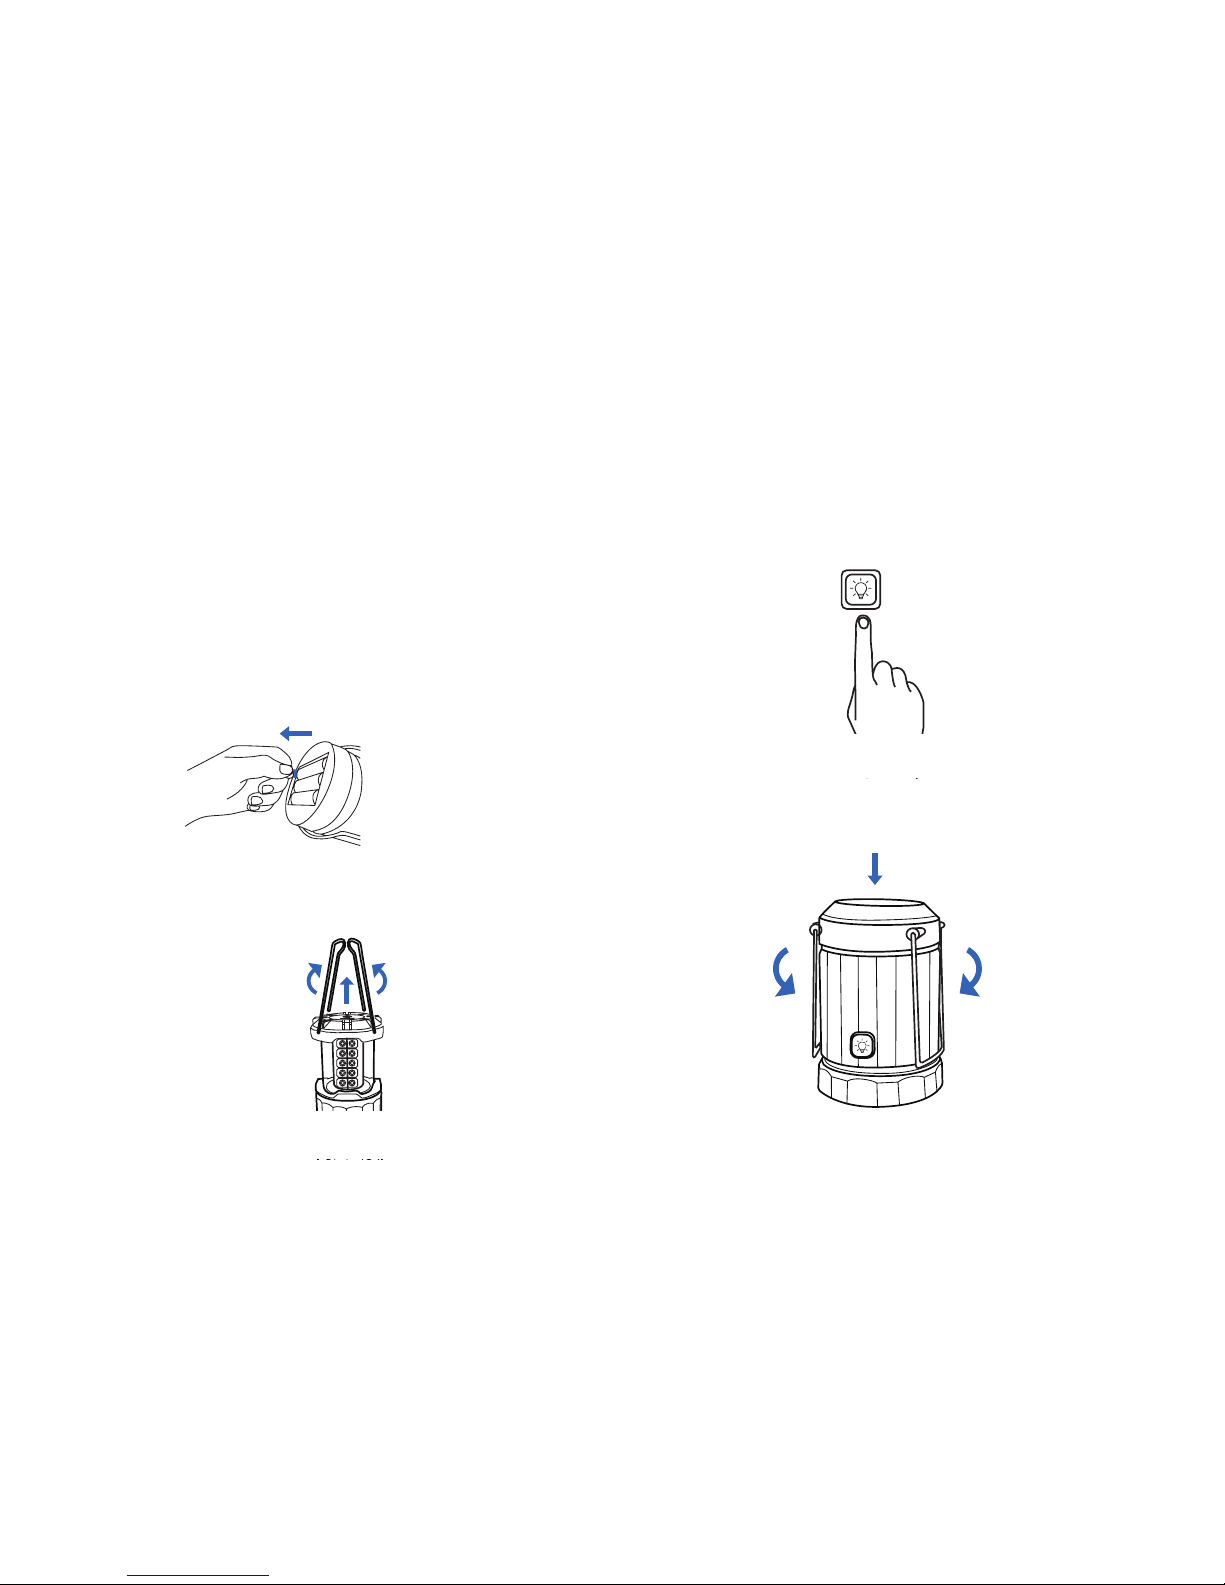
• When not in use, turn off the lantern by completely collapsing the device.
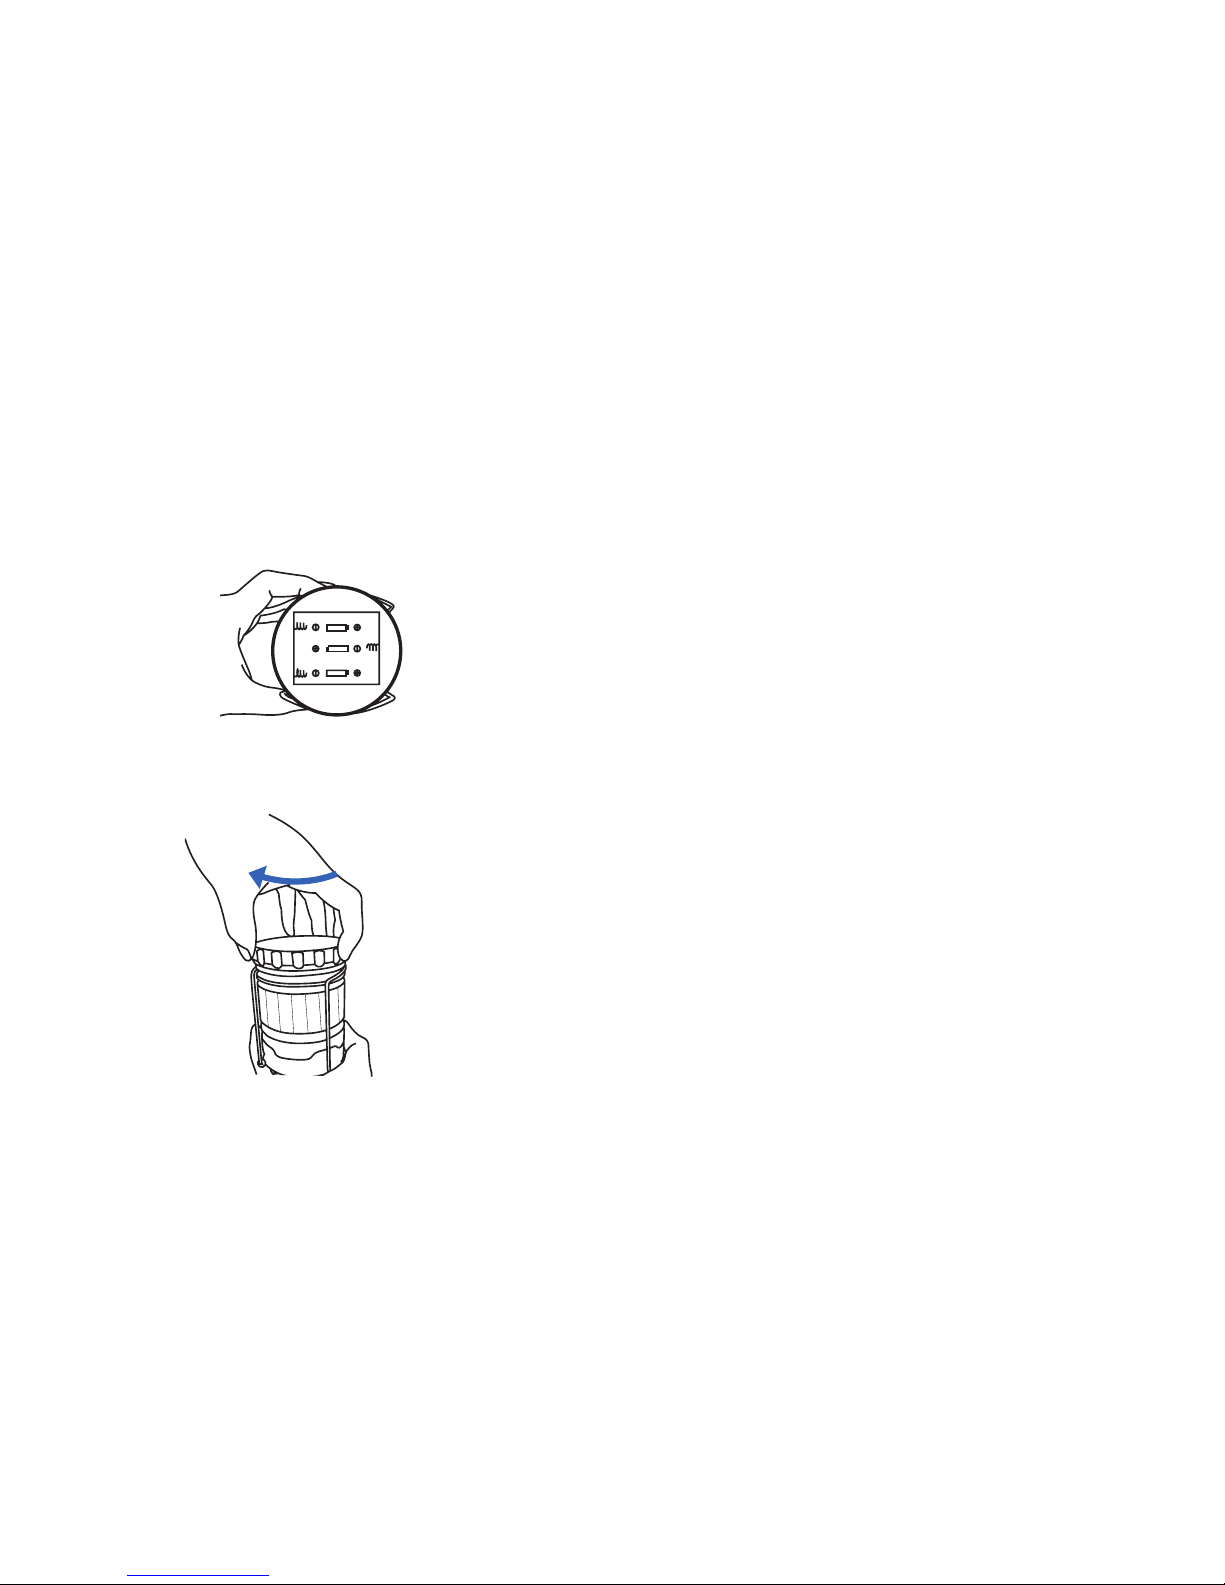
• When installing or changing batteries, always make sure to place the batteries under the
correct polarity as indicated within the battery compartment.
• DO NOT dispose any part of this product in a fire.

5
Function Diagram
• Properly dispose all parts of this product in accordance with local environmental regulations.
Do not dispose of the lantern or batteries in regular household waste.
• DO NOT submerge or place the lantern in any direct contact to water or any other liquid.
• When cleaning, use a damp or dry cloth to wipe the lantern’s surface.
• When not in use for an extended period of time, remove the batteries to avoid power drainage.
1. Handles
2. LED lights
3. Firestarter compartment
4. Firestarter
5. Starter rod cover
6. Striker
7. Fire Starter rod
8. Dimming button
9. Battery compartment
10. Magnetic base pads.
4
7
6
5
10
8
3
1
2
9

6
Set-Up & Operation
Lantern Operation
1. Before first use, remove the battery
compartment lid by holding the lantern upside
down and twisting the base counterclockwise.
Remove the insulation strip and replace the
battery compartment lid.
2. Flip out the foldaway handles and pull them up
to turn on the lantern.
3. Adjust the height to control the brightness of
the emitted light.
4. Press the button on the lantern to adjust the
brightness levels. The chart on page 7 describes
each brightness setting.
5. Fully collapse the lantern to turn off the light.
Fold down the handles and secure them to
bottom of the base to ensure the lantern is off.

7
Function Operation
Turning the lantern on Pull up the lantern
Press dimming button once Dims lantern to brightness level 2
Press dimming button twice Dims lantern to brightness level 3
Press dimming button three times Dims lantern to brightness level 4
Press dimming button four times Returns lantern to brightness level 1
• Brightness level 1 is the maximum brightness setting.
• The lantern can be attached to metallic surfaces for hands-free lighting.
NOTE

8
Fire Starter Operation
Battery Replacement
1. Remove the top cover on the lantern by twisting
it counterclockwise to reveal the fire starter
compartment. Take out the fire starter.
2. Twist the starter rod clockwise to remove
it from the cover.
3. Remove the striker from the starter rod, and
attach it to the starter rod cover.
1. Remove the battery compartment lid by holding
the lantern upside down and twisting the base
counterclockwise. Take out the used batteries
and dispose of them properly.
4. Hold the fire starter rod and striker near a dry
flammable substance.
5. Strike the fire starter rod with the striker so
that sparks are produced. Keep striking the rod
until the sparks make contact and ignite the
flammable substance.
6. Reassemble the fire starter when you are
finished. Place the assembly back into the fire
starter compartment.

9
AA
AA
AA
2. Install three new AA 1.5V batteries into the
lantern, making sure each battery is placed
under the correct polarity.
3. Replace the battery compartment lid.

10
Specifications
Voltage DC 4.5V (3 x AA 1.5V batteries)
Rated Power 3W
Weight 11.5 oz (325 g)
Waterproof Grade IP54
Max Lumen 60 Lumen
Fire Starter Rod Magnesium

11
Warranty
Terms & Policy
Etekcity warrants all products to be of the highest
quality in material, craftsmanship and service for
a minimum of 1 year, effective from the date of
purchase. Warranty lengths may vary between
product categories. Etekcity will replace any
product found to be defective due to manufacturer
flaws based on eligibility; refunds are available
within the first 30 days of purchase. This warranty
extends only to personal use and does not extend
to any product that has been used for commercial,
rental, or any other use in which the product is
not intended for. There are no warranties other
than the warranties expressly set forth with each
product.
This warranty is non-transferrable. Etekcity is not
responsible in any way for any damages, losses or
inconveniences caused by equipment failure or by
user negligence, abuse, or use noncompliant with
the user manual or any additional safety, use, or
warnings included in the product packaging and
manual.
This warranty does not apply to the following:
• Damage due to abuse, accident, alteration,
misuse, tampering or vandalism.
• Improper or inadequate maintenance.
• Damage in return transit.
• Unsupervised use by children under 18 years of
age.
Etekcity and its subsidiaries assume no liability
for damage caused by the use of the product
other than for its intended use or as instructed
in the user manual. Some states do not allow
this exclusion or limitation of incidental or
consequential losses so the foregoing disclaimer
may not apply to you. This warranty gives you
specific legal rights and you may also have other
rights which may vary from state to state.

12
Date of Purchase
Place of Purchase
Order Number
ALL EXPRESSED AND IMPLIED WARRANTIES, INCLUDING THE WARRANTY OF
MERCHANTABILITY, ARE LIMITED TO THE PERIOD OF THE LIMITED WARRANTY.
Should your product prove defective within the specified warranty period, please return the defective unit
in its original packaging with (1) an original copy of the invoice, (2) your order confirmation number, (3)
and your warranty ID number.
To find out more about extending your warranty, visit
www.etekcity.com/warranty or contact customer support.

13
Should you encounter any issues or have any questions regarding your new product, feel free to
contact our helpful Customer Support Team. Your satisfaction is our goal!
Customer Support
Etekcity Corporation
1202 N. Miller St. Suite A
Anaheim, CA 92806
Local: (657)500-1872
Toll Free: (855)686-3835
Fax: (657)202-1693
Email: support@etekcity.com
Support Hours
Monday - Friday:
9:00 am - 5:00 pm PST
*Please have your order confirmation number
ready before contacting customer support.
Customer Support

Scan here to join the community!
Visit us at www.etekcity.com
Building on better living.
Table of contents
Other ETEKCITY Lantern manuals
Popular Lantern manuals by other brands

olympia electronics
olympia electronics GR-8/leds installation instructions

Fusion
Fusion 25075 Assembly instructions

Easy Camp
Easy Camp Jackal SB1201 instruction manual

Seto
Seto ALDEBARAN GLADIUS 2K LED operating instructions

Midstream
Midstream Titan Series Installation guidance

Quoizel
Quoizel BERK8407MB installation guide