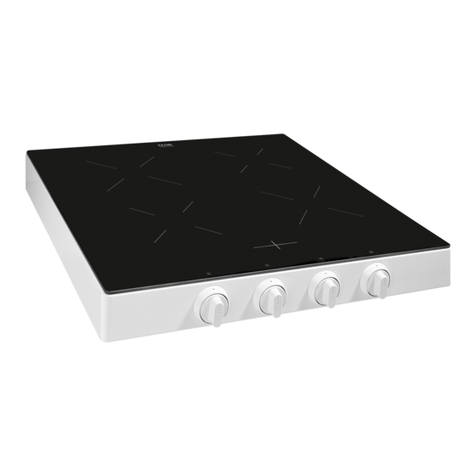
ETNA KEV158WIT User manual

Handleiding
Manual
KEV158WIT
700005792000

Toestelbeschrijving
TOESTELBESCHRIJVING
6
5
43
2
1
0
6
5
43
2
1
0
6
5
43
2
1
0
6
5
43
2
1
0
2
3
1
5
6
4
1Snelkookplaat ø 18 cm / 1500 W
2Snelkookplaat ø 14,5 cm / 1000 W
3Snelkookplaat ø 18 cm / 2000 W
4Snelkookplaat ø 14,5 cm / 1500 W
5Bedieningsknoppen
6Aan/uit signalering

1
Introductie
Als u deze gebruiksaanwijzing doorleest, bent
u snel op de hoogte van alle mogelijkheden
die dit toestel u biedt. U vindt informatie
voor uw veiligheid en over het onderhoud
van het toestel. Verder vindt u milieutips en
aanwijzingen om energie te besparen.
Bewaar de gebruiksaanwijzing en het
installatievoorschrift. Een eventueel volgende
gebruiker van dit toestel kan daar zijn
voordeel mee doen.
Veel kookplezier!
Inhoud
Opstellen . . . . . . . . . . . . . . . . . . . . . . . . . . . 2
Veiligheid. . . . . . . . . . . . . . . . . . . . . . . . . . . 2
Gebruik. . . . . . . . . . . . . . . . . . . . . . . . . . . . 3
Bediening. . . . . . . . . . . . . . . . . . . . . . . . . . 4
De 7-standen bedieningsknop . . . . . . . . . . 4
Onderhoud . . . . . . . . . . . . . . . . . . . . . . . . . . 5
Reiniging en bescherming . . . . . . . . . . . . . 5
Milieuaspecten . . . . . . . . . . . . . . . . . . . . . . 6
Dit toestel voldoet aan de geldende CE
richtlijnen.
INHOUD

2
Opstelling
Plaatsen
Plaats de kookplaat op een vlakke, stabiele
en horizontale ondergrond.
Houd rondom de kookplaat een vrije ruimte
van minimaal 5 cm.
Het stopcontact moet na installatie altijd
bereikbaar blijven.
Geen licht ontvlambare of vervormbare
voorwerpen direkt onder de kookplaat
zetten.
Plaats het toestel op een hittebestendige
tafel of werkblad (> 90 ºC).
Elektrische aansluiting
Stop de stekker in een stopcontact.
Zorg dat het snoer niet in aanraking komt
met onderdelen die heet worden.
Belangrijk
Het apparaat is gefabriceerd volgens de meest
recente veiligheidsstandaarden. Desondanks
adviseren wij personen met psychische of
motorische stoornissen, mentale achterstand of
zwakbegaafdheid het apparaat niet te gebruiken
zonder toezicht van een bekwaam persoon.
Het toestel is aangesloten volgens het schema
230 V 2L+2Nac. Wanneer een andere aansluiting
is vereist, laat dan een erkend installateur de
aansluiting verzorgen (Zie aansluitschema’s op
de onderzijde van het toestel).
Bij verkeerde aansluiting kunnen de elementen
doorbranden. Dit valt niet onder de garantie.
Wanneer de aansluitkabel is beschadigd
mag deze alleen worden vervangen door
de fabrikant, zijn serviceorganisatie of
gelijkwaardig gekwalificeerde personen, om
gevaarlijke situaties te voorkomen.
Voor uw veiligheid
Lees de separate
veiligheidsvoorschriften voordat u
het toestel in gebruik neemt!
OPSTELLEN/VEILIGHEID

3 GEBRUIK
Gebruik
Kookplaat inschakelen
Voordat u de kookplaat in gebruik gaat nemen
dient elk element gedurende 3 à 4 minuten
op de hoogste stand te worden ingeschakeld
zonder dat er een pan op wordt geplaatst.
fig. 1
Elk kookelement is door de fabrikant voorzien
van een speciale roestwerende laag. Als de
kookplaat voor de eerste maal sterk verhit
wordt, zult u een schroeilucht waarnemen.
Dit is normaal.
Toestelinformatie
De kookelementen zijn vervaardigd van
gietijzer. De warmte wordt verkregen door
gloeispiralen die ringsgewijs in het element
liggen.
De warmte wordt door direkte geleiding aan
de panbodem afgegeven. Elk element is gevat
in een roestvrijstalen afsluitrand.
Bij gebruik van een of meerdere elementen
gaat op het bedieningspaneel de kontrolelamp
aan.
Pannen
Gebruik alleen pannen die geschikt zijn
voor elektrisch koken. Dus pannen met een
dikke vlakke bodem. Wanneer de bodem hol
of bol is gaat er veel energie verloren. Het
kookproces duurt erg lang. Het element kan
oververhit raken en krom trekken.
Zet alleen pannen met een droge bodem op
het element. Vocht op de elementen kan roest
veroorzaken.
fig. 2; goed
fig. 3; fout
Gebruik geen pannen die kleiner zijn
dan de kookzone. Hiermee vermijdt u dat
voedselresten op de gloeiend hete kookzone
terecht komen. Ingebrande voedselresten zijn
moeilijk te verwijderen.

4BEDIENING
Bediening
Een symbool naast de bedieningsknop geeft
aan welk element wordt bediend.
Instellen
De bedieningsknoppen kunt u zowel links- als
rechtsom draaien.
Controlelampje
Zodra u een kookplaat inschakelt, gaat het
controlelampje branden.
Uitschakelen
U kunt de kookplaat 5 tot 10 minuten voordat
de kooktijd verstreken is, uitschakelen. Het
element blijft nog geruime tijd warm. Van deze
restwarmte kunt u gebruik maken. Laat de
deksel op de pan.
7-standen bedieningsknop
Stand 6
Aan de kook brengen van alle gerechten.
Slinken van bladgroenten. Aanbraden
van vlees. Bakken van biefstuk, vis en
aardappelen.
Stand 5
Bakken van flensjes. Wentelteefjes, frituren.
Stand 4
Bakken van pannenkoeken, drie in de pan.
Stand 3
Doorbakken van vis en klein vlees.
Doorbraden van groot vlees, uien fruiten.
Stand 2
Doorkoken van gerechten met een kooktijd
van meer 10 minuten. Smoren van groenten.
Ontdooien van diepgevroren bladgroenten.
Stand 1
Trekken van bouillon, vlees stoven,
warmhouden van gerechten, doorkoken van
kleine hoeveelheden.
Stand 0
Op deze stand is het element uitgeschakeld.
Doorkoken van gerechten met een kooktijd
korter dan 10 minuten, nadat het gerecht eerst
op een hogere stand aan de kook is gebracht.
6
5
43
2
1
0

5 ONDERHOUD
Reiniging en bescherming
De kookplaten reinigen kunt u het beste met
een vochtige doek of keukenpapier.
Verwijder overkooksel zo snel mogelijk.
Vooral rode kool, rabarber en appelmoes
werken in op de lak of op het roestvrijstaal.
Hardnekkige vlekken op het emaille
verwijderen met een vloeibaar schuurmiddel
of kunststof schuursponsje. Gebruik
nooit schuurpoeders, agressieve
reinigingsmiddelen en groene
schuursponsjes.
Na het reinigen de kookplaten even
inschakelen om het vocht te laten
verdampen.
Onderhoud van de kookplaten. Van tijd tot
tijd de platen inwrijven met zuurvrije olie
(naaimachine olie), vaseline of met een
speciaal onderhoudsmiddel.

Verpakking en toestel afvoeren
De verpakking van het toestel is recyclebaar.
Gebruikt kunnen zijn:
karton;
polyethyleenfolie (PE);
CFK- vrij polystyreen (PS- hardschuim).
Deze materialen op verantwoorde wijze en
conform de overheidsbepalingen afvoeren.
Op het typeplaatje is het symbool van een
doorgekruiste vuilnisbak aangebracht:
Dit betekent dat het apparaat aan het einde
van zijn levensduur niet bij het gewone
huisvuil mag worden gevoegd, maar naar
een speciaal centrum voor gescheiden
afvalinzameling van de gemeente moet
worden gebracht of naar een verkooppunt dat
deze service verschaft.
Het apart verwerken van een huishoudelijk
apparaat zoals deze kookplaat, voorkomt
mogelijk negatieve gevolgen voor het milieu
en de gezondheid, die door een ongeschikte
verwerking ontstaat, en zorgt ervoor dat de
materialen waaruit het apparaat bestaat
teruggewonnen kunnen worden om een
aanmerkelijke besparing van energie en
grondstoffen te verkrijgen.
Om op de verplichting tot gescheiden
verwerking van elektrische huishoudelijke
apparatuur te wijzen, is op het product het
symbool van een doorgekruiste vuilnisbak
aangebracht.
Conformiteitsverklaring
Wij verklaren dat onze producten voldoen aan
de van toepassing zijnde Europese Richtlijnen,
Besluiten en Verordeningen en de eisen die
zijn vermeld in de normen waar naar wordt
verwezen.
6MILIEUASPECTEN

7

Appliance description
APPLIANCE DESCRIPTION
6
5
43
2
1
0
6
5
43
2
1
0
6
5
43
2
1
0
6
5
43
2
1
0
2
3
1
5
6
4
1Fast plate ø 18 cm / 1500 W
2Fast plate ø 14,5 cm / 1000 W
3Fast plate ø 18 cm / 2000 W
4Fast plate ø 14,5 cm / 1500 W
5Control knobs
6On/off control light

9
Introduction
When you have read these instructions for
use, you will quickly be aware of all the
facilities the appliance can offer you. You can
read about safety and how you should look
after the appliance. In addition you will find
environmental tips and instructions that can
help to save energy.
Keep the instructions for use and the
installation instructions. Any later user of this
appliance could benefit from them.
Enjoy your cooking!
Contents
Preparing for use . . . . . . . . . . . . . . . . . . . 10
Safety . . . . . . . . . . . . . . . . . . . . . . . . . . . . . 10
Use . . . . . . . . . . . . . . . . . . . . . . . . . . . . . . 11
Control . . . . . . . . . . . . . . . . . . . . . . . . . . . 12
The 6 settings switch . . . . . . . . . . . . . . . . 12
Maintenance . . . . . . . . . . . . . . . . . . . . . . . 13
Cleaning and protecting . . . . . . . . . . . . . . 13
Environmental aspects. . . . . . . . . . . . . . . 14
This appliance conforms to current CE
guidelines.
CONTENTS

10
Preparing for use
Positioning
Place the hob on a firm, flat surface.
Keep a minimum space of 5 cm around the
hob.
Wall socket and plug must be accessible at
all times.
Do not place any inflammable or deformable
objects immediately under the hob.
The appliance may be placed on top of a
table or work top. The surface has to be
heat resistant (>90 ºC).
Electrical connection
Put the plug in a socket.
Make sure that the connecting cable does
not come into contact with parts that
become hot.
Importeren
This appliance is not intended for use by
persons (including children) with reduced
physical, sensory or mental capabilities, or
lack of experience and knowledge, unless they
have been given supervision or instruction
concerning use of the appliance by a person
responsible for their safety
The appliance is connected according to
the connection scheme 230 V 2L+2Nac. If a
different connection is needed, the appliance
should only be connected by a qualified fitter
(See wiring diagrams on the bottom of the
appliance). Improper connection can cause the
hotplates to burn out. This is not covered by the
guarantee.
If the supply cord is damaged, it must be
replaced by the manufacturer, its service agent
or similarly qualified persons in order to avoid
a hazard.
For your safety
Read the separate safety instructions
before using the device!
PREPARING FOR USE USE/SAFETY

11 USE
Use
Switch on the hob
Before using your hob for the first time, each
element should be switched on to the highest
setting for 3-4 minutes, without a pan.
fig. 1
The manufacturer has applied a layer of rust-
preventer to each element. When the hob is
heated for the first time a burning smell will
be noticeable. This is normal.
Appliance information
The heating elements are made of cast iron.
he heat is created by spiral filaments which
lie in the element in rings.
The heat is transmitted to the base of the pan
by direct conduction. Each element is fitted in
a stainless steel sealing rim.
When one or more plates are in use the
control light on the panel will go on.
Pans
Use pans that are suitable for cooking by
electricity. Use pans with a thick and flat
base. If the base is concave or convex a lot
of energy is lost. The cooking process will
take very long. The element can become
overheated and warp.
Only place pans with a dry base on the
element. Moisture on the cooking elements
can cause rust.
fig. 2; good
fig. 3; wrong
Do not use pans that are smaller than the
cooking zone. This will prevent food spills
on the very hot cooking zone. Burnt-on food
spills are difficult to remove.

12 CONTROL
Control
A symbol next to the control knob indicates
which element is being operated.
Switching on
You may turn the switch either to the left or
the right.
Control light
When you switch on the hob, the control light
.
Switching off
The cooking zone can be switched off 5 to
10 minutes before the end of the cooking
time. The dish will then finish cooking on the
residual heat, provided you keep the lid on the
pan.
The 7 settings control knob
Level 6
Bringing all foods and liquids to the boil.
Reducing leaf vegetables. Sealing meats.
Frying steak, fish and potatoes.
Level 5
Frying crêpes, French toast, deep frying.
Level 4
Frying (Scotch) pancakes.
Level 3
Frying fish and small cuts of meat.
Braising large joints of meat, frying onions.
Level 2
Simmering vegetables with a cooking time of
more than 10 minutes, braising vegetables,
thawing frozen leaf vegetables.
Level 1
Stewing meats, keeping dishes warm,
simmering small quantities.
Level 0
In this setting the element is switched off.
Simmering food with a cooking time shorter
than 10 minutes, once it has first been brought
to the boil at a higher setting.
6
5
43
2
1
0

13 MAINTENANCE
Cleaning and protection
The hobs are best cleaned with a
damp cloth or kitchen paper.Remove
all spillages as soon as possible. Red
cabbage, rhubarb and apple sauce in
particular will corrode the varnish or
stainless steel.
Remove stubborn stains on the enamel
surface with a non-abrasive cream or a
soft sponge. Never use scouring powders,
aggressive cleaning agents, green scours.
After cleaning, switch the plate on briefly
to allow the moisture to evaporate.
Maintenance of the plates. Rub the plates
with non-acidic oil (sewing machine oil) or
with a protectant.

14 ENVIRONMENTAL ASPECTS
Disposal of packaging and
appliances
In the manufacturing of this appliance use
has been made of durable materials. The
appliance packaging is recyclable. The
following may have been used:
cardboard;
polythene film (PE);
CFC-free polystyrene (PS hard foam);
Dispose of these materials in a responsible
manner and in accordance with government
regulations.
On the data plate is put the symbol of a
crossed-out wheeled dustbin.
This means that at the end of its working
life, the product must not be disposed of as
urban waste. It must be taken to a special
local authority differentiated waste collection
centre or to a dealer providing this service.
Disposing of a household appliance
separately avoids possible negative
consequences for the environment and
health deriving from inappropriate disposal
and enables the constituent materials to be
recovered to obtain significant savings in
energy and resources.
As a reminder of the need to dispose of
household appliances separately, the product
is marked with a crossed-out wheeled
dustbin.
Declaration of conformity
We hereby declare that our products satisfy
the applicable European directives, orders
and regulations, as well as the requirements
stated in the referenced standards.

15

16

17
Other manuals for KEV158WIT
1
Table of contents
Languages:
Other ETNA Hob manuals