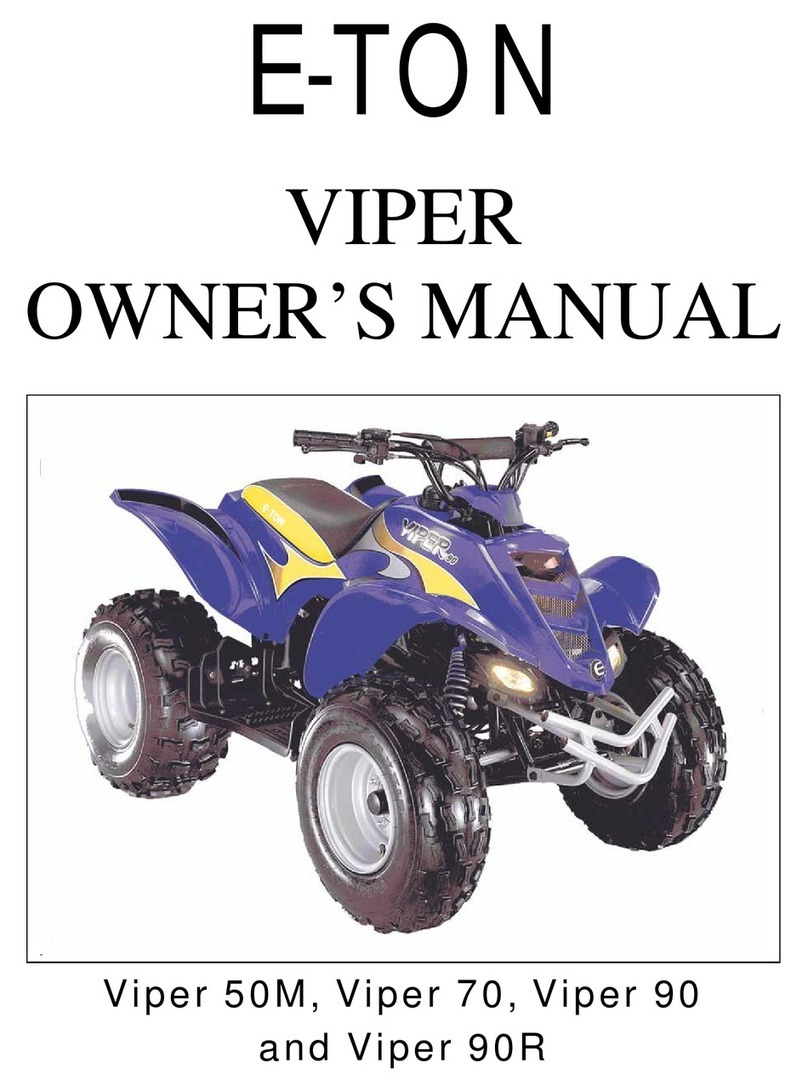
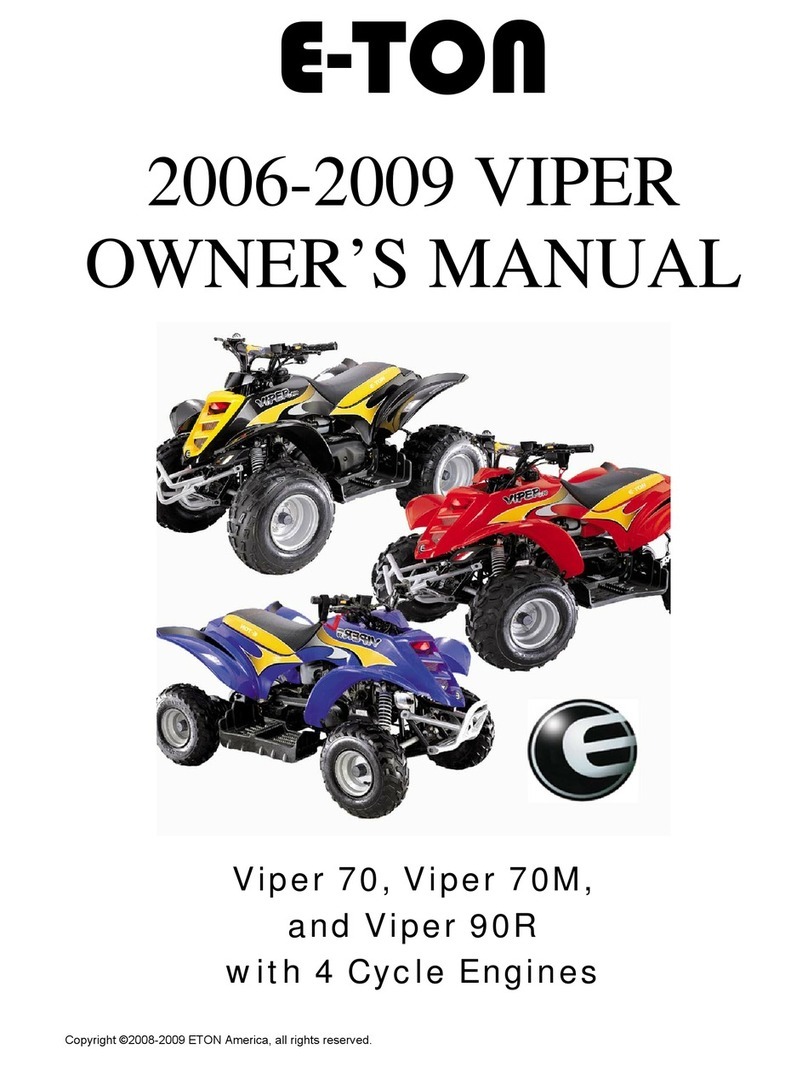
Eton ROVER User manual

OWNER’S MANUAL
E
E-
-TON
TON
ROVER & ROVER GT
E
E-
-TON E
TON E-
-TON E
TON E-
-TON E
TON E-
-TON E
TON E-
-TON E
TON E-
-TON E
TON E-
-TON
TON
ROVER
ROVER GT
Copyright ©2008-2009 ETON America, all rights reserved.

Rover (Safety Nets)
Rover (Brush Guards)
Rover GT
E-TON
ROVER
C
O
N
F
I
G
U
R
A
T
I
O
N
S
Copyright ©2008-2009 ETON America, all rights reserved.

OBEY all State and local laws and regulations
SPEED RESTRICTION Devices
READ and UNDERSTAND this owner's manual
NO Passengers
ADULTSupervision and Instruction are REQUIRED.
ALWAYSWear ProtectiveClothing
OFF ROAD USE ONLY
Both the operator and the adult supervisor should completely read and understand this
owner's manual before operating this vehicle. This owner's manual will instruct you in thesafe
operation of the vehicle.
This vehicle was designed for operation ONLY by the operator, (Driver). The load limit
and seat configuration is designed for the operator ONLY. It is not safe to carry passengers on
the vehicle.
This vehicle MUST NOT be operated by a youth without adult supervision and
Instructions. Unattended operation without adult supervision could result in injuries. E-TON
recommends that both the operator and the adult supervisor attend an vehicle safety instruction
course.
While operating this vehicle, the driver must always wear protective clothing. Protective
helmet with face shield, elbow and knee pads, long leg pants, gloves and hard soled boots
Should always be worn when operating this vehicle.
Each state and local governing agency has laws and regulations for vehicle operations.
It is the owner's responsibility to know, understand and obey these laws and regulations.
This vehicle is designed and manufactured for off-road use only. Operation on public
streets, roads or highways is illegal and very dangerous.
This vehicle is equipped with electronic speed limiting devices.Any attempt to change,
over-ride or bypass these devices may cause dangerous operating conditions.
Important Notices
Page 1
Copyright ©2008-2009 ETON America, all rights reserved.

TABLE OF CONTENTSTABLE OF CONTENTS
Page 2
SAFETY NOTES
Vehicle Identification Number
CONTROL FEATURE
Key Switch
Throttle Pedal
Brake Pedal
Parking Brake Lever
Fuel System
Fuel Tank
Fuel Valve
Inline Fuel Filter
Engine Oil
Tires And Wheels
Tire & Wheel Inspection
Tire Pressure
Spark Plug
Spark Arrester Screen
Air Filter
Braking Systems
Drive Chain
Throttle Pedal
Electrical Battery
Transmission Gear Selector
SPECIFICATIONS
Maintenance Schedule
WIRING DIAGRAM
MANUFACTURE'S WARRANTY
3
7
7
9
9
9
10
10
11
13
22
20
25
24
26
27
Manual Choke Knob
Filling The Brake Fluid Reservoir
Purging Brake Line
23
18
Changing Transmission Oil
15
23
22
14
17
20
29
SERIAL NUMBER 7
10
Checking Engine Oil Level
Changing Engine Oil
12
The Seat
MAINTENANCE 17
To Clean The Filter
The Brake Hoses Inspection
Chain Slack Adjustmen
Adjusting The Throttle
21
RIDING TIPS
24
OPERATION
DESCRIPTION 7
Parking Brake Ajustment
13
Controls, Switches & Feature Locations
Dashboard Indicators 14
Owners Maintenance Records
Copyright ©2008-2009 ETON America, all rights reserved.

SAFETY NOTESSAFETY NOTES
1. Both the adult supervisor and youth operator must fully understand everything in this manual
2. This vehicle was designed for the operator only. NO PASSENGERS should be allowed on
3. This vehicle is designed for operation on level, obstacle free off-road areas.
4. Riding this vehicle on public roads or highways is illegal. If it becomes necessary to cross a
public road or highway, the vehicle should be pushed across using extreme caution.
5. This vehicle MUST NOT be operated without adult supervision and instruction.
6. DO NOT operate this vehicle while under the influence of drugs, alcohol or other medication
that impairs judgment or coordination. Doing so can result in serious injury or even death.
7. Maintain a safe distance between your vehicle and other vehicles with whom you are riding.
12. ALWAY S wear a helmet, face shield,
elbow & knee pads, hard-soled boots,
gloves, and protective clothing while
11. READ the owner's manual carefully
before riding.
before operating this vehicle.
this vehicle.
operating this vehicle.
8. The driver must tie the safety belt (and button the safety nets).
9. Always use both hands for steering.
10. Avoid wheelies and jumping. You may lose control of the machine or overturn.
Page 3
Copyright ©2008-2009 ETON America, all rights reserved.

SAFETY NOTESSAFETY NOTES
13. NEVER ride this vehicle unless it has
14. WARN UP your body with some
exercises before riding.
This helps to make you alert and prevent
cramping and other discomfort.
15. LEARN TO RIDE this vehicle properly
and safely. Have an experienced rider
teach You the safe operation of your
vehicle. E-TON recommends you take
an vehicle riding course before you first
ride your vehicle.
Page 4
been properly maintained and adjusted.
Always perform a pre-ride inspection
of your vehicle. Look for wires, bolts
and other fastener that may have come
loose onprevious rides. Inspect the drive
chain, throttle and brakes for proper
adjustment and operation.
Check the engine oil level in the oil tank.
Check fuel level and inspect for fuel
leaks.
(Remember, you can ride further in 1
hour than you can walk back in 1 day!)
Copyright ©2008-2009 ETON America, all rights reserved.

SAFETY NOTESSAFETY NOTES
18. HOT! The engine and exhaust system on
your vehicle become very hot during
normal operation. Touching these hot
surfaces can cause sever burns.
Always assume that your units engine
and exhaust system are HOT unless
you know that they are not.
16. NEVER REFUEL this vehicle when hot.
Ask your adult supervisor to refuel your
vehicle.
Gasoline is extremely flammable and
will ignite if spilled on a hot engine or
muffler. Never smoke or expose the
fuel to an open flame or spark while
refueling your vehicle.
Always refuel your vehicle in a safe
place free of any ignition source.
17. NEVER run the vehicle in an enclosed
area.
The exhaust gases from the engine
contain CARBON MONOXIDE which can
be fatal if breathed in high concentrations
for an extended time.
Page 5
Copyright ©2008-2009 ETON America, all rights reserved.

Additional safety tips:
Pre-Ride Inspection - Inspecting the condition of your vehicle before each ride is very
important to minimizethe chance of injury and maximize the enjoyment of your ride. It also
helps ensures long term performance of your Vehicle. Follow the owner's manual guide to
inspection and maintenance of your Vehicle.
A well maintained the vehicle will give you years of enjoyment.
Watch out for thin ice which may be camouflaged by snow.
Remember, you can ride further in one hour than you can walk in an entire day.
Participate in an approved the vehicle safety education training program
Always provide responsible adult supervision for the vehicle operators younger than 18
years of age
Don't let youngsters ride full-sized vehicles
Follow all safety recommendations of the vehicles manufacturer
Operate the vehicles only during daylight
Wear a helmet with face protection at all times
Operate only four-wheeled vehicles
Provide a drug and alcohol free environment
Always use the buddy system
Avoid riding in areas where contact with automobiles might be possible
Drive the vehicle on surfaces as recommended by the manufacturer
Travel at speeds conducive to conditions and operator abilities
Check on the conditions of the trails you will be traveling
Know and understand local and state laws governing the use of the vehicles
Permit only one operator per the vehicle
Insist on a "perfect fit" between the vehicle and the physical, mental, and emotional maturity
of the operator
Use antenna flags and wear bright clothing to increase conspicuity.
Use maps and compass if you are riding in an unfamiliar area.
Make a mental note of landmarks; you may need them if you are stranded.
If you are lost at night, do not move around. You will waste valuable fuel that you can use to
ride safety in the daylight.
Carry a first-aid pack with you.
Carry some snacks and a water supply with you.
Carry equipment to handle medical and mechanical emergencies.
Your vehicle field repair kit should include the following items;
the manufacturer's tool kit
wire, tape, elastic cords,
possibly locking pliers
and a towrope.
®
®
®
SAFETY NOTESSAFETY NOTES
®
Page 6
Copyright ©2008-2009 ETON America, all rights reserved.

Engine serial number
is located on the left-hand side of the
engine on the crankcase housing.
Vehicle Identification Number (VIN)
is located at the right of the frame
and approaches the front wheel.
Vehicle Identification Numbers
YOUR VIN Eng. No.
Page 7
Controls, Switches & Feature Locations
5. Throttle Pedal
3. Horn Button
1. Key Switch 4. Brake Pedal
6. Parking Brake Lever
2. Steering Wheel
Locations of controls and features
11
22
33
4455
66
Copyright ©2008-2009 ETON America, all rights reserved.

Controls, Switches & Feature Locations
Locations of controls and features
14. Fuel Tank Filler AndVent tube
13. Front Cargo Box
15. Rear Cargo Box
Page 8
1515
1313
1414
99
88
1212
1111
1010
9. Manual Chocke Knob
8. Brake Oil Reservoir
12. Transmission Gear Selector
& Reverse Indicator Lamp
10. Compass Ball(for ROVER GT)
11. Speedometer & Odometer
Fuel Indicator Meter(for ROVER GT)
ROVERROVER
7. Auxiliary 12v DC Electrical Outlet
77
77
Only for ROVER GTOnly for ROVER GT
ROVER GTROVER GT
1313
1515
1414
Copyright ©2008-2009 ETON America, all rights reserved.

A - OFF Position - With key in off position,all
switched power is off,and engine should not
run.
Key Switch Manual Chocke Knob
B - ON Position - Turn key from off to the position
and all switched power circuits will be energized.
C - START Position - Turn key to start position
to start the engine .Release key after engine
has started and it will automatically return to
the on position.
The engine will continue to run.
The vehicle are equipped with a manually
operated carburetor chokesystem.
This choke is operated by the knob at the
left side ofthe dashboard.
The engine choke knob is used to enrich
the fuel mixture when starting the engine
from a coldstart.
When first starting the engine,(cold start),
place the knob in the full up position,(Choke
closed or on) After allowing the engine to
warm up for 15-20 seconds, slowly move
the knob back to the normal until the engine
idles down runs smooth.The knob to the full
down is the normal operation position.(Choke
open or off).
CONTROL FEATURECONTROL FEATURE
NOTE: Your unit includes an electronic speed
control (C.D.I) that is set to limit the maximum
speed of the unit to the standards set by the
CPSC for the age of the rider the unit was
designed for.
This vehicle is equipped with a long key and a
short key.
A limited speed with Max 7 mile is controled by
the short key.
A limited speed is controled by the long key and
(C.D.I.) with 4different kind of speed.(9.3,12.4,
15.5 & 18.6 mile)
C.D.I is located in front cargo box.
Page 9
Only For ROVER
Copyright ©2008-2009 ETON America, all rights reserved.

Parking OffParking Off
Parking OnParking On
Brake Pedal
This vehicle is equipped with dual front hydraulic
discl brakes and a rear hydraulic disc brake.
Parking Brake Lever
The parking brake is shown on the picture.
This should be engaged as a parking brake
whenever the vehicle is not in operation.
The position of parking Off is on the full
down position.Turn parking brake to the
full up position is parking On.
Page 10
The throttle pedal is located on the under of
the dashboard of the right. To operate the
throttle pedal, place your sole of the right
foot on the pedal and press down to increase
your speed.To decrease your speed, reduce
your pressure on the pedal and the spring
tension will automatically reduce your speed.
Throttle Pedal
CONTROL FEATURECONTROL FEATURE
The four wheel simultaneously brakes are
operated by pushing the foot brake pedal.
Parking OffParking Off
Parking OnParking On
Copyright ©2008-2009 ETON America, all rights reserved.

Page 11
Fuel Tank
Fuel System
The fuel tank fill cap is located on top of the
back of the seat.
The cap contains a vent to prevent a vacuum
from forming in the tank as fuel is used.
The vent tube must be attached to the cap
and Inserted in the vent tube holder hole
The fuel cap vent and vent tube must be
clean and clear of obstructions for the unit to
operate normally. You can check the vent and
vent tube by blowing air through the tube. If
you can not blow through the vent tube and
cap you must clean the vent and tube or
replace them.
Every time you refuel your unit, check the
rubber seal inside the cap for cuts, tears and
dirt. Clean or replace the seal if it becomes
warn or torn. the seal must be in good
condition to insure a proper seal of the cap to
The unit is equipped with a three way fuel
valve located on the left side of the unit just
below the seat.
The valve has three settings; "OFF", "ON"
and "RES". With the valve in the "OFF" position
fuel is held in the tank and is prevented from
flowing to the carburetor. The valve should be
placed in the "OFF" position whenever the
unit is not being operated. Place the valve in
the "ON" for normal operation of the unit.
This allows fuel to flow to the carburetor for
normal operating. The "RES" position allows
fuel to flow from the small reserve in the tank
NEVER REFUEL YOUR vehicle when the
off the unit before refueling. Spilling fuel on
a HOT engine could cause a fire. Wipe up
any fuel spills before re-starting.
engine is HOT. Wait 30 minutes after turning
the tank to prevent fuel spills. DO NOT allow
dirt or other debris to enter the tank when
refueling.
Replace the cap if damaged or if it will not
seal to the tank.
Tighten the cap snugly, being careful not to
over tighten. Over tightening the cap can
cause damage to the cap or seal.
The fuel tank capacity is 11 liters, 2.9gal,
including a reserve of 2 liters, 0.5gal.
Use regular unleaded automobile gasoline
with an octane level of 91 or higher.
Fuel Valve
while operating the unit.
to allow the unit to be taken to a refueling
When you have to switch to the "RES" position
you must refuel the unit as soon as possible.
ALWAYS CHECK YOUR Fuel level before
you start riding your vehicle. Remember:
You can drive further in one hour on your
Vehicle than you can walk in one day.
location.
CONTROL FEATURECONTROL FEATURE
ROVERROVER
ROVER GTROVER GT
Copyright ©2008-2009 ETON America, all rights reserved.

Inline Fuel Filter
This vehicle is equipped with an inline fuel
filter to prevent dirt and debris from entering
the carburetor and engine.
Check the filter for dirt or damage before
each ride and at each refueling. Replace
the filter if dirty or damaged.
The filter should be replaced every 600
hours of operation and at the start of each
season.
To replace the filter, first turn the fuel valve
to the "OFF" position.
Then carefully compress the wire clamp
rings until the clamp is free of the fuel line.
Slide each clamp away from the filter about
3/4".
Remove the filter from the fuel line by holding
the line and pulling the filter. Install the new
filter by inserting the filter into the fuel line
Turn the fuel valve to the "ON" position and
returning the clamps to the original position.
check for leaks. Inspect the fuel lines for
cuts, abrasions and deterioration. Replace
fuel lines as needed.
DO NOT operate or start the engine if the
fuel filter or lines are leaking. Leaking fuel
can cause a fire.
CONTROL FEATURECONTROL FEATURE
The Seat
You can change the position of sest and
head rest to make a comfortable position
of you.
To change the seat position, you need to
lossen two bolts at the seat bottom right
hand side.
To move the head rest, you need to take
out the bolts.
Move the head rest to a correct position,
then tighten the bolts.
Page 12
Only For ROVER (CEILING)
Copyright ©2008-2009 ETON America, all rights reserved.

Transmission Gear Selector
The vehicle is equiped with a transmission
gear selector switch mounted on the dash-
board. The switch has three positions ("R",
"N","F").
"R" = Reverse
"N" = Neutral
"F" = Forward
The selector must be placed on "N" to
start the engine. Once the engine is started,
engine the brake lever and move the slector
switch to the desired direction of travel.
Always be sure the vehicle has come to
a complete stop and the brake lever is fully
engaged before turning the selector switch.
Always pause in the "N" neutral positon
for a few seconds when shifting from forward
to revers or from revers to forward, this
allows the transmission time to disengage
and resycronize.
CONTROL FEATURECONTROL FEATURE
Always check your engine oil level with the
engine off and cold. Removing the dip stick
with the engine running could cause hot
oil to splash from the crankcase causing
severe burns.
Checking your engine oil while the engine
is hot can give you a false reading; always
check the oil level with a cold engine.
Your engine requires SAE 15W/40 engine
oil and the crankcase capacity is 0.9 Liters
/ 0.9 quart.
Engine Oil
Checking Engine Oil Level
This vehicle uses automotive type engine
oil to lubricate the engine. The engine oil
dip stick is located on the right-hand side
of your engine.
To check your oil level, remove the dip stick
by turning the thumb hold counter clockwise
until the stick has been completely disengaged
from the threads. Pull the dip stick out of
the crank case and check the level of the
oil as Indicated on the dip stick. The engine
oil is full when the oil reaches the level on
the stick as Indicated in the photo above.
The engine oil should be changed before
the start of each riding season or every 300
hours of operation. When riding where
conditions are dusty or humidity is high the
engine oil should be change more frequently.
Page 13
Engine Oil
Dip Stick
And fill tube
For your safety and protecting the engine,
you must wait the indicator light bright
(white color) when you shift to forward or
reverse. The engine will be shut down if
the engine speed is high.
DO NOT SHIFT GEAR when you drive
downhill.
NOTE!
Copyright ©2008-2009 ETON America, all rights reserved.

Always check the pressure when the tires
are cool. Use the tire pressure gauge that
came with Your vehicle to check the tire
pressure.
Tire Pressure
Wheel Nut torque 24-30 N/m (18-22 lb/ft)
Recommended tire pressure is:
Front Min
Max
2
3.2psi / 0.23kg/cm
2
4.0psi / 0.28kg/cm
2
3.2psi / 0.23kg/cm
2
4.0psi / 0.28kg/cm
Rear Min
Max
Tires And Wheels
Tire & Wheel Inspection
It is important to inspect your tires and
wheels for damage and wear before each
riding session. Inspect each tire for cuts,
tears and punctures. Inspect the wheel rim
for dentsand separation of the wheel from
the tire bead. Replace any tire or wheel
found to be damaged.
Operating your vehicle with damaged tires
or wheels is dangerous.
Damaged tires or wheels can result in a
sudden loss of tire pressure and control
which could result in injuries.
Check your tire pressure before each riding
session and at each refueling operation.
CONTROL FEATURECONTROL FEATURE
Page 14
Dashboard Indicators
It is digital LCD meter and displayed in cold
light can applicable to night.
(1)Speedometer digital follow the vehicle's
speed to change digital.
(2)Odometer digital is follow the vehicle's
ride distance to change mileage .
(3)Fuel indicator to"F"when the tank is full,
and to"E"when empty.(And the ROVER.
Of the oil gauge flashes when 3-4 stages
left.)
11
33
22
Power outlet do not use high power electric
equipment to avoid dead battery.
Auxiliary 12v DC
Electrical Outlet
Brake Condition Brake
on
0W
45W
19W
75W
Brake
off
Speed
Idle
over 15 km/h
SUPPORTING POWER
Please foll theowing the regulation list
below.
Copyright ©2008-2009 ETON America, all rights reserved.

Engine
Type Four cycle air cooled (EPA Compliant) SOHC
Displacement 88.4cc
Bore / Stroke φ47.0 * 51.0mm
Compression Ratio / Pressure 10.2 : 1 / 120-140psi
Torque / BHP 6.5N ms @ 6500rpm / 4.8BHP
EPA Approved Meet or exceeds EPA clean air requirements and CA Green Sticker
Spark Plug Recommended: NGK CR7HSA/NGK or Nipendenso U22FS-U
Electrode Gap 0.6-0.7mm or 0.023”
Starting Electrical starter
Transmission
Type Automatic (C.V.T. V-Belt) with forward/reverse shift
Chassis
Overall Length-Width-Height 1766mm / 69.9" - 1020mm / 40.2" - 1675mm / 65.9"
Wheel Base 1108mm / 43.6"
Seat Height 700mm / 26.6"
Dry Weight 162 kg / 356 lbs
Suspension
Front Swing A-arm with dual Adjustable Shocks
Rear Swing Arm with Adjustable Shock
Brakes
Front Dual Hydraulic Disc
Rear Hydraulic Disc
Tires
Front 18/7-10
Rear 18/8-10
Tire Pressure
Front Min 3.2psi / 0.23kg/cm2
Max 4.0psi / 0.28kg/cm2
Rear Min 3.2psi / 0.23kg/cm2
Max 4.0psi / 0.28kg/cm2
Wheels
Bolt Pattern Front 4 x 110mm (P.C.D.)
Rear 4 x 110mm (P.C.D.)
Carburetor
Make/Size SVR 22mm with Manual Choke
Main Jet 0.95mm
Pilot Jet 0.32mm
Air Mixture Adjustment Back out 1½ - 1 ¾ turns
Idle Speed Idle 1700 - 1900rpm
Sprockets
Front 520x12t
Rear 520x32t
Chain #520
Battery
Jell Acid (Maintenance Free) 12V-4AH/AH - GTX5L
Fluids
Fuel Type Unleaded Gasoline 92 octane
Volume 11liters / 2.9gal
Engine Oil Type SAE 15W-40
Volume 0.9liters / 0.23gal
Transmission Type SAE 80W-90
Volume 300cc / 10.2oz
ROVER
Copyright ©2008-2009 ETON America, all rights reserved.

Sprockets
Front 520x12t
Rear 520x32t
Chain #520
Battery
Jell Acid (Maintenance Free) 12V-4AH/AH - GTX5L
Fluids
Fuel Type Unleaded Gasoline 92 octane
Volume 11liters / 2.9gal
Engine Oil Type SAE 15W-40
Volume 0.9liters / 0.23gal
Transmission Type SAE 80W-90
Volume 300cc / 10.2oz
Safety Features
Speed Control Ignition Key Speed Control (Standard)
Remote Stop Switch Remote Engine Stop Switch (Optional)
Safety Catch Netting Rider compartment Safety Netting (Standard)
Seat Belt Lap Belt (Standard)
Carrying Capacity
Maximum Rider Weight 86.2kg / 190 lbs
Additional Features
Rear Cargo Bed Accessory Power Outlet
Covered Front Storage Compartment Foot peddle throttle and brakes controls
Sporty Split Steering Wheel Dash mounted Forward / Reverse Shift Knob
Adjustable Head Rest Optional Floor mat and bed liners
ROVER
Copyright ©2008-2009 ETON America, all rights reserved.

Engine
Type Four cycle air cooled (EPA Compliant) SOHC
Displacement 88.4cc
Bore / Stroke φ47.0 * 51.0mm
Compression Ratio / Pressure 10.2 : 1 / 120-140psi
Torque / Power 6.1N ms @ 4000rpm / 6.4Ps/8000rpm
EPA Approved Meet or exceeds EPA clean air requirements and CA Green Sticker
Spark Plug Recommended: NGK CR7HSA/NGK or Nipendenso U22FS-U
Electrode Gap 0.6-0.7mm or 0.023”
Starting Electrical starter
Transmission
Type Automatic (C.V.T. V-Belt) with forward/reverse shift
Chassis
Overall Length-Width-Height 2110mm / 83.0" - 1000mm / 39.4" - 1110mm / 43.7"
Wheel Base 1375mm / 54.1"
Seat Height 710mm / 28.0"
Dry Weight 185 kg / 407.9 lbs
Suspension
Front A-arm with dual Adjustable Shocks
Rear Swing Arm with Adjustable Shock
Brakes
Front 155mm Dual Hydraulic Disc
Rear 175mm Hydraulic Disc
Tires
Front 18/7-10
Rear 18/8-10
Tire Pressure
Front Min 3.2psi / 0.23kg/cm2
Max 4.0psi / 0.28kg/cm2
Rear Min 3.2psi / 0.23kg/cm2
Max 4.0psi / 0.28kg/cm2
Wheels
Bolt Pattern Front 4 x 110mm (P.C.D.)
Rear 4 x 110mm (P.C.D.)
Carburetor
Make/Size SVR 22mm with Manual Choke
Main Jet 0.95mm
Pilot Jet 0.32mm
Air Mixture Adjustment Back out 1½ - 1 ¾ turns
Idle Speed Idle 1700 - 1900rpm
Sprockets
Front 520x12t
Rear 520x32t
Chain #520
Battery
Jell Acid (Maintenance Free) 12V-5AH - GTX5L
Fluids
Fuel Type Unleaded Gasoline 92 octane
Volume 11 liters / 2.9gal
Engine Oil Type SAE 15W-40
Volume 0.9liters / 0.23gal
Transmission Type SAE 80W-90
Volume 300cc / 10.2oz
ROVER GT
Copyright ©2008-2009 ETON America, all rights reserved.

Safety Features
Seat Belt Lap Belt (Standard)
Remote Stop Switch Remote Engine Stop Switch (Optional)
Carrying Capacity
Maximum Rider Weight 100kg / 200 lbs
Additional Features
Rear Cargo Flat Bed (Standard) Digital dash gauge—Speedometer & Fuel Level (Standard)
Covered Front Storage Compartment Dash mounted F/R Shift Knob & indicator lights (Standard)
(Standard) Trailer Hitch &Accessory Power Outlet (Optional)
Sporty Steering Wheel Foot peddle throttle & brakes controls (Standard)
Rear Cargo Basket (Optional) Front Cargo Rack (Optional)
Detachable Spot Light (Optional) Carpeted floor mat (Optional)
ROVER GT
Copyright ©2008-2009 ETON America, all rights reserved.
This manual suits for next models
1
Table of contents
Other Eton Offroad Vehicle manuals

Eton
Eton Lightning-AXL50 User manual

Eton
Eton Vector 250R User manual

Eton
Eton VECTOR ST 250 User manual

Eton
Eton IXL 40 User manual

Eton
Eton ATV6A 90 User manual

Eton
Eton Yukon II User manual

Eton
Eton Vector 250R User manual

Eton
Eton ATV8E - SERVICE User manual

Eton
Eton ATV3F-150 - SERVICE User manual

Eton
Eton DXL90 User manual

Eton
Eton Viper 40E (RXL-40E) User manual

Eton
Eton ATV RXL 50 User manual

Eton
Eton CXL-150 User manual

Eton
Eton DXL90 User manual

Eton
Eton Viper 70 User manual

Eton
Eton Viper Jr. (RXL-40) User manual

Eton
Eton Viper 150 User manual

Eton
Eton VIPER 50 ST - SERVICE User manual

Eton
Eton EXL-50 - SERVICE User manual

Eton
Eton VIPER 50M User manual