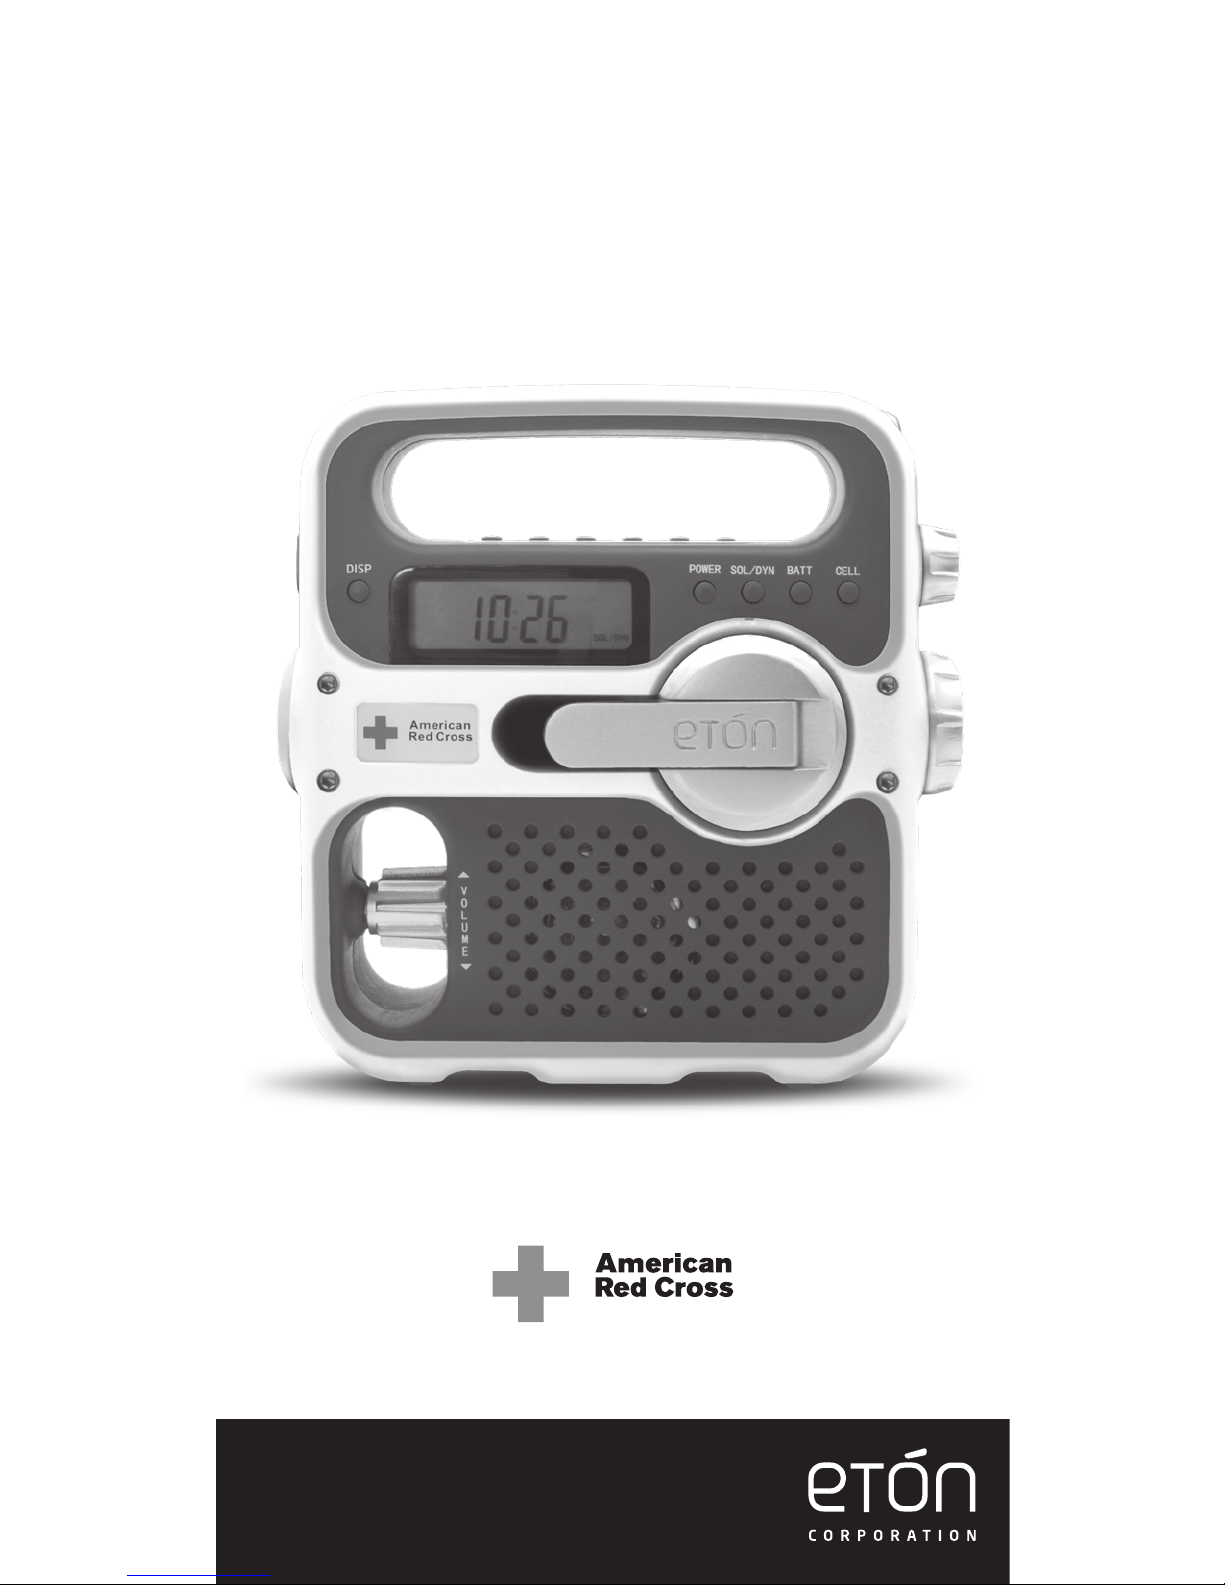
SOLARLINK FR360 OWNER’S MANUAL
5
adjacent to it, then set the power switch to the DYN/SOL posi-
tion. You may have to charge the battery; to do this turn the
crank for 90 seconds. The rechargeable battery will eventually
lose its ability to hold a charge. Call Eton Corporation to order
another one.
DC-IN 6V AC ADAPTER (not included)
This is the rst socket to the left on the back of the radio, under
the rubber plugs. Plug in the AC adapter (6 Volt, positive polarity,
300 milliampere, not included) to the DC IN 6 volt socket. This
also charges the Ni-MH battery. In the United States, an AC
adapter can be purchased by calling 1-800-872-2228, 8 am -
4:30 pm, Pacific Time.
ANSWERS TO QUESTIONS REGARDING CHARG-
ING
• How much operating time does 90 seconds of hand cranking
provide for the radio to play? About 15 minutes.
• How long does it take to fully charge the radio’s battery with
the AC adapter? About 6 hours.
• How long will the radio play when charged with the AC
adapter? About 10hrs.
• How long does it take to fully charge the radio’s battery with
the solar panel? About 10 hrs in direct sunlight.
CHARGING CELL PHONES
Press the button labeled CELL. Plug the USB cell phone charging
cord into the USB PHONE CHARGER jack, the second socket
from the left at the rear of the radio. Plug the other end of the
cord into the cell phone charging tip and then into the jack of
the cell phone. About 3 minutes of cranking results in one short
emergency call. To purchase a charging tip and cord for your
cell phone, go to www.iGo.com and purchase USB cord part#
PS00271-0001.
NOTE: When charging a cell phone via the USB cell phone
charger, it is important to turn the crank at least 2 revolutions
per second, or until you see the green or orange LED above the
crank handle turn on. This is an indication that the phone is re-