Images are for illustrative purposes.
We reserve the right to make changes. RDM-035-0922 7
®NORDcanopy |aSAP
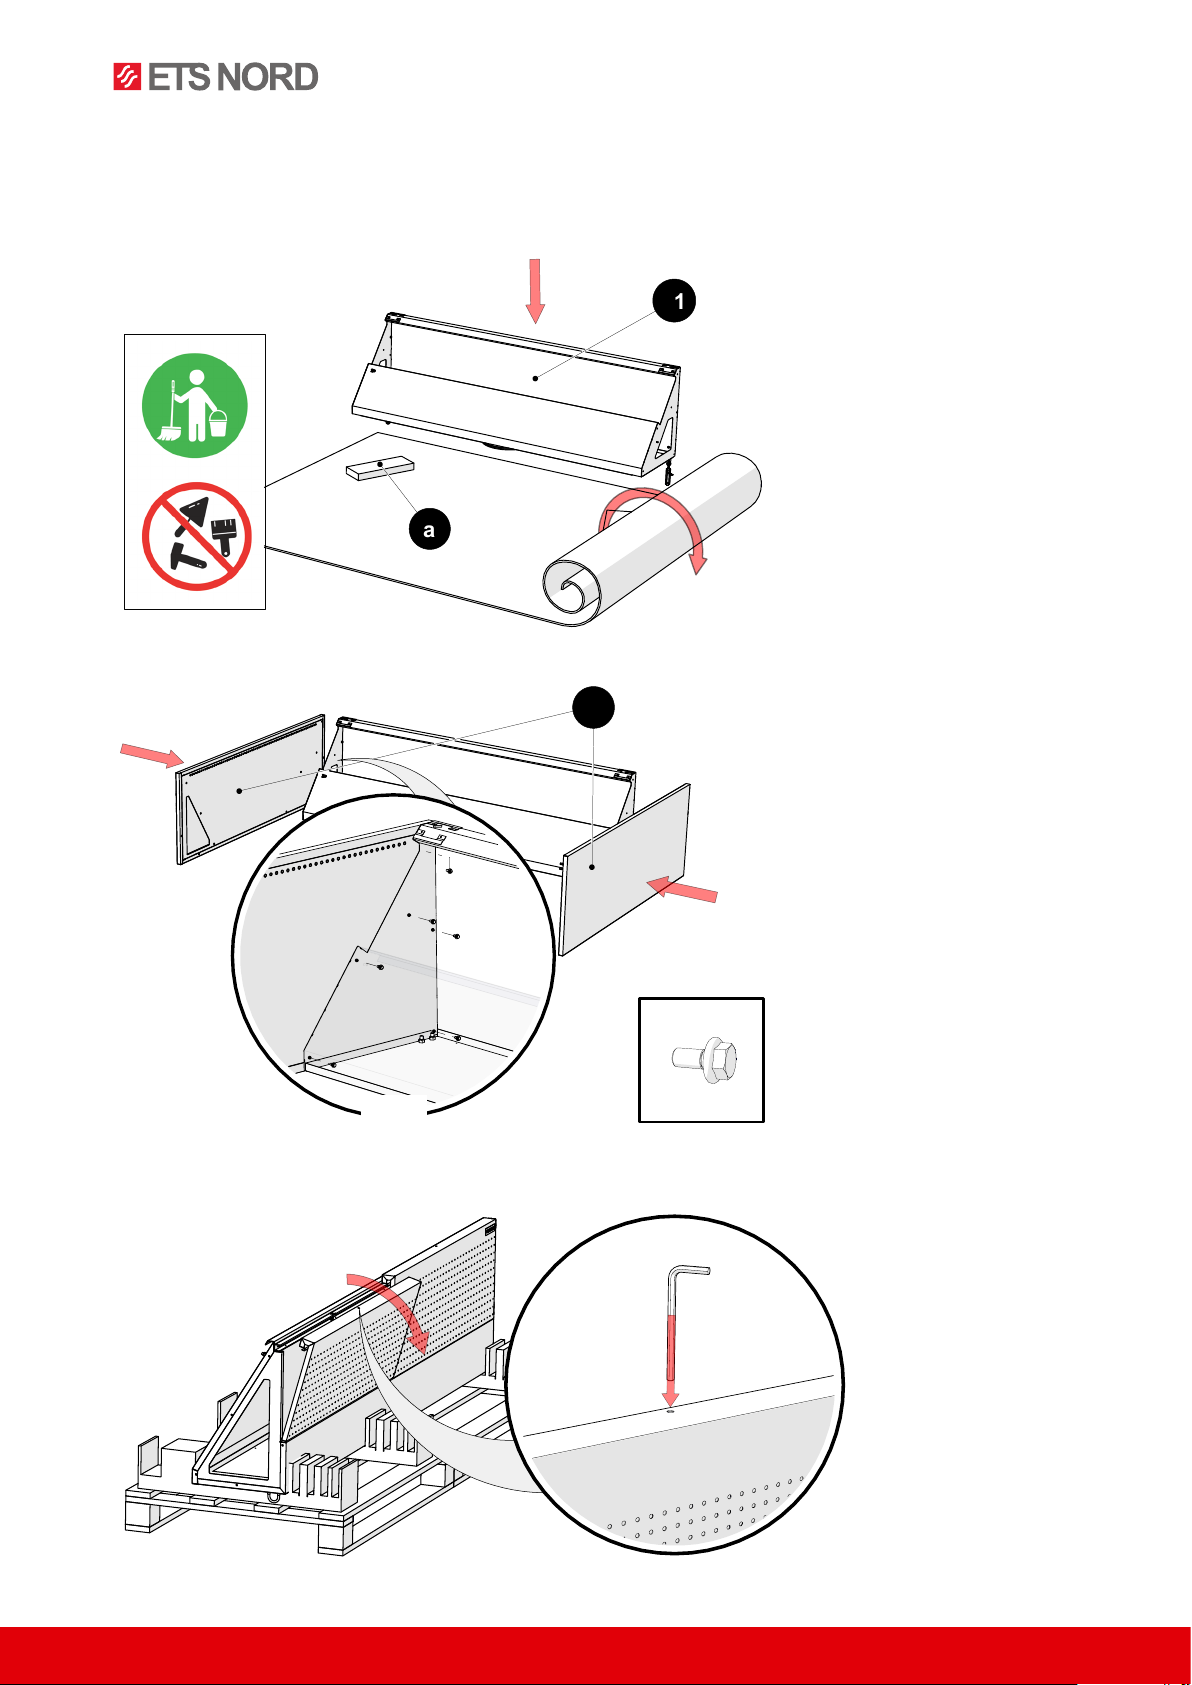
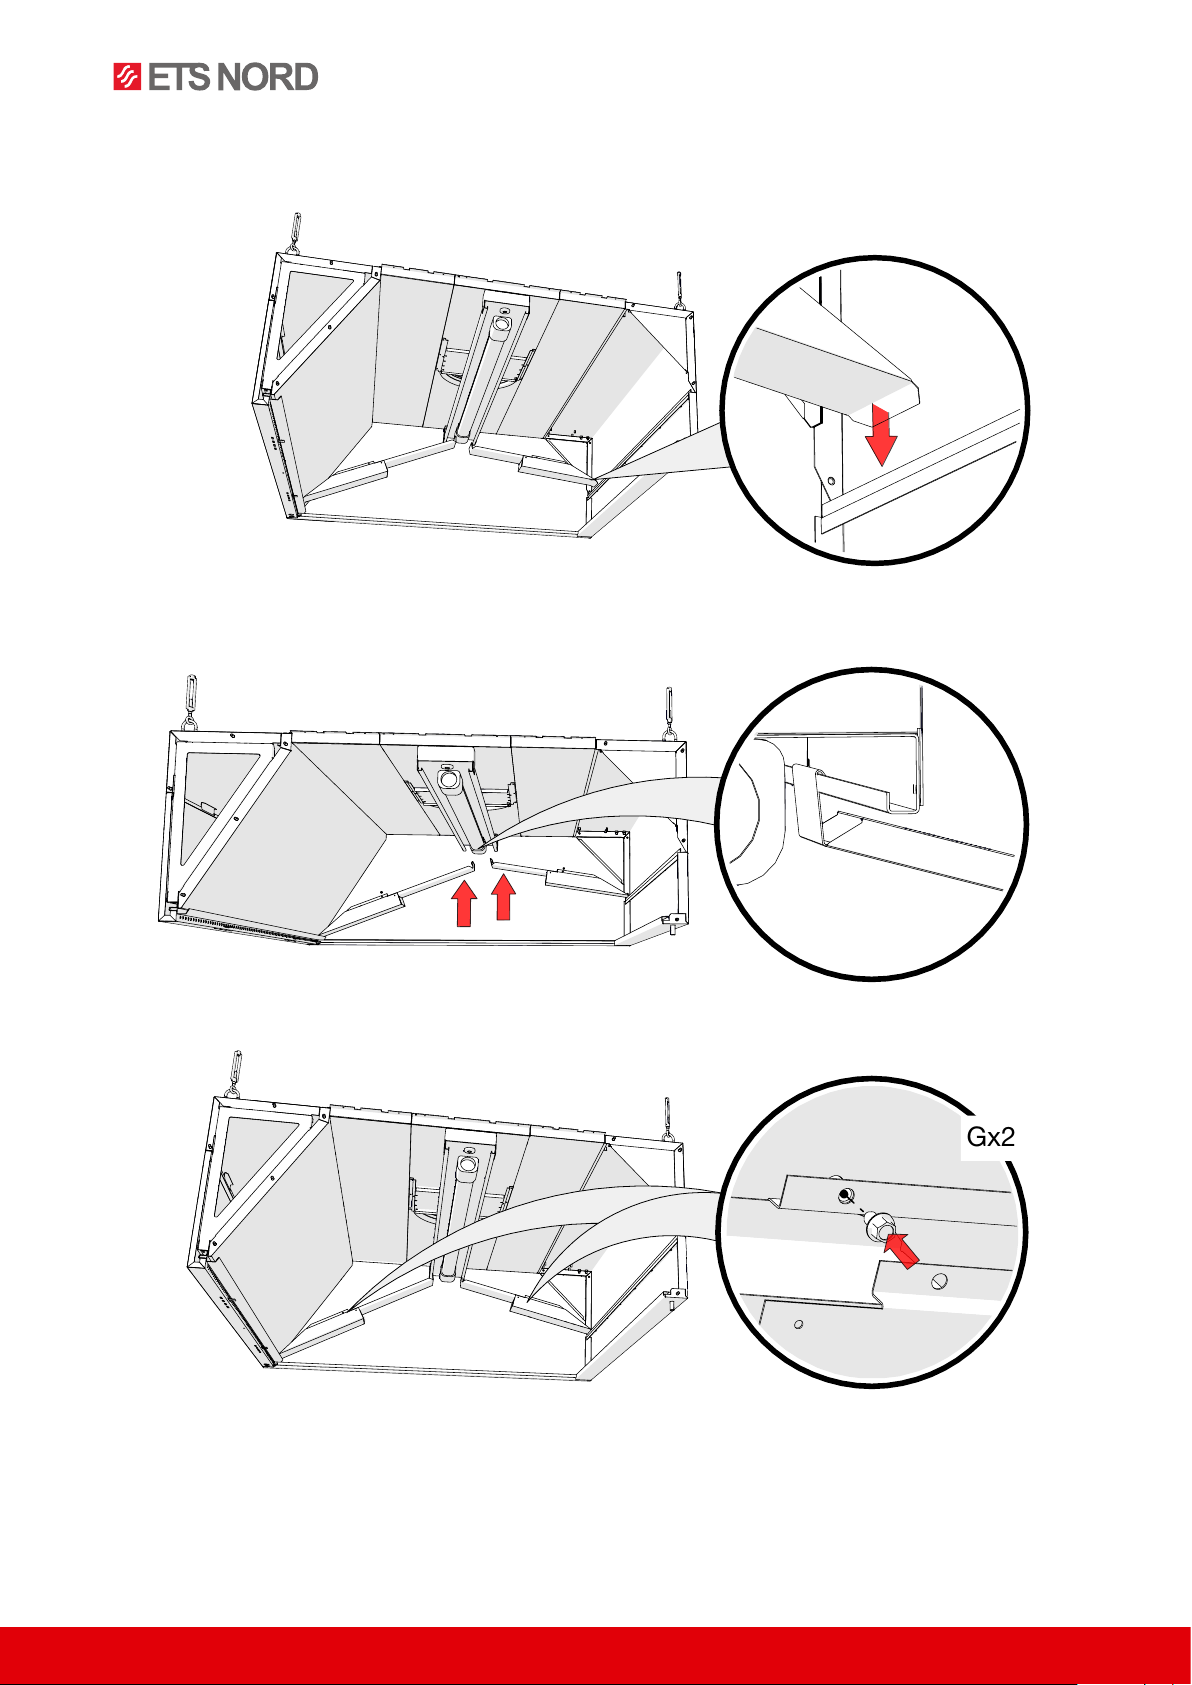
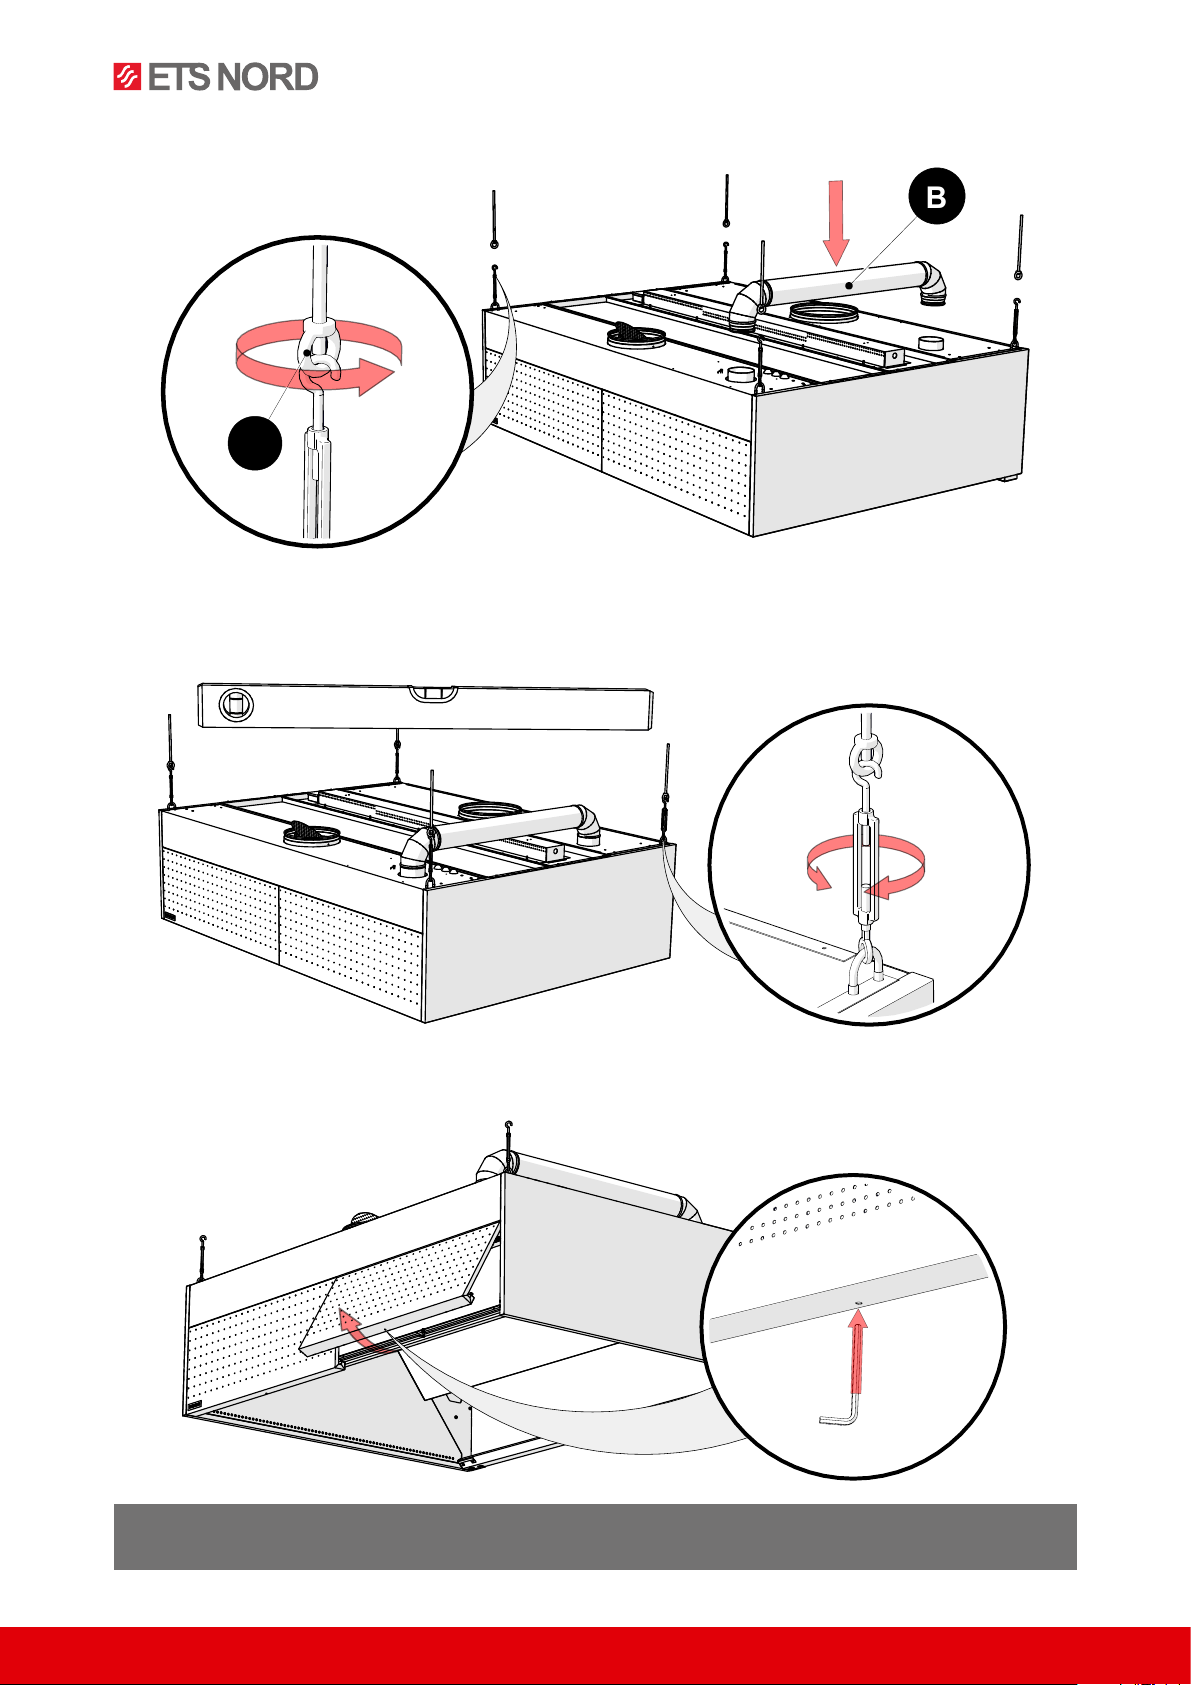
2. Canopy installation
In the kit:
119 10
7 8
13
21
14
654
1512
3
1 – Supply air adjustment plate
2 – Supply air connection
3 – Ozonator
4 – Front panel
5 – Suspension points
6 – Lighting
7 – Exhaust air connection
8 – Adjustment plate for exhaust air
9 – Front panel
10 – Front panel lock
11 – “AirGrip” air nozzle system
12 – Airflow measuring nozzles
13 – HFK grease filter
14 – Grease collection container
15 – Blind plate for grease filter rail
A – Loop nut
B – Ozone duct for HZ canopy
C – Ceiling panel for modular
connection
D – Grease collection container
E – Blind plate for grease filter rail
F – HFK Grease filter
G – Bolts and cap nuts
H – Scresw
ABCD
EFGM5/10 HM4/16
H
GM5/10