www.etsnord.com
2RDM-032-0923
HR/HZ Installation, use and maintenance
®
Installation, use and maintenance manual
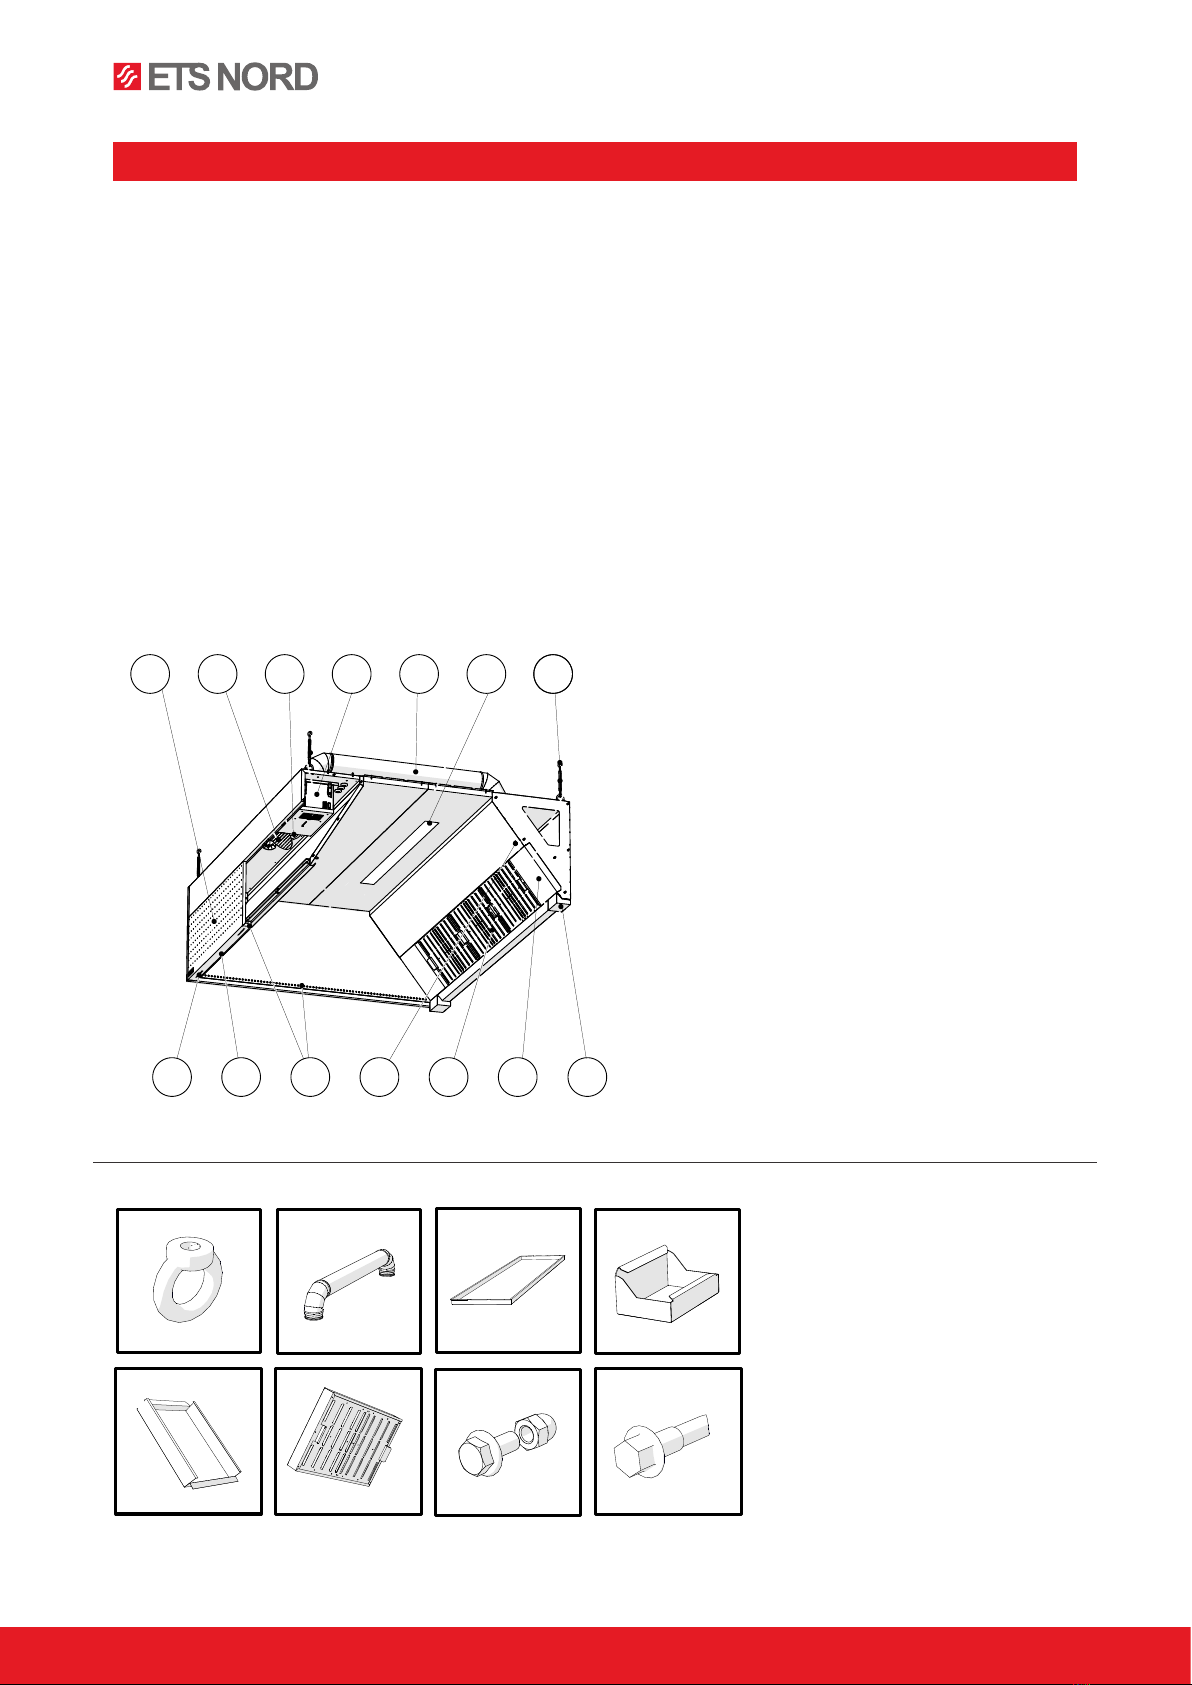
In the kit:
A- Loop nut
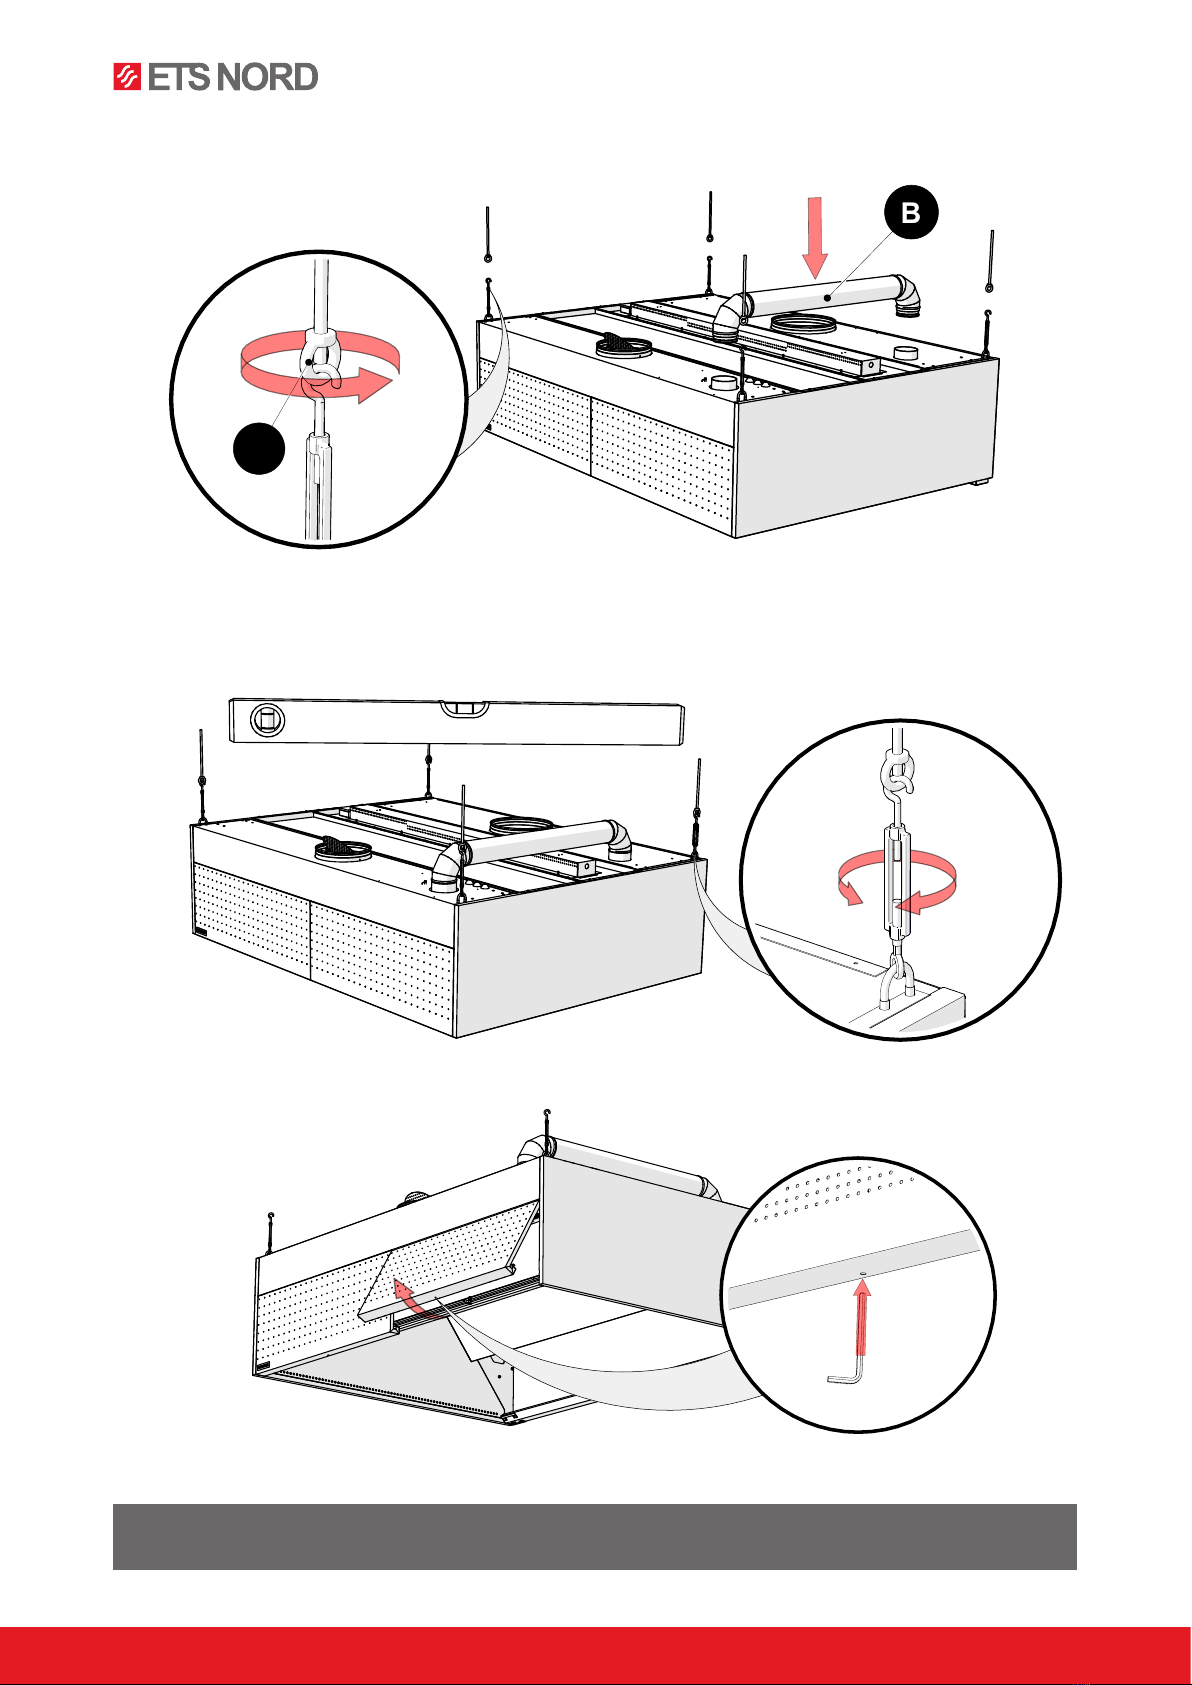
B- Ozone duct for HZ canopy
C-
Ceiling panel for modular
connection
D- Grease collection container
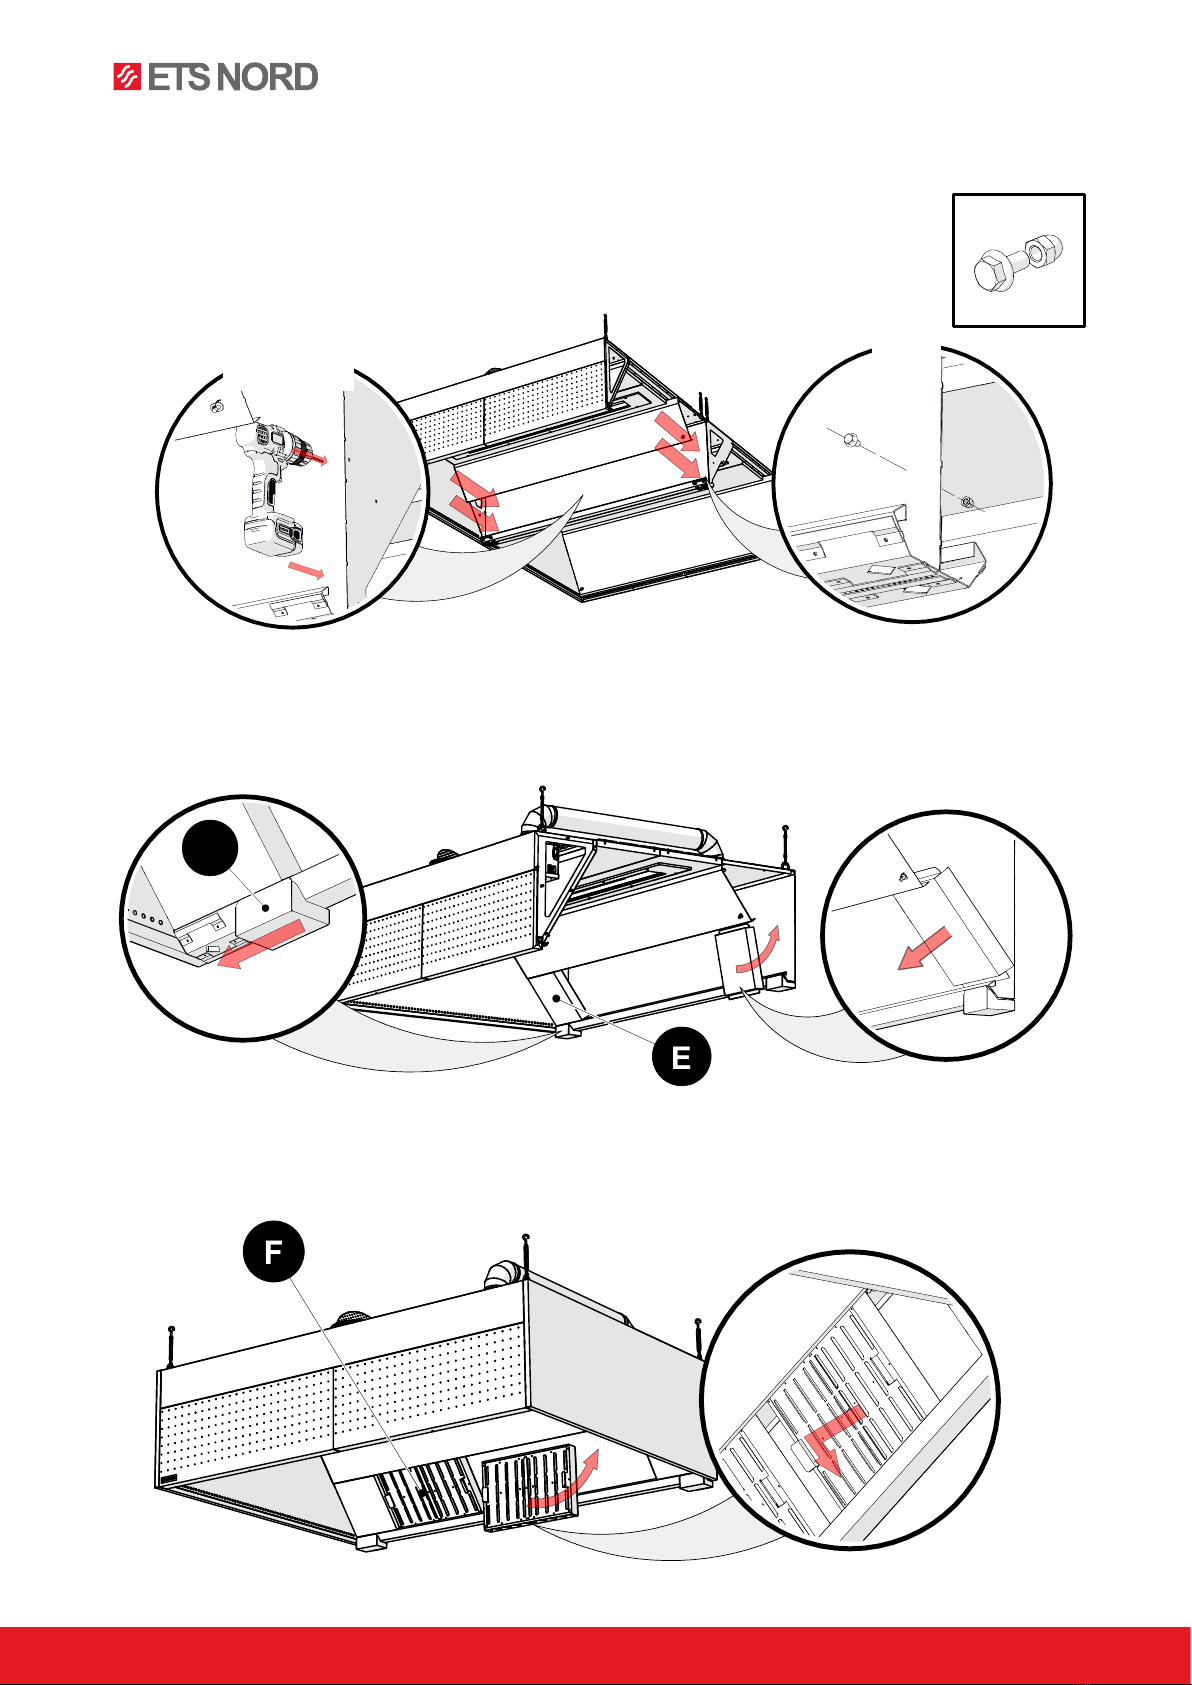
E- Blind plate for grease filter rail
F- HFK Grease filter
G- Bolts and cap nuts
H- Screws
108 9
7
12
21
13
54
1411
3 6
ABCD
EFGM5/10 HM4/16
H
GM5/10
1- Front panel
2- Supply air adjustment plate
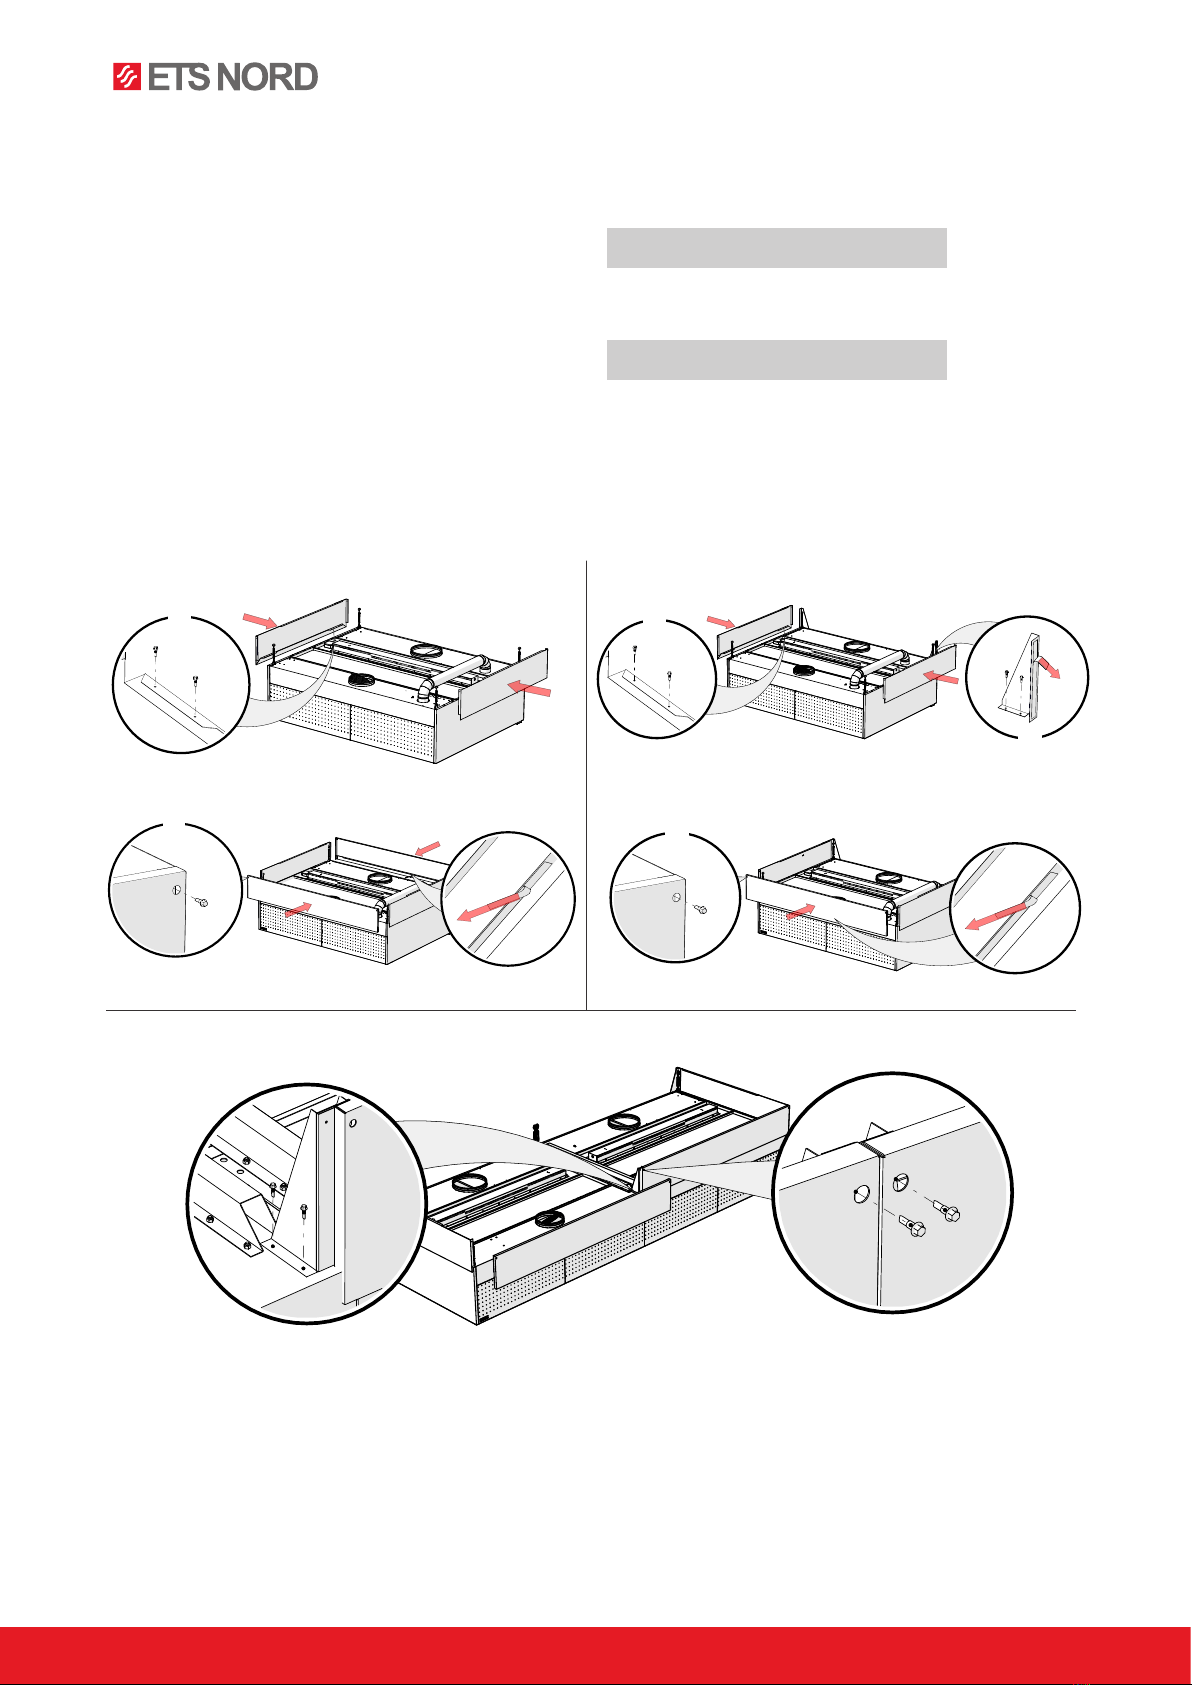
3- Supply air connection
4- Ozonator
5- Ozone duct
6- Lighting
7- Suspension points
8- Auxilliary air supply
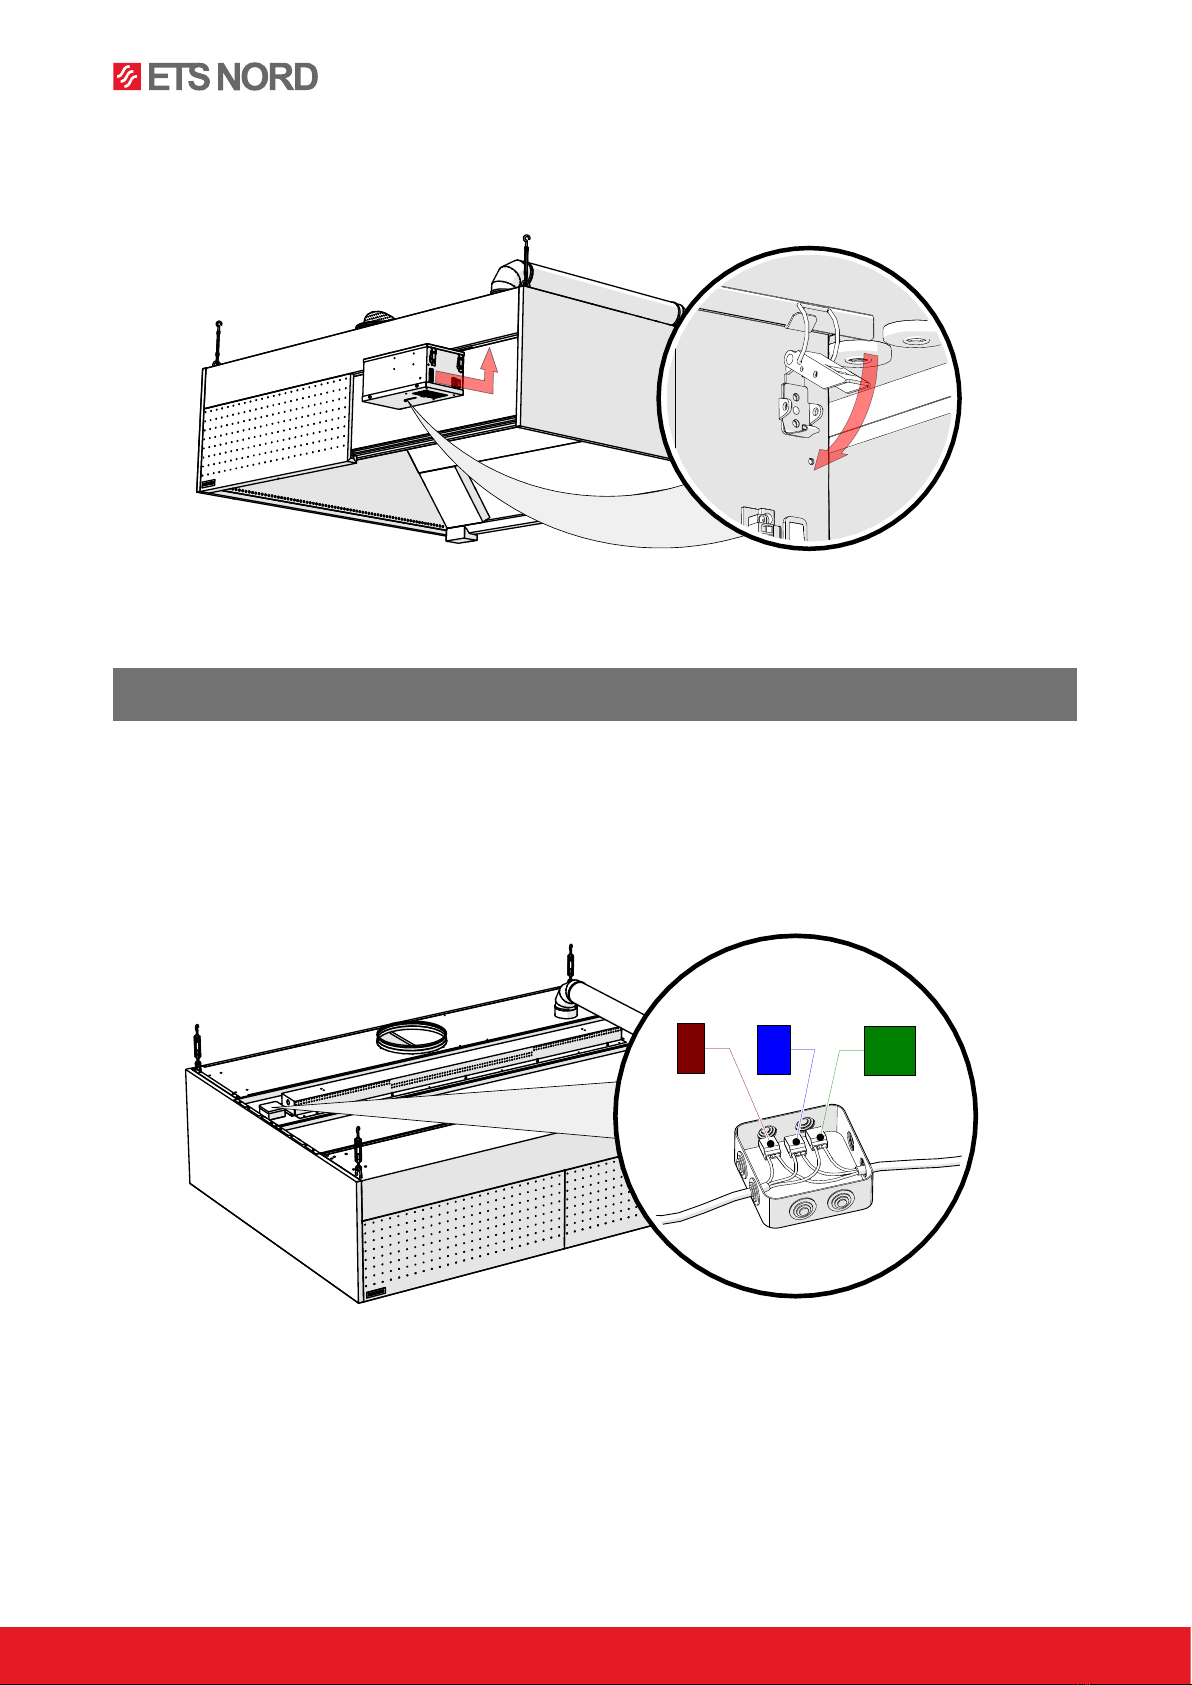
9- Front panel lock
10- “AirGrip” air nozzle system
11- Airflow measuring nozzles
12- HFK grease filter
13- Blind plate for grease filter rail
14- Grease collection container
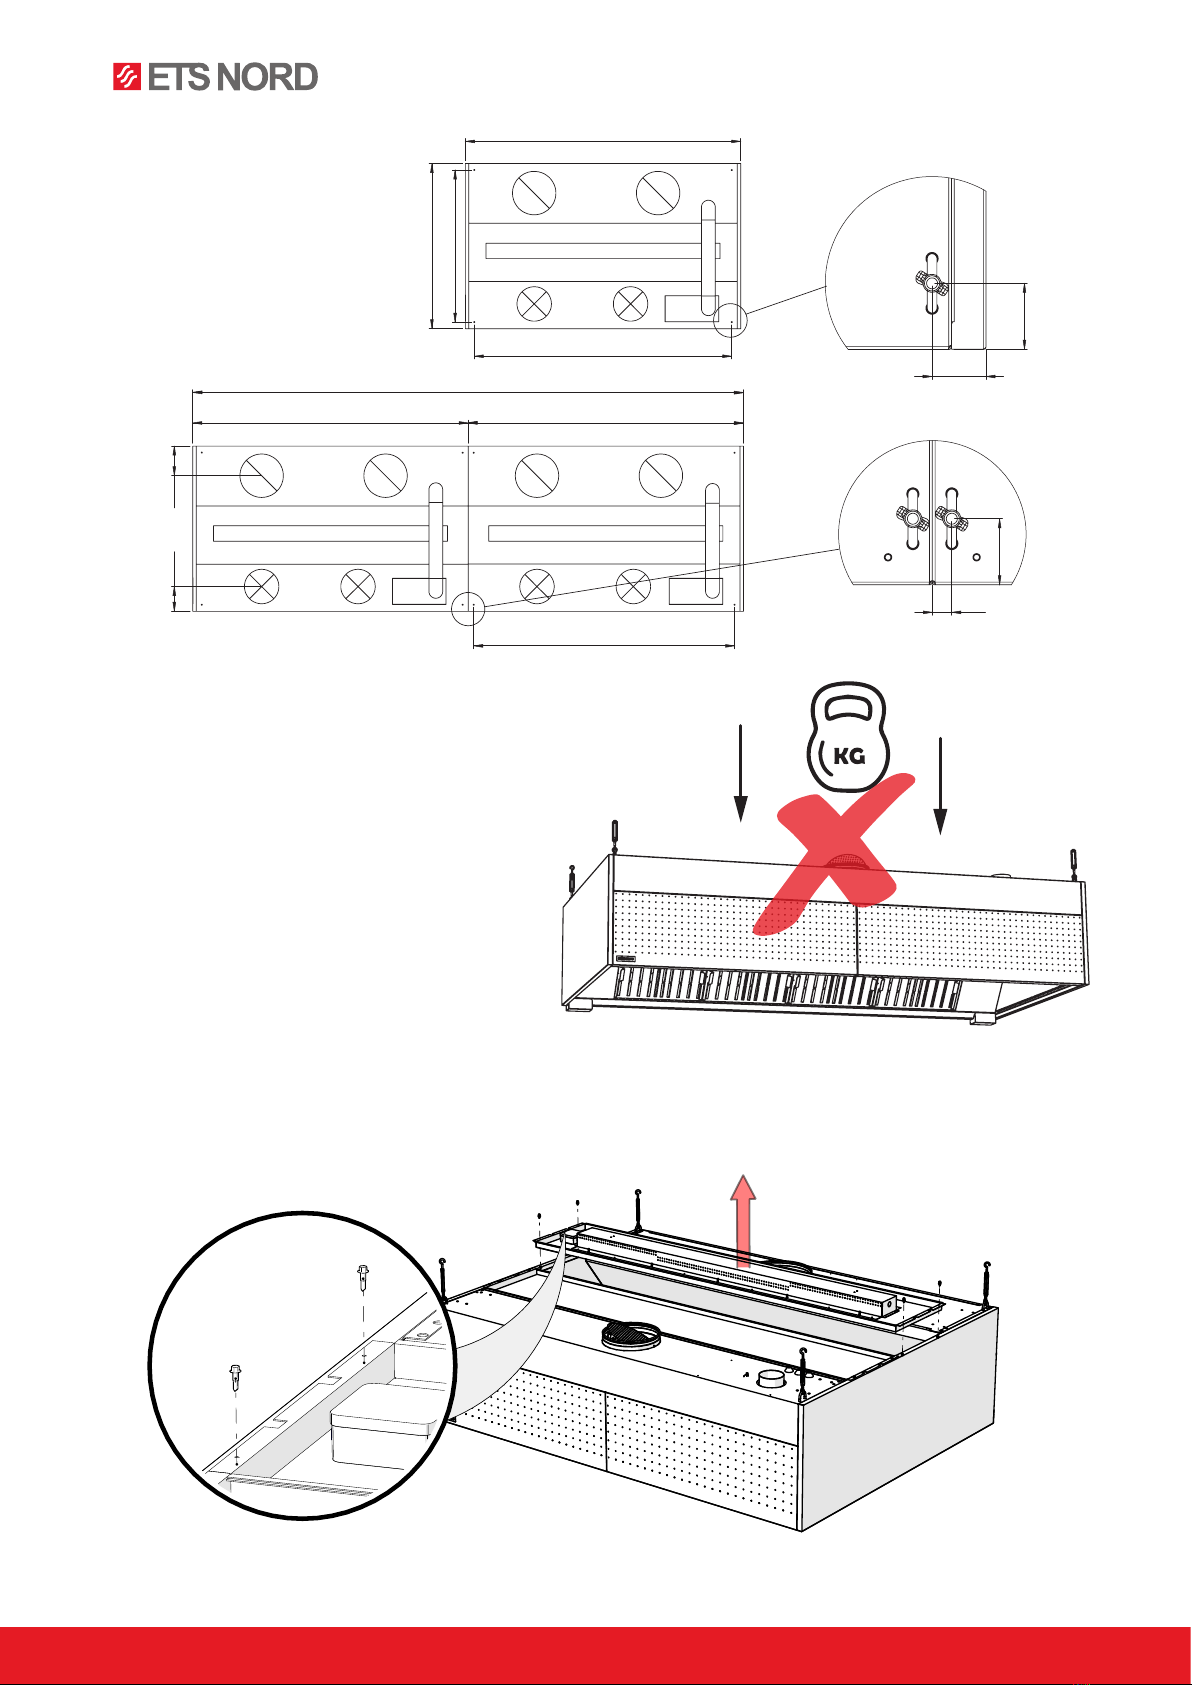
1. Removing the ceiling panel (Optional) ................................................................................................3
2. Hanging the kitchen canopy and ozone duct installation ...................................................................4
3. Leveling the canopy ............................................................................................................................4
4. Opening the front panel ......................................................................................................................4
5. Fastening kitchen canopy modules together ......................................................................................5
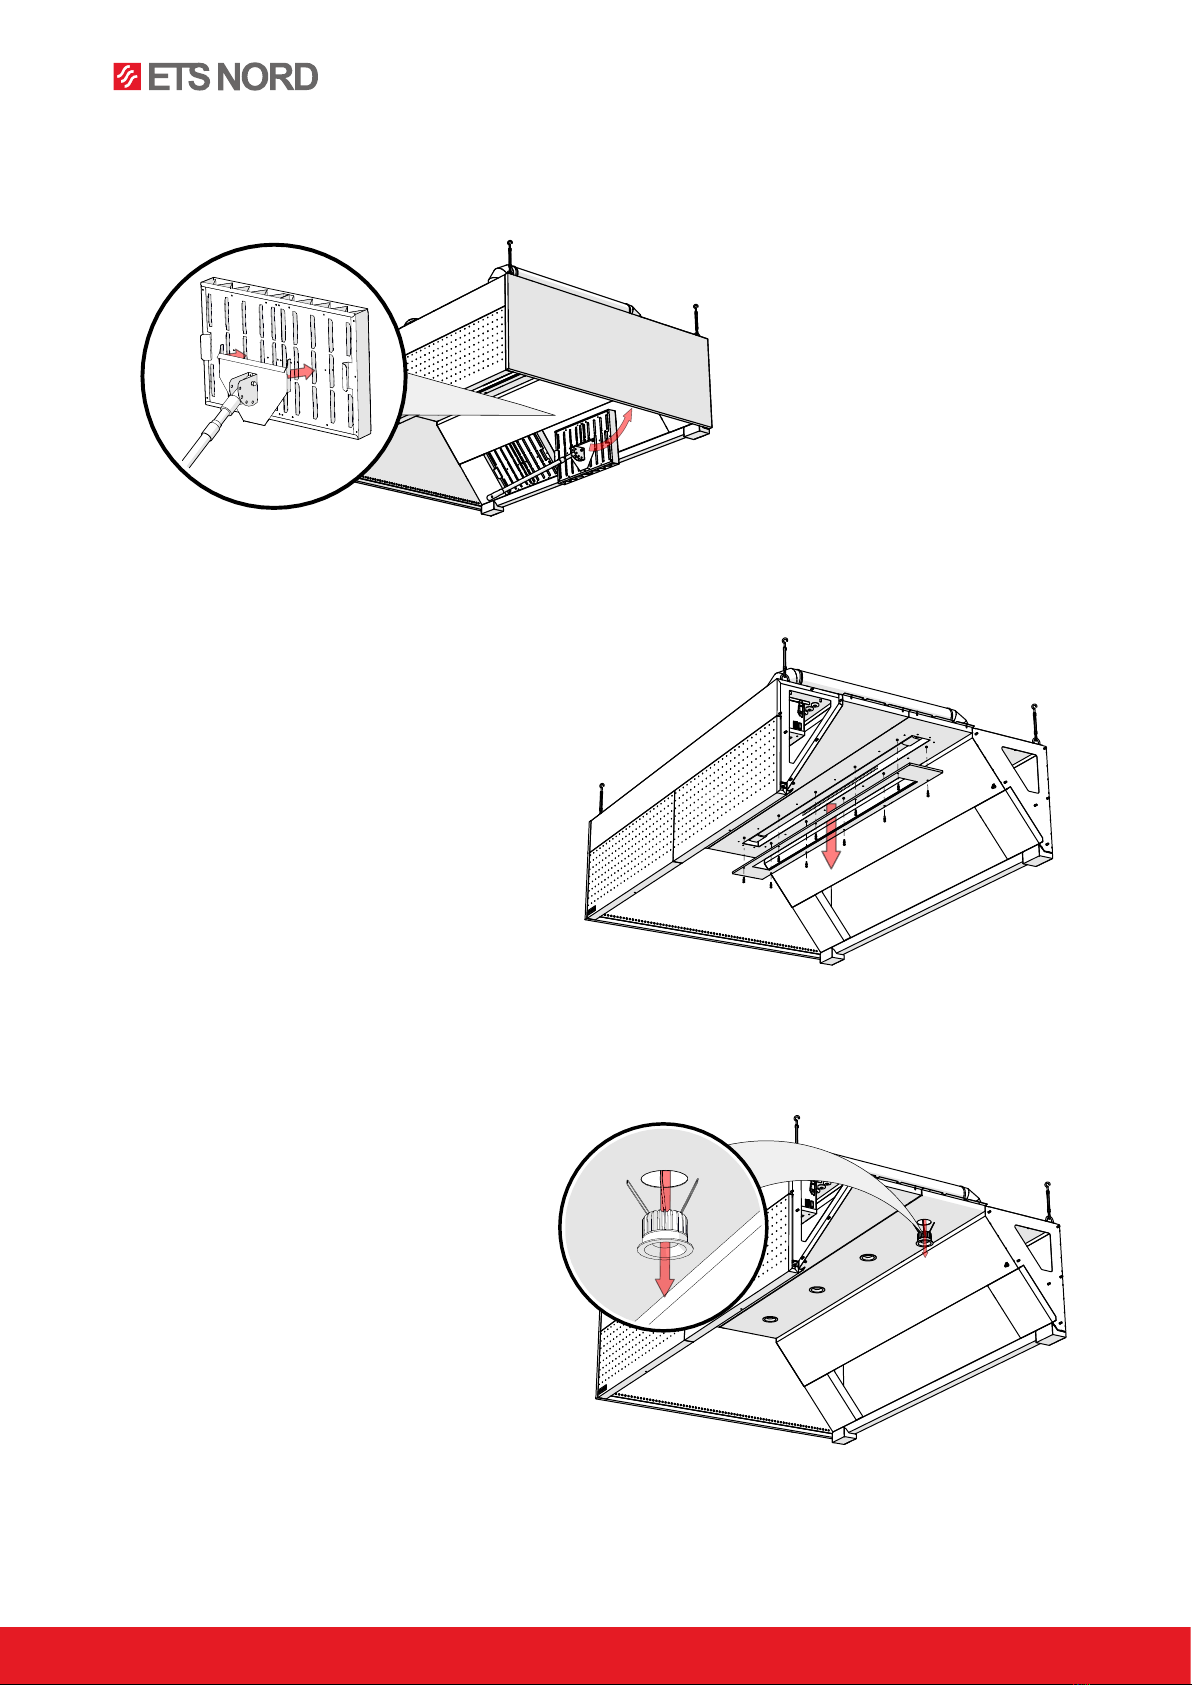
6. Installing grease collection containers and blind panels for the grease filter rail................................6
7. Installing HFK grease filters.................................................................................................................6
8. Installing the ozonator.........................................................................................................................7
9. Lighting connection.............................................................................................................................7
10. Measuring and adjusting airflow .........................................................................................................8
11. Accessories.........................................................................................................................................9
12. Replacing the luminaires...................................................................................................................10
13. Kitchen canopy maintenance............................................................................................................11
M8