EUCHIPS DMX-E01L User manual

DMX-E01L
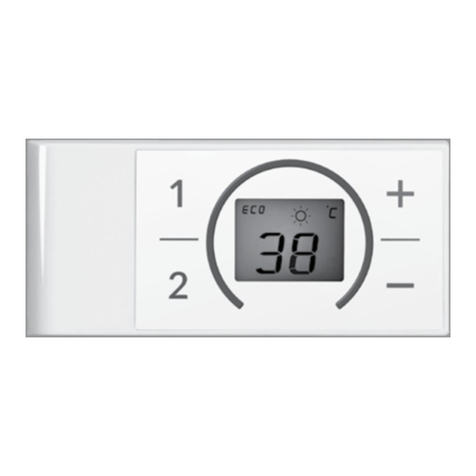
Touch Panel
Function Description
Dimension(mm)
Panel Description
Technical Parameters
Product Feature
1/3
User’s manual: 2019-9 www.euchips.com
Model DMX-E01L
Input Voltage 5VDC
Dimming Type
Input Power
Area number
Working Temperature
Channels
Packing Size
N.W
DMX512
3-3.5W
4
200g
Transmission Distance 300m
RF Function Support
0˫~+50˫
4
171x145x48(mm)
Dimension 140x106x11(mm)
·Compliance with DMX512 (1990) International Standard Agreement
·Supporting independent or synchronous brightness control for four regions
·Support real-time adjustment of brightness and color temperature
·High sensitivity glass touch button and adjusting ring, more fine control
·Using glass material, fashionable and beautiful appearance
·Compatible with any DMX lamp or DMX driver
·It can be installed in the wall body, suitable for all kinds of wall boxes.
·The saved scene saves the new scene again, and the original saved scene will be overwritten.
·Support RF function, dimming, calling scene, etc.
In the closed state, click on the "switch button" to open the DMX panel. The lamp
controlled by the panel lights up according to the last closed state. When you click on the
"switch button" in the open state, you can close the panel. All the lights under control are
turned off. The switch indicator light is slightly lit. It can be used to indicate the switch
position in darkness.
This panel supports 4 DMX zones, 1 channel for each zone, that is, zone 1 is channel 1, zone
2 is channel 2, zone 3 is channel 3, zone 4 is channel 4. Each area has a corresponding
indicator light.
Click the zone1/2/3/4 area button to select the corresponding area respectively. The
luminaire in the area will light up according to the last turn off brightness. At the same
time, the corresponding area selection indicator will light up, indicating that the luminaire
in the area can be dimmed. The luminance of lamps in this area can be adjusted and
controlled by touching the luminance adjustment ring in the middle, while the luminance
of lamps in other areas remains unchanged. Click to select another area button to switch
areas. At this time the effect of lamps and lanterns of other area does not change. Only
the selected area has a light indicating that the area can be edited.
When a certain area is selected, click the area icon again to turn off the light in the area
and turn off the area light. Long press the button of a certain area for 2 seconds, then 4
areas are selected at the same time, and 4 areas indicator lights are on at the same time.
At this time, synchronous operation can be carried out on 4 areas at the same time.
After a region or all regions are selected.
Click the Scene1/2/3/4 button to invoke each of the four scenarios saved by the user. Only
one scenario can be invoked at a time. In scene call mode, brightness cannot be adjusted.
After dimming lamps in one or more areas, long press the scene button for 3 seconds and
hear the "di-di-di" sound, indicating that the lighting effect in the current area has been
successfully saved into the scene.
Each area can hold 4 user-defined scenarios. The new scene effect can be saved again on
the scene button of a scene that has been saved (note: the previously saved scene will be
overwritten).
When you need to edit luminance, you can use this panel's powerful real-time editing
function.
Note: only when the corresponding area is selected can the lighting effect be edited, and
only the brightness can be adjusted in the scene mode. Operation "guide for the selection
of areas.
Night light modeAll Selection
On-Off Switch
Brightness Plus
Group
Touch Ring
Brightness Reduction
Scene
ON/OFF
Area Dimming
Scene Setting
Lighting Effect Editing

Touch Panel
2/3
User’s manual: 2019-9 www.euchips.com
RF Connection Description
Touch Ring
B+/B- Key
Night
All Selection
Setting by dialing switch 1. When the dial switch is on, there is a key tone; conversely,
there is no key tone.
Press Key Sound
Setting by dial switch 2. When the dial switch is on, the indicator lights on; otherwise, it
does not.
1. Check the code: select the receiver that needs to check the code, cut off the power for
10 seconds and turn on the power again. Click the "group on 1" button for 3 times within 5
seconds after the power on.
2. Clear the code: select the receiver that needs to clear the code, cut off the power for 10
seconds and then switch on the power again. Click the "group on 1" button for 6 times
during the 5 seconds when the power is on. The Zone1 button on the panel can be seen to
switch continuously.
Press key Indicator light
For Non-corresponding Panels:
Proportional Brightness Adjustment Key
S+/S- Key:
Select a single area or all areas and press the 25% brightness key to turn the lights in that
area to 25% brightness. Press the 50% luminance key to turn the lights in the area to 50%
luminance. Press the 75% brightness button to change the area light to 75% brightness.
Press the 100 luminance key to change the area light to 100 luminance.
Brightness Adjustment Key:
Short press + to increase the brightness of the selected area, short press - to decrease
the brightness of the selected area.
Touch Ring:
After selecting the corresponding area, the user can adjust the lighting brightness of the
selected area by sliding the color ring with his finger (not available in scene mode).
Scene key calls the four scenes saved in the panel, and groups Zone1, 2, 3 and 4
corresponding to the four areas on the panel. (no long press function).
Whether The Panel Corresponds To The Remote Control Is Shown In The Right Picture:
Group 1
Group 2
Group 3
Group 4
Scene 1
Scene 2
Scene 3
Scene 4
ALL key, realize four groups at the
same time control
B key, brightness adjustment plus
Color key, Color temperature
adjustment minus
The Night key performs a low-light
scene
Brightness plus, divided into ten levels
Brightness reduction, divided into
ten levels
Brightness ALL OFF 0%
Brightness ALL ON 100%
Turn ON/OFF
Corresponding Panel
Corresponding Panel
Corresponding Panel
Corresponding Panel
Non-corresponding
Panel
Non-corresponding
Panel
Non-corresponding
Panel
Non-corresponding
Panel
Corresponding Panel
Corresponding Panel
Corresponding Panel
Corresponding Panel
Corresponding Panel
Corresponding Panel
Corresponding Panel
Corresponding Panel
Corresponding Panel
Select a single area or all areas, press S + lamp to reach the maximum brightness
immediately, press s - lamp to extinguish.
The brightness of clockwise slide increases while that of counterclockwise slide
decreases.
ALL button is pressed, indicating that ALL four areas are selected, and brightness and
color temperature can be adjusted, as well as scene call.
B+ for brightness increase, B- for brightness reduction, divided into 10 levels. This can only
be done when the group and ALL keys are pressed.
Night light mode. Lights in ALL areas are at 1% brightness. Press group and ALL to exit
night light mode.

Touch Panel
3/3
User’s manual: 2019-9 www.euchips.com
※The contents of this manual are updated without prior notice. If the function of the product you are using is inconsistent with the instructions, the function of the product shall prevail.Please contact us if you have any questions.
2. Fix the bottom cover on the electrical box with screws to ensure a firm installation.
3. Connection: DMX: connect the signal line of DMX port; Power: ensure that the positive
and negative poles are not connected to the reverse;
4. Fix the glass panel on the bottom cover and fix the glass panel and the bottom cover
with screws from the bottom.
1.The product shall be tested and installed by qualified personnel.
2.This product cannot be waterproof, so it needs to avoid the sun and rain. If it is installed
outdoors, please use the waterproof water tank.
3.Before power-on debugging, ensure all wiring is correct to avoid lamp damage caused
by wrong wiring. Power supply should be within the voltage range, exceeding the voltage
range may burn out the controller.
4.Before electrification, please ensure that all wiring positive and negative poles
correspond correctly. Please check that there is no short circuit between the input and
output wires.
5.Good heat dissipation will prolong the service life of the controller. Please install the
product in a well-ventilated environment.
6.The size of the wires used must be sufficient to load the connected lamps and ensure
the wiring is firm.
7.In case of failure, please do not repair without permission. If you have any questions,
please contact the supplier.
1.Purchase ochase LED controller for technical support and warranty.
·Free warranty; Ochase will provide repair or replacement service if any product quality
problem occurs within 5 years from the date of purchase
·Paid insurance: appropriate maintenance material costs will be charged for products
beyond the free warranty period.
2.The following circumstances are not covered by the free warranty or replacement
service.
·Over high pressure, over load, improper operation and other man-made damages
·Product appearance is seriously damaged or deformed
·Product warranty label and product unique bar code are damaged
·Products have been updated
3.Repair or replacement is ochs 'only remedy to the customer and ochs shall not be liable
for any incidental damages.
4.Only ochase has the right to modify or adjust this warranty, and shall issue a written
confirmation.
Caution
Warranty Agreement
PIN1: DMX+
PIN2: DMX-
PIN7: GND
PIN8: GND
Port 1: power interface V+
Port 2: power interface V-
Port 3: signal interface GND
Port 4: signal interface DMX
Dial code switch 2: control indicator light on/off
Dial code switch 1: control the button tone on/off
Port 5: signal interface DMX+
1. Install the electrical box on the wall (dmx-e02l can be installed in the standard electrical
box, and the power adapter can be installed inside or outside the electrical box).
interface introduced
Installation instructions

鍘䱽匣
1/3
欽䨪䩛ⱃ: 2019-9 www.euchips.cn
劥匣佅䭯4⚡DMX⼓㚖嫦⚡⼓㚖1⚡鸑麤⽰⼓㚖1⚹鸑麤1⼓㚖2⚹鸑麤2⼓
㚖3⚹鸑麤3⼓㚖4 ⚹鸑麤4կ嫦⚡⼓㚖鿪剣湱䎾涸䭷爙抧կ
挿ⴁZone1/2/3/4⼓㚖䭽꛵〳ⴔⵆ鷥⚥湱䎾涸⼓㚖霪⼓㚖涸抧Ⱘ䭽撑剒た♧妃
Ⱒ涸❭䏞❭饰ず 傞湱䎾涸⼓㚖鷥䭊䭷爙抧❭饰邍爙〳㼆霪⼓㚖涸抧Ⱘ鵳
遤靈⯕乼⡲կ〳鸑鵂鍘䷫⚥ꢂ涸❭䏞靈蒜梠 㼆霪⼓㚖涸抧Ⱘ涸❭䏞鵳遤靈蒜
䱽ⵖⰦ➭⼓㚖涸抧Ⱘ❭䏞⥂䭯♶」կ〳挿ⴁ鷥⚥〥㢪♧⚡⼓㚖䭽ꝶ勻ⴗ䰃⼓
㚖կ姼傞Ⱖ➭⼓㚖涸抧Ⱘ佪卓♶」կ〫剣鷥⚥涸⼓㚖涸䭷爙抧❭饰邍爙霪⼓
㚖〳鵳遤綘鳓乼⡲կ
䔲厤⚡⼓㚖鄄鷥⚥傞ⱄ妃挿ⴁ霪⼓㚖㕃叻ⴭ〳Ⱒ霪⼓㚖涸抧Ⱘず傞⼓
㚖䭷爙抧抣կ䭽厤⚡⼓㚖䭽꛵2猲ꛦⴭ4⚡⼓㚖ず傞鷥⚥4⚡⼓㚖䭷爙抧ず
傞❭饰姼傞〳ず傞㼆4⚡⼓㚖鵳 遤ず姿乼⡲կ
鷥⚥厤⚡⼓㚖䧴Ⰼ鿈⼓㚖たկ
挿ⴁScene1/2/3/4䭽꛵〳ⴔⵆ靈欽欽䨪⥂㶸涸4猫㖞兞կ嫦妃〫腊靈欽1猫㖞兞կ
㖈㖞兞靈欽垷䒭♴♶腊鵳遤❭䏞涸靈蒜կ
㼆1⚡䧴㢴⚡⼓㚖涸抧Ⱘ鵳遤靈⯕た〳䭽㖞兞䭽꛵3猲ꛦゑⵌ“㎇-㎇-㎇”䲿
爙갉ⴭ邍爙䔲⼓㚖涸抧⯕佪卓鄄䧭⸆⥂㶸鵳霪㖞兞⚥կ
嫦⚡⼓㚖〳⥂㶸4⚡欽䨪荈㹁⛐涸㖞兞կ〳㖈䊺⥂㶸鵂涸厤⚡㖞兞涸㖞兞䭽꛵
♳ⱄ妃⥂㶸倝涸㖞兞佪卓岤䠑⾲勻⥂㶸涸㖞兞㼜鄄銻渷կ
DMX-E01L
⸆腊䲽鶣
㽯㼄(mm)
匣䲽鶣
䪮助侨
❡ㅷ暵挿
㘗〿 DMX-E01L
鳕Ⰶ歏⾓ 5VDC
靈⯕倰䒭
鳕Ⰶ⸆桧
⼓㚖侨
䊨⡲庛䏞
鸑麤侨
⺫鄳㽯㼄
ⲙꅾ
DMX512
3-3.5W
4
200g
⠛鳕騄猌 300碛(Ⱘ⡤錠䞔ⲃ罜㹁)
RF⸆腊 佅䭯
0˫~+50˫
4
171x145x48(mm)
❡ㅷ㽯㼄 146x106x11(mm)
·痗ざDMX5121990㕂꣢叻ⲥ⼸雳
·佅䭯4⚡⼓㚖杝用䧴ず姿涸❭䏞䱽ⵖ
·佅䭯❭䏞涸㹊傞靈蒜
·넞抳併䏞梯槴鍘䷫䭽ꝶ⿺靈蒜梠刿礵絈䱽ⵖ
·ꅷ欽梯槴勞餘㢪錜傞㼿繠錜
·Ⱟ㺂⟣⡦DMX抧Ⱘ䧴DMX끮⸓㐼
·〳㸝鄳㖈㟖⡤鷓ざぐ碫㟖渱կ
·䊺絑⥂㶸鵂涸㖞兞ⱄ妃⥂㶸倝涸㖞兞⾲勻⥂㶸涸㖞兞㼜鄄銻渷
·佅䭯RF⸆腊靈⯕ծ靈欽㖞兞瘝
㖈Ⱒ朐䙖♴挿ⴁ“䒓Ⱒ䭽꛵”䒓DMX匣匣䱽ⵖ涸抧Ⱘ䭽撑♳妃Ⱒ涸
朐䙖❭饰կ䒓朐䙖♴挿ⴁ“䒓Ⱒ䭽꛵”ⴭ〳Ⱒ匣䨾剣䱽ⵖ涸抧Ⱘ擆抣
䒓Ⱒ䭷爙抧䗎❭欽✵랱冝⚥䭷爙䒓Ⱒ⡙縨կ
㢹抧垷䒭ꝶⰌ鷥ꝶ
䒓Ⱒꝶ
❭䏞㟞⸈ꝶ
ⴔ絆Z
徾鲰
❭䏞Ⲹ㼱ꝶ
㖞兞ꝶS
䒓/Ⱒ
⼓㚖靈⯕
㖞兞霃縨
䔲䝠銳㼆抧Ⱘ鵳遤❭䏞鵳遤綘鳓傞〳⢪欽劥匣䔂㣐涸㹊傞綘鳓⸆腊կ
岤䠑〫剣鷥⚥湱䎾涸⼓㚖た䩞〳鵳遤抧Ⱘ佪卓涸綘鳓㖈㖞兞垷䒭♴〫腊鵳
遤❭䏞涸靈蒜կ乼⡲”䭷⽂鵳遤⼓㚖涸鷥䭊կ
抧Ⱘ佪卓綘鳓
곡傞ꛏ徾⸓❭䏞㟞⸈鷟傞ꛏ徾⸓❭䏞Ⲹ㼭կ
靈蒜梠
㢹抧垷䒭կ䨾剣⼓㚖涸抧儑爙1%涸❭䏞䭽♴ⴔ絆ㄤALLꝶ鷍ⴀ㢹抧垷䒭կ
Night
ALLꝶ䭽♴邍爙4⚡⼓㚖Ⰼ鷥〳鵳遤❭䏞⟄⿺蒀庛涸靈蒜⟄⿺㖞兞涸靈欽կ
Allꝶ
B+鵳遤❭䏞涸㟞⸈B-鵳遤❭䏞涸꣭⡛ⴔ⚹10紩կ㖈ⴔ絆ㄤALLꝶ䭽♴傞䩞腊乼
⡲կ
B+/B-ꝶ

PIN1: DMX+
PIN2: DMX-
PIN7: GND
PIN8: GND
畮〡1歏彂䱹〡V+
畮〡2歏彂䱹〡 V-
畮〡3⥌〿䱹〡GND
畮〡4⥌〿䱹〡DMX
畮〡5⥌〿䱹〡DMX+
䭉瀦䒓Ⱒ2䱽ⵖ䭷爙抧涸䒓/Ⱒ
䭉瀦䒓Ⱒ1䱽ⵖ䭽ꝶ갉涸䒓/Ⱒ
1.㖈㟖⡤♳㸝鄳歏孞渱(DMX-E02L〳⟄㸝鄳㖈叻ⲥ涸歏孞渱ⰻ, 歏彂鷓ꂁ㐼〳⟄
㸝鄳㖈歏孞渱涸ⰻ鿈䧴罏㢪鿈)կ
䱹〡➝絏
㸝鄳霹僈
鍘䱽匣
2/3
欽䨪䩛ⱃ: 2019-9 www.euchips.cn
RF 鵶䱹霹僈
匣♸黔䱽僽や㼆䎾㥵〸㕃䨾爙
㼆✵♶㼆䎾匣涸
嫱⢾❭䏞靈蒜ꝶ
S+/S-ꝶ
鷥⚥⽀⚡⼓㚖䧴䨾剣⼓㚖䭽25%❭䏞ꝶⴭ霪⼓㚖涸抧」⚹25%涸❭䏞կ䭽50%
❭䏞ꝶⴭ霪⼓㚖涸抧」⚹50%涸❭䏞կ䭽75%❭䏞ꝶⴭ霪⼓㚖涸抧」⚹75%涸❭
䏞կ䭽100❭䏞ꝶⴭ霪⼓㚖涸抧」⚹100涸❭䏞կ
鷥⚥⽀⚡⼓㚖䧴䨾剣⼓㚖䭽s+抧用⽰ⵌ鴪剒㣐❭䏞涸朐䙖䭽s-抧擆抣կ
❭䏞靈蒜ꝶ:
瀊䭽+ꝶ鵳遤䨾鷥⼓㚖涸❭䏞㟞⸈靈蒜瀊䭽-ꝶ鵳遤䨾鷥⼓㚖涸❭䏞涸Ⲹ㼱
靈蒜կ
蒀梠
欽䨪鷥⚥湱䎾⼓㚖た欽䩛䭷徾⸓蒀梠〳靈蒜鷥㹁⼓㚖涸抧Ⱘ❭䏞(㖈㖞兞垷
䒭♴♶〳欽)կ
㖞兞䭽ꝶ靈欽匣⥂㶸涸4⚡㖞兞ⴔ絆Zone1ծ2ծ3ծ4ⴔⵆ㼆䎾匣♳涸4⚡
⼓㚖կ(偽䭽⸆腊)կ
鸑鵂䭉瀦䒓Ⱒ1鵳遤霃縨կ䔲䭉瀦䒓Ⱒ㖈“ON”畮傞剣䭽ꝶ갉⿿⛓ⴭ尵剣䭽ꝶ
갉կ
䭽ꝶ갉霃縨
鸑鵂䭉瀦䒓Ⱒ2鵳遤霃縨կ䔲䭉瀦䒓Ⱒ㖈“ON”畮傞䭷爙抧❭⿿⛓ⴭ♶❭
1. 㼆瀦: 鷥㹁銳㼆瀦涸䱹佐㐼ⴗ倗歏彂10猲ꛦたꅾ倝䱹鸑歏彂㖈䱹鸑歏彂
涸5猲ꛦⰻ挿ⴁ“絆䒓1”ꝶ3妃瘝5猲た欽歏彂䒓Ⱒꝶ崵霚僽や〳⟄䱽ⵖ㥵卓
〳⟄䱽ⵖ烁雩㼆瀦䧭⸆կ
2. 幡瀦: 鷥㹁銳幡瀦涸䱹佐㐼ⴗ倗歏彂10猲ꛦたꅾ倝䱹鸑歏彂㖈䱹鸑歏彂
涸5猲ꛦⰻ挿ⴁ“絆䒓1”ꝶ6妃〳⟄溏ⵌ匣涸Zone1䭽ꝶⱄ♶倗涸ⴗ䰃欽歏彂
䒓Ⱒꝶ崵霚僽や〳⟄䱽ⵖ㥵卓♶〳⟄䱽ⵖ烁雩幡瀦䧭⸆
䭽ꝶ䭷爙抧霃縨
ⴔ絆1
ⴔ絆2
ⴔ絆3
ⴔ絆4
㖞兞1
㖞兞2
㖞兞3
㖞兞4
ALLꝶ㹊梡㔋⚡ⴔ絆ず傞䱽ⵖ
B+ꝶ❭䏞靈蒜⸈
B-ꝶ❭䏞靈蒜⸈
Nightꝶ䪄遤♧⚡⡛❭䏞涸㖞兞
❭䏞⸈ⴔ⚹⼧紩
❭䏞Ⲹⴔ⚹⼧紩
❭䏞ⰌⰢ0%
❭䏞Ⰼ䒓100%
䚪䒓Ⱒꝶ
㼆䎾匣
㼆䎾匣
㼆䎾匣
㼆䎾匣
㼆䎾匣
㼆䎾匣
㼆䎾匣
㼆䎾匣
㼆䎾匣
㼆䎾匣
㼆䎾匣
㼆䎾匣
♶㼆䎾匣
♶㼆䎾匣
♶㼆䎾匣
♶㼆䎾匣
㼆䎾匣

鍘䱽匣
3/3
欽䨪䩛ⱃ: 2019-9 www.euchips.cn
˟劥霹僈⛼ⰻ㺂㥵剣刿倝䛓♶〥遤鸑濼կ蕯䝠⢪欽涸❡ㅷ⸆腊♸霹僈⛼♶♧荝傞霼⟄❡ㅷ⚹ⲥկ㥵剣毟霼♸䧮⟌翫禹կ
1.劥❡ㅷ霼歋Ⱘ剣⚁⚌餴呔涸➃プ鵳遤靈霚㸝鄳
2.劥❡ㅷ♶腊宐銳鼙⯝傈儮ꨍ巵㥵㸝鄳㖈䨪㢪霼欽宐盲կ
3.鸑歏靈霚䎾烁⥂䨾剣䱹絁姻烁⟄鼙⯝㔔䱹絁ꝡ霴罜㼋荝抧Ⱘ䰀㗁歏彂
⣘歏銳㖈歏⾓薴㔵ⰻ馄鵂歏⾓薴㔵〳腊⠔掔㗁䱽ⵖ㐼կ
4.鸑歏⛓銳烁⥂䨾剣涸䱹絁姻餏匧㼆䎾姻烁.霼唬叅鳕Ⰶ鳕ⴀ鵶䱹絁⛓ꢂ偽
瀊騟梡韌歏⾓僽や痗ざ❡ㅷ歏⾓倰銳宠կ
5.葻㥩涸侔掚勵⟝⠔䒁䱽ⵖ㐼涸⢪欽㼑ㄐ,霼䪾❡ㅷ㸝鄳㖈鸑굥葻㥩涸梠㞯.
6.⢪欽涸歏絁㣐㼭䗳곢腊駈㢿餏鲿鵶䱹涸抧Ⱘ䎇烁⥂䱹絁暖㔿կ
7㥵卓〄欰佦ꥻ霼⺡猙荈絶⥝㥵卓剣毟霼翫禹⣘䎾㉁կ
1.餝✈妍ⴗ倛LED䱽ⵖ㐼❧「䪮助佅䭯ㄤ⥂⥝剪⸉կ
·⯝餩⥂⥝;荈餝✈⛓傈饰5䎃ⰻⴀ梡❡ㅷ餘ꆀ곿妍ⴗ倛絛✮絶⥝䧴刿䰃剪⸉
·剣⩟⥂ꤗ馄鵂⯝餩⥂⥝劍涸❡ㅷ佐》鷓䔲涸絶⥝勞俱䧭劥餩欽
2.⟄♴䞔ⲃ♶㖈⯝餩⥂⥝䧴刿䰃剪⸉薴㔵⛓ⰻկ
·鵂넞⾓馄餏鲿乼⡲♶䔲瘝➃⚹鸣䧭涸䰀㗁
·❡ㅷ㢪䕎⚚ꅾ䰀㗁䧴」䕎
·❡ㅷ⥂⥝叻皊ㄤ❡ㅷ㈔♧勵䕎瀦䰀㗁
·❡ㅷ䊺絑刿倝䰃➿
3.⥝椚䧴刿䰃僽妍ⴗ倛㼆㹐䨪涸㈔♧邉佹䲃倶妍ⴗ倛♶䪬䬐⟣⡦꣡䌄䒸饰涸
䰀㹲饄⩟餓⟣կ
4.〫剣妍ⴗ倛❧剣⥝姻䧴靈侮劥⥂⥝勵妴涸勉ⵄ,䎇⟄⛼䕎䒭〄䋒雩㹁⚹ⲥ.
岤䠑✲고
⥂⥝⼸雳
2. 欽轠ꛐ㼜䏀渷㔿㹁㖈歏孞渱♳⟄烁⥂㸝鄳暖㔿կ
3.鵶絁DMX:鵶䱹DMX畮〡⥌〿絁Power烁⥂姻餏匧尵剣䱹⿿
4. 㼜梯槴匣㔿㹁㖈䏀渷♳䎇➢䏀鿈欽轠ꛐ㼜梯槴匣ㄤ䏀渷㔿㹁կ
Table of contents
Other EUCHIPS Remote Control manuals
