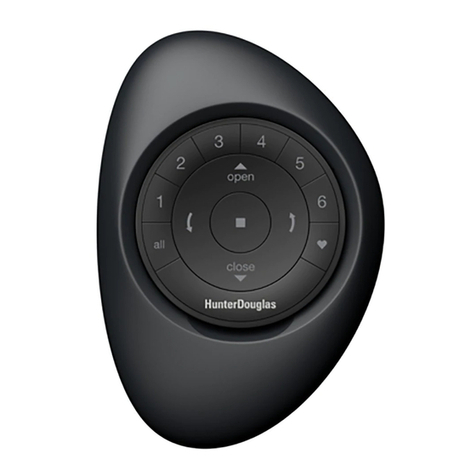
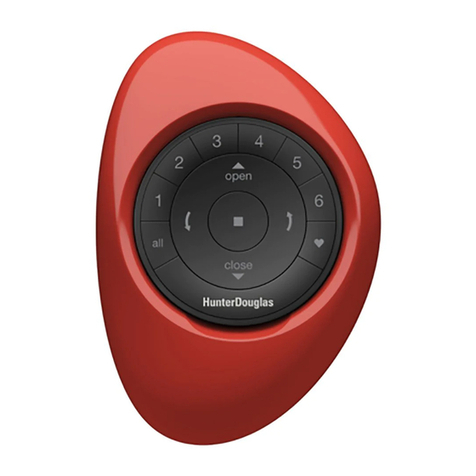
HunterDouglas PowerView User manual

PowerView™ Remote Control Guide
Page 1 of 8 Rev 1.8 01292015
FRONT:
All Groups
Group 1
Group 2
Group 3
Group 4
Group 5
Group 6
Favor te
(shade pos t on)
OPEN
CLOSE
STOP
(Press and hold for program mode)
RIGHT ARROW
Sends the m ddle ra l UP
on Top-Down/Bottom-Up
or Duol te™ products.
Sends vanes to fully
closed r ght-fac ng
pos t on on Lum nette®
Sheers
LEFT ARROW
Sends the m ddle ra l DOWN
on Top-Down/Bottom-Up or
Duol te™ products
Sends vanes to fully
closed left-fac ng
pos t on on Lum nette®
Sheers
BACK
(cover removed):
ATTERY
COMPARTMENT
(2) 3V CR 2032

Power
V
Page 2 of 8
attery Placement:
1. Remove Cover.
Press notch to move cover sl ghtly
clockw se to release and remove cover.
3. Replace Cover.
Pos t on cover over slots. Press notch to
move cover sl ghtly counterclockw se to
lock nto pos t on.
V
iew™ Remote Control Guide
Rev 1.8
Press notch to move cover sl ghtly
clockw se to release and remove cover.
2. Place Batter es.
Use two CR 2032 3V batter es.
battery nto
each compartment
place to fully seat.
Pos t on cover over slots. Press notch to
move cover sl ghtly counterclockw se to
4. Battery Removal
To remove batter es use a small screwdr ver or
f ngerna l to l ft battery
and remove from slot.
01292015
Use two CR 2032 3V batter es.
Sl de one
each compartment
and press nto
To remove batter es use a small screwdr ver or

PowerView™ Remote Control Guide
Page 3 of 8 Rev 1.8 01292015
Groups
A GROUP can be a s ngle w ndow cover ng or mult ple w ndow cover ngs. There are s x un que
ass gnable groups to use on each remote. NOTE: It s recommended that only s m lar w ndow cover ngs
be ncluded n a group because of d fferences n product features and operat on. When a shade s added
to a group for the f rst t me, t s also added to a network that l nks shades and dev ces together.
To join a shade to a GROUP:
1. Press and hold Stop for four seconds to put remote n program mode. The l ghts on remote
w ll bl nk to nd cate t s n program mode.
2. Press des red group number (1 – 6) on the remote. The l ght for the group number selected w ll
bl nk to show t s selected.
3. Press and hold the manual control button on the shade.
4. Wh le cont nu ng to press the manual button, Press Open on the remote. The shade w ll jog
to nd cate t has jo ned the group.
5. Press and hold Stop for four seconds to ex t program mode.
To remove a shade from a group:
1. Press and hold Stop for four seconds to put remote n program mode. The l ghts on remote
w ll bl nk to nd cate t s n program mode.
2. Press des red group number (1 – 6) on the remote. The l ght for the group number selected w ll
bl nk to show t s selected.
3. Press and hold the manual control button on the shade.
4. Wh le cont nu ng to press the manual button, Press Close on the remote. The shade w ll jog
to nd cate t has been removed from the group.
5. Press and hold Stop for four seconds to ex t program mode.
Resetting Limits:
Applause® honeycomb shades; Design Studio Roman Shades; Duette® honeycomb shades; Nantucket
window shadings; Pirouette® window shadings; Pleated Shades; Silhouette® window shadings; Solera
Soft Shades; Vignette® Modern Roman Shades.
1. Press and hold the manual control button on the shade for s x seconds. The shade w ll jog to
nd cate t has been cleared.
2. Then run the shade fully to Open to set a new upper l m t. The shade w ll run slowly to
the top where t w ll set a new upper l m t. The shade w ll jog to nd cate a new l m t has
been set.
3. Then press Close. The shade w ll run down slowly unt l t reaches ts mechan cal lower
l m t. The shade w ll jog to nd cate a new l m t has been set.

PowerView™ Remote Control Guide
Page 4 of 8 Rev 1.8 01292015
Resetting Limits – Designer Roller Shades & Designer Screen Shades Only
1. Press and hold the manual control button on the shade for e ghteen seconds. Cont nue to
hold the manual control button as the shade jogs at s x seconds and twelve seconds. Release
t after a th rd jog at e ghteen seconds to clear the bottom l m t.
2. Then run the shade fully to Open to set a new upper l m t. The shade w ll run to the top
where t w ll set a new upper l m t. The shade w ll jog to nd cate a new l m t has been set.
3. Then press Close. The shade w ll run down. Press Stop at the des red bottom length.
Adjust up or down as needed. Caut on: When lower ng the shade, the shade w ll not stop
unt l you stop t. If t s not stopped, t w ll roll up backwards.
4. Press and hold Stop for four seconds to put remote n program mode. The l ghts on
remote w ll bl nk to nd cate t s n program mode. Check to make sure no group number s
flash ng. If a group number s l t, press t to deselect the group.
5. Press and hold the manual control button on the shade.
6. Wh le cont nu ng to press the manual button, Press Close on the remote. The shade w ll
jog to nd cate t has set a new lower l m t.
7. Press and hold Stop for four seconds to ex t program mode.
Resetting Limits – Luminette® Privacy Sheers and Skyline Gliding Panels
1. Press and hold the manual control button on the shade for s x seconds. The shade w ll jog to
nd cate t has been cleared.
2. Then run the shade fully to Open to set a new open l m t. The shade w ll run slowly to
the stack s de where t w ll set a new traverse open l m t.
3. Then press Close. The shade w ll run slowly to the closed pos t on where t w ll set a new
traverse closed l m t.
4. (Luminette Only) Press
r ght arrow to rotate vanes fully to the r ght where a new l m t for
r ght rotat on w ll be set.
5. (Luminette Only) Press
left arrow to rotate vanes fully to the left where a new l m t for left
rotat on w ll be set

Power
V
Page 5 of 8
Setting Favorites Position
Each shade has one favor te pos t on
new favor te pos t on replaces any prev ous sett ng. Resett ng
favor te pos t on to the default pos t on.
To set a new favorite position:
1.
Run shade to the des red favor te pos t on.
2. Press and hold
Stop for
remote w ll bl nk
to nd cate t s n program mode.
3.
Press and hold the manual control button on the shade.
4.
Wh le cont nu ng to press the manual button, Press the
The shade w ll
jog to nd cate t has set th s as your favor te pos t on..
5. Press and hold
Stop for
Radio Control Operation
Once shades have been jo ned to a group, rad o c
to a m the remote toward the shade(s) be ng operated. Mult ple shades can be operated at the same
t me even f they are n another room.
Remote Functions:
1. To wake up remote,
s mply p ck t up or
select
ed w ll be h ghl ghted and act ve.
2. Press “All” or Groups 1
-6 to select spec f c shade(s) to move.
Selected groups w ll l ght to show they are selected.
a. Mult ple Group
number
b. To deselect a G
roup, press
that group w ll go
out
3. Select the OPEN
button to send selected shade(s) UP
4. Select the CLOSE
button to send selected shade(s) DOWN to 100%
5. Wh le a
shade s n mot on, press
to reverse d rect on.
V
iew™ Remote Control Guide
Rev 1.8
Each shade has one favor te pos t on
wh ch s set by default at 50% of the shade he ght. Sett ng a
new favor te pos t on replaces any prev ous sett ng. Resett ng
shade l m ts w ll also reset the
favor te pos t on to the default pos t on.
To set a new favorite position:
Run shade to the des red favor te pos t on.
Stop for
four seconds to
put remote n program mode. The l ghts on
to nd cate t s n program mode.
Press and hold the manual control button on the shade.
Wh le cont nu ng to press the manual button, Press the
♥
favor te button on the remote.
jog to nd cate t has set th s as your favor te pos t on..
Stop for
four seconds to ex t program mode.
Radio Control Operation
Once shades have been jo ned to a group, rad o c
ontrol s used to operate the shades. There s no need
to a m the remote toward the shade(s) be ng operated. Mult ple shades can be operated at the same
t me even f they are n another room.
s mply p ck t up or
press Stop. The last group(s)
ed w ll be h ghl ghted and act ve.
-6 to select spec f c shade(s) to move.
Selected groups w ll l ght to show they are selected.
number
may be selected at a t me.
roup, press
the Group number aga n. The l ght for
out
.
button to send selected shade(s) UP
to 100%.
button to send selected shade(s) DOWN to 100%
.
shade s n mot on, press
OPEN or CLOSE,
the oppos te of shade mot on
01292015
wh ch s set by default at 50% of the shade he ght. Sett ng a
shade l m ts w ll also reset the
put remote n program mode. The l ghts on
favor te button on the remote.
ontrol s used to operate the shades. There s no need
to a m the remote toward the shade(s) be ng operated. Mult ple shades can be operated at the same
the oppos te of shade mot on

PowerView™ Remote Control Guide
Page 6 of 8 Rev 1.8 01292015
6. Select ng the r ght arrow* w ll open vanes to 100%.
a. OR send the m ddle ra l UP on Top-Down/Bottom-Up or Duol te™ products.
b. OR send vanes to fully closed r ght-fac ng pos t on on Lum nette® Sheers.
7. Select the left arrow* to close vanes.
a. OR send the m ddle ra l DOWN on Top-Down/Bottom-Up or Duol te™ products.
b. OR send vanes to fully closed left-fac ng pos t on on Lum nette® Sheers.
8. Select ng the STOP button w ll stop shade movement at current pos t on.
9. Select the
♥
FAVORITE button, shown to send selected shade(s) to preset favor te pos t ons.
* The r ght or left arrows w ll not send operat onal commands for a standard bottom-up product

PowerView™ Remote Control Guide
Page 7 of 8 Rev 1.8 01292015
Table of Remote Functions by Shade Type:
Open
Close
Left Arrow
Right Arrow
Stop ♥Heart
Standard Stacking
Products
shade stacked shade down
No effect No effect Stops shade
Moves shade to
preset favor te
pos t on*
at top at bottom
w ndow
uncovered w ndow covered
TD U/Duolite
Stacking Products
shade stacked shade down shade stacked shade down
Stops shade
Moves shade to
preset favor te
pos t on*
both ra ls at top bottom ra l down At bottom bottom ra l down
w ndow
uncovered w ndow covered W ndow uncovered w ndow covered
TD Stacking Products
shade stacked shade up
No effect No effect Stops shade
Moves shade to
preset favor te
pos t on*
both ra ls at
bottom mov ng ra l up
w ndow
uncovered w ndow covered
Roller products
shade rolled shade down
No effect No effect Stops shade
Moves shade to
preset favor te
pos t on*
nto headra l at bottom
w ndow
uncovered w ndow covered
Silhouette/Pirouette
Products
shade rolled shade down shade down shade down
Stops shade
Moves shade to
preset favor te
pos t on*
nto headra l vanes closed vanes closed vanes open
w ndow
uncovered w ndow covered w ndow covered w ndow covered
Vertical Products
shade stacked shade extended
No effect No effect Stops shade
Moves shade to
preset favor te
pos t on*
w ndow
uncovered w ndow covered
Luminette Products
shade stacked shade extended shade extended shade extended
Stops shade
Moves shade to
preset favor te
pos t on*
w ndow
uncovered w ndow covered vanes closed vanes closed
Vanes open t lted left t lted r ght

Power
V
Page 8 of 8
U.S. Radio Frequency FCC Compliance
Th s dev ce compl es w th Part 15 of the FCC Rules. Operat on s subject to the follow ng two cond t ons:
(1) Th s dev ce may not cause harmful nterference, and
(2) Th s dev ce must accept any
nterference rece ved, nclud ng nterference that may cause undes red operat on.
Th s equ pment has been tested and found to comply w th the l m ts for a Class B d g tal dev ce, pursuant to Part 15 of the F
l m ts are des gned to prov de re
asonable protect on aga nst harmful nterference n a res dent al nstallat on. Th s equ pment generates, uses
and can rad ate rad o frequency energy and, f not nstalled and used n accordance w th the nstruct ons, may cause harmful
rad
o commun cat ons. However, there s no guarantee that nterference w ll not occur n a part cular nstallat on. If th s equ p
harmful nterference to rad o or telev s on recept on, wh ch can be determ ned by turn ng the equ pment off and on,
try to correct the nterference by one or more of the follow ng measures:
• Reor ent or relocate the rece v ng antenna.
• Increase the separat on between the equ pment and rece ver.
• Connect the equ pment nto an outlet on a c r
cu t d fferent from that to wh ch the rece ver s connected.
• Consult the dealer or an exper enced rad o/TV techn c an for help.
Any changes or modifications not expressly approved by the party responsible for compliance could void the user’s authority t
equipment.
Industry Canada
Under Industry Canada regulat ons, th s rad o transm tter may only operate us ng an antenna of a type and max mum (or lesser)
for the transm tter by Industry Canada. To reduce potent al rad o nterferen
that the equ valent sotrop cally rad ated power (e. .r.p.) s not more than that necessary for successful commun cat on.
Th s dev ce compl es w th Industry Canada l cence
may not cause nterference, and (2) th s dev ce must accept any nterference, nclud ng nterference that may cause undes red
dev ce.
Class B D g tal Dev ce Not ce
Th s Class B d g tal apparatus compl es w th Canad an ICES
Industrie Canada
Conformément à la réglementat on d’Industr e Canada, le présent émetteur rad o peut fonct onner avec une antenne d’un type et
max mal (ou nfér eur) approuvé pour l’émetteur par Industr e Canada. Dans le but de rédu re les r sques de brou llage r
l’ ntent on des autres ut l sateurs, l faut cho s r le type d’antenne et son ga n de sorte que la pu ssance sotrope rayonné
ne dépasse pas l’ ntens té nécessa re à l’établ ssement d’une commun cat on sat sfa sante
Le présent appare l est conforme aux CNR d’Industr e Canada appl cables aux appare ls rad o exempts de l cence. L’explo tat o
aux deux cond t ons su vantes : (1) l’appare l ne do t pas produ re de brou llage, et (2) l’ut l sateur de l’appa
rad oélectr que sub , même s le brou llage est suscept ble d’en compromettre le fonct onnement.
Appare l Numér que de la Classe B – Av s
Cet appare l numé
r que de la classe B est conforme
CAN ICES-3 (B)/NMB-3(B)
European Conformity
We, the unders gned,
Hunter Douglas W ndow Fash ons
Address: One Duette Way, Broomf eld, CO 80020, USA
Author zed representat ve n Europe:
Hunter Douglas Europe B.V.
P ekstraat 2, 3071 EL Rotterdam, The Netherlands
cert fy and declare under our sole respons b l ty that the
d rect ve 2004/108/EC and
R&TTE d rect ve 1999/5/EC.
A copy of the or g nal declarat on of conform ty may be found at
V
iew™ Remote Control Guide
Rev 1.8
Th s dev ce compl es w th Part 15 of the FCC Rules. Operat on s subject to the follow ng two cond t ons:
(1) Th s dev ce may not cause harmful nterference, and
nterference rece ved, nclud ng nterference that may cause undes red operat on.
Th s equ pment has been tested and found to comply w th the l m ts for a Class B d g tal dev ce, pursuant to Part 15 of the F
asonable protect on aga nst harmful nterference n a res dent al nstallat on. Th s equ pment generates, uses
and can rad ate rad o frequency energy and, f not nstalled and used n accordance w th the nstruct ons, may cause harmful
o commun cat ons. However, there s no guarantee that nterference w ll not occur n a part cular nstallat on. If th s equ p
harmful nterference to rad o or telev s on recept on, wh ch can be determ ned by turn ng the equ pment off and on,
the user s encouraged to
try to correct the nterference by one or more of the follow ng measures:
• Increase the separat on between the equ pment and rece ver.
cu t d fferent from that to wh ch the rece ver s connected.
• Consult the dealer or an exper enced rad o/TV techn c an for help.
Any changes or modifications not expressly approved by the party responsible for compliance could void the user’s authority t
Under Industry Canada regulat ons, th s rad o transm tter may only operate us ng an antenna of a type and max mum (or lesser)
for the transm tter by Industry Canada. To reduce potent al rad o nterferen
ce to other users, the antenna type and ts ga n should be so chosen
that the equ valent sotrop cally rad ated power (e. .r.p.) s not more than that necessary for successful commun cat on.
Th s dev ce compl es w th Industry Canada l cence
-exempt RSS stan
dard(s). Operat on s subject to the follow ng two cond t ons: (1) th s dev ce
may not cause nterference, and (2) th s dev ce must accept any nterference, nclud ng nterference that may cause undes red
Th s Class B d g tal apparatus compl es w th Canad an ICES
-003, RSS-Gen and RSS-210.
Conformément à la réglementat on d’Industr e Canada, le présent émetteur rad o peut fonct onner avec une antenne d’un type et
max mal (ou nfér eur) approuvé pour l’émetteur par Industr e Canada. Dans le but de rédu re les r sques de brou llage r
l’ ntent on des autres ut l sateurs, l faut cho s r le type d’antenne et son ga n de sorte que la pu ssance sotrope rayonné
ne dépasse pas l’ ntens té nécessa re à l’établ ssement d’une commun cat on sat sfa sante
.
Le présent appare l est conforme aux CNR d’Industr e Canada appl cables aux appare ls rad o exempts de l cence. L’explo tat o
aux deux cond t ons su vantes : (1) l’appare l ne do t pas produ re de brou llage, et (2) l’ut l sateur de l’appa
re l do t accepter tout brou llage
rad oélectr que sub , même s le brou llage est suscept ble d’en compromettre le fonct onnement.
r que de la classe B est conforme
à la norme NMB-003, CNR-Gen et CNR-210 du Canada.
Address: One Duette Way, Broomf eld, CO 80020, USA
P ekstraat 2, 3071 EL Rotterdam, The Netherlands
cert fy and declare under our sole respons b l ty that the
PowerV ew
™
Remote Control
conforms w th the essent al requ rements of the
R&TTE d rect ve 1999/5/EC.
A copy of the or g nal declarat on of conform ty may be found at
www.hunterdouglas.com/RFcert f cat ons.
01292015
Th s equ pment has been tested and found to comply w th the l m ts for a Class B d g tal dev ce, pursuant to Part 15 of the F
CC Rules. These
asonable protect on aga nst harmful nterference n a res dent al nstallat on. Th s equ pment generates, uses
and can rad ate rad o frequency energy and, f not nstalled and used n accordance w th the nstruct ons, may cause harmful
nterference to
o commun cat ons. However, there s no guarantee that nterference w ll not occur n a part cular nstallat on. If th s equ p
ment does cause
the user s encouraged to
Any changes or modifications not expressly approved by the party responsible for compliance could void the user’s authority t
o operate the
Under Industry Canada regulat ons, th s rad o transm tter may only operate us ng an antenna of a type and max mum (or lesser)
ga n approved
ce to other users, the antenna type and ts ga n should be so chosen
that the equ valent sotrop cally rad ated power (e. .r.p.) s not more than that necessary for successful commun cat on.
dard(s). Operat on s subject to the follow ng two cond t ons: (1) th s dev ce
may not cause nterference, and (2) th s dev ce must accept any nterference, nclud ng nterference that may cause undes red
operat on of the
Conformément à la réglementat on d’Industr e Canada, le présent émetteur rad o peut fonct onner avec une antenne d’un type et
d’un ga n
max mal (ou nfér eur) approuvé pour l’émetteur par Industr e Canada. Dans le but de rédu re les r sques de brou llage r
ad oélectr que à
l’ ntent on des autres ut l sateurs, l faut cho s r le type d’antenne et son ga n de sorte que la pu ssance sotrope rayonné
e équ valente (p. .r.e.)
Le présent appare l est conforme aux CNR d’Industr e Canada appl cables aux appare ls rad o exempts de l cence. L’explo tat o
n est autor sée
re l do t accepter tout brou llage
conforms w th the essent al requ rements of the
EMC
Other manuals for PowerView
6
Table of contents
Other HunterDouglas Remote Control manuals

HunterDouglas
HunterDouglas PowerView User manual

HunterDouglas
HunterDouglas PowerView Motorization User manual

HunterDouglas
HunterDouglas PowerView Pebble Dimensional drawing

HunterDouglas
HunterDouglas Platinum Use and maintenance manual

HunterDouglas
HunterDouglas PowerView Pebble User manual

HunterDouglas
HunterDouglas PowerView User manual