A Overview
A1 Eureka Environmental
Eureka Environmental was formed in 2002 to take advantage of the market leaders’ inattention to
product development and customer service. Eureka’s staff, with over 100 man-years experience in
all areas of the multiprobe industry, produced the Amphibian Multiprobe Data Display and the Manta
1 Water-Quality Multiprobe in 2003. The Manta sported such industry firsts as direct connection to
USB ports, unbreakable cable connections, the transparent multiprobe housing, and on-board LED’s
for easy troubleshooting. The Amphibian was the industry’s first PDA-based data display.
With over 1000 instruments in the field, Eureka has joined the ranks of manufacturers whose
instruments are accepted by the most discerning field practitioners.
A2 What is new about the Manta 2?
The Manta 2 takes the Manta 1’s utility a step further by associating most of each sensor’s circuitry
with the sensor instead of elsewhere in the basic multiprobe. For instance, the circuitry that operates
a conductivity sensor is normally built into the one or two large circuit boards dominating the center
section of a multiprobe. In the Manta 2, however, most of the conductivity circuitry is built into the
conductivity sensor itself. This architecture solves two of the most pernicious problems that have
faced multiprobe users for decades.
First, you don’t have to buy stuff you don’t need. The base price of virtually all pre-Manta 2
multiprobes includes the circuitry needed to measure six or eight parameters. The Manta 2 base
price includes only basic communication circuitry. If you want to measure pH, the price of the pH
sensor and its circuitry are added to the Manta 2 base price. If you don’t want pH, you don’t pay for
the sensor or its circuitry. This system also makes adding additional sensors to a multiprobe a snap.
Second, you will never have to suffer the downtime and cost of returning a Manta 2 to the factory for
repair. Troubleshooting works like this: If the multiprobe turns on and reads any of its parameters
correctly, then the basic communication circuitry is OK - if not, you need a new communications
board. If the multiprobe reads temperature, but not, say, conductivity, then you need a new
conductivity sensor. You call Eureka, we send you a new conductivity sensor by FedEx, and you
install it yourself in a few minutes. There’s no labor charge, and only one day of down-time. It really
is that easy.
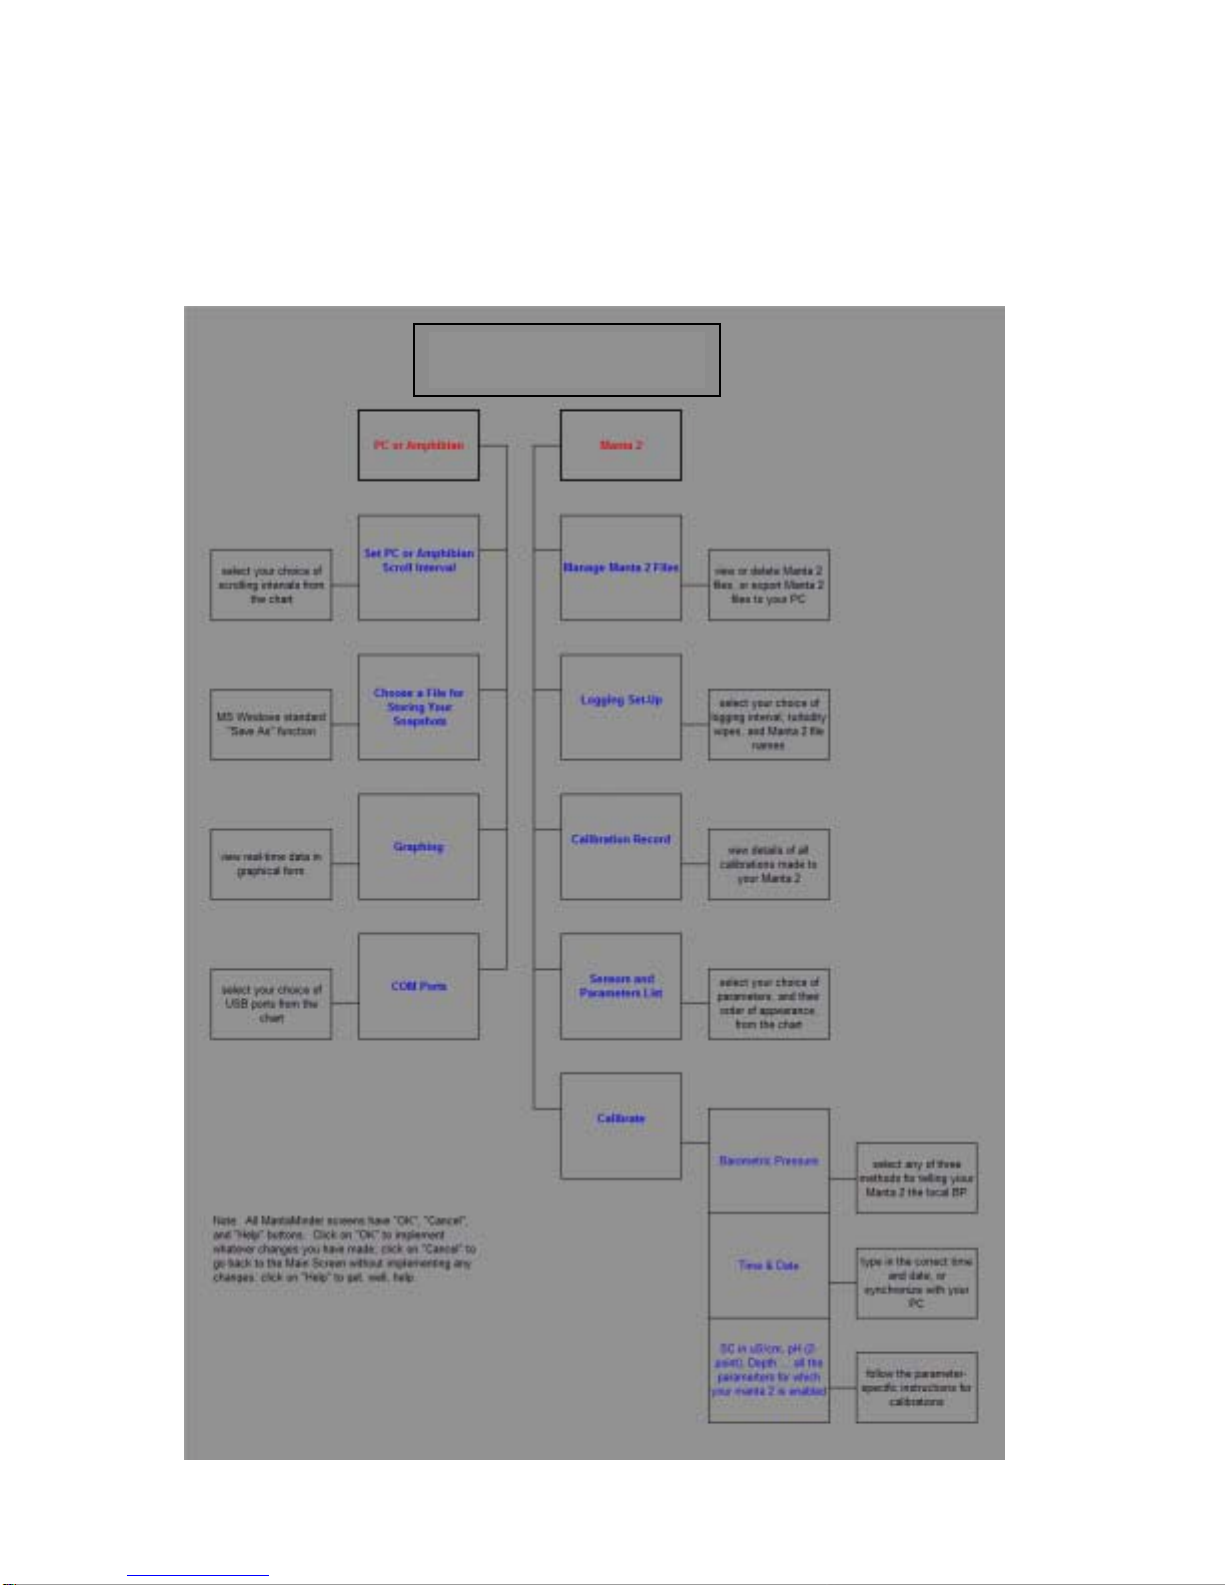
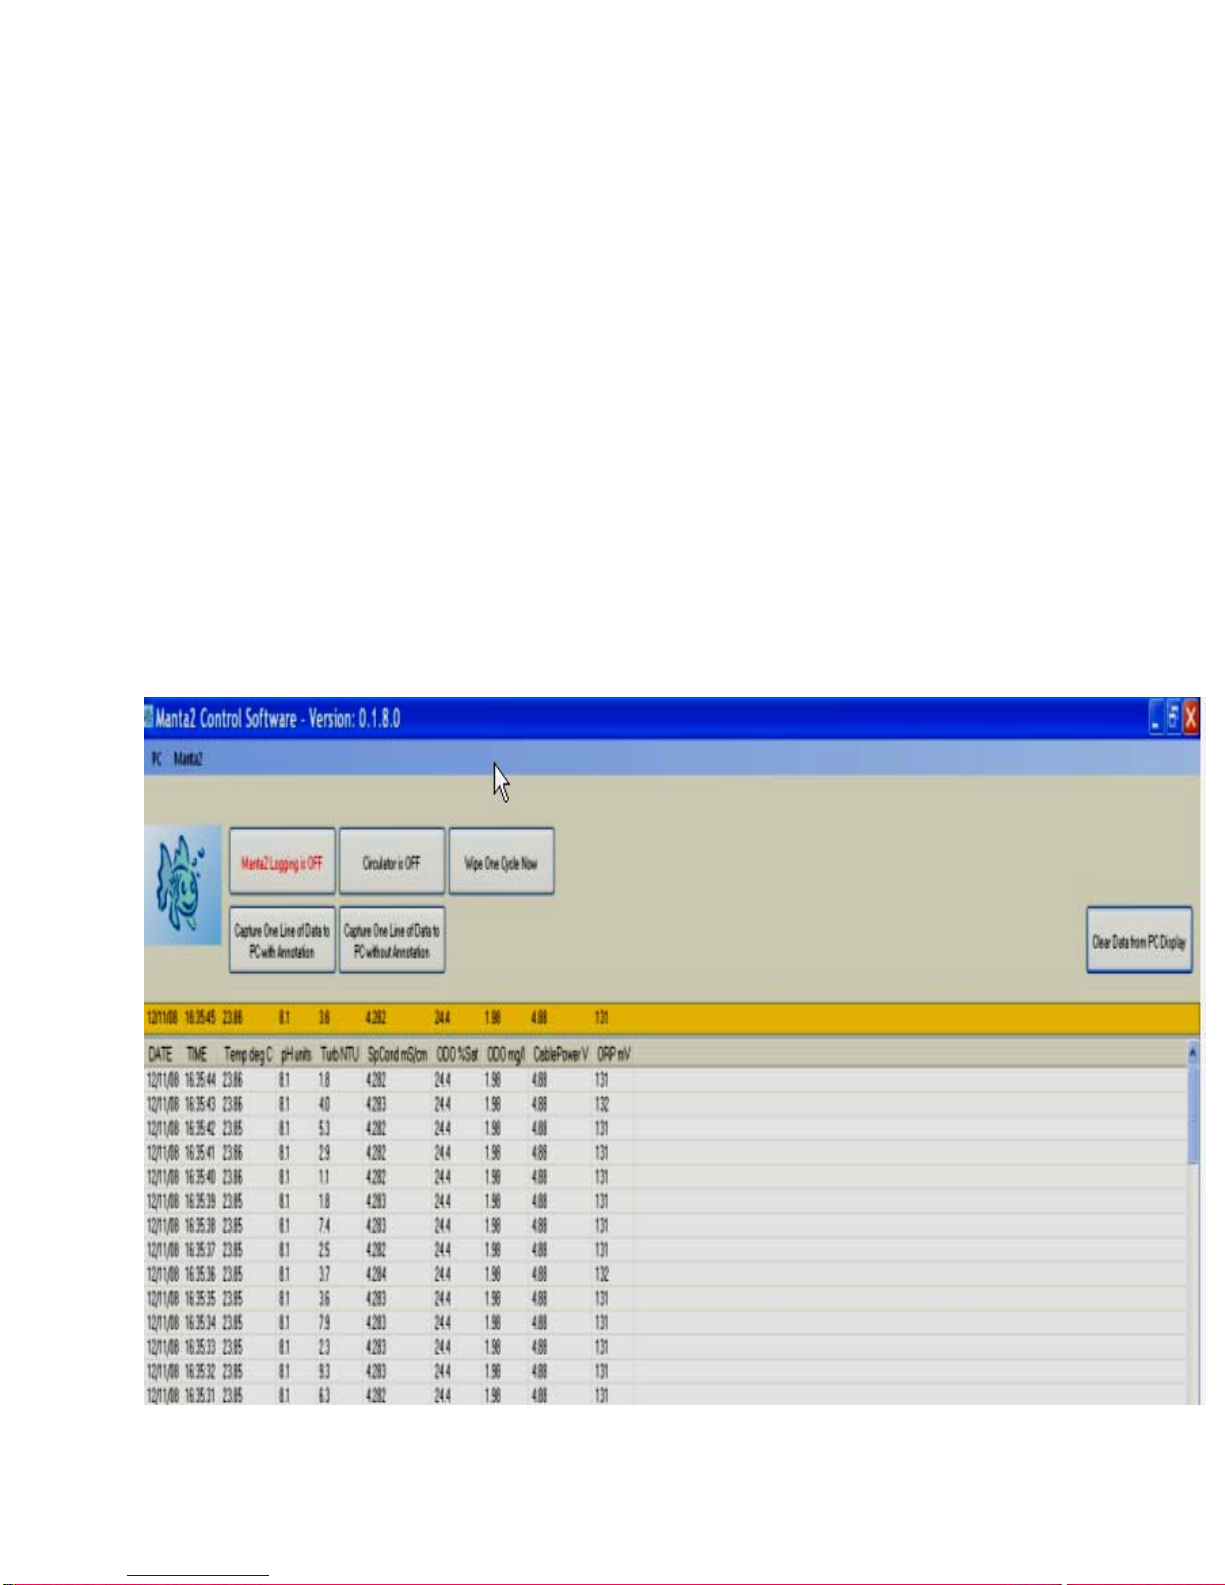
And, of course, the Manta 2 continues Eureka’s tradition of user software that is so easy that most
customers rarely read this instruction manual. Who knows, you may be the only customer ever to
read these words.
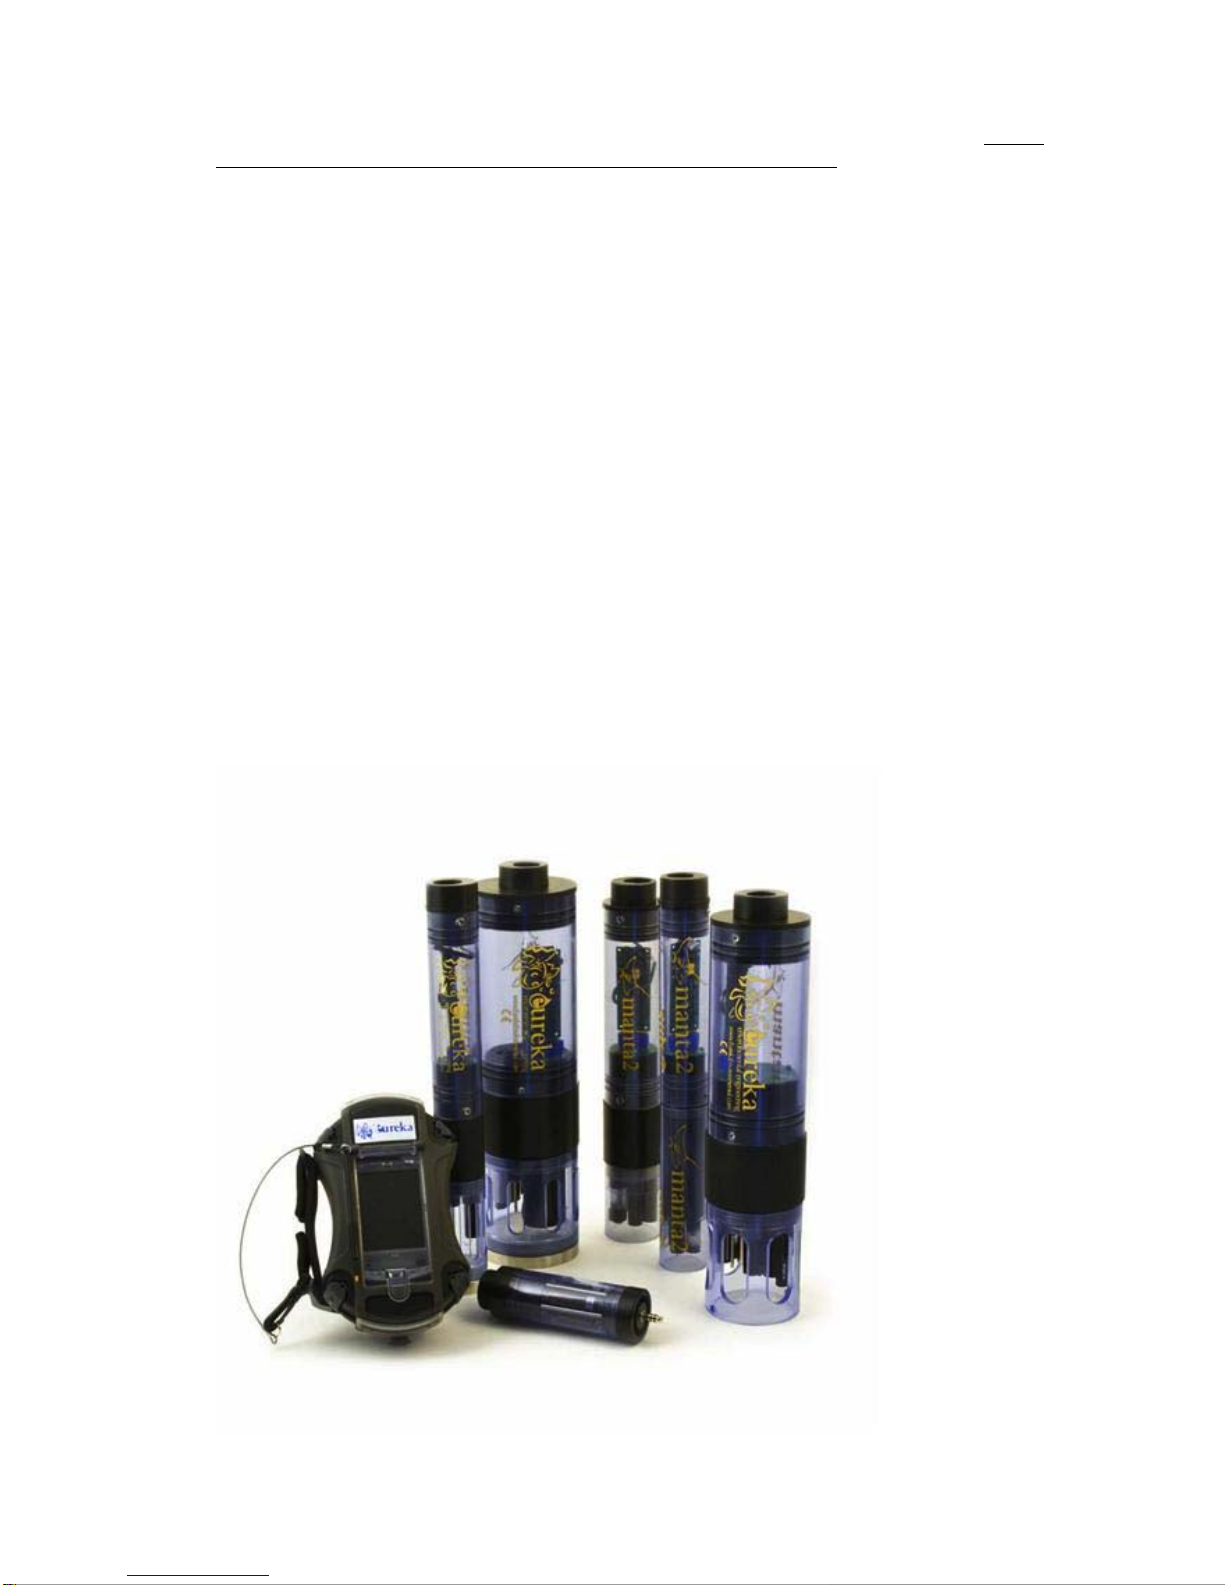
A3 Example Systems and Applications
The Manta 2 multiprobe, which can be used in any natural water up to 50 degrees C and 200 meters
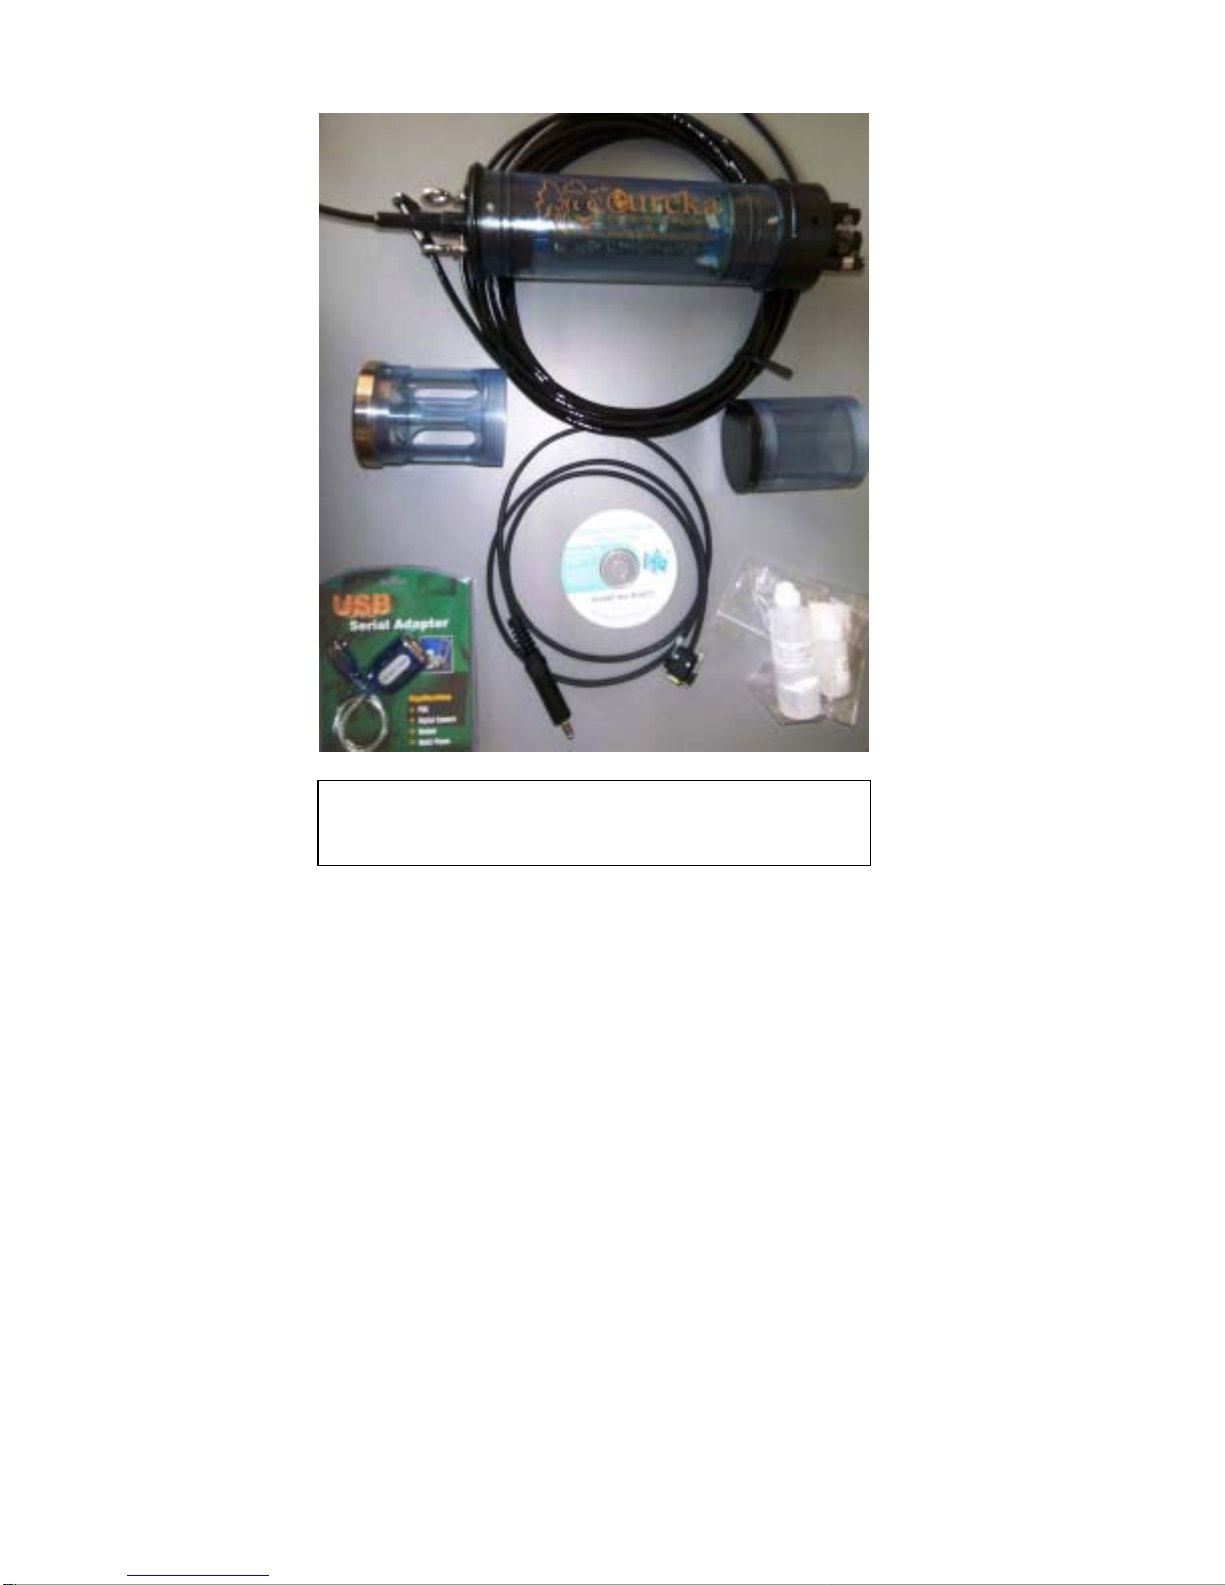
depth, has three basic applications. First, it can be used manually to gather data if you have a cable
and an Amphibian or notebook PC. You might take a series of measurements in one or more lakes
or streams during the day, and then download any saved data to your desktop PC that evening.
Second, it can run unattended for weeks at a time with a battery pack. You might set the instrument
to take a set of readings every half-hour, anchor it in an estuary, and return two weeks later to
retrieve the instrument and download the data.
Third, the Manta 2 can connect to a data telemetry system. You might deploy the instrument in a
location for which access is dangerous or expensive. A data logger, battery, and modem would take
data from the multiprobe and transmit the data to a Website of your choosing.
6