Euri Downlight Series User manual
Read carefully before installing a fixture. Retain these instructions for future reference.
This fixture must be wired in accordance with the National Electrical Code and all applicable local codes. Proper grounding is required for
safety. This product must be installed in accordance with the applicable installation code by a person familiar with the construction and
operation of the product and the hazards involved.
WARNINGS
• Risk of electrical shock. Disconnect power at fuse or circuit breaker before installing or servicing.
• To prevent early lamp failure, the lamp should only be installed in operating environments ranging between -30°C and +40°C (-22°F
and+104°F).
• No user-serviceable parts inside. To avoid electrical shock do not disassemble the product.
• Risk of fire or electric shock. LED Retrofit Kit installation requires knowledge of luminaires’ electrical systems. If not qualified, do not
attempt installation. Contact a qualified electrician.
• Risk of fire or electric shock. Install this kit only in luminaires that have the construction features and min dimensions are shown in the
Template and where the input rating of the retrofit kit does not exceed the input rating of the luminaire.
• Do not make or alter any open holes in an enclosure of wiring or electrical components during kit installation
• To prevent wiring damage or abrasion, do not expose wiring to edges of sheet metal or other sharp objects.
• Installers should not disconnect existing wires from lamp holder terminals to make new connections at lamp holder terminals, Instead,
installers should cut existing lamp holder leads away from the lamp holder and make new electrical connections to lamp holder lead wires
by employing applicable connectors.
• This Retrofit kit is accepted as a component of a luminaire where the suitability of the combination shall be determined by authorities
having jurisdiction. The product must be installed by a qualified electrician in accordance with the applicable and appropriate electrical
codes. The installation guide does not supersede local national regulations for electrical installation
CAUTION
• The risk of re. Consult a qualied electrician to ensure the correct branch circuit conductor.
INSTRUCTIONS
INSTALLATION GUIDE
MODEL #: DLC6C-18W103swej / DLC8C-22W103swej
©2019. Euri Lighting | A Division of IRTRONIX Inc. All Rights Reserved
For customer service please call us at 1-310-787-1100
Office Hours: 8:00 a.m. – 5:00 p.m. PST Monday-Friday
Questions?
THIS PRODUCT MAY NOT BE COMPATIBLE WITH ALL DIMMERS, FOR MORE INFORMATION ABOUT DIMMER COMPATIBILITY PLEASE VISIT: WWW.EURILIGHTING.COM
Downlight Series | Fixed Class
6”-8”LED Downlight
PLEASE REVIEW THE INSTRUCTIONS AND WARNINGS LISTED BELOW PRIOR TO PROPER INSTALLATION
6”-8"LED
Commercial Downlight
DIAMETER: XX’’(XX mm)
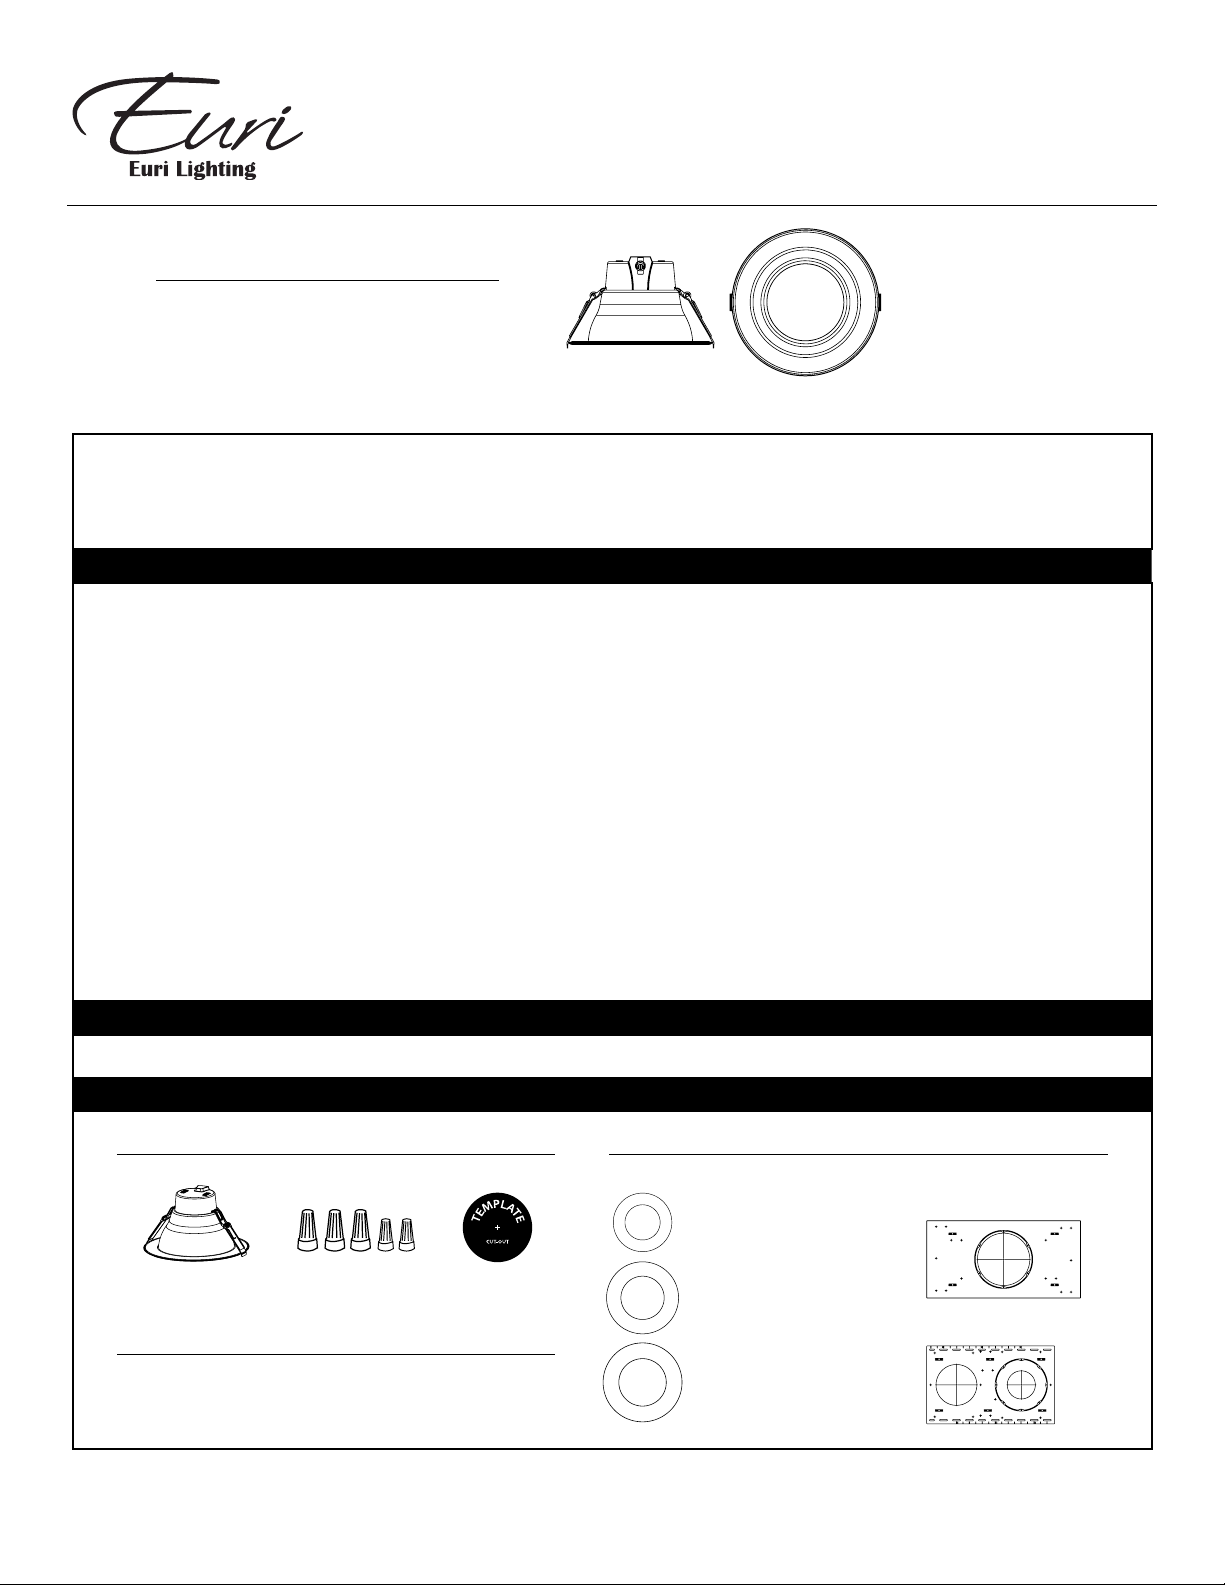
WHAT’S IN THE BOX OPTIONAL ACCESSORES
TOOLS NEEDED
Downlight (1)
This LED Recessed Kit requires very few tools for installation.
A screwdriver and a pair of wirecutters will help to install.
Wire Nuts (5)
8-10 GR
for extending from 8-1/4” to 10-1/2”
Maximum Ceiling Cutout 9”
New construction or remodel plate
for T-grid ceilings
New construction plate for Stud/Joist
10-12 GR
for extending from 10-1/4” to 12-1/2”
Maximum Ceiling Cutout 10-15/16”
12-14 GR
for extending from 11-1/2” to 14-3/16”
Maximum Ceiling Cutout 12-3/8”
Template (1)
Goof Ring T-Plate
SJ-Plate

INSTALLATION WITH EXISTING FRAME
INSTALLATION WITHOUT EXISTING FRAME
©2019. Euri Lighting | A Division of IRTRONIX Inc. All Rights Reserved
THIS PRODUCT MAY NOT BE COMPATIBLE WITH ALL DIMMERS, FOR MORE INFORMATION ABOUT DIMMER COMPATIBILITY PLEASE VISIT: WWW.EURILIGHTING.COM
INSTALLATION GUIDE
MODEL #: DLC6C-18W103swej / DLC8C-22W103swej
For customer service please call us at 1-310-787-1100
Office Hours: 8:00 a.m. – 5:00 p.m. PST Monday-Friday
Questions?
Downlight Series | Fixed Class
6”-8”LED Downlight
PLEASE REVIEW THE INSTRUCTIONS AND WARNINGS LISTED BELOW PRIOR TO PROPER INSTALLATION
6”-8"LED
Commercial Downlight
1. Shut power OFF to the xture.
2. Remove the old housing for a lamp. (Fig.1)
5. Adjust the xture power to the desired
lumen output by sliding the black selector
switch. Adjust the color temperature to the
desired one, by sliding the red selector switch.
(Fig.4)
1. Make sure the POWER IS TURNED
OFF at the source to the location in
which you are installing the product.
2. Use a template inside the box to
cut a hole in the ceiling. (Fig.7)
3. Attach the carabiner safety clip to the
existing xture. (Fig.2)
6. Install the downlight by lifting both
retention tabs upward. (Fig.5)
3. Select the desired lumen output and
CCT. (Fig. 8)
5. Push until the trim sits flush against
the ceiling. (Fig.10)
4. Insert lamp conduit
into a preinstalled J-box
(not provided) and wire to
the power source (black
to hot, white to neutral,
green to the ground). For
0-10V dimming circuits,
connect grey to grey and
purple to purple. Close the
J-box securely. Install the
downlight by lifting both
retention tabs upward.
(Fig. 9)
7. Push until the trim sits flush against
the ceiling. (Fig.6)
8. Restore power at the source and the
installation is complete.
4. Remove junction box faceplate.
Disconnect all wires to the ballast
and remove the ballast from J-Box.
Remove appropriate round knock out
and attach the xture conduit whip into
the knockout. Connect incoming power
(White to White, Black to Black, Green
to Green/Ground). For 0-10V dimming
circuits, connect Grey to Grey and Purple
to Purple. Reattach J-Box faceplate.
(Fig.3)
Fig.1
Fig.4
Fig.7
Fig.8
Fig.9
Fig.2
Fig.5 Fig.6
Fig.3
Note: These instructions do not
cover all details or variations in
equipment nor do they provide
for every possible situation
during installation, operation or
maintenance.
This manual suits for next models
2
Popular Lantern manuals by other brands


shada
shada 1000436 instruction manual

BEGA
BEGA 84 036 Instructions for use

BEGA
BEGA 33 596 Instructions for use

Dale Tiffany
Dale Tiffany GT701162 Assembly instructions

Wagan
Wagan Brite Nite Pop-Up USB Lantern user manual

Eaton
Eaton Crouse-Hinds Pauluhn DLLA M2 Series Installation & maintenance information