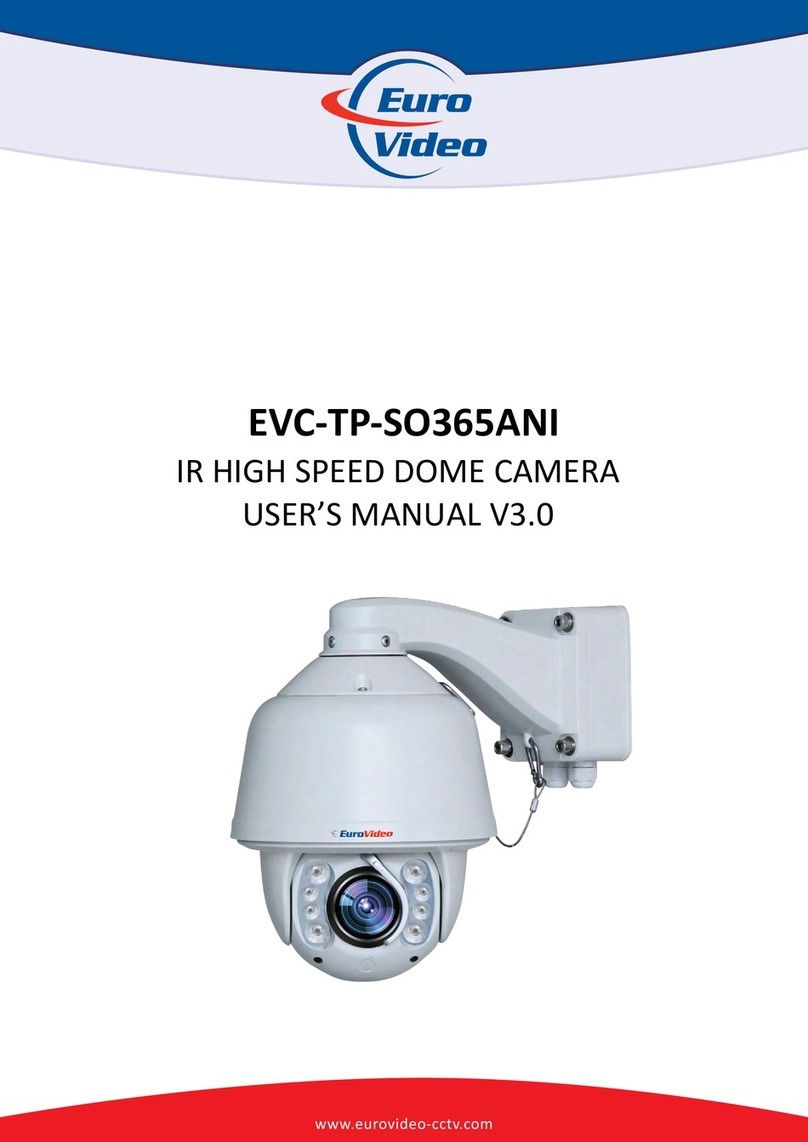
Euro Video EVC-DG-BX360BNW User manual

User’s Manual
EVC-DG-BX360BN/EVC-TP-BX360BNW
1
www.eurovideo-cctv.com
EVC-DG-BX360BNW
1/3” High Resolution Camera with On-
Board OSD
EVC-TP-BX360BNW
1/3” High Resolution Camera with On-
Board OSD, IR-Cut Filter
User’s Manual
Before operating this unit, please read this manual thoroughly and
retain it for future reference.

User’s Manual
EVC-DG-BX360BN/EVC-TP-BX360BNW
2
www.eurovideo-cctv.com
Content
FCC Information ....................................................... 3
Warning..................................................................... 3
Package Content...................................................... 4
Product Overview ..................................................... 4
Features.................................................................... 5
Operation.................................................................. 6
1.Operating the OSD Menu............................ 6
2. OSD Menu Structure................................... 6
2.1 LENS.......................................... 8
2.2 EXPOSURE ............................... 9
2.3 WHITE BALANCE.................... 12
2.4 DAY NIGHT.............................. 13
2.5 3DNR(3D Digital Noise reduction)
15
2.6 SPECIAL .................................. 16
2.7 ADJUST ................................... 22
2.8 RESET ..................................... 22
2.9 EXIT.......................................... 22
Appendix................................................................. 24
System Diagram ............................................ 24

User’s Manual
EVC-DG-BX360BN/EVC-TP-BX360BNW
3
www.eurovideo-cctv.com
FCC Information
This equipment has been tested and found to comply with the limits of a
class A digital device, pursuant to part 15 of the FCC rules and also
guaranteed with CE approval. These limits are designed to provide
reasonable protection against harmful interference in a residential
installation. This equipment generates, uses, and can radiate radio
frequency energy and, if not installed and used in accordance with the
instructions, may cause harmful interference to radio communications.
Operation of this equipment in a residential area is likely to cause harmful
interference, in which case the user will be required to correct the
interference at his or her own expense.
The user's manual or instruction manual for an intentional or unintentional
radiator shall caution the user that changes or modifications not expressly
approved by the party responsible for compliance could void the users'
authority to operate the equipment.
Warning
To prevent fire or shock hazard, do not expose the unit to moisture.
CAUTION
This symbol alerts the user to the presence of un-insulated
dangerous voltage within the product's enclosure that may
be of sufficient magnitude to constitute a risk of electric shock.
RISK OF ELECTRIC SHOCK, DO NOT OPEN
This symbol alerts the user to the presence of important
operating and maintenance (servicing) instructions in the
literature accompanying the product.
●Handle the camera with care.
Be careful while handling or installing the camera. Do not drop it or subject it to strong
shock or vibration to prevent any damages to it. Do not disassemble it or place it on an
unstable base.
●Never face the camera toward the sun.
The camera's picture may be influenced when working in unusual brightness
environment. Sun light may do influence on the picture quality or camera itself. Never
aim the camera at the sun or other extremely bright objects whether it is in use or not.
●Cleaning
Do not touch the surface of CCD sensor by hand directly. Using lens tissue or a cotton
tipped applicator and ethanol to clean the CCD sensor and camera lens.

User’s Manual
EVC-DG-BX360BN/EVC-TP-BX360BNW
4
www.eurovideo-cctv.com
Package Content
Product Overview
1. Video output terminal. (BNC)
2. Power input terminal - DC/AC (12~24)V or AC 99V~240V.
(Please see the indication on the label)
3. OSD menu control:
1
2
3
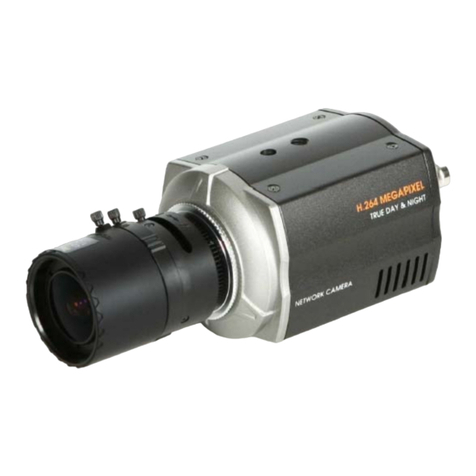
Box Camera
Accessory Pack
User’s Manual

User’s Manual
EVC-DG-BX360BN/EVC-TP-BX360BNW
5
www.eurovideo-cctv.com
Features
1/3” Sony Super-HAD CCD II
Feature with 1/3” Sony Super-HAD CCD II, presents lower lux
illumination and clear/crispy picture.
3DNR (3D Digital Noise Reduction)
Embedded with 3DNR(3D Digital Noise Reduction) technology,
produces extremely clear picture quality even under low-light
condition for 24/7 surveillance.
HSBLC(Highlight Suppression BLC)
64 selectable areas for highlight suppression BLC. It helps the
camera cut off strong light to capture distinct picture.
D-WDR(Digital Wide Dynamic Range)
D-WDR Improves the contrast between low and high lighting
areas, presents a clear image even under strong contrast
environment.
Wide range of Automatic White Balance (2,000
O
K ~ 20,000
O
K)
The Automatic White Balance provides an extensive range
color temperature control that covers from 2,000
O
K to 20,000
O
K generating natural color image without being red or blue in
varying light conditions.
256X Sens-up
Sens-Up funciton up to 256X, allows the camera can display
the bright image even extreme darkness.
Digital Zoom ( X1~X32)
The screen can be digitally zoomed with provided OSD control
form 1X to 32X.

User’s Manual
EVC-DG-BX360BN/EVC-TP-BX360BNW
6
www.eurovideo-cctv.com
Operation
1.Operating the OSD Menu
The button provides five separate actions: UP, DOWN,
EXIT, ENTER and MENU.
Press MENU to go to the OSD Menu Page.
Press UP, DOWN, EXIT or ENTER to select items on the
menu and begin configuration.
2. OSD Menu Structure
OSD
LENS DC BRIGHTNESS
VIDEO
MANUAL
EXPOSURE
SHUTTER
AUTO, 1/60(1/50),
FLK(1/100), 1/250, 1/500,
1/2000, 1/5000, 1/10000,
1/100000, X2, X4, X8,
X16, X32, X64, X128,
X256
BRIGHTNESS
AGC
OFF, LOW, MIDDLE,
HIGH
SENSE-UP X2~X256
BLC BLC, HSBLC, OFF
D-WDR INDOOR, OUTDOOR
WHITE BAL
ATW
AWB
AWC->SET
MANUAL BLUE
RED
INDOOR
OUTDOOR
DAY NIGHT
COLOR
AUTO DELAY
S-LEVEL
E-LEVEL
EXT
B/W BURST
3DNR ON 1~100

User’s Manual
EVC-DG-BX360BN/EVC-TP-BX360BNW
7
www.eurovideo-cctv.com
OFF
SPECIAL
CAM TITLE
D-EFFECT
FREEZE
MIRROR
OFF
MIRROR
V-FLIP
ROTATE
D-ZOOM
D-ZOOM
PAN
TILT
GAMMA 0.05~1.0
NEG. IMAGE
RS485
CAM ID 0~255
ID DISPLAY
BAUD
RATE
2400, 4800,
9600, 19200,
38400, 57600
MOTION
AREA SELECT
AREA DISPLAY
LEFT/RIGHT
WIDTH
TOP/BOTTOM
HEIGHT
SENSITIVITY
MOTION VIEW
PRIVACY
AREA SELECT
AREA DISPLAY
LEFT/RIGHT
WIDTH
TOP/BOTTOM
HEIGHT
COLOR
SYNC INT
LL
LANGUAGE
Traditional Chinese,
Simplified Chinese,
ENGLISH, JAPANESE,
KOREAN
ADJUST SHARPNESS
BLUE
RED
RESET
EXIT

User’s Manual
EVC-DG-BX360BN/EVC-TP-BX360BNW
8
www.eurovideo-cctv.com
Camera Menu
Camera menu allows the adjustment of different
configurations to obtain the optimal image clarity and
color realism.
SETUP
1.
LENS
MANUAL
2. EXPOSURE
3. WHITE BAL
ATW
4. DAY NIGHT
AUTO
5. 3DNR
ON
6. SPECIAL
7. ADJUST
8. RESET
9. EXIT
2.1 LENS
According to the lens type, choose DC, VIDEO, or MANUAL
mode to have the appropriate setting.
If choosing DC option, enter into subdirectory to adjust the
brightness from level 1 to 100 of the image.
LENS
BRIGHTNESS
--------
|
---
-------
50
RETURN
RET
Note : If there is a “ ” sign after the option, you could enter
into the subdirectory to do more settings.

User’s Manual
EVC-DG-BX360BN/EVC-TP-BX360BNW
9
www.eurovideo-cctv.com
2.2 EXPOSURE
EXPOSURE
SHUTTER
AUTO
BRIGHTNESS
--------
|
----------
50
AGC
---
SENSE
-
UP
AUTO
BLC
OFF
D
-
WDR
OFF
RETURN
RET
SHUTTER SETUP
Shutter setup allows control of the speed with which the
electronic shutter switches between preset shutter speeds to
match various light conditions, and control flicker.
Select a base shutter speed for the camera lens. Choose
from AUTO, 1/60(1/50), FLK(1/100), 1/250, 1/500, 1/2000,
1/5000, 1/10000, 1/100000, X2, X4, X8, X16, X32, X64,
X128, X256.
Some countries require different refresh rates, e.g. PAL (50
Hz, 60 Hz) and NTSC (50 Hz, 60 Hz). In such cases, set the
shutter to FLK(1/100) to accommodate the different refresh
rates.
Option 1 - For darker environments select a slower shutter
speed e.g.1/60 seconds.
Option 2 - For brighter environments, or scenarios in which
fast- moving objects must be captured, select a faster shutter
speed e.g.1/1000 seconds.
BRIGHTNESS SETUP
When shutter set to “AUTO” mode, adjust image
brightness by selecting a brightness level from 1 to 100.
The higher the brightness level the brighter the image.

User’s Manual
EVC-DG-BX360BN/EVC-TP-BX360BNW
10
www.eurovideo-cctv.com
AGC(Auto Gain Control) SETUP
AGC mode automatically amplifies the video signal during
low light condition to provide brighter night vision, adjust
the AGC by selecting OFF, LOW, MIDDLE, or HIGH.
Note : AGC setting is available when “DAY NIGHT” value set
to “COLOR”; it
would be unavailable when “DAY NIGHT” value set to “AUTO”,
“EXT”, “B/W”.
Note : Signal noise is slightly higher in AGC activation.
SENSE-UP SETTING
When it is night or dark, the camera automatically detects
the light level and maintains a clear picture if this mode is
activated.
OFF: Deactivates the SENS-UP function.
AUTO: Activates the SENS-UP function. Select the sense-
up rating from level X2 to X256.
Note : Sense-Up function is available when AGC is ON.
BLC(Back Light Compensation) SETTING
BLC mode improves image detail of foreground objects in
excessive background light conditions. Choose “OFF” to
deactivate the BLC function, or enter into subdirectory
“BLC”, ”HSBLC” to have more settings.
EXPOSURE
SHUTTER
AUTO
BRIGHTNESS
--------
|
----------
50
AGC
-
-
-
SENSE
-
UP
AUTO
BLC
OFF
D
-
WDR
OFF
RETURN

User’s Manual
EVC-DG-BX360BN/EVC-TP-BX360BNW
11
www.eurovideo-cctv.com
BLC (Back Light Compensation)
BLC
GAIN
MIDDLE
DEFAULT
LEFT/RIGHT
--------
|
----------
4
WIDTH
--------
|
----------
4
TOP/BOTTOM
--------
|
----------
4
HEIGHT
--------
|
----------
4
RETUR
N
RET
Set the BLC level by selecting “LOW”, ”MIDDLE”,
and ”HIGH”.
Select “DEFAULT” to reset BLC to factory default
setting.
The screen would show 64 grids, choose the grids you
want for BLC activation by adjust “LEFT/RIGHT”,
“WIDTH”, “TOP/BOTTOM”, “HEIGHT” value.
HSBLC(Highlight Suppression BLC)
HSBLC function could cut off the strong light like the
headlight of the vehicle. According to user's adjustment,
zones and sensitivity can be adjustable.
HSBLC
LEVEL
--------
|
----------
4
DEFAULT
LEFT/RIGHT
-----
|
-------------
2
WIDTH
--------
|
----------
4
TOP/BOTTOM
------
|
------------
3
HEIGHT
------
|
------------
3
RETURN
Adjust the HSBLC level from 0 to 8; the bigger the
value you set, the smaller the sensitivity to light would
act, and vice versa.

User’s Manual
EVC-DG-BX360BN/EVC-TP-BX360BNW
12
www.eurovideo-cctv.com
Select “DEFAULT” to reset BLC to factory default
setting.
The screen would show 64 grids, choose the grids you
want for BLC activation by adjust “LEFT/RIGHT”,
“WIDTH”, “TOP/BOTTOM”, “HEIGHT” value.
D-WDR(Digital Wide Dynamic Range) SETTING
If activate “D-WDR” function, camera delivers a distinctive
subject and background at the same time. Choose
“INDOOR” or “OUTDOOR” by the environment of camera
installed.
Choose “OFF” to deactivate the D-WDR function.
2.3 WHITE BALANCE
SETUP
1. LENS
MANUAL
2. EXPOSURE
3. WHITE BAL
AWB
4. DAY NIGHT
AUTO
5. 3DNR
ON
6. SPECIAL
7. ADJUST
8. RESET
9. EXIT
Adjust the image color in accordance with lighting
conditions by selecting one of different white balance
modes:
ATW(Auto Tracking White Balance)
AWB(Auto White Balance)
AWC->SET
MANUAL
INDOOR(NTSC: 5100K, PAL: 3200K)
OUTDOOR(10500K).

User’s Manual
EVC-DG-BX360BN/EVC-TP-BX360BNW
13
www.eurovideo-cctv.com
AWC->SET SETTING
SETUP
1. LENS
MANUAL
2. EXPOSURE
3. WHITE BAL
AWC
→
SET
4. DAY NIGHT
AUTO
5. 3DNR
ON
6. SPECIAL
7. ADJUST
8. RESET
9. EXIT
To find the optimal setting for the current luminance
environment, set the option to AWC->SET, and point the
camera towards the scene and press the “MENU button” 3
seconds. The camera would automatically catch the white
balance value around the scene.
MANUAL SETTING
WHITE BAL MANUAL
BLUE
--------
|
------
----
37
RED
-----
|
-------------
24
RETURN
Adjust the value of the blue and red to have user-preferred
white balance image.
2.4 DAY NIGHT
Camera menu allows the adjustment of different
configurations to obtain image settings during Day/Night
surveillance.

User’s Manual
EVC-DG-BX360BN/EVC-TP-BX360BNW
14
www.eurovideo-cctv.com
SETUP
1. LENS
MANUAL
2. EXPOSURE
3. WHITE BAL
AWC
→
SET
4. DAY NIGHT
COLOR
5. 3DNR
ON
6. SPECIAL
7. ADJUST
8. RESET
9. EXIT
Set “DAY NIGHT” value to “COLOR”, “EXT”, “AUTO”, or
“B/W” mode by different applications.
AUTO: The mode is switched to ‘Color’ in a normal
environment, but switches to ‘B/W’ mode when ambient
illumination is low.
COLOR: The camera would stay at color mode all the time.
B/W: The camera would stay at B/W mode all the time.
EXT: This mode allows you to apply a desired sensor of
external signals. (Optional)
AUTO SETTING
Set the “DAY NIGHT” mode to “AUTO”, camera would detect
the Lux rating or around environment and switch to day/night
mode automatically.
DAY NIGHT AUTO
DELAY
--
|
-----------
-----
5
S
-
LEVEL
-----
|
-------------
75
E
-
LEVEL
--------
|
----------
65
RETURN
RET
Adjust “DELAY” to set the delay time when camera switch
from color mode to B/W mode or vice versa. The delay
time could set from 0 to 63 seconds.

User’s Manual
EVC-DG-BX360BN/EVC-TP-BX360BNW
15
www.eurovideo-cctv.com
S-LEVEL: Set the starting level for camera switch from
color mode to B/W mode; the bigger the value is set, the
earlier the camera switch to B/W model.
E-LEVEL: Set the ending level for camera switch from
color mode to B/W mode; the bigger the value is set, the
later the camera switch to color mode.
B/W SETTINGDAY NIGHT B/W
BURST
ON
RETURN
RET
Burst ON: The B/W image is actually grey image, contains
color signal.
Burst OFF: True B/W image, no color signal.
2.5 3DNR(3D Digital Noise reduction)
With 3D Digital Noise Reduction (3DNR) embedded, camera
produces extremely clear picture quality even under low light
condition for 24/7 surveillance.
SETUP
1. LENS MANUAL
2. EXPOSURE
3. WHITE BAL AWC→SET
4. DAY NIGHT COLOR
5. 3DNR ON
6. SPECIAL
7. ADJUST
8. RESET
9. EXIT
Set the 3DNR to “ON” to activate the DNR function, “OFF”
to deactivate the function.

User’s Manual
EVC-DG-BX360BN/EVC-TP-BX360BNW
16
www.eurovideo-cctv.com
3DNR
LEVEL
-----
|
-------------
20
RETURN
RET
When 3DNR is ON, enter into the subdirectory to adjust
the DNR level from 1 to 100.
Note : 3DNR function is available when AGC is ON.
2.6 SPECIAL
SPECIAL
1. CAM TITLE
ON
2. D
-
EFFECT
3. RS485
4. MOTION
OFF
5. PRIVACY
OFF
6. SYNC
INT
7. LANGUAGE
ENGL
ISH
8. RETURN
RET
CAM TITLE SETTING
The Title Menu provides the ability for the camera name to
appear on-screen, and to set the camera name.

User’s Manual
EVC-DG-BX360BN/EVC-TP-BX360BNW
17
www.eurovideo-cctv.com
CAM TITLE
0 1 2 3 4 5 6 7 8 9
A B C D E F G H I J K
L M N O P Q R S T U R
W X Y Z
→←↑↓
()
~_
▉
/=&’
~
.
←
→
CLR POS END
GKB SECURITY
To display the camera name on-screen, set the “CAM
TITLE” to ON.
Select a camera name by selecting one letter/number at a
time using the menu at the bottom of the screen.
Note : Consider assigning a Camera Name that highlights the location
of the camera such as Lobby, Main Hall, Passageway 1, etc.
Press “CLR” to clear all letters, press “POS” to choose the
position of camera title, press “END” to exist the menu.
D-EFFECT(Digital Effect) SETTING
D-EFFECT
FREEZE
OFF
MIRROR
OFF
D
-
ZOOM
OFF
GAMMA
0.45
NEG. IMAGE
OFF
RETURN
RET
FREEZE
“ON” for still picture, “OFF” for moving picture.

User’s Manual
EVC-DG-BX360BN/EVC-TP-BX360BNW
18
www.eurovideo-cctv.com
MIRROR
The image can be mirrored by switching on the Mirror
Image View mode. 3 mode for options: MIRROR, V-
FLIP(Vertical Flip), ROTATE(Rotate 180
O
).
D-ZOOM(Digital Zoom)
D-ZOOM
D
-
ZOOM
X 1.0
PAN
-----
|
-------------
0
TILT
-----
|
-------------
0
RETURN
RET
The level of digital zoom could set from X1.0 to X32.0.
PAN: Adjust the zoom picture to move horizontally.
TILT: Adjust the zoom picture to move vertically.
GAMMA
Adjust the Gamma value from 0.05 to 1; factory set is
0.45.
NEG. IMAGE(Negative Image)
Negative image view has a wider dynamic range and
preserve most detail as it records data or metadata exactly
as the CCD sense. Switch ON the Negative Image View
mode in order to reproduce images with closest possible
light intensity and color information.
RS-485 SETTING(Optional)
The camera allows OSD configuration to completed remotely
with the help of a digital video recorder (DVR) once the
Device ID, Baud Rate and Protocol are programmed using
the RS-485 Menu.
Note : In order to access the camera’s OSD functions via a DVR,
the

User’s Manual
EVC-DG-BX360BN/EVC-TP-BX360BNW
19
www.eurovideo-cctv.com
Communications Settings must be first completed.
RS-485
CAM ID
1
ID DISPLAY
OFF
BAUDRATE
9600
RETURN
RET
CAM ID
Select an ID number between 0 to 225. If multiple
cameras are being used in the surveillance system,
confirm that no other cameras are using the same ID
number.
Note : If two or more cameras share the same ID number, the
DVR will not be
able to configure any of the cameras.
ID DISPLAY
Set “ID DISPLAY” to “ON”, the menu would show
CAM.00X according to CAM ID.
BAUDRATE
Choose a baud rate for transmission between the camera
and monitor through RS-485. Baud rate options include:
2400,4800, 9600, 19200, 28400, 57600.
MOTION SETTING
Motion configuration allows the user to set the motion
detection areas up to 4 zones; once the object in selected
area is moving, the camera screen would show “MOTION
DETECTION”.

User’s Manual
EVC-DG-BX360BN/EVC-TP-BX360BNW
20
www.eurovideo-cctv.com
MOTION
AREA
AREA 1
AREA
ON
LEFT/RIGHT
-----
|
--------------
8
WIDTH
-------------
|
-----
32
TOP/BOTTOM
---
|
----------------
4
H
EIGHT
----
-
|
----------
24
SENSITIVITY
------------------
|
40
MOTION
OFF
RETURN
RET
Set “MOTION” to “ON”, enter into subdirectory for more
settings.
Select 1~4 zones under “AREA SELECT” to select the
area to be detected.
AREA DISPLAY set to “ON” to show the detection zone on
the screen, set to “OFF” to hide the detection zone on the
screen.
Customize the size of detection zone by adjusting
“LEFT/RIGHT”, “WIDTH”, “TOP/BOTTOM”, “HEIGHT”
value.
Set “MOTION VIEW” to “ON”, if the object is moving, the
screen would mark the moving object by green shadow.
PRIVACY SETTING
Privacy Configuration allows the masking of up to 8 different
surveillance-free zones of the camera picture.
PRIVACY
AREA
AREA 6
AREA
ON
LEFT/RIGHT
-----
|
-----
---------
8
WIDTH
-------------
|
-----
32
TOP/BOTTOM
---
|
----------------
4
HEIGHT
----
-
|
----------
24
SENSITIVITY
------------------
|
40
MOTION
OFF
RETURN
RET
Set “PRIVACY” to “ON”, enter into subdirectory for more
settings.
This manual suits for next models
1
Table of contents
Other Euro Video Security Camera manuals

Euro Video
Euro Video OMEGA-51P22-18 User manual

Euro Video
Euro Video EVH-25-X User manual

Euro Video
Euro Video EVC-TP-SO453ARW User manual

Euro Video
Euro Video EVC-TV-DV1080PA28 User manual

Euro Video
Euro Video EVC-TP-IE358BN3 User manual

Euro Video
Euro Video EVC-TP-SO365ANI User manual

Euro Video
Euro Video EVC-TI-BX213D User manual

Euro Video
Euro Video EVC-TI-BX220D User manual