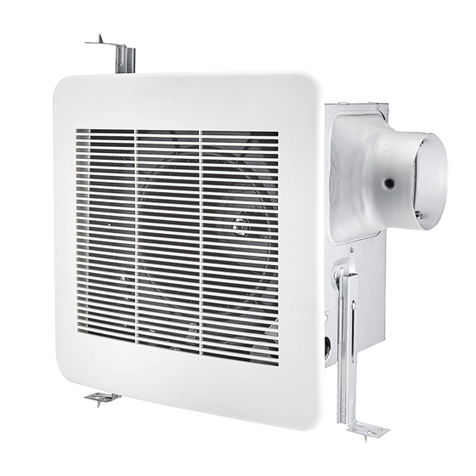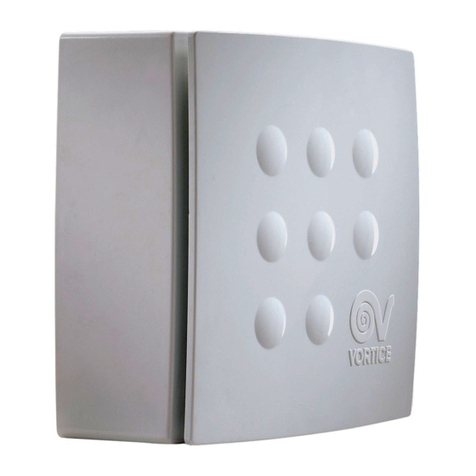
• Fitting Material: Plastic with Frosted Polymethyl Methacrylate.
• Lamp type: Including: 1 x LED max 16W 230V
• Motor: 20W
• Lumen: 1100lm
• Voltage: 220V - 240V ~ 50/60Hz.
• Protection against electric shock: Class: 1 Require earthing Connection.
• IP Rating: IP 30. Protected from tools and wires greater than 2.5 millimeters.
Not protected from liquids.
• Dimensions: (H) 276 x (W) 276 x (D) 174mm
• Cut Out : 245mm x 245mm
• Air Movement : 150m3/ hr
• Additional Information:
2 in 1 unit fan and light combo
DIY item
LED light Source
Life - Time lunbricated motor
SPECIFICATIONS ASSEMBLY INSTRUCTIONS
F31LED/F32LED - attachments:
If the external exible cable or cord of this luminaire is damaged, it should be exclusively replaced
by the manufacturer or his service agent or a similar qualied person in order to avoid a hazard.To
ensure that you get maximum longevity and maximum use out of your luminaire, please observe
the following safety instructions.
Electrical products can cause death, injury, or damage to property. Installation of the luminaire
must be carried out by a qualied electrician, in accordance with SANS 10142. On completion
of installation, ensure that the Certicate of Compliance is updated.
• Before connecting this luminaire, ensure that voltage indicated on the rating label corresponds
with the mains voltage in your home.
• When changing the lamp, ensure that the power is turned off.
• This luminaire is checked in full for conformity to the quality standards and safety requirements.
• The manufacturer / supplier is not responsible for any damage of properties and persons,
caused by the incorrect use or installation of the luminaire.
• Should you be unsure of how to install this luminaire correctly, please consult a professional
electrician or your supplier for assistance.
• Ensure all items/ components, threads and screws are tightly secured.
IMPORTANT:
• Tampering with this luminaire, IE. Using silicon sealers or incorrect cabling, will invalidate your
warranty. If one is not supplied within the carton, DO NOT use a solid speed control.
• Each blade set supplied is weighted and a complete set. If installing more than one fan, DO NOT
mix or add blades as this can cause your fan to wobble.
• Please check whether the connection of the power cord is safe and reliable before installation.
• Always ensure that the mains supply voltage is correct.
• Do not use the fan outdoors, in wet conditions or areas of high humidity.
• Do not insert objects or ngers through the bars of the grill.
• This appliance is not intended for use by young children or inrm persons unless they have been
adequately supervised by a responsible person.
• Always unplug the fan when cleaning or moving from one location to another.
IMPORTANT SAFEGUARDS
CLEANING
• Before cleaning always ensure the power supply is turned off and that the fan has
been unplugged.
• Do not immerse the fan in water.
• No abrasive products, solvents, detergent may be used to clean this fan.
• Ensure that the fan does not come in contact with corrosive chemicals, etc.
• Remove the front grill guard, blades and rear grill guard and wipe down parts with a damp cloth
to remove any dust.
• Ensure all parts are dry before reassembling your fan.
• The motor bearings are permanently sealed and do not require additional lubrication.
Aside from the grill and blades, there are no user serviceable parts in this appliance.
Do not tamper with the fan motor, if repair is required, contact the dealer from whom you
Purchased this appliance or contact Eurolux.
Before commencing with installation ensure that the power to the electrical mains is turned off.
Check for any hidden timbers, wiring or water pipes in the cut-out area before installation.
Always ensure that the electricity is turned off before installing.
A disconnecting device (isolator) must be installed on the primary side of the (ceiling extractor fan).
Make sure that you do not install this in a high-temp place
Clearance of the exhauster lamp set to the ceiling should be 5cm or more:
Clearance of the exhauster lamp set to the ceiling should be 2.3m or more:
The exhauster lamp should be separately controlled from other light.
Open the terminal box cover and remove the cable reliever.
Unscrew the inlet screw and remove the sealing ring.
Thread the power cable through the inlet screw and the sealing ring.
Insert the wire ends into the terminal block and then tighten them.
Replace the cable reliever and the box cover.
Screw in the inlet screw together with the sealing ring.
In order for the warranty to be honoured, the fan must be installed:
1.1. Make sure the exhauster-lamp has been turned OFF before removing the exhauster lamp.
1.2. Gently press the cover glass with your hands while turning the holding lid counter clockwise,
Please don’t forget to remove holding lid before taking out the cover glass.
1.3. Make sure that the glass doesn’t fall when you unscrewing the holding lid.
1.4. When you unscrew the LED panel, please using soldering iron to remove the wires from
the LED panel.
2. Cut a hole of (F32 - 245mm x 245mm) for the cut-out using either a jigsaw, keyhole saw
or hacksaw.
3. Turn on the power at the switch to test the LED panel than turn off the power when it is alright.
4. Connect the power to the outlet, insert then fan assembly into the opening.
A: Push the clamps all the way out to hold the fan into the ceiling.
Tighten screws to secure into place.
B: to secure the fan to the ceiling locate screws in the holes in the outer lip of the fan frame.


