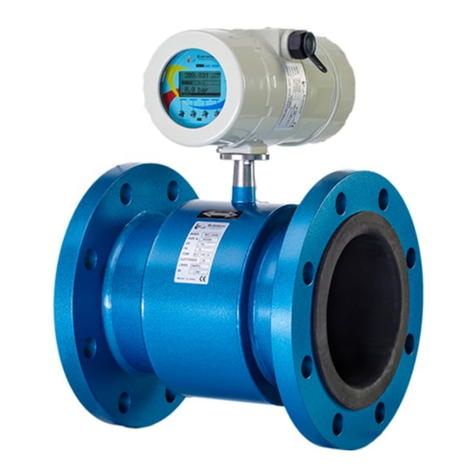
Euromag MUT2200EL User manual

CAREFULLY READ THESE INSTRUCTIONS AND KEEP THEM IN A SAFE PLACE
TD-217-1-ENG
ENGLISH
Translation of the original instructions
MUT2200EL/US
MUT2300 /US
MUT1000EL/US
MUT1100J
MUT1222
MUT2660
MUT2770
Instruction manual
Sensors
ELECTROMAGNETIC FLOWMETERS

2 / 542 / 54
Sensors
EUROMAG | SENSORS | Ed. 04/2019
READ THE INSTRUCTIONS CAREFULLY AND KEEP THEM IN A SAFE PLACE
This manual can be downloaded from the website
www.euromag.com
in the Area Download section.
We want you to save time and money!
We assure you that, having read this manual thoroughly, you will be able to perform correct installation
and fully use the product in total safety.
This document must be delivered to the user before machine installation and commissioning.
Symbols used in this manual
In order to draw the attention of all personnel working with the equipment supplied by EUROMAG
INTERNATIONAL, the points of particular importance described in this manual are highlighted with
graphic signs and different colors that will make them easily identiable.
Legend
CAUTION! This sign indicates a risk of electric shock! All operations marked with this sign must
be performed exclusively by qualied technical personnel.
CAUTION/WARNING: This symbol indicates vital information and points to be observed. Please
refer to the related documents.
NOTE: This symbol indicates information and points of particular importance to be observed.

3 / 543 / 54
Sensors
EUROMAG | SENSORS | Ed. 04/2019
1 INTRODUCTION 6
1.1 MANUFACTURER’S STATEMENT............................................................................................... 6
1.2 PACKAGING VERIFICATION....................................................................................................... 6
1.3 PRELIMINARY NOTES ................................................................................................................ 7
1.4 PRODUCT IDENTIFICATION....................................................................................................... 7
1.5 APPLICATIONS ............................................................................................................................ 8
2 PRODUCT DESCRIPTION 9
2.1 OPERATING PRINCIPLE ............................................................................................................. 9
2.1.1 Bidirectional reading ..................................................................................................................... 9
2.2 AVAILABLE VERSIONS ............................................................................................................. 10
2.2.1 Flanged sensors ......................................................................................................................... 10
• MUT2200EL – Full Bore ........................................................................................................ 10
• MUT2300 – Reduced Bore .................................................................................................... 10
2.2.2 Wafer sensors............................................................................................................................. 10
• MUT1000EL - Wafer .............................................................................................................. 10
• MUT1100J - Wafer in plastic material .................................................................................... 10
2.2.3 Insertion sensors......................................................................................................................... 10
• MUT1222 ............................................................................................................................... 10
• MUT2660 ............................................................................................................................... 10
• MUT2770 ............................................................................................................................... 10
2.3 TYPES OF INSTALLATION OF THE SENSOR.......................................................................... 10
3 INSTALLATION 11
3.1 STORAGE AND MOVING .......................................................................................................... 11
3.1.1 Storage ....................................................................................................................................... 11
3.1.2 Moving ........................................................................................................................................ 11
3.2 GENERAL INSTALLATION REQUIREMENTS........................................................................... 12
3.2.1 Vibrations .................................................................................................................................... 12
3.2.2 Magnetic elds ............................................................................................................................ 12
3.2.3 Negative pressure....................................................................................................................... 13
3.2.4 Protection from direct sunlight .................................................................................................... 13
3.2.5 Operating temperatures.............................................................................................................. 13
3.3 INSTALLATION CONDITIONS ................................................................................................... 14
3.3.1 Positioning in relation to the plant............................................................................................... 14
3.3.2 Important guidelines for correct installation ................................................................................ 14
3.4 INSTALLATION........................................................................................................................... 18
3.4.1 Important instructions on installation........................................................................................... 18
3.4.2 Sensor support............................................................................................................................ 19
3.4.3 Tightening torque ........................................................................................................................ 19
• Flanged sensors .................................................................................................................... 19
• Wafer Sensors ....................................................................................................................... 20
3.4.4 Underground installations ........................................................................................................... 22
3.5 HOW TO AVOID AIR POCKETS IN THE PIPELINES ................................................................ 23
3.6 INSTRUCTIONS FOR DIAMETER REDUCTION ...................................................................... 27

4 / 544 / 54
Sensors
EUROMAG | SENSORS | Ed. 04/2019
4 POTENTIAL EQUALIZATION 28
4.1 GENERAL INDICATIONS ........................................................................................................... 28
4.2 PLASTIC PIPES ......................................................................................................................... 29
4.3 METAL PIPES............................................................................................................................. 30
4.4 METAL PIPES WITH INSULATING ADAPTERS ........................................................................ 30
4.5 METAL AND PLASTIC PIPES .................................................................................................... 31
4.6 PIPES EQUIPPED WITH CATHODIC PROTECTION ............................................................... 31
5 ELECTRICAL CONNECTION 32
5.1 SEPARATE VERSION SENSOR CONNECTION....................................................................... 32
5.2 ELECTRICAL DIAGRAMS.......................................................................................................... 33
5.2.1 Connection with standard single-shielded electrode cable......................................................... 33
5.2.2 Connection with standard double-shielded electrode cable........................................................ 33
5.3 SEPARATION CABLES .............................................................................................................. 34
6 PRESSURE TAP 35
7 INSERTION METERS 36
7.1 INTRODUCTION ........................................................................................................................ 36
7.1.1 Operating principle...................................................................................................................... 36
7.2 GENERAL INSTALLATION REQUIREMENTS........................................................................... 37
7.2.1 Care of the device....................................................................................................................... 37
7.2.2 Alignment of the electrodes in relation to the ow ...................................................................... 38
7.3 MUT1222 .................................................................................................................................... 39
7.3.1 Dimensions and main features ................................................................................................... 39
7.3.2 Calculation of the insertion depth................................................................................................ 40
7.3.3 Installation of the sensor............................................................................................................. 41
7.3.3.1 Preparation of the pipe................................................................................................................ 41
7.3.3.2 Assembly of the owmeter ......................................................................................................... 41
7.3.4 Installation on non-metallic pipes using a saddle bracket........................................................... 42
7.3.5 Flowmeter grounding .................................................................................................................. 42
7.4 MUT2660 .................................................................................................................................... 43
7.4.1 Dimensions and main features ................................................................................................... 43
7.4.2 Calculation of the insertion depth................................................................................................ 44
7.4.3 Installation of the sensor............................................................................................................. 45
7.4.3.1 Preparation of the pipe................................................................................................................ 45
7.4.3.2 Installation of the owmeter ....................................................................................................... 45
7.4.4 Flowmeter grounding .................................................................................................................. 46
7.5 MUT2770 .................................................................................................................................... 47
7.5.1 Dimensions and main features ................................................................................................... 47
7.5.2 Calculation of the insertion depth................................................................................................ 48
7.5.3 Installation of the sensor............................................................................................................. 49
7.5.3.1 Preparation of the pipe................................................................................................................ 49
7.5.3.2 Installation of the owmeter ....................................................................................................... 49
7.5.4 Flowmeter grounding .................................................................................................................. 50

5 / 545 / 54
Sensors
EUROMAG | SENSORS | Ed. 04/2019
8 MAINTENANCE 50
8.1 BOLTS TIGHTENING ................................................................................................................. 50
8.2 GROUNDING CHECK ................................................................................................................ 50
8.3 CLEANING OF EBONITE COATINGS: ...................................................................................... 50
9 TROUBLESHOOTING 50
10 CERTIFICATIONS AND TECHNICAL FEATURES 50
11 SENDING THE FLOWMETER TO THE MANUFACTURER 51
11.1 REPAIR REQUEST FORM ......................................................................................................... 51
12 PRODUCT DISPOSAL 53

6 / 546 / 54
Sensors
EUROMAG | SENSORS | Ed. 04/2019
1 INTRODUCTION
IMPORTANT WARNING! It is very important that all personnel working with the equipment have
read and understood the instructions and indications provided in this manual, and that they
follow them prior to using the equipment itself. The manufacturer assumes no responsibility for
the consequences resulting from improper use by the worker.
The suitability of the device for particular purposes shall be the worker’s responsibility.
The warranty will be considered void in cases of improper installation and use of devices (systems).
• The manufacturer shall bear no responsibility for any damage caused by improper use, improper
installation, or tampering of own products. Installation, connection, commissioning, and maintenance
must be carried out by personnel who are qualied and authorized for this purpose. The personnel
in charge of the installation must make sure that the measurement system is properly connected as
per the wiring diagram indicated in this document.
• The manufacturer shall bear no responsibility for any damages or injuries resulting from any
misunderstanding of this manual. In order to avoid possible accidents to persons or things caused
by incorrect interpretation of the instructions, the user must not proceed with operations and/or
interventions on the converter if there are uncertainties or doubts regarding the operation(s) to be
performed. We recommend contacting Assistance Service for clarications in this regard for more
precise instructions
• The manufacturer will be held responsible only if the converter will be used in its original conguration.
For applications that require high working pressures or use of substances that may be dangerous
for people, the environment, equipment, or anything else: In case of pipe breakage, EUROMAG
INTERNATIONAL recommends taking necessary precautions, such as adequate positioning and
protection or installation of a guard or safety valve, before installing the CONVERTER in the COMPACT
version.
The device contains live electrical components; therefore, installation, checks, and maintenance must
be carried out by experienced and qualied personnel who are aware of all necessary precautions to be
taken. Before opening any internal part, please disconnect the power supply.
1.1 MANUFACTURER’S STATEMENT
»Stresses and loads possibly caused by earthquakes, strong winds, re damage, vibrations, and
natural disasters were not taken into account in the phase of machine designing.
»Do not install the machine in such a way that it acts as a focus for pressure on the pipes. External
loads were not taken into account in the device conguration.
»While the device is working, the pressure, supply voltage, and/or temperature values indicated on
the label or in this Operating Manual must not be exceeded.
1.2 PACKAGING VERIFICATION
At the moment of purchase and/or upon receipt of the product, the buyer is strongly advised to check
the quality of the packaging, which must be intact, without visible dents, and completely and correctly
closed.
When opening the packaging, also check that the product complies with the information on the packing
list in terms of completeness of components/accessories.
NOTE: All EUROMAG INTERNATIONAL software is available on the USB stick that
accompanies the product.
The software can also be downloaded from the website www.euromag.com by accessing
the Download Area. A free registration will be required, after which you can download
the conguration software for your product.

7 / 547 / 54
Sensors
EUROMAG | SENSORS | Ed. 04/2019
1.3 PRELIMINARY NOTES
Main parts of the electromagnetic owmeter are:
»Sensor – installed in the tube with the use of anges and other joints
»Converter – can be installed on the sensor (in compact version) or remotely (in remote version)
connected with two pipes
Electromagnetic owmeters have many important advantages compared to their mechanical counterparts,
such as exceptional long-term stability, maximum process reliability, and zero maintenance. As a result,
these sensors can provide accurate and reliable long-term measurements.
See the following paragraphs for more detailed information on correct installation.
NOTES:
Electromagnetic owmeters are designed specically to operate under the following basic
conditions:
1. The liquid must be conductive;
2. Pipe must be always full and free from air and bubbles;
3. The input and output distances must be on recommended settings
4. The grounding instructions must be followed
1.4 PRODUCT IDENTIFICATION
Each Sensor manufactured by EUROMAG INTERNATIONAL has an identication plate (Fig. 1) that
displays the following information::
IDENTIFICATION PLATE
»MODEL: Sensor model
»S/N: Sensor identication number
»DN: Nominal diameter [inches or mm]
»PN: Nominal diameter [inches or mm]
»TEMP.: Maximum liquid temperature for process
completion
»IP: International degree of protection
»ELECTRODES: Electrodes material composition
»LINING: Lining material
»KA: Calibration coefcient
»CE: Marking
Fig. 1 Identication plate
The identication plate must never be removed, damaged, or changed. It must also be kept
clean from any dirt deposits, as the data contained are the only safe and unambiguous way to
recognize the type of converter and be able to complete the repair request form attached to this
manual.

8 / 548 / 54
Sensors
EUROMAG | SENSORS | Ed. 04/2019
1.5 APPLICATIONS
The sensors manufactured by the company EUROMAG are widely used in many applications where it
is important to measure the ow rate of electrically conductive liquids. Various models can be used in
different applications. The table below shows the typical applications according to the individual sensor
models manufactured by EUROMAG.
SENSOR MODEL
MUT2200EL/US
MUT2300/US
MUT1000EL/US
MUT1100J
MUT1222
MUT2660
MUT2770
APPLICATIONS
Wastewater XXXX
Industrial drainage water XXXX
Industrial wastewater XXX
Data acquisition for report and analysis XXXXXXX
Night applications with very low ow rates X
Leakage control X X X X
Dams X X
Water distribution X X
Distribution, municipal waters X
Sludge X
Water network management XXX
Flow studies XXX
Industry X X
Installation in small spaces without linear
distances X
Irrigation X X X
Industrial process liquids, sludge, and concrete X X
Mines X X
District measure XXX
Drinking or wastewater measurement XXX
Tax measures X X
Industrial processes X X
Flow proling XXX
Leakage detection X X
Building sector X X
Fire-ghting systems X X
Refrigeration systems X X
Pumping stations X
Water treatment X X
Verication of owmeters on site XXX

9 / 549 / 54
Sensors
EUROMAG | SENSORS | Ed. 04/2019
2 PRODUCT DESCRIPTION
2.1 OPERATING PRINCIPLE
The electromagnetic sensor is used to measure the ow rate of liquids (drinking water, wastewater,
beverages, fertilizers, chemical products, and any other liquid) that have an electrical conductivity of
at least 5μS/cm. Electromagnetic owmeters are the best solution for measuring the ow rate liquids
because of fast response times, great measurement accuracy, and a passage tube that does not present
any obstruction to the liquid ow, therefore no pressure drop in the pipe.
Furthermore, since they do not use any moving parts, they require virtually no maintenance.
EUROMAG electromagnetic owmeters cover a wide variety of applications (e.g., water owmeters,
wastewater ow measurement, fertilizer ow measurement, etc.) and respond to every customer request
thanks to the wide range of models.
Meters are available in wafer, anged, threaded, and insertion versions from DN6 to DN2000 in pressure
class up to ANSI900.
In order to perform its measuring function, the sensor must be combined with a converter.
The converters are designed to meet all the needs of modern water management systems through
exible and hybrid electronics, which, depending on the model, offers various electrical power solutions.
At the ends of a conductive uid that moves with speed
v in a magnetic induction eld Ban electromotive
force e is induced and can be expressed as:
e = kBDv
Where:
BB is constant by construction;
Dis constant and represents the
distance between the electrodes E1
and E2 (equivalent to the owmeter
diameter);
vis the speed of the liquid;
k is the calibration constant;
1- Electromotive force (proportional to the speed);
2- Electrodes;
3 - Magnetic eld;
4- Coils;
1
2 4
3
The electromotive force «e» is proportional to the speed «v»
2.1.1 Bidirectional reading
The sensor has a possibility of bidirectional reading (i.e., it is able to read the ow of the liquid in both
directions).
By convention, the sensor will output positive values if the liquid ows:
»in the same direction as the arrow (enters in – and exits in +), the ow is positive, and the display
will show a reading without a sign
»in the opposite direction to that indicated by the arrow (enters in + and exits in -), the ow is
negative, and the display will show a reading with a negative sign
Direct ow -> number without sign
Reverse ow -> negative number

10 / 5410 / 54
Sensors
EUROMAG | SENSORS | Ed. 04/2019
2.2 AVAILABLE VERSIONS
EUROMAG manufactures its sensors in different versions, each intended for use in different applications,
as summarized in the paragraph “1.5 Applications.”
The different sensor versions available are shown below.
2.2.1 Flanged sensors
• MUT2200EL – Full Bore
• MUT2300 – Reduced Bore
2.2.2 Wafer sensors
• MUT1000EL - Wafer
• MUT1100J - Wafer in plastic material
2.2.3 Insertion sensors
• MUT1222
• MUT2660
• MUT2770
2.3 TYPES OF INSTALLATION OF THE SENSOR
The sensors in different versions can be connected to the converter in two different ways, namely:
Flanged Sensors Wafer Sensors Insertion Sensors
COMPACT installation: The
sensor is connected directly to
the related converter.
SEPARATE installation [re-
mote]: The sensor is con-
nected to the converter by spe-
cic power/signal cables.

11 / 5411 / 54
Sensors
EUROMAG | SENSORS | Ed. 04/2019
3 INSTALLATION
3.1 STORAGE AND MOVING
3.1.1 Storage
To ensure the correct maintenance of the device while waiting for its installation, it is necessary
to comply with the storage provisions below:
1) Store the device in a dry place and protected from dust
2) Keep away from direct and continued sunlight
3) Keep the device in the original packaging until it is used
4) Temperature of the storage place: -40 ÷ +70 °C (-40 ÷ +158 °F)
3.1.2 Moving
CAUTION! The sensor must be carefully lifted and moved so as not to cause damage to the
sensor itself and connection anges. Below you will nd a description of correct and incorrect
lifting and moving.
The proper lifting method (for transport and installation) of the sensor is shown in Fig. 2.
The owmeter must be lifted and transported by properly harnessing the device on the side parts of the
owmeter, making sure that the slings (ropes, bands, etc.) are xed to the appropriate eyebolts.
WARNING: Do not raise the owmeter harnessing the converter (Fig. 3)!!
Do not move the owmeter with the lifting device if it is not in the original packaging (Fig. 4) or
without adequate support that ensures the required stability.
Fig. 2 Fig. 3 Fig. 4

12 / 5412 / 54
Sensors
EUROMAG | SENSORS | Ed. 04/2019
3.2 GENERAL INSTALLATION REQUIREMENTS
IMPORTANT NOTE! THE SENSOR MUST ALWAYS BE COMPLETELY FULL OF LIQUID!
Fig. 5 The pipe must always be completely full of liquid
3.2.1 Vibrations
• DO NOT expose the owmeter to vibrations and/or movements that could affect its performance and
duration.
AVOID EXCESSIVE
VIBRATIONS
Fig. 6 Avoid vibrations
• Install a suitable anti-vibration protection if vibrations occur.
Fig. 7 Installation with anti-vibration protections
3.2.2 Magnetic elds
• AVOID exposing the owmeter to strong or nearby magnetic elds.
NS
Fig. 8 Avoid magnetic elds

13 / 5413 / 54
Sensors
EUROMAG | SENSORS | Ed. 04/2019
3.2.3 Negative pressure
Avoid vacuum conditions in the pipe. These can damage the coating of the owmeter and move
the electrodes from their correct position.
3.2.4 Protection from direct sunlight
• Protect the owmeter if exposed to direct sunlight.
Fig. 9 Avoid direct exposure to sunlight
3.2.5 Operating temperatures
• For normal and efcient operating of the owmeter:
»The room temperature must be limited within the range of (-25 ÷ +60) °C, (-13 ÷ +140) °F.
Fig. 10 Environment and uid temperature limits
°C °F
Min. Max. Min. Max.
Coating in EBONITE -40 +80 -40 +176
Coating in PTFE (remote) -40 +130 -40 +266
Coating in PTFE (compact) -40 +80 -40 +176
Coating in PTFE (separate high temperature) -40 +180 -40 +356
MUT1100J 0 +80 32 +176
INSERZIONI -20 +80 -4 +176

14 / 5414 / 54
Sensors
EUROMAG | SENSORS | Ed. 04/2019
3.3 INSTALLATION CONDITIONS
3.3.1 Positioning in relation to the plant
To ensure optimal working conditions, the owmeter must be installed correctly inside the
system. Correct and incorrect installation positions are described and illustrated below.
The owmeter must remain below the hypothetical blue line (piezometric level line), which connects the
two levels of uid to be measured (Fig. 11).
NOTE: Avoid placing the owmeter above the piezometric level line (Fig. 12).
Fig. 11 Correct position Fig. 12 Incorrect position
3.3.2 Important guidelines for correct installation
The junction box on the sensor is designed to have the IP68 protection degree only when properly
closed and tightened. The manufacturer does not assume any responsibility for an improper
closing by third parties.
For correct working conditions, please follow the important guidelines shown in the following gures.
Improper installation may result in an inaccurate measurement.
For partially lled pipes or with downward ow and free exit, the owmeter should be placed in a
U-shaped tube (see Fig. 13).
Full bore Sensors Reduced bore Sensors
5 DN
3 DN
0 DN
0 DN
Fig. 13 Installation on U-shaped tube

15 / 5415 / 54
Sensors
EUROMAG | SENSORS | Ed. 04/2019
Insertion sensors
15 DN
10 DN
Fig. 14 Installation on U-shaped tube
“T” connection downstream of the owmeter
10 DN
Fig. 15 Installation on U-shaped tube
Three-dimensional curves
10 DN
Fig. 16 Installation near three-dimensional bends

16 / 5416 / 54
Sensors
EUROMAG | SENSORS | Ed. 04/2019
IMPORTANT NOTE: THE SENSOR MUST ALWAYS BE COMPLETELY FULL OF LIQUID!
To ensure that the sensor is always completely lled with liquid, it is important to install it in the correct
position ( √) and avoid all possible incorrect positions ( X).
√ This installation secures the sensor full of li-
quid.
XThis installation DOES NOT guarantee a pipe
full of liquid.
Fig. 17 Correct installation Fig. 18 Incorrect installation
We recommend installing the sensor on a vertical/sloped pipe with an upward ow direction (Fig. 19) to
minimize the wear and deposits in the sensor. Avoid the installation on vertical pipes with free exit (Fig.
20).
Fig. 19 Correct position Fig. 20 Incorrect position

17 / 5417 / 54
Sensors
EUROMAG | SENSORS | Ed. 04/2019
√ The position on the left secures the sensor full
of liquid.
XCentral and right positions DO NOT guarantee
a pipe full of liquid.
Fig. 21 Correct (LH) and incorrect installation (central and RH)
We recommend installing gate valves downstream of the meter.
Fig. 22 Gate valves installation
XIn order to avoid a vacuum, always install the sensor downstream of the pump and NEVER upstream.
Fig. 23 Avoid negative pressure

18 / 5418 / 54
Sensors
EUROMAG | SENSORS | Ed. 04/2019
XDO NOT install the sensor on vertical pipes with a free outlet or at the highest point of the pipe
system.
Fig. 24 Incorrect installation
3.4 INSTALLATION
3.4.1 Important instructions on installation
In case of inadequate distance between the sensor and the pipe, use elastic pipe ttings (Fig. 25). Do
not try to move the pipe closer to the sensor by tightening the bolts (Fig. 26).
Do not try to move the pipe closer to the sensor by tightening the bolts.
Fig. 25 Correct xing Fig. 26 Incorrect xing
Also avoid the following positions (*) :
Fig. 27 Correct position Fig. 28 Incorrect position Fig. 29 Incorrect position
(*) Note: Insertion meters can also be installed horizontally.

19 / 5419 / 54
Sensors
EUROMAG | SENSORS | Ed. 04/2019
Maximum allowable deviation of the pipe ange faces is 0.5 mm.
L min
L max L max. - L min. ≤ 0,5 mm
Fig. 30 Maximum allowable deviation
3.4.2 Sensor support
XDO NOT USE the sensor as a support for the
pipe.
√ The pipe must be the support for the owmeter.
Fig. 31 Incorrect installation Fig. 32 Correct installation
3.4.3 Tightening torque
• Flanged sensors
Standard bolts must be lubricated well and tightened evenly around the gasket. If the bolts are over-
tightened, leakage or damage to the owmeter or piping may occur.

20 / 5420 / 54
Sensors
EUROMAG | SENSORS | Ed. 04/2019
Fig. 33 Flange tightening
Carefully follow the instructions given in the diagrams. Check the correct centering of the sensor before
you tighten the anges and proceed following the steps described here.
• Step 1. ≈ 50% of the maximum tightening torque
• Step 2. ≈ 80% of the maximum tightening torque
• Step 3. 100% of the maximum tightening torque given in the diagram
All the values are theoretical and have been calculated for optimal conditions and with the use of carbon
steel anges.
• Wafer Sensors
Grounding Rings
Flat Gasket
O-Rings
Stud Bolt
Piping Flanges
Nut
Flat Washer
Fig. 34 Flange tightening
Other manuals for MUT2200EL
1
This manual suits for next models
9
Table of contents
Other Euromag Measuring Instrument manuals

