EvenCare G2 User manual

Dear EvenCare G2 Owner,
Thank you for choosing the EvenCare G2 Blood Glucose Monitoring
System to help you in monitoring your diabetes. We designed the
EvenCare G2 Blood Glucose Monitoring System to be accurate and
easy to use. The added convenience of the voice feature can be used
as a verbal aid for using the meter and hearing test results by visually
impaired users. This manual contains all of the information needed to
use and to maintain your new blood glucose meter.
Please read it carefully before use.
If you need assistance, please call Medline’s Technical Service
Center at 1-866-274-2131 Monday through Friday between 8:00 a.m.
and 5:00 p.m.(Central Time). Contact your Healthcare Provider at all
other times.
EvenCareG2
Dear EvenCare G2 Owner
1

Intended Use
The EvenCare G2 Blood Glucose Monitoring System is intended for
the quantitative measurement of glucose in fresh capillary whole blood
samples drawn from the fingertips, forearm, or palm. Testing is done
outside the body (In Vitro diagnostic use). The meter includes voice
functionality to assist visually impaired users. It is intended for both
lay use by people with diabetes and in a clinical setting by healthcare
professionals, as an aid to monitoring levels in Diabetes Mellitus.
It is not intended for the diagnosis or screening of diabetes or for
neonatal use.
IM ORTANT:
• Alternate Site Testing (AST) with the EvenCare G2 Blood Glucose
Monitoring System can be used only during steady-state blood
glucose conditions.
• Dehydration – Severe dehydration may lead to inaccurate blood
glucose test results. If you suspect you are severely dehydrated,
contact your healthcare professional immediately.
• Hematocrit range – A hematocrit range that is higher than 55% or
lower than 30% can cause inaccurate blood glucose test results.
EvenCareG2
Dear EvenCare G2 Owner
2

Table of Contents
Understanding Your New Blood Glucose System
The EvenCareG2 Meter 6
Meter Display Screen 8
The EvenCareG2 Test Strip 10
EvenCareG2 Glucose Control Solution (Recommended) 11
Setting Up Your New System
The Set Up Screen 12
Setting the Clock 13
Setting the Alarms 16
Voice and Beeper Function 18
Language Selection 19
Voice Function Table 20
Control Solution Testing
Performing a Control Solution Test 25
Control Solution Trouble Shooting 29
Testing Your Blood Glucose
Preparing Your Lancing Device 30
Important Information on Alternate Site Testing (AST) 32
Performing Blood Glucose Test 34
Understanding Your Blood Glucose Test Results 38
Viewing Your Meter’s Memory 39
Caring for the Meter
Changing the Battery 42
Cleaning the Meter 43
EvenCareG2
Table of Contents
3

4
Table of Contents
EvenCareG2
Storage and Precautions 43
Solving roblems 44
roduct Warranty 47
Specifications 48

Understanding Your New Blood Glucose System
The EvenCare G2 Blood Glucose Monitoring System contains the
following items if it arrives as a meter only system:
• EvenCareG2 Meter
•User’s Guide
•Carrying Case
•Log Book
The EvenCare G2 Blood Glucose Monitoring System contains the
following items if is arrives as a Starter it:
• EvenCareG2 Meter
•Lancing Device
•10 Lancets
•10 Test Strips
•User’s Guide
•Carrying Case
•Log Book
5
Understanding Your New Blood Glucose System
EvenCareG2

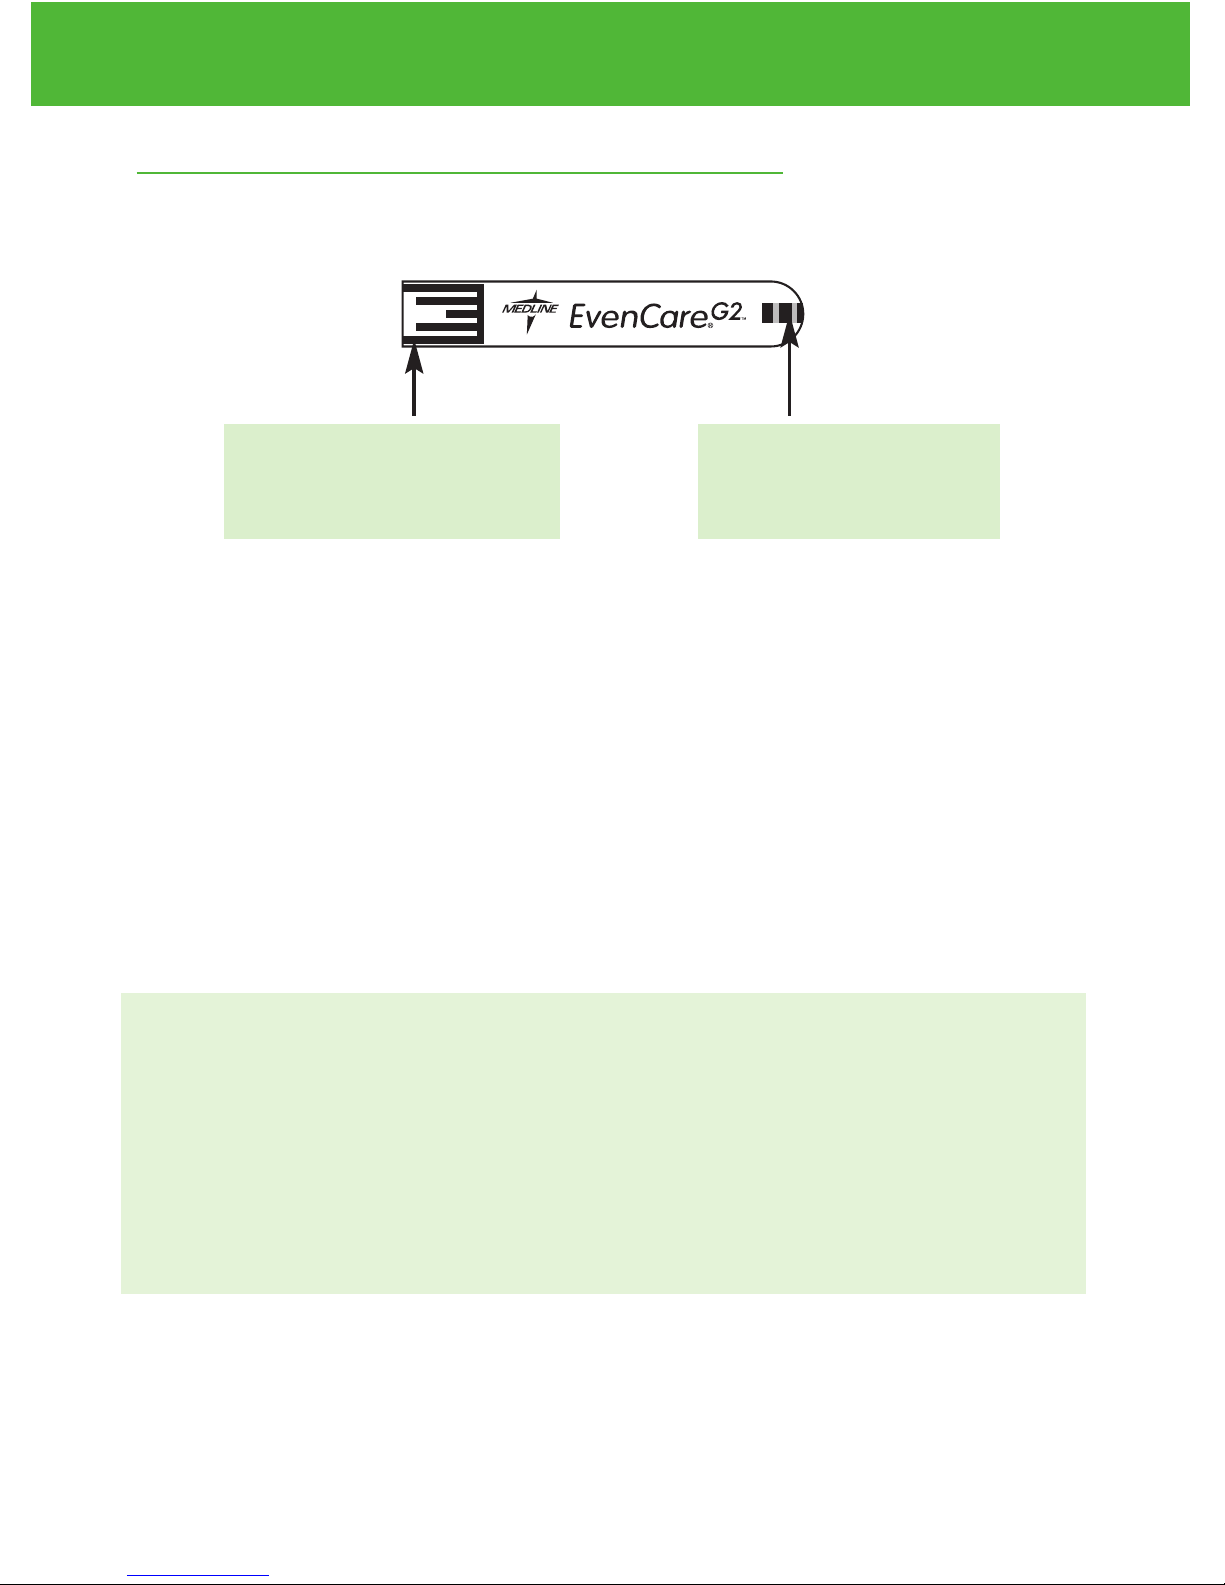
The EvenCareG2 Meter
Meter Display
Shows your blood glucose test re-
sults, memory values, averages,
and other messages.
Test Strip ort
Insert test strip (see page 34) to
turn on the meter.
6
Understanding Your New Blood Glucose System
EvenCareG2
Enter ( ) and ▲▼ buttons
Press and hold Enter ( ) for 2
seconds to turn on or off the
Meter, or press Enter ( ) to go
into setup mode when not testing
(see page 12)
Press ▲or▼ to enter control
mode with test strip inserted
(see page 26), during meter
setting (see page 12), or to
navigate the stored test values
and averages (see page 39)

Battery Compartment
Holds two AAA batteries
Data ort
This function is not yet available.
7
Understanding Your New Blood Glucose System
EvenCareG2

Meter Display Screen
EvenCareG2
Understanding Your New Blood Glucose System
8
mg /dL
DAY
AVG
mem
mg /dL
PM PM
mol/dL
code
PM
mol/dL
code
PM
mmol/dL
code
PM
mol/dLmmol/dL
PM
mg/dL
mem
DAY
AVG
mg/dL
mem
DAY
AVG
mg /dL
DAY
AVG
mem
mg/dL
mem
DAY
AVG
mg/dL
mem
DAY
AVG
mg /dL
DAY
AVG
mem
code
code
mem
ctl
AM
DAY
AVG
PM
mg /dL
mem
ctl
AM
DAY
AVG
PM
mg /dL
mem
PM
mg /dL
PM
mg /dL
ctl
mo /dL
PM
mo /dL
PM
mg /dL
mem
PM
ctl
mo /dL
PM
ctl
mo /dL
PM
mg /dL
mem
PM
mem
mem
PM
mem
PM
code
mem
PM
mem
PM
mem
PM PM PM PM PM
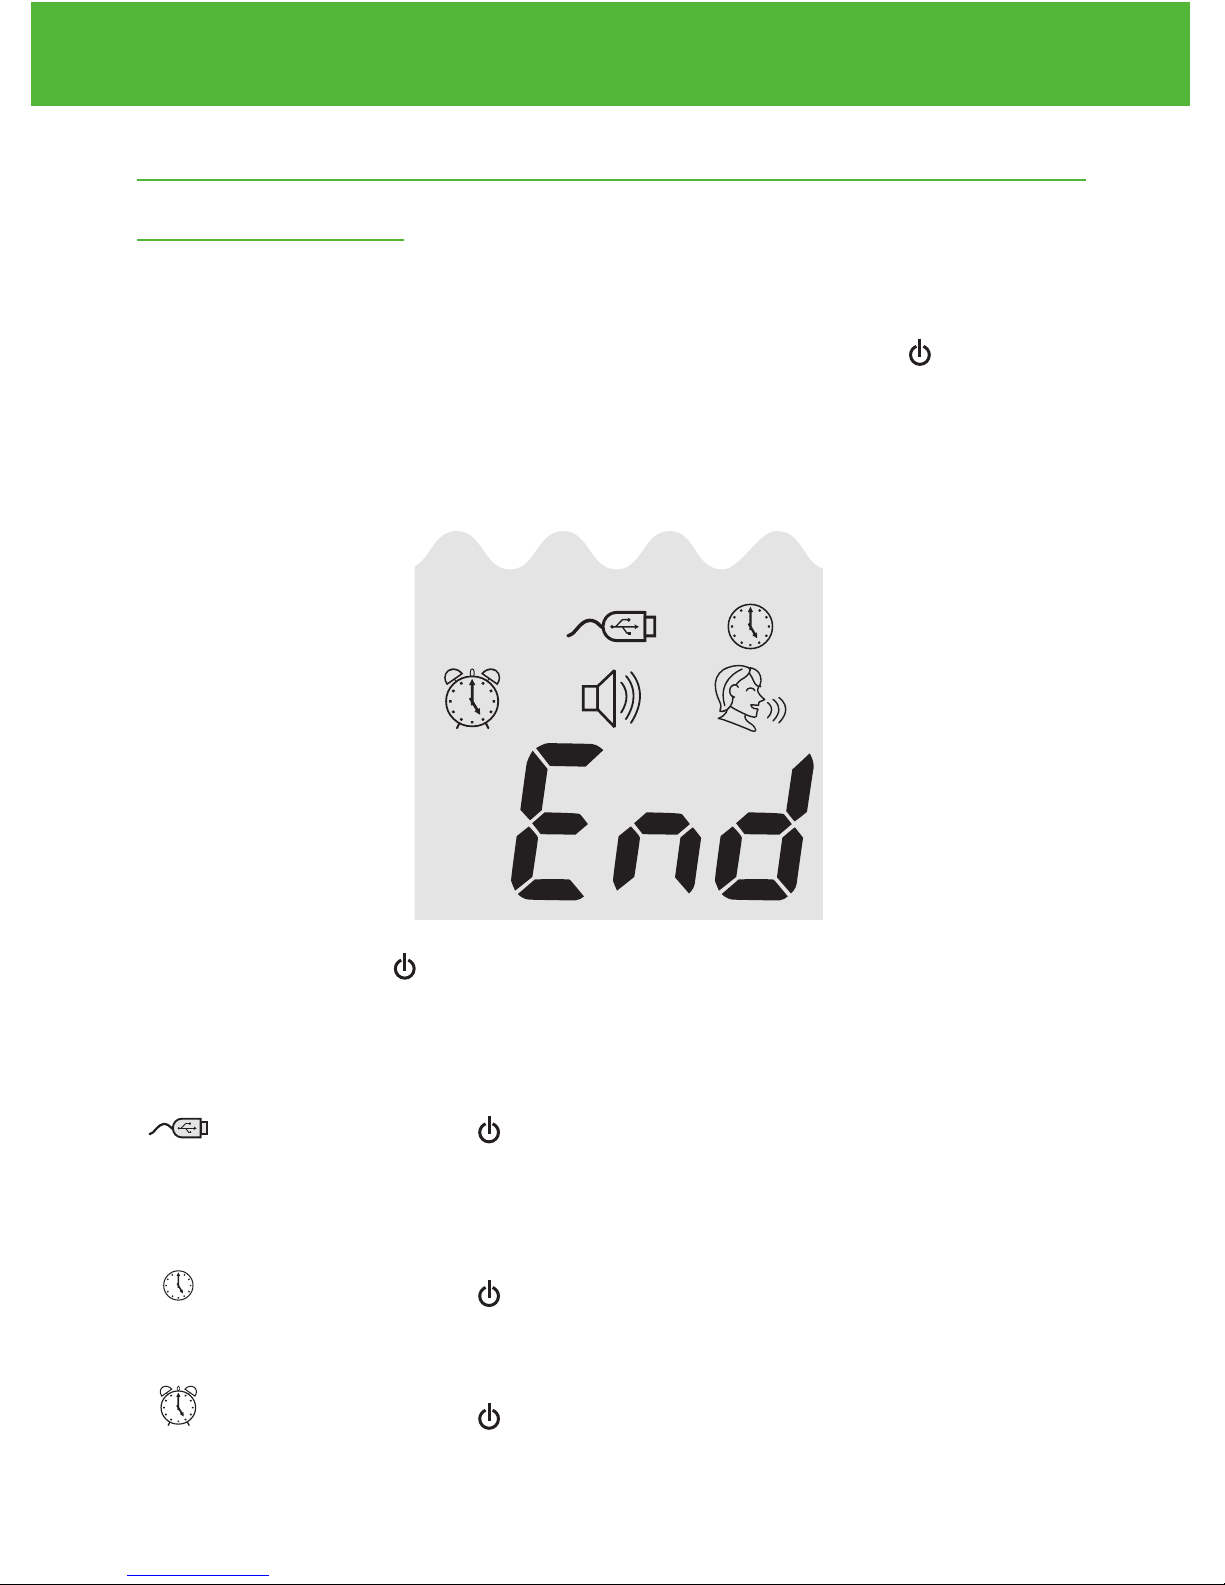
MEM
Indicates the number in the
meter display is a stored test
value (see page 39).
ALARM
Indicates alarm has been set
(see page 16).
CABLE
Indicates the meter is in data
transfer mode to PC*
*This function is not available yet.
END
Will appear on the display
screen after the last recorded
test result if less then 300
readings are stored.
Displays the date, time, am/pm
(in 24-hours format, see page
12), or type of day averages (7,
14, or 30, see page 39)
CTL
This icon indicates a control
solution test (see page 25) or
the stored value is a control
solution result (see page 39).
BATTERY
Appears when batteries need to
be changed (see page 42).

EvenCareG2
Understanding Your New Blood Glucose System
9
TEM ERATURE
Appears when it is either too hot or too cold to
test (outside the ranges of 50˚F~104˚F).
BEE ER
Set sound volume (see page 18).
CLOCK
Indicates the meter is ready to set up time and date (see page 13).
VOICE
Indicates the voice feature is on (see page 18).
UNITS
Unit of measurement for your blood glucose is mg/dL.
BLOOD DRO and ARROW
Indicate the meter is ready for testing (see page 34).
10
Understanding Your New Blood Glucose System
EvenCareG2
The EvenCareG2 Blood Glucose Test Strip
The EvenCare G2 Test Strips are glucose specific, biosensor-based
test strips that require very little blood sample to quickly test glucose in
fresh capillary whole blood. The test results are plasma-calibrated for
easy comparison to lab results, however results may be 10% to 15%
higher than results obtained from whole-blood referenced blood glucose
assays. The test strip is also equipped with under-fill detection to alert you
when there is not enough blood to perform a test, so you can be assured
that every reading you get is an accurate and meaningful result.
IM ORTANT:
• Immediately close the vial cap of the test strip bottle tightly after
each use. eep the unused test strips in its original bottle.
• DO NOT leave any test strips outside the bottle while not in use.
• DO NOT reuse test strips.Test strips are for single use only.
• Carefully discard used test strips and lancets in proper
waste containers.
Contact oints
Insert this end to the test
strip port on the meter.
Sampling End
Apply blood or control
solution here.

EvenCare G2 Glucose Control Solution (Recommended)
Call your local supplier or pharmacy to order control solution. If they do
not stock it, please contact us at 1-866-274-2131 between 8:00 am and
5:00 pm (central time), Monday through Friday.
EvenCare G2 Glucose Control Solution is the standard glucose concen-
tration solution required to perform a Glucose Control Solution Test
(See Control Solution Testing). It is available at 2 levels. EvenCare G2
LOW Glucose Control Solution helps you to validate the performance of
your system at a low range blood glucose reading, while HIGH solution
helps you to validate your system performance at a high range blood
glucose reading. Run the control test to make sure the test strips and
the meter are working together properly, to practice testing procedure,
and when using a new lot of EvenCare G2 Blood Glucose Test Strips.
DVI
e
g
a
r
otS
e
r
u
tare
p
meT
51
e
t
a
d
n
oi
t
a
ri
px
e
e
h
t
e
rofe
b
r
o
gn
i
n
e
po
t
sr
ifr
et
f
a
shtn
om3
ni
htiw
esU
Low
Control Soluon
Suitable for Self-tesng
www.medline.com
©2010 Medline Industries,Inc.
Manufacturedfor Medline Industries,Inc.,
Mundelein,IL 60060 USA Made in Taiwan
1-800-MEDLINE RK10APB
Patent# 7655128
DVI
e
g
a
r
otS
erutarepmeT
51
e
t
ad
n
oit
a
ri
px
eehte
r
ofe
b
r
o
gninepotsrifretfashtnom3nihtiwesU
Low
Control Soluon
Suitable for Self-tesng
11
Understanding Your New Blood Glucose System
EvenCareG2
Setting Up Your New System
The Setup Screen
The Setup Screen of the EvenCare G2 Meter lets you take advantage
of the advance functions of this meter. Simply use
▲▼
buttons to
navigate to the desired function icon, and press the Enter ( ) button
to enter the function when the icon is flashing. Navigate to End at the
display screen to exit the Setup Screen. The Meter will also announce
each function when the voice feature is on.
..........Press
Enter ( ) to enter Memory Recall to retrieve stored re-
sults. Your meter can memorize up to 300 memories with
date and time. (see page 39)
..........Press Enter ( ) to enter PC Link Mode for data transfer
onto a PC*
*This function is not available yet.
..........Press Enter ( ) to enter Time and Date Setup
(see page 13).
..........Press Enter ( ) to enter Alarm Setup (see page 16).
Your meter can have as many as 3 alarm settings.
ctl
DAY
AVG
AM
PM
mmol/dL
code
mem
ctl
DAY
AVG
AM
PM
mmol/dL
code
mem
ctl
DAY
AVG
AM
PM
mmol/dL
code
mem
ctl
DAY
AVG
AM
PM
mmol/dL
code
mem
EvenCareG2
Setting Up Your New System
12
mg /dL
DAY
AVG
mem
mg /dL
PM
PM
mol/dL
code
PM
mol/dL
code
PM
mmol/dL
code
PM
mol/dLmmol/dL
PM
mg/dL
mem
DAY
AVG
mg/dL
mem
DAY
AVG
mg /dL
DAY
AVG
mem
mg/dL
mem
DAY
AVG
mg/dL
mem
DAY
AVG
mg /dL
DAY
AVG
mem
code
code
mem
ctl
AM
DAY
AVG
PM
mg /dL
mem
ctl
AM
DAY
AVG
PM
mg /dL
mem
PM
mg /dL
PM
mg /dL
ctl
mo /dL
PM
mo /dL
PM
mg /dL
mem
PM
ctl
mo /dL
PM
ctl
mo /dL
PM
mg /dL
mem
PM
mem
mem
PM
mem
PM
code
mem
PM
mem
PM
mem
PM PM PM PM PM
..........Press Enter ( ) to enter Volume Setup (see page 18).
..........Press Enter ( ) to enter Language Selection
(see page 19).
End ..........Exit Setup Screen and return to testing.
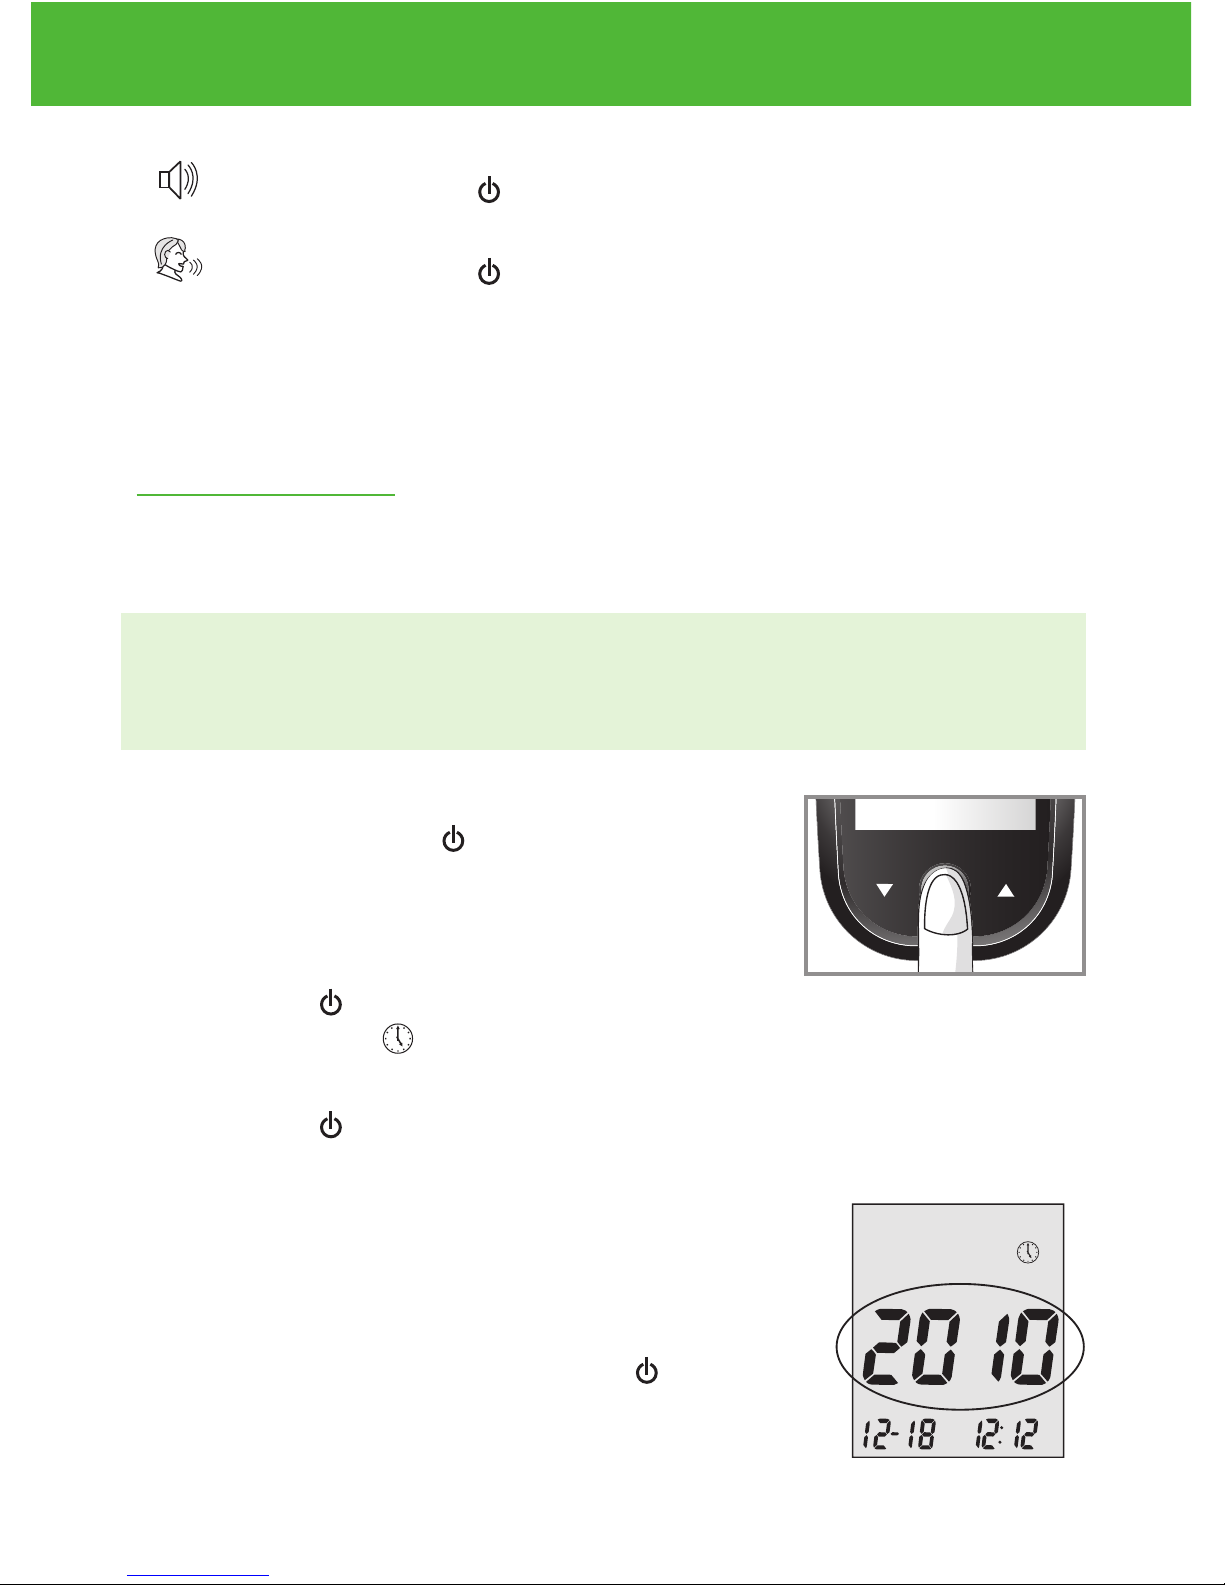
Setting the Clock
You will need:
√ Your EvenCare G2 Meter
NOTE
If date and time on the EvenCare G2 Meter has not been set, test or
control result will not be stored in memory.
Step 1:
Press and hold Enter ( ) to turn on the meter.
Step 2:
Press Enter ( ) to go into setup screen, then
press ▲or▼ until start to flash. If the voice
function is on, the meter will say, “Set date and time.”
Press Enter ( ) to enter clock setup.
Step 3-Set the Year
The current year will flash. If the voice function is
on, the meter will say, “Set Year.” press ▲or▼to
select the correct year. Press Enter ( ) to con-
firm your choice and advance to set the month.
ctl
DAY
AVG
AM
PM
mmol/dL
code
mem
ctl
DAY
AVG
AM
PM
mmol/dL
code
mem
ctl
DAY
AVG
AM
PM
mmol/dL
code
mem
EvenCareG2
Setting Up Your New System
13
mg /dL
DAY
AVG
mem
mg /dL
PM PM
mol/dL
code
PM
mol/dL
code
PM
mmol/dL
code
PM
mol/dLmmol/dL
PM
mg/dL
mem
DAY
AVG
mg/dL
mem
DAY
AVG
mg /dL
DAY
AVG
mem
mg/dL
mem
DAY
AVG
mg/dL
mem
DAY
AVG
mg /dL
DAY
AVG
mem
code
code
mem
ctl
AM
DAY
AVG
PM
mg /dL
mem
ctl
AM
DAY
AVG
PM
mg /dL
mem
PM
mg /dL
PM
mg /dL
ctl
mo /dL
PM
mo /dL
PM
mg /dL
mem
PM
ctl
mo /dL
PM
ctl
mo /dL
PM
mg /dL
mem
PM
mem
mem
PM
mem
PM
code
mem
PM
mem
PM
mem
PM PM PM PM PM
DVI
e
g
a
r
otS
e
ru
t
are
p
m
e
T
51
e
t
a
d
n
oi
t
a
ri
px
e
e
h
t
e
rofe
b
r
o
gn
i
n
e
po
t
sr
ifr
et
f
a
shtn
om3
ni
htiw
esU
Low
Control Soluon
Suitable for Self-tesng
www.medline.com
©2010 Medline Industries, Inc.
Manufacturedfor Medline Industries,Inc.,
Mundelein,IL 60060 USA Made in Taiwan
1-800-MEDLINE RK10APB
Patent# 7655128
DVI
e
g
a
r
otS
erutarepmeT
51
e
t
ad
n
oit
a
ri
px
eehte
r
ofe
b
r
o
gninepotsrifretfashtnom3nihtiwesU
Low
Control Soluon
Suitable for Self-tesng
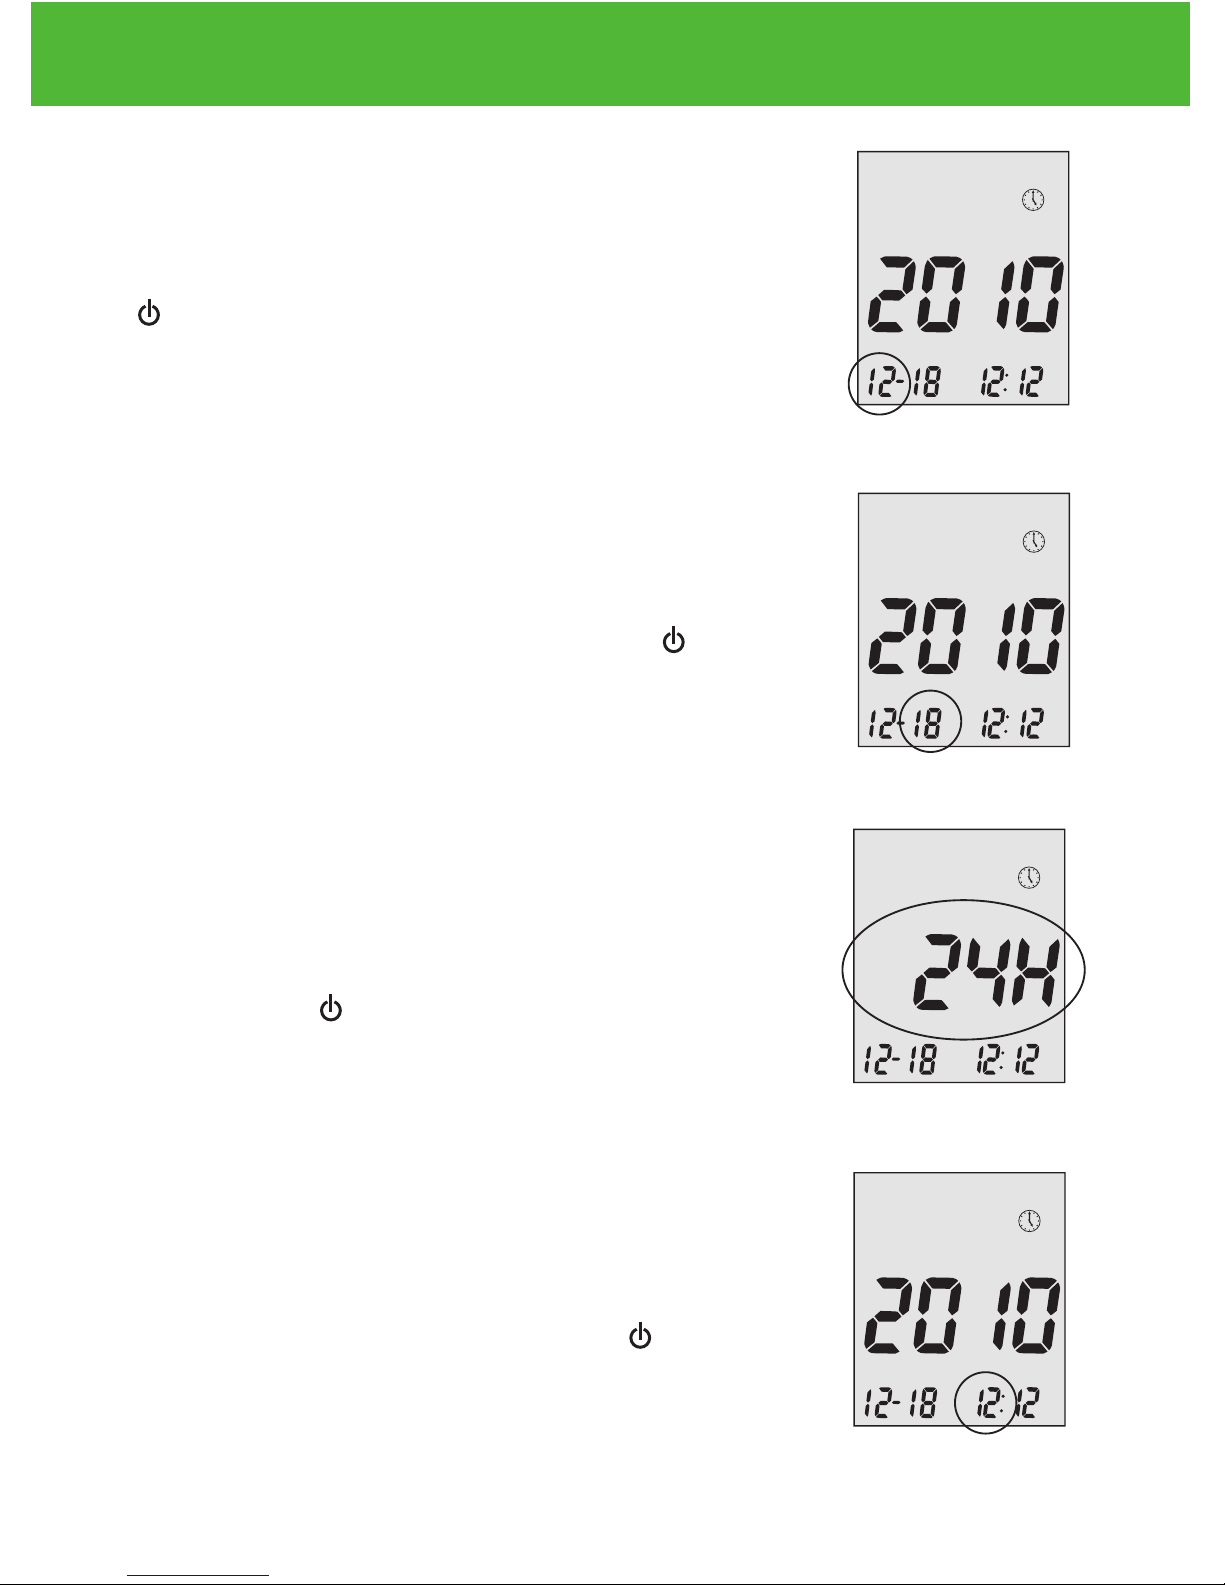
Step 4 - Set the Month:
The current month will flash. If the voice function
is on, the meter will say, “Set Month.” press
▲or▼ to select the correct month. Press Enter (
) to confirm your choice and advance to set the
date.
Step 5 - Set the Date:
The current date will flash. Press ▲or▼ to select
the correct day. If the voice function is on, the
meter will say, “Set Day.” Press Enter ( ) to con-
firm your choice and advance to set time format.
Step 6 - Set Time Format to 12-hour or 24-hour:
The current time format will flash. Press ▲or▼ to
select for either 12-hour format or 24- hour format.
Press Enter ( ) to confirm your choice and ad-
vance to set hour.
Step 7 - Set the Hour:
The current hour will flash. If the voice function is
on, the meter will say, “Set Hour.” press ▲or▼ to
select the correct hour. Press Enter ( ) to con-
firm your choice and advance to set minutes.
EvenCareG2
Setting Up Your New System
14
mg /dL
DAY
AVG
mem
mg /dL
PM PM
mol/dL
code
PM
mol/dL
code
PM
mmol/dL
code
PM
mol/dLmmol/dL
PM
mg/dL
mem
DAY
AVG
mg/dL
mem
DAY
AVG
mg /dL
DAY
AVG
mem
mg/dL
mem
DAY
AVG
mg/dL
mem
DAY
AVG
mg /dL
DAY
AVG
mem
code
code
mem
ctl
AM
DAY
AVG
PM
mg /dL
mem
ctl
AM
DAY
AVG
PM
mg /dL
mem
PM
mg /dL
PM
mg /dL
ctl
mo /dL
PM
mo /dL
PM
mg /dL
mem
PM
ctl
mo /dL
PM
ctl
mo /dL
PM
mg /dL
mem
PM
mem
mem
PM
mem
PM
code
mem
PM
mem
PM
mem
PM PM PM PM PM
mg /dL
DAY
AVG
mem
mg /dL
PM PM
mol/dL
code
PM
mol/dL
code
PM
mmol/dL
code
PM
mol/dLmmol/dL
PM
mg/dL
mem
DAY
AVG
mg/dL
mem
DAY
AVG
mg /dL
DAY
AVG
mem
mg/dL
mem
DAY
AVG
mg/dL
mem
DAY
AVG
mg /dL
DAY
AVG
mem
code
code
mem
ctl
AM
DAY
AVG
PM
mg /dL
mem
ctl
AM
DAY
AVG
PM
mg /dL
mem
PM
mg /dL
PM
mg /dL
ctl
mo /dL
PM
mo /dL
PM
mg /dL
mem
PM
ctl
mo /dL
PM
ctl
mo /dL
PM
mg /dL
mem
PM
mem
mem
PM
mem
PM
code
mem
PM
mem
PM
mem
PM PM PM PM PM

Step 8 - Set Minute:
The current minutes will flash. If the voice function
is on, the meter will say, “Set Minutes.” Press
▲or▼ to select the correct minutes. Press Enter (
) to confirm your choice and finish setting the
clock.
NOTE:
• Anytime during set up, inserting a EvenCare G2 Test Strip will
begin testing. Any changes made so far are stored.
• You may need to reset time after changing batteries.
After date and time has been set, the meter will announce the date
and time if the voice feature is on. Begin testing by inserting an
EvenCare G2 Blood Glucose Test Strip (see page 30, Testing Your
Blood Glucose), or press and hold Enter ( ) to turn off the meter, or
see the next section on how to set up the alarm feature on your meter.
EvenCareG2
Setting Up Your New System
15
mg /dL
DAY
AVG
mem
mg /dL
PM PM
mol/dL
code
PM
mol/dL
code
PM
mmol/dL
code
PM
mol/dLmmol/dL
PM
mg/dL
mem
DAY
AVG
mg/dL
mem
DAY
AVG
mg /dL
DAY
AVG
mem
mg/dL
mem
DAY
AVG
mg/dL
mem
DAY
AVG
mg /dL
DAY
AVG
mem
code
code
mem
ctl
AM
DAY
AVG
PM
mg /dL
mem
ctl
AM
DAY
AVG
PM
mg /dL
mem
PM
mg /dL
PM
mg /dL
ctl
mo /dL
PM
mo /dL
PM
mg /dL
mem
PM
ctl
mo /dL
PM
ctl
mo /dL
PM
mg /dL
mem
PM
mem
mem
PM
mem
PM
code
mem
PM
mem
PM
mem
PM PM PM PM PM
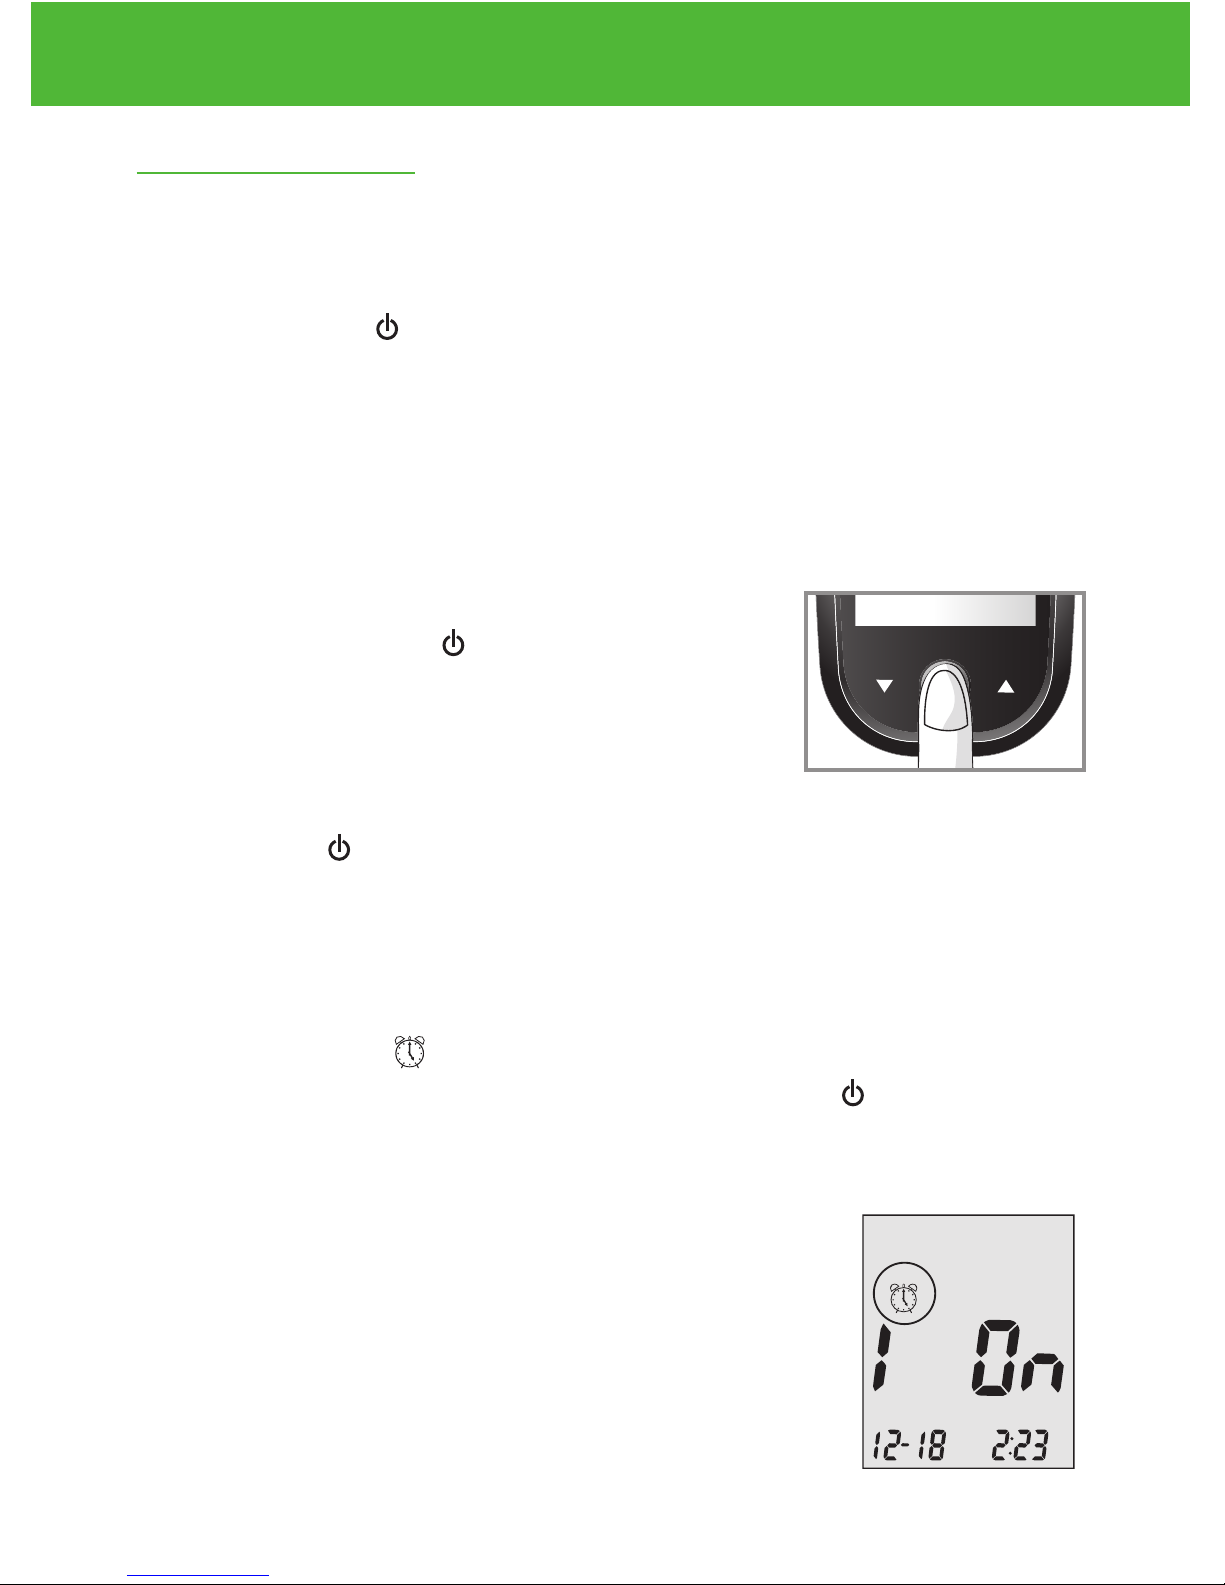
Setting the Alarms
You can set up to three alarms on the EvenCare G2 Meter. You must
set the clock before you can set the alarms. When an alarm sounds,
the meter will turn on, and a melody will sound for 30 seconds.
Pressing Enter ( ) or inserting a test strip will silence the alarm.
You can set up one or all three alarms.
You will need:
√ Your EvenCare G2 Meter
Step 1:
Press and hold Enter ( ) to turn on the meter.
Step 2:
Press Enter ( ) to enter setup screen.
Step 3:
Press ▲or▼ until starts to flash. If the voice function is on,
the meter will say, “Set testing Alarm.” Press Enter ( ) to enter
alarm setting.
Step 4:
The display screen will indicate alarm 1 status
(the default is OFF). You can turn it on or off by
pressing ▲or▼
ctl
DAY
AVG
AM
PM
mmol/dL
code
mem
EvenCareG2
Setting Up Your New System
16
mg /dL
DAY
AVG
mem
mg /dL
PM PM
mol/dL
code
PM
mol/dL
code
PM
mmol/dL
code
PM
mol/dLmmol/dL
PM
mg/dL
mem
DAY
AVG
mg/dL
mem
DAY
AVG
mg /dL
DAY
AVG
mem
mg/dL
mem
DAY
AVG
mg/dL
mem
DAY
AVG
mg /dL
DAY
AVG
mem
code
code
mem
ctl
AM
DAY
AVG
PM
mg /dL
mem
ctl
AM
DAY
AVG
PM
mg /dL
mem
PM
mg /dL
PM
mg /dL
ctl
mo /dL
PM
mo /dL
PM
mg /dL
mem
PM
ctl
mo /dL
PM
ctl
mo /dL
PM
mg /dL
mem
PM
mem
mem
PM
mem
PM
code
mem
PM
mem
PM
mem
PM PM PM PM PM
DVI
e
g
a
r
otS
e
ru
t
are
p
m
e
T
51
e
t
a
d
n
oi
t
a
ri
px
e
e
h
t
e
rofe
b
r
o
gn
i
n
e
po
t
sr
ifr
et
f
a
shtn
om3
ni
htiw
esU
Low
Control Soluon
Suitable for Self-tesng
www.medline.com
©2010 MedlineIndustries, Inc.
Manufacturedfor Medline Industries,Inc.,
Mundelein,IL 60060 USA Made in Taiwan
1-800-MEDLINE RK10APB
Patent# 7655128
DVI
e
g
a
r
otS
erutarepmeT
51
e
t
ad
n
oit
a
ri
px
eehte
r
ofe
b
r
o
gninepotsrifretfashtnom3nihtiwesU
Low
Control Soluon
Suitable for Self-tesng

Step 5:
Press Enter ( ) and the hour will flash. Press
▲or▼ to select the hour. Press Enter ( ) to
confirm your choice and advance to set minutes.
Step 6:
The current minutes will flash. Press ▲or▼ to
select the correct minutes. Press Enter ( ) to
confirm your choice and advance to set alarm 2.
Step 7:
Set alarm 2 and 3 following steps 4 through 6. After you have finished
setting up alarm 3, press Enter ( ) to exit alarm setup.
NOTE:
• Alarm will not sound during testing.
• Alarm will follow the time format (12-hour or 24-hour) you choose
when setting up the clock.
• Alarm settings will not be erased when changing batteries.
Begin testing by inserting a EvenCare G2 Blood Glucose Test Strip (see
page 30, Testing Your Blood Glucose), or press and hold Enter ( )
to turn off the meter, or see the next section on how to set up the voice
feature on your meter.
EvenCareG2
Setting Up Your New System
17
mg /dL
DAY
AVG
mem
mg /dL
PM PM
mol/dL
code
PM
mol/dL
code
PM
mmol/dL
code
PM
mol/dLmmol/dL
PM
mg/dL
mem
DAY
AVG
mg/dL
mem
DAY
AVG
mg /dL
DAY
AVG
mem
mg/dL
mem
DAY
AVG
mg/dL
mem
DAY
AVG
mg /dL
DAY
AVG
mem
code
code
mem
ctl
AM
DAY
AVG
PM
mg /dL
mem
ctl
AM
DAY
AVG
PM
mg /dL
mem
PM
mg /dL
PM
mg /dL
ctl
mo /dL
PM
mo /dL
PM
mg /dL
mem
PM
ctl
mo /dL
PM
ctl
mo /dL
PM
mg /dL
mem
PM
mem
mem
PM
mem
PM
code
mem
PM
mem
PM
mem
PM PM PM PM PM
mg /dL
DAY
AVG
mem
mg /dL
PM PM
mol/dL
code
PM
mol/dL
code
PM
mmol/dL
code
PM
mol/dLmmol/dL
PM
mg/dL
mem
DAY
AVG
mg/dL
mem
DAY
AVG
mg /dL
DAY
AVG
mem
mg/dL
mem
DAY
AVG
mg/dL
mem
DAY
AVG
mg /dL
DAY
AVG
mem
code
code
mem
ctl
AM
DAY
AVG
PM
mg /dL
mem
ctl
AM
DAY
AVG
PM
mg /dL
mem
PM
mg /dL
PM
mg /dL
ctl
mo /dL
PM
mo /dL
PM
mg /dL
mem
PM
ctl
mo /dL
PM
ctl
mo /dL
PM
mg /dL
mem
PM
mem
mem
PM
mem
PM
code
mem
PM
mem
PM
mem
PM PM PM PM PM

Voice and Beeper Function
Your meter has a voice function that can be used as a verbal aid for
using the meter and hearing test results. The default setting for the
voice function is on, and can be switched off to conserve battery power.
When the voice function is off, the meter will beep to alert you
to important messages.
You will need:
√ Your EvenCare G2 Meter
Setting Volume
Step 1:
Press and hold Enter ( ) to turn on the meter.
Step 2:
Press Enter ( ) to go into setup screen. Press ▲or▼ until starts
to flash. Press Enter ( ) to enter volume setting.
Step3:
The display screen will show the current sound
volume (default is 2).
Press ▲or▼ to adjust the sound volume from 1
(lowest) to 5 (highest). A melody will sound
according to the sound volume you have selected. Setting to 0 will
turn off the voice function. The meter will instead beep to alert you to
important messages. Once you have determined the suitable volume,
press Enter ( ) again to exit volume setting.
ctl
DAY
AVG
AM
PM
mmol/dL
code
mem
EvenCareG2
Setting Up Your New System
18
mg /dL
DAY
AVG
mem
mg /dL
PM
PM
mol/dL
code
PM
mol/dL
code
PM
mmol/dL
code
PM
mol/dLmmol/dL
PM
mg/dL
mem
DAY
AVG
mg/dL
mem
DAY
AVG
mg /dL
DAY
AVG
mem
mg/dL
mem
DAY
AVG
mg/dL
mem
DAY
AVG
mg /dL
DAY
AVG
mem
code
code
mem
ctl
AM
DAY
AVG
PM
mg /dL
mem
ctl
AM
DAY
AVG
PM
mg /dL
mem
PM
mg /dL
PM
mg /dL
ctl
mo /dL
PM
mo /dL
PM
mg /dL
mem
PM
ctl
mo /dL
PM
ctl
mo /dL
PM
mg /dL
mem
PM
mem
mem
PM
mem
PM
code
mem
PM
mem
PM
mem
PM PM PM PM PM
DVI
e
g
a
r
otS
e
ru
tare
p
m
e
T
51
e
t
a
d
n
oi
t
a
ri
px
e
e
h
t
e
rofe
b
r
o
gn
i
n
e
po
t
sr
ifr
et
f
a
shtn
om3
ni
htiw
esU
Low
Control Soluon
Suitable for Self-tesng
www.medline.com
©2010 Medline Industries, Inc.
Manufacturedfor Medline Industries,Inc.,
Mundelein,IL 60060 USA Made in Taiwan
1-800-MEDLINE RK10APB
Patent# 7655128
DVI
e
g
a
r
otS
erutarepmeT
51
e
t
ad
n
oit
a
ri
px
eehte
r
ofe
b
r
o
gninepotsrifretfashtnom3nihtiwesU
Low
Control Soluon
Suitable for Self-tesng

Language Selection
Step 1:
Press and hold Enter ( ) to turn on the meter.
Step 2:
Press Enter ( ) to enter setup screen.
Step 3:
Press ▲or▼ until starts to flash. The meter will announce
“Language Selection.”
Step 4:
The default language (1 on the display screen)
is announced. Press ( ) to change the language.
Press ▲or▼ to select another language. Press
( ) when you have finished selecting the
language and exit language selection. English and
Spanish are the two options.
NOTE:
• Any time during set up you can insert an EvenCare G2 Test Strip
and begin testing. Any changes made so far are stored.
• Your choice of language and volume settings will not be erased
when changing batteries.
Begin testing by inserting an EvenCare G2 Blood Glucose Test Strip
(see page 30, Testing Your Blood Glucose) or press and hold Enter
( ) to turn off the meter.
ctl
DAY
AVG
AM
PM
mmol/dL
code
mem
EvenCareG2
Setting Up Your New System
19
mg /dL
DAY
AVG
mem
mg /dL
PM
PM
mol/dL
code
PM
mol/dL
code
PM
mmol/dL
code
PM
mol/dLmmol/dL
PM
mg/dL
mem
DAY
AVG
mg/dL
mem
DAY
AVG
mg /dL
DAY
AVG
mem
mg/dL
mem
DAY
AVG
mg/dL
mem
DAY
AVG
mg /dL
DAY
AVG
mem
code
code
mem
ctl
AM
DAY
AVG
PM
mg /dL
mem
ctl
AM
DAY
AVG
PM
mg /dL
mem
PM
mg /dL
PM
mg /dL
ctl
mo /dL
PM
mo /dL
PM
mg /dL
mem
PM
ctl
mo /dL
PM
ctl
mo /dL
PM
mg /dL
mem
PM
mem
mem
PM
mem
PM
code
mem
PM
mem
PM
mem
PM PM PM PM PM
DVI
e
g
a
r
otS
e
ru
tare
p
m
e
T
51
e
t
a
d
n
oi
t
a
ri
px
e
e
h
t
e
rofe
b
r
o
gn
i
n
e
po
t
sr
ifr
et
f
a
shtn
om3
ni
htiw
esU
Low
Control Soluon
Suitable for Self-tesng
www.medline.com
©2010 Medline Industries, Inc.
Manufacturedfor Medline Industries,Inc.,
Mundelein,IL 60060 USA Made in Taiwan
1-800-MEDLINE RK10APB
Patent# 7655128
DVI
e
g
a
r
otS
erutarepmeT
51
e
t
ad
n
oit
a
ri
px
eehte
r
ofe
b
r
o
gninepotsrifretfashtnom3nihtiwesU
Low
Control Soluon
Suitable for Self-tesng

Voice Function Table
The voice function can be used as an aid for you to hear the test results
and use the meter. The following table lists WHEN the meter will speak
and WHAT the meter will say.
Testing blood and control solutions (see page 25 , Control Solution Test-
ing, and page 30, Testing your blood glucose)
WHEN the meter will speak… WHAT the meter will say…
EvenCareG2
Voice Function Table
20
Turned on.
Prompt user to insert test strip.
Test strip is inserted and the
meter is ready to test (with flash-
ing arrow and blood drop).
Blood Glucose test is completed
and the result is shown on screen.
Blood Glucose test result is
BELOW the measurement range
of 20 mg/dL.
Blood Glucose test result is
ABOVE the measurement range
of 600 mg/dL.
Greeting Tone will sound.
“Please insert test strip”
“Blood glucose test. Please apply
blood to the test strip.”
“Your blood glucose reading is
(number) milligram per deciliter.”
“Your blood glucose reading is
below 20 mg/dL.”
“Your blood glucose reading is
above 600 mg/dL.”
Other manuals for G2
1
Table of contents
Languages:
Other EvenCare Blood Glucose Meter manuals


