5
CABINET & DRAWER LATCHES (continued)
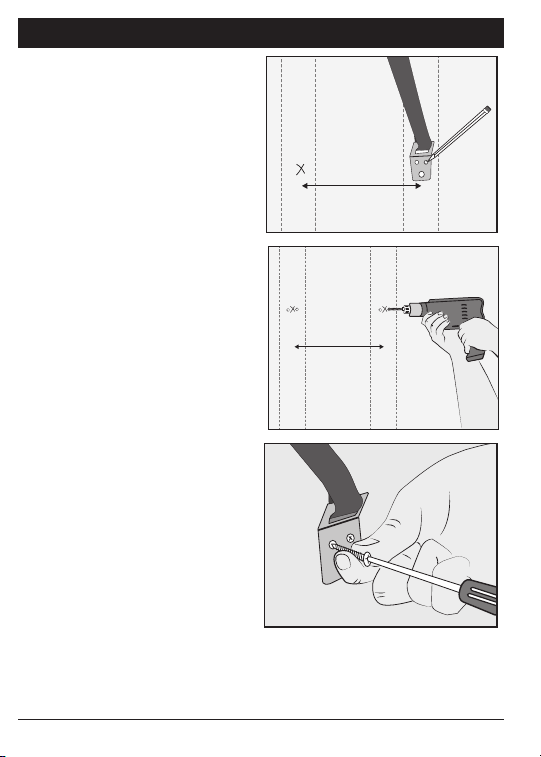
4. Determine the correct position for
the catch to lock the latch. The tip
of the latch should grasp the tip
of the catch, keeping the cabinet
door secure. Place the catch
following the same steps above.
5. Using a Phillips Head
Screwdriver, screw the 4
included screws into the holes
on both the latch and catch.
ALWAYS use the screws
provided to install the latches.
NEVER rely on the adhesive
pads without screws.
6. To open, simply open the
cabinet door and push down on
the spring-loaded latch. 22
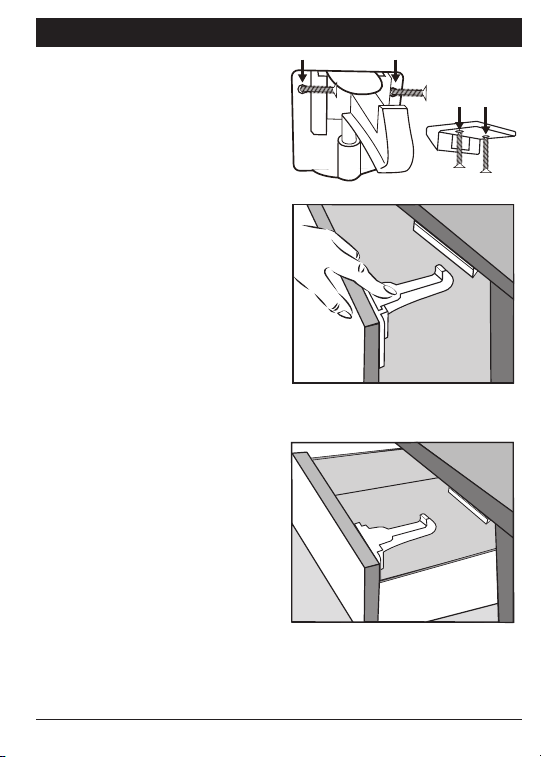
Drawer Installation
1. Determine position for drawer
latches. Position the latch on
the inside of the face of the
drawer aligned with the top,
inside edge. 3
2. Clean and dry the surface
thoroughly where you plan to
place the latch and catch.
3. Remove adhesive backing on
the latch, stick into position,
press and hold for 10 seconds.
NOTE: For best performance, the mounted adhesive must be left
to fully adhere for 48 hours before rst use.
3